


16 Laparoscopic Cholecystectomy |
401 |
|
|
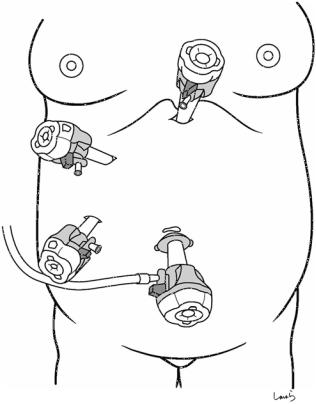
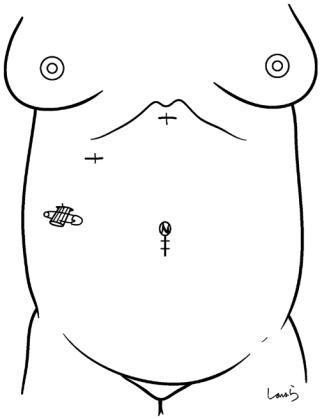
Fig. 16.2 Additional trocars are inserted in the epigastric region (12 mm, ), on the subcostal midclavicular line (5 mm,), and on the preaxillary line (5 mm, ). This should be done under guidance with a laparoscope inserted through trocar to avoid damaging the intestine. The surgeon uses trocars and and the first assistant uses trocar
 12 mm
12 mm
 5 mm
5 mm
 5 mm
5 mm
 12 mm
12 mm
 teres
teres
16 Laparoscopic Cholecystectomy |
405 |
|
|
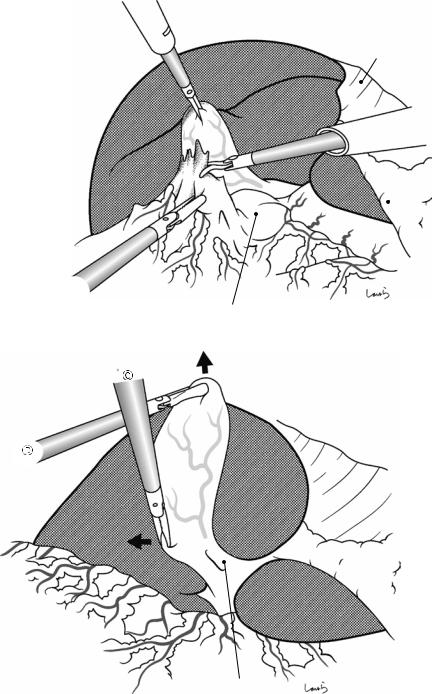
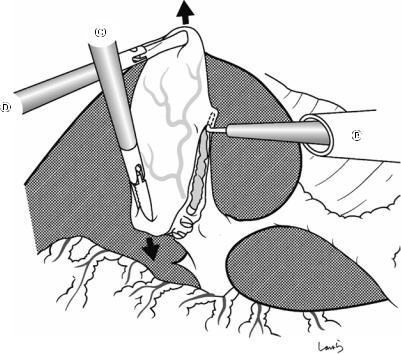
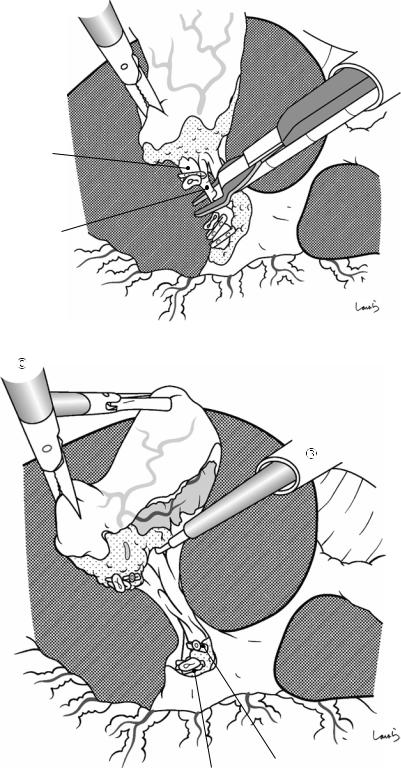
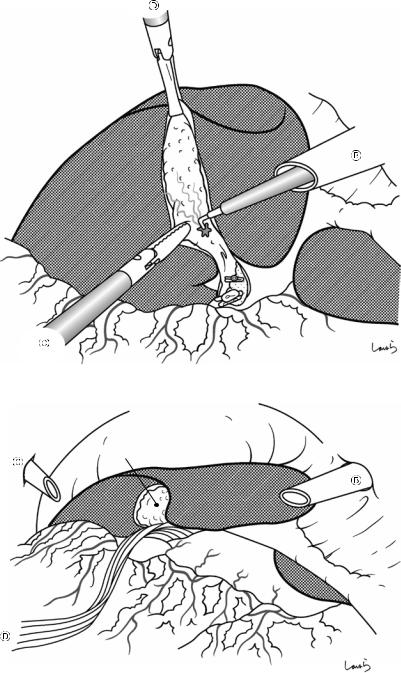
Fig. 16.7 The serosal incision is also extended to the dorsal side of the attachment to the liver in the same way. With the grasping forceps held in the left hand, the pouch of Hartmann is twisted toward S4 (small arrow) to apply appropriate tension to the gallbladder serosa that is to be incised

16 Laparoscopic Cholecystectomy |
407 |
|
|
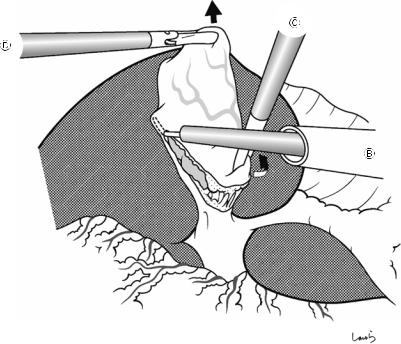
Fig. 16.9 The thin |
|
fibrous tissue |
|
surrounding the cystic |
|
duct wall is most likely |
|
to be nerves. Forcibly |
|
pulling them apart with |
|
the Maryland’s dissector |
|
may cause bleeding, so |
|
they should be scooped |
|
with L-hook dissector |
|
and divided by |
|
electrically activating |
|
the dissector. The tissue |
|
should then be |
|
sufficiently lifted from |
|
the cystic duct wall |
|
before activating the |
|
L-hook dissector, to |
|
avoid thermal damage to |
|
the duct from the back |
|
of the dissector. After |
|
these fibrous tissues |
|
have been dissected, the |
|
cystic duct is further |
|
extended and its entire |
Cystic duct |
surface is exposed |
16 Laparoscopic Cholecystectomy |
409 |
|
|
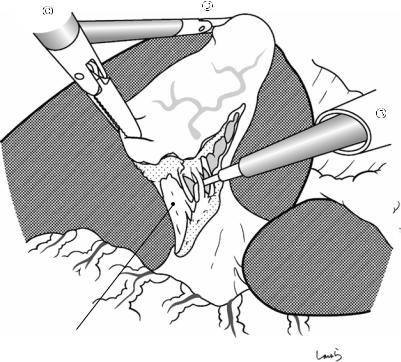
Fig. 16.12 After advancing the dissector, its tip is opened along the long axis of the cystic duct to ensure a sufficient margin for transection. If this procedure causes an unexpectedly large amount of bleeding, we might have misidentified the common bile duct for the cystic duct


 gland
gland
16 Laparoscopic Cholecystectomy |
411 |
|
|
|
|
Fig. 16.14 Once we are |
a |
|
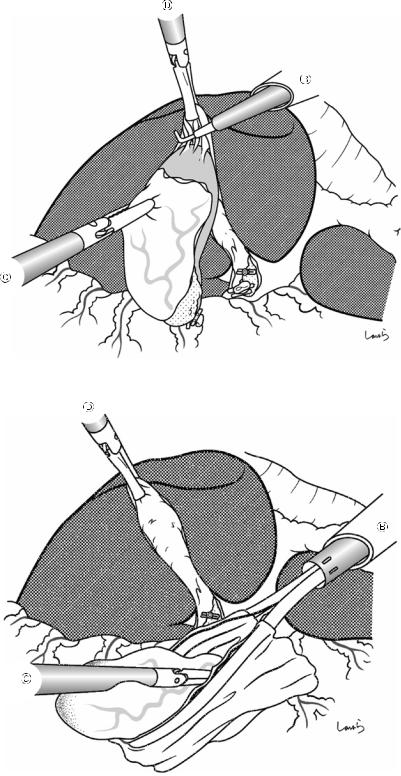
confident about having identified the vessels in the triangle of Calot, we can transect the cystic duct. One clip is applied on the cystic side and two clips on the common bile duct side (a), and the cystic duct is then divided with scissors (b)
b
16 Laparoscopic Cholecystectomy |
415 |
|
|
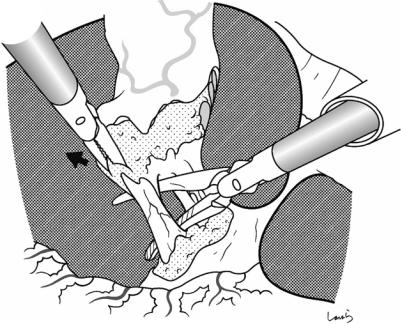
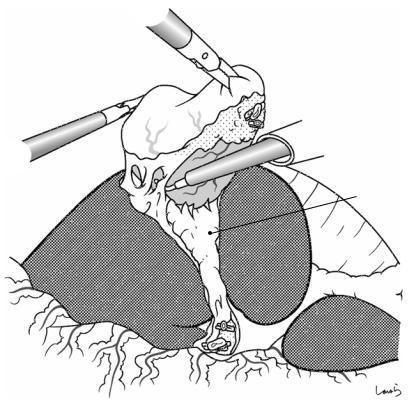
Fig. 16.19 With appropriate tension applied continuously to the connective tissue remaining around the fundus, the back of the L-hook dissector is made to gently contact the connective tissue and is then activated to complete the dissection
Fig. 16.20 A specimen retrieval pouch is inserted through trocarto retrieve the gallbladder. The squeezed opening of the bag is grasped with the grasping forceps inserted through trocar. After the endoscope is switched from trocar
to trocar , another pair of grasping forceps is inserted through trocar
to receive the bag and extricate it from the body through the umbilical wound
416 |
16 Laparoscopic Cholecystectomy |
|
|
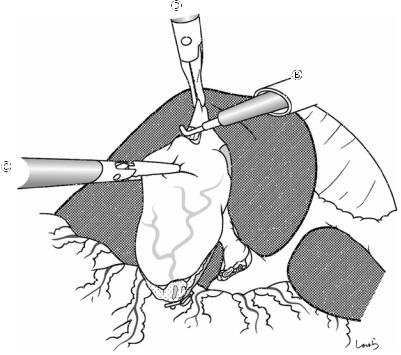
Fig. 16.21 The abdominal cavity is again insufflated to confirm hemostasis of the liver bed. Mild bleeding, such as oozing, can be adequately treated by electrocautery with the L-hook dissector. Any bilious contamination occurring during the operation should be washed out
Fig. 16.22 If necessary, |
|
a Penrose drain tube is |
|
inserted through trocar |
|
and pulled out through |
Liver bed |
trocar . The tip of the |
|
tube is placed under the |
|
liver near the liver bed |
|
and the tube is fixed to |
|
the skin |
|
16 Laparoscopic Cholecystectomy |
417 |
|
|
Fig. 16.23 The 1 Vicryl suture applied to the anterior rectus sheath around trocar wound is ligated to close the fascia and followed by skin suturing. The operation is completed by closing the remaining wounds with skin sutures