

C# ПІДРУЧНИКИ / c# / Premier Press - C# Professional Projects
.pdf178 Project 1 CREATING A CUSTOMER MAINTENANCE PROJECT
FIGURE 9-1 Adding a DateTimePicker control to the for m
|
Y |
L |
|
F |
|
M |
|
A |
|
E |
|
Run the applicationTand open the JobDetails form. You will notice that the current date automatically appears in the form. Similarly, when data is loaded from the database, the JobDate field changes to the one that was specified while adding the record, as shown in Figure 9-2.
FIGURE 9-2 Displaying date and time data from a database
Team-Fly®
VALIDATIONS AND EXCEPTION HANDLING |
Chapter 9 |
|
179 |
|
|||
|
|
|
|
Trapping Incomplete Data
There are certain fields in a database that cannot be left blank when you add records to the database. For example, the CMS (Customer Maintenance System) database uses the tblJobDetails table to store records pertaining to the JobDetails form. Follow these steps to check the fields that are mandatory in the
tblJobDetails table:
1.Open SQL Ser ver Enterprise Manager.
2.In the SQL Server Enterprise Manager window, click on the + (plus) sign next to the name of the SQL server on which the database is installed.
3.In the SQL Server node, expand the CMS database, which stores the
tblJobDetails table.
4.Click on Tables. The tables in the CMS database will appear.
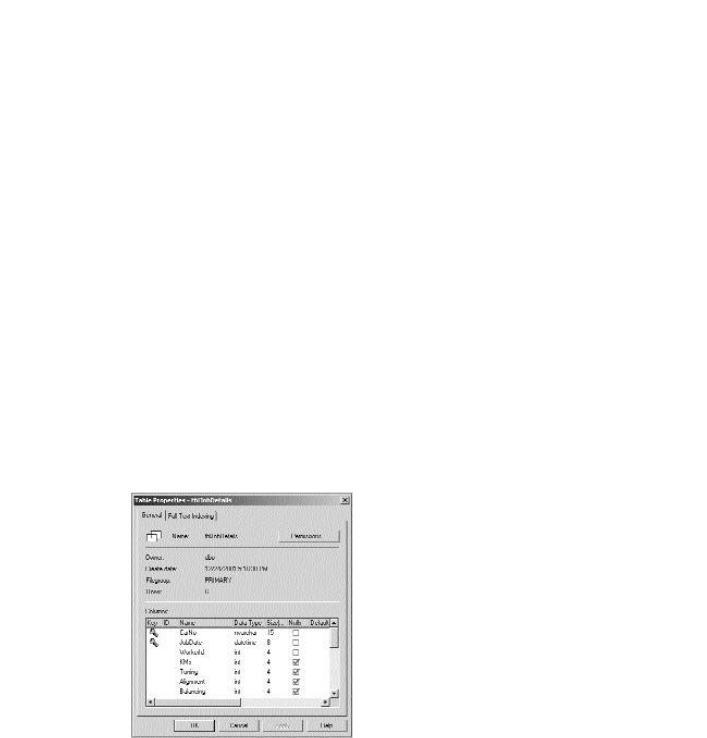
5.Right-click on tblJobDetails and select Properties. The Table Properties - tblJobDetails dialog box will appear. This dialog box shows the fields of the table in which you can have null values, as displayed in Figure 9-3.
FIGURE 9-3 Mandatory fields in a table

180 Project 1 CREATING A CUSTOMER MAINTENANCE PROJECT
As you can see in Figure 9-3, the CarNo, JobDate, and WorkerId fields are mandatory in the database.The CarNo, JobDate, and WorkerId controls on the JobDetails form represent these fields.
To ensure that a user has specified values for the three fields described above, there are two methods. Either you can validate the required field as soon as a user moves out of it, or you can validate the entire form when the user clicks on the Add or Update button. I examine the procedure to validate an entire form in the next section. In this section, I will describe the ways to validate one field at a time.
When a user selects a control, the Enter event of the control is generated. Similarly, when a user deselects a control, the Leave event of the control is generated. You can use these events to validate controls.
Begin by ensuring that the user has specified a valid car number before the user proceeds to specify the date. When a user tabs out of the CarNo control, the Enter event of the JobDate control and the Leave event of the CarNo control are generated.Therefore, you can check whether the user has specified a valid value for the CarNo either in the Enter event of the JobDate control or in the Leave event of the CarNo control. If the user has not specified a valid value, you can reactivate the CarNo control. To code the functionality, follow these steps:
1.Click on the editCarNo text box in the design view of the JobDetails form.
2.In the Properties window, click on the Events button (the button that has the yellow lightning symbol). All the events available for the TextBox control will appear.
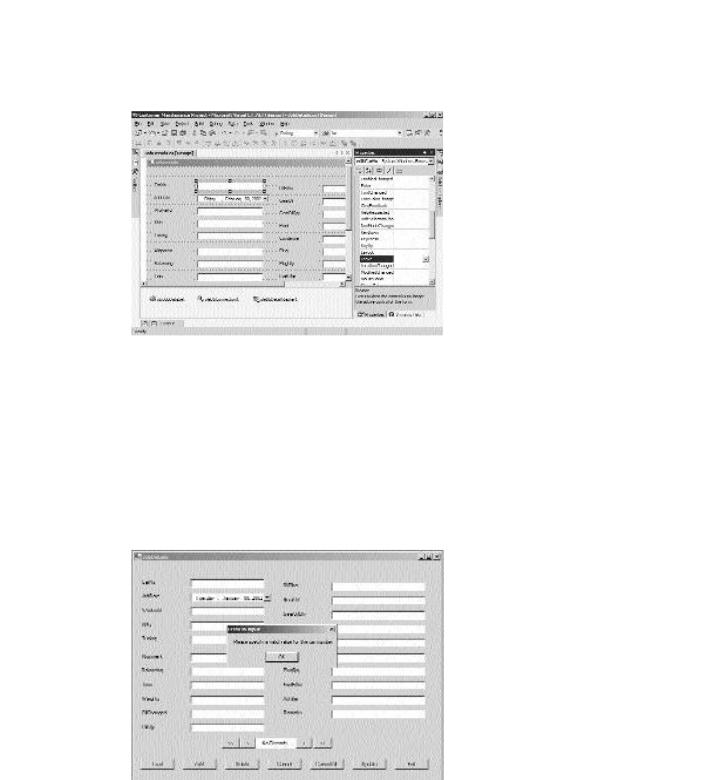
3.From the list of available events, double-click on Leave. The location of this option in the Properties window is shown in Figure 9-4.
4.When you double-click on Leave, Code Editor opens and the event handler for the Leave event is defined. Write the following code for the
Leave event of the editCarNo text box:
private void editCarNo_Leave(object sender, System.EventArgs e)
{
if ((editCarNo.Text==””) || (editCarNo.Text==null))
{
MessageBox.Show(“Please specify a valid value for the car number”,”Error in input”);
VALIDATIONS AND EXCEPTION HANDLING |
Chapter 9 |
181 |
|
|
|
FIGURE 9-4 Adding event handlers for controls
editCarNo.Focus();
}
}
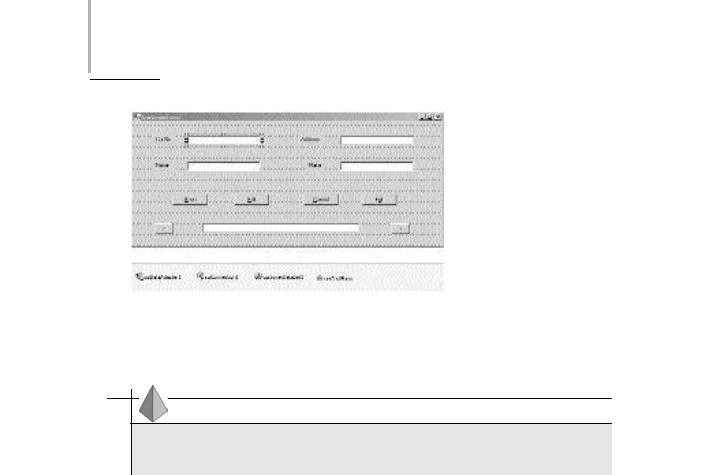
After writing the preceding code, compile and run the application. If you attempt to specify a blank value in the editCarNo text box, the application will display an error message and bring the text box into focus, as shown in Figure 9-5.
FIGURE 9-5 Validating data in controls

182 Project 1 CREATING A CUSTOMER MAINTENANCE PROJECT
The preceding method has two main drawbacks:
The user cannot decide the order in which controls should be filled. For example, if the user wishes to fill WorkerId before CarNo, the user cannot do so.
The control generates an error message when a user closes the form without specifying a valid value in the CarNo field. This is because the
Leave event of the control is fired even when the user closes the form. Therefore, even if the user decides to discard all changes and close the form, the error message is generated.
To overcome these drawbacks, you can validate data in all the controls when the user clicks on the Update or Add button. This method will be discussed in the next section.
Validating a Form
You can validate data in the JobDetails form in the Click event of the Update button. Validating all the controls simultaneously saves you the effort of coding events for each TextBox control separately. To validate the JobDetails form:
1.Open the JobDetails form in the Design view.
2.Double-click on the Update button. Code Editor opens.
3.Write the following code for the Click event of the JobDetails form:
if (editCarNo.Text.Length <6)
{
MessageBox.Show(“Please specify a valid car Number”); editCarNo.Focus();
return;
}
if (Convert.ToInt32(editWorkerId.Text)<1)
{
MessageBox.Show(“Please specify a valid worker ID”); editWorkerId.Focus();
return;
}

VALIDATIONS AND EXCEPTION HANDLING |
Chapter 9 |
|
183 |
|
|||
|
|
|
|
The preceding code displays an error message if the user specifies incorrect values for the editCarNo and the editWorkerId fields. You will notice that I have not validated the dates and other fields. It is easier to validate these fields by using exception handlers, which will be discussed in the “Handling Exceptions” section of this chapter. Before doing that, the next section will examine the ErrorProvider control of Visual Studio .NET.
Using the ErrorProvider Control
Instead of displaying message boxes each time the user submits an incorrect or incomplete form, you can use the ErrorProvider control to show an icon next to the control (which will be referred to as the error icon in future references) that has an error. When a user moves the mouse pointer over the error icon, the error message associated with the icon is displayed as a ToolTip.
The ErrorProvider control enhances user experience by eliminating the use of message boxes for notifying errors. You have already added the validation code for the JobDetails form.Therefore, in this section, you will validate a different form, CustomerForm, by using the ErrorProvider control. The steps to add the ErrorProvider control to the CustomerForm form are as follows:
1.Open the CustomerForm form in the Design view.
2.Drag the ErrorProvider control from the Toolbox to the form. The ErrorProvider control will be added to the component tray.
3.Change the Name property of ErrorProvider to errCustForm.
4.Click on the textBox1 control that represents the Car No. field.
5.In the Properties window, specify a description of the error message in the Error on errCustForm property, as shown in Figure 9-6.
6.Repeat Steps 4 and 5 to add error descriptions for all text boxes to the
CustomerForm form.
184 Project 1 CREATING A CUSTOMER MAINTENANCE PROJECT
FIGURE 9-6 Adding an ErrorProvider control
TIP
As you add error descriptions to each control in the form, an exclamation point icon appears next to each control.
When you specify an error message with each control during design time, the error icon appears as soon as a user loads the form. To avoid showing an error message even before the user has entered values in the form, you should clear the error message. To clear the error messages associated with controls, use the SetError method of the errCustForm control.The SetError method sets the error message associated with a control. If a blank string is passed to this method, the error message associated with the control is cleared. To clear error messages, add the following code for the Load event
of the CustomerForm form:
private void CustomerForm_Load(object sender, System.EventArgs e)
{
errCustForm.SetError(textBox1,””); errCustForm.SetError(textBox2,””); errCustForm.SetError(textBox3,””); errCustForm.SetError(textBox4,””);
}

VALIDATIONS AND EXCEPTION HANDLING |
Chapter 9 |
185 |
|
|
|
Next, you need to check for the availability of data in each text box when the user clicks on Save.The code for the Click event of the Save button is given as follows:
private void btnSave_Click(object sender, System.EventArgs e)
{
bool flag; flag=true;
if (textBox1.Text==””)
{
errCustForm.SetError(textBox1,”Please specify a valid car number.”); flag=false;
}
else errCustForm.SetError(textBox1,””);
if (textBox2.Text==””)
{
errCustForm.SetError(textBox2,”Please specify a valid name.”); flag=false;
}
else errCustForm.SetError(textBox2,””);
if (textBox3.Text==””)
{
errCustForm.SetError(textBox3,”Please specify a valid address.”); flag=false;
}
else errCustForm.SetError(textBox3,””);
if (textBox4.Text==””)
{
errCustForm.SetError(textBox4,”Please specify a valid make.”); flag=false;
}
else errCustForm.SetError(textBox4,””);
if (flag==false) return;
186 Project 1 CREATING A CUSTOMER MAINTENANCE PROJECT
else
{
sqlDataAdapter1.Update(customerDataSet1); MessageBox.Show(“Database updated!”);
}
}
In the preceding code, I have used a variable flag of the bool data type to determine whether any field has been left blank. When a field is blank, the value of the flag variable changes to false and an error message is set on the ErrorProvider control. Similarly, after the user specifies a valid value in the field, the error message associated with the field is cleared.
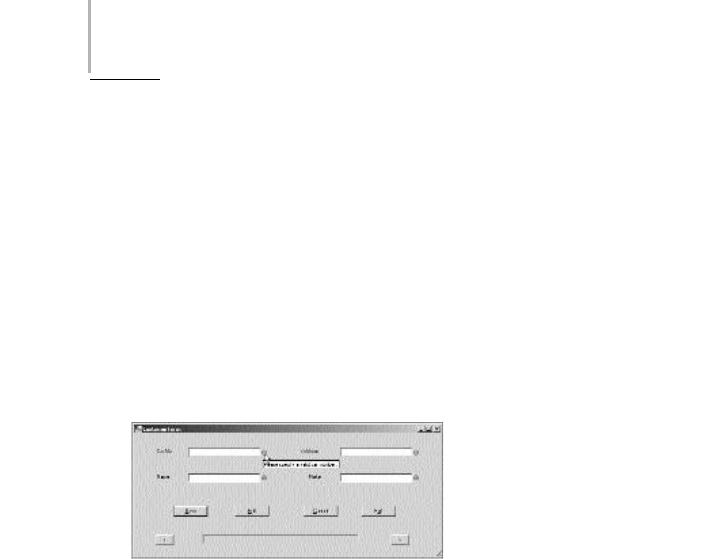
After writing the preceding code, run the form and check the output. To open CustomerForm, click on Customer on the main menu of the form. If you click on Save without specifying any value in the CustomerForm form,error icons appear for each field in the form, as shown in Figure 9-7.
FIGURE 9-7 Using an ErrorProvider control
Handling Exceptions
Exceptions are abnormal conditions in an application. For example, if you attempt to update records in a database when one or more of the mandatory fields have been left blank, your application will throw an exception.

VALIDATIONS AND EXCEPTION HANDLING |
Chapter 9 |
187 |
|
|
|
If exceptions are not handled by your application, your application will terminate abnormally. In this section, you can learn about ways to handle exceptions in the
JobDetails form.
Using the try and catch Statements
The try and catch statements form part of structured exception handling. When you know about certain statements of code that may generate an error, you can place those statements in a try block. For example, when you specify code to update data in a database or convert data from one format to another, your application can throw an exception. Therefore, you should place these statements in a try block.
Whenever statements in a try block throw an exception, the catch block, which follows the try block, catches the exception if the exception is in the same format as that expected by the catch block. For example, if you attempt to supply a string data type variable instead of an int data type, your application will throw an exception of the FormatException class. If the catch block handles exceptions of the FormatException class, the statements of the catch block will be executed.
You may wonder if you need to specify catch statements for each type of exception that your application generates. It is not mandatory to do so. All exception classes are derived from the Exception class of the System namespace. Therefore, unless you want to implement different exception handling logic for different types of exceptions, you can use the Exception class to handle all exceptions generated by your application.
The syntax for the try and catch statements is given as follows:
try
{
//The statements that might generate an error Statement(s);
}
catch (filter)