

C# ПІДРУЧНИКИ / c# / Premier Press - C# Professional Projects
.pdf208 Project 1 CREATING A CUSTOMER MAINTENANCE PROJECT
If the user needs to cancel the changes made to the records in the DataSet, the user can click the Cancel button. You can now write the code for the Cancel button.
Adding Functionality to the Cancel Button
To add functionality to the Cancel button, perform the following steps:
|
|
Y |
1. Double-click on the Cancel button to display the code window. |
||
|
L |
|
2. Add the following code to the Click event of the button. |
||
private void btnCancel_Click(object sender, System.EventArgs e) |
||
{ |
M |
|
|
|
|
|
workerDataSet1.Clear(); |
|
|
A |
|
|
sqlData dapter1.FFill(workerDataSet1); |
|
} |
E |
|
|
|
|
The previous codeTuses the Clear() method of the DataSet class to clear all the rows in the dataset.
Adding Functionality to the Exit Button
After working with the WorkerForm, you need to close the WorkerForm to display the main form, Form1.This can be done by adding the following code to the Click event of the Exit button.
private void btnExit_Click(object sender, System.EventArgs e)
{
Form1 newForm = new Form1(); newForm.Show();
this.Hide();
}
Until now, you have written the code for all the controls in the form. Now consider the entire code for the WorkerForm.
using System;
using System.Drawing;
using System.Collections;
using System.ComponentModel;
using System.Windows.Forms;
Team-Fly®

DATABASE INTERACTION USING ADO.NET |
Chapter 10 |
209 |
|
|
|
|
|
namespace Customer_Maintenance_Project
{
public class WorkerForm : System.Windows.Forms.Form
{
private |
System.Windows.Forms.Button |
btnSave; |
private |
System.Windows.Forms.Button |
btnEdit; |
private |
System.Windows.Forms.Button |
btnCancel; |
private System.Windows.Forms.Button |
btnExit; |
|
private |
System.Data.SqlClient.SqlDataAdapter sqlDataAdapter1; |
|
private System.Data.SqlClient.SqlCommand sqlSelectCommand1; |
||
private |
System.Data.SqlClient.SqlCommand sqlInsertCommand1; |
|
private |
System.Data.SqlClient.SqlCommand sqlUpdateCommand1; |
|
private |
System.Data.SqlClient.SqlCommand sqlDeleteCommand1; |
|
private |
System.Data.SqlClient.SqlConnection sqlConnection1; |
|
private Customer_Maintenance_Project.WorkerDataSet workerDataSet1; private System.Windows.Forms.DataGrid dataGrid1;
private System.Windows.Forms.Label label1;
private System.ComponentModel.Container components = null;
public WorkerForm()
{
InitializeComponent();
}
protected override void Dispose( bool disposing )
{
if( disposing )
{
if(components != null)
{
components.Dispose();
}
}
base.Dispose( disposing );
}
private void WorkerForm_Load(object sender, System.EventArgs e)
{

210 Project 1 CREATING A CUSTOMER MAINTENANCE PROJECT
}
private void btnSave_Click(object sender, System.EventArgs e)
{
sqlDataAdapter1.Update(workerDataSet1); MessageBox.Show(“The Worker table is updated.”);
}
private void btnEdit_Click(object sender, System.EventArgs e)
{
workerDataSet1.Clear(); sqlDataAdapter1.Fill(workerDataSet1);
}
private void btnExit_Click(object sender, System.EventArgs e)
{
Form1 newForm = new Form1(); newForm.Show();
this.Hide();
}
private void btnCancel_Click(object sender, System.EventArgs e)
{
workerDataSet1.Clear(); sqlDataAdapter1.Fill(workerDataSet1);
}
}
}
The previous code includes default namespaces, such as System, System.Drawing,
System.Collections, System.ComponentModel, and System.Windows.Forms. Visual
Studio .NET creates a default namespace with the same name as that of the project, Customer_Maintenance_Project.Inside the namespace, a class with the same name as that of the form,WorkerForm, is created.The WorkerForm class is derived
from the System.Windows.Forms.Form class.
The WorkerForm class includes the declaration of all the controls used in the form. These controls include the Label, Button, DataSet, DataAdapter, and DataGrid controls. In addition, the declaration of the SQL commands, such as Select,

DATABASE INTERACTION USING ADO.NET |
Chapter 10 |
211 |
|
|
|
|
|
Update, Insert, and Delete are included in the WorkerForm class. This class also contains a default constructor with the name WorkerForm. The constructor is used to call the InitializeComponent() method, which is a private void method declared in the #region preprocessor directives. The InitializeComponent() method contains the statements used to initialize the controls and commands used in the code.
The WorkerForm class also includes a protected override of the Dispose() method, which is used to deallocate memory to the components that are no longer used by the program code. Finally, the code includes the Click event of the button controls that you added in the previous sections.
WorkerForm that you have created is now functional. To test the form, perform the following steps:
1.On the Debug menu, click on the Start option. Alternatively, you can press the F5 key to start debugging.
You can now click on each button to test the functionality.
2.Click on the Edit button.
The records in the tblWorker table are displayed.
3.Edit a record and click on the Save button.
A message box showing the text The Worker table is updated. is displayed.
Similarly, you can add or delete a record by clicking the Save button. You can also cancel the changes that you made to the records in the dataset by pressing the Cancel button and return to the main form by pressing the Exit button.
As you can see, the main form, Form1, is displayed when you click on the Exit button. Form1 contains the links to the WorkerForm, CustomerForm,JobDetails, and Reports forms. After creating the WorkerForm form, you can now add the functionality to the CustomerForm form.
Connecting CustomerForm to the tblCustomer Table
The CustomerForm is used to display the records from the tblCustomer table. To do this, you need to create the DataSet object for the customer records similar to the ones that you created for the worker records. The steps for creating a dataset

212 Project 1 CREATING A CUSTOMER MAINTENANCE PROJECT
are the same as discussed earlier, except for the SQL query that you create to select the records from the database.
To create a DataSet object, run the Data Adapter Configuration Wizard. The wizard creates the sqlDataAdapter and sqlConnection objects that you can use to connect to the tblCustomer table. However, in the Generate the SQL statements page of the Data Adapter Configuration Wizard, type the following SQL query that selects all the records from the tblCustomer table:
SELECT CarNo, Name, Address, Make
FROM tblCustomer
The previous SQL statement enables the sqlDataAdapter data adapter to connect to the tblCustomer table. However, a dataset is still not created. To enable Visual Studio .NET to create a dataset, perform the following steps:
1.Click anywhere in the form to make it active.
2.In the Data menu, select the Generate Dataset option. The Generate Dataset window is displayed.
3.From the Choose a dataset: group box, select the New radio button. In the text box adjacent to the New radio button, type the name of the
dataset as customerDataSet.
Make sure that the tblCustomer table is selected in the Choose which table(s) to add to the dataset text box.
4.Check the Add this dataset to the designer. check box.
5.Click on the OK button to close the Generate Dataset window.
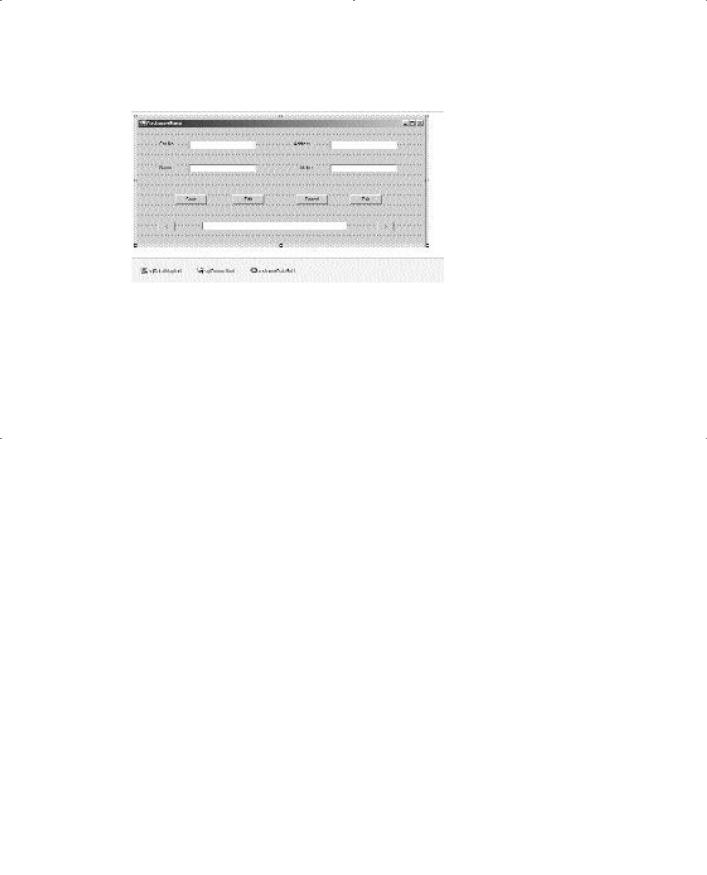
A DataSet object with the name customerDataSet1 is added to the component tray at the bottom of the form. Figure 10-4 shows the Cus-
tomerForm form with sqlDataAdapter1, sqlConnection1, and customerDataSet1 added to the form.
However, generating a DataSet object does not display records in the form. To display records, you can either use a DataGrid control or bind the controls to the fields in the underlying table. In the previous section, you have seen that a DataGrid control displays all the records in the form of a grid. However, you can also display each field in a separate control by binding each control to a field in the table. The following section discusses binding controls to the fields in a table.
DATABASE INTERACTION USING ADO.NET |
Chapter 10 |
|
213 |
|
|
||||
|
|
|
|
|
FIGURE 10-4 CustomerForm in the design view
Binding TextBox Controls to Fields in the tblCustomer Table
In Chapter 7, you created the interface for the CustomerForm form. CustomerForm includes four text boxes that you can bind to the four column headings in the tblCustomer table. You can bind a control to a field in a table by changing the properties of the control. To do so, perform the following steps:
1.Click on a TextBox control to change its properties.
In the Properties window, change the properties of the TextBox controls.
2.Click on the plus (+) sign to the left of the DataBindings property. A list of properties is displayed.
3.Click on the Down Arrow button of the Text property. A list of datasets is displayed.
4.Expand the customerDataSet1 dataset by clicking the plus (+) sign.
5.Expand the list of tables that is displayed.
6.Select the CarNo option to bind the text box control to the CarNo field.
The TextBox control will now display the records in the CarNo field. Similarly, you can bind the rest of the text boxes to display records from
the Name, Address, and Make fields of the tblCustomer table.

214 Project 1 CREATING A CUSTOMER MAINTENANCE PROJECT
Even after binding the controls to the fields in the table, records are not automatically loaded in the CustomerForm at run time. To load the records, you need to call the Fill() method of the data adapter in the Click event of the Edit button. You can now write the code to load the records in the CustomerForm form at run time.
Adding Functionality to the Edit Button
To write the code for the Edit button, perform the following steps:
1.Double-click on the Edit button to display the code window.
2.Add the following code to the Click event of the Edit button.
private void btnEdit_Click(object sender, System.EventArgs e)
{
customerDataSet1.Clear(); sqlDataAdapter1.Fill(customerDataSet1);
}
The previous code calls the Clear() method to clear all the records in the dataset. Next, it calls the Fill() method to load the records from customerDataSet1 to CustomerForm. If you are using OleDbDataAdapter, you need to make the following changes to the Click event of the Edit button.
private void btnEdit_Click(object sender, System.EventArgs e)
{
customerDataSet1.Clear(); oleDbDataAdapter1.Fill(customerDataSet1);
}
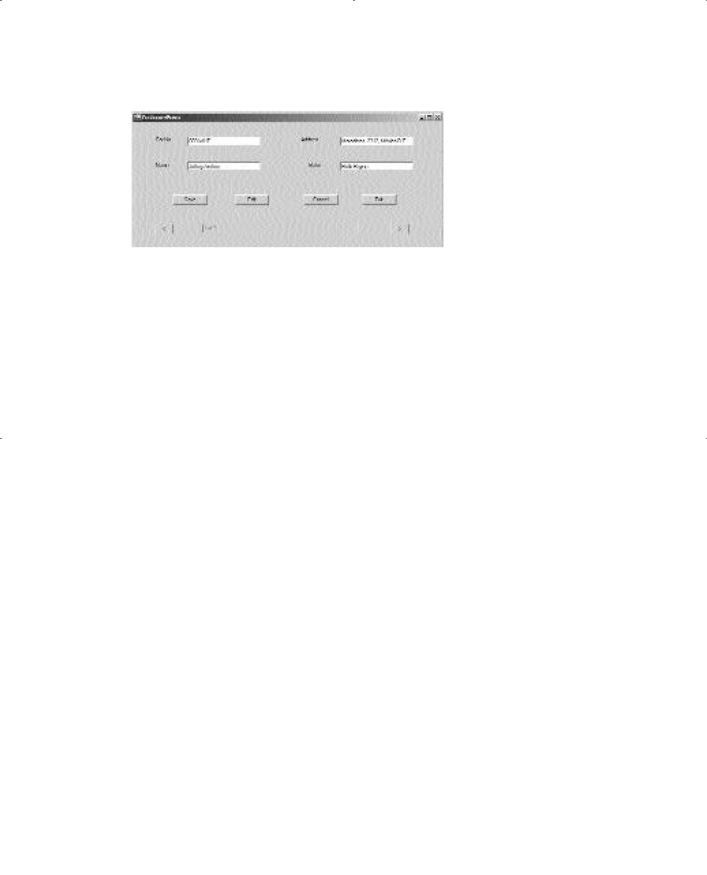
When the user clicks on the Edit button, the records are displayed in the CustomerForm form. Figure 10-5 shows the CustomerForm form with the records displayed.
When the records are loaded, you can make changes to the records. In addition, you can add or delete a record. To save the changes that you make to the records, you need to write the code for the Save button. The following section discusses how to add code to the Save button.
DATABASE INTERACTION USING ADO.NET |
Chapter 10 |
215 |
|
|
|
|
|
FIGURE 10-5 CustomerForm with the records displayed
Adding Functionality to the Save Button
The Save button is used to save the changes that you make to the records in the tblCustomer table. To do so, you need to add the following code to the Click event of the Save button.
private void btnSave_Click(object sender, System.EventArgs e)
{
bool flag; flag=true;
if (textBox1.Text==””)
{
errCustForm.SetError(textBox1,”Please specify a valid car number.”); flag=false;
}
else
errCustForm.SetError(textBox1,””); if (textBox2.Text==””)
{
errCustForm.SetError(textBox2,”Please specify a valid name.”); flag=false;
}
else
errCustForm.SetError(textBox2,””); if (textBox3.Text==””)
{
errCustForm.SetError(textBox3,”Please specify a valid address.”); flag=false;
}

216 Project 1 CREATING A CUSTOMER MAINTENANCE PROJECT
else
errCustForm.SetError(textBox3,””); if (textBox4.Text==””)
{
errCustForm.SetError(textBox4,”Please specify a valid make.”); flag=false;
}
else
errCustForm.SetError(textBox4,””); if (flag==false)
return; else
{
sqlDataAdapter1.Update(customerDataSet1); MessageBox.Show(“Database updated!”);
}
}
Similar to the Cancel and Exit buttons in the WorkerForm, you need to add the functionality to the Cancel and Exit buttons in the CustomerForm form.
As you have seen, a DataGrid control displays all the records in a grid. However, if you are using individual controls to display the fields of a table, as in the case of CustomerForm, a single record is displayed at a time. To view all the records, you need to add Back and Next buttons that allow you to navigate through multiple records.
All the column headings in the tblCustomer table are mandatory. Therefore, before saving the changes that a user has made to the records to the underlying tblCustomer table, you first need to check whether the user has entered the data in all fields. To do so, the previous code declares a bool type variable flag and initializes it to true.
The code then tests if any of the fields are left blank. If a field is left blank, an error message is displayed adjacent to the corresponding field. For example, if the user does not enter a value for the Address field, an error message with the text “Please specify a valid address” is displayed.
Next, the value in the variable flag is changed to false.
Finally, the code uses an if statement to check the value of the variable flag. If the value of the variable flag is false, the return statement is used to retrieve the changes made by the user.
DATABASE INTERACTION USING ADO.NET |
Chapter 10 |
|
217 |
|
|
||||
|
|
|
|
|
Alternatively, if the value of the variable flag is true, the changes made by the user are replicated in the tblCustomer table and a message box confirming the same is displayed.
Adding Functionality to the Back Button
The Back button allows you to display the previous record of the tblCustomer table. To do so, add the following code to the Click event of the Back button.
private void btnBack_Click_1(object sender, System.EventArgs e)
{
btnBack.BindingContext[customerDataSet1, “tblCustomer”].Position -=1 ; CurrentPosition();
}
The previous code uses the Position property of the BindingContext object to find the position of the record. To navigate to the previous record, the value of the Position property is decremented by one. The code then calls the CurrentPosition() method that is used to display the position of the record in the txtDis-
playPosition text box.
NOTE
A BindingContext object is used to manage objects derived from the Control class. These controls include all Windows Forms controls, such as TextBox, GroupBox, ListBox, and so on. Each of these controls has an associated BindingContext object.The BindingContext class contains several methods that can be used to perform operations on these objects.
The CurrentPosition() method is a custom-defined private void method. You can add the code of the CurrentPosition() method to the public class CustomerForm.
private void CurrentPosition()
{
int currentPosition, ctr;
ctr = this.BindingContext[customerDataSet1, “tblCustomer”].Count; if(ctr == 0)
{
txtDisplayPosition.Text = “(There are no records in the Customer table.)”;
}