

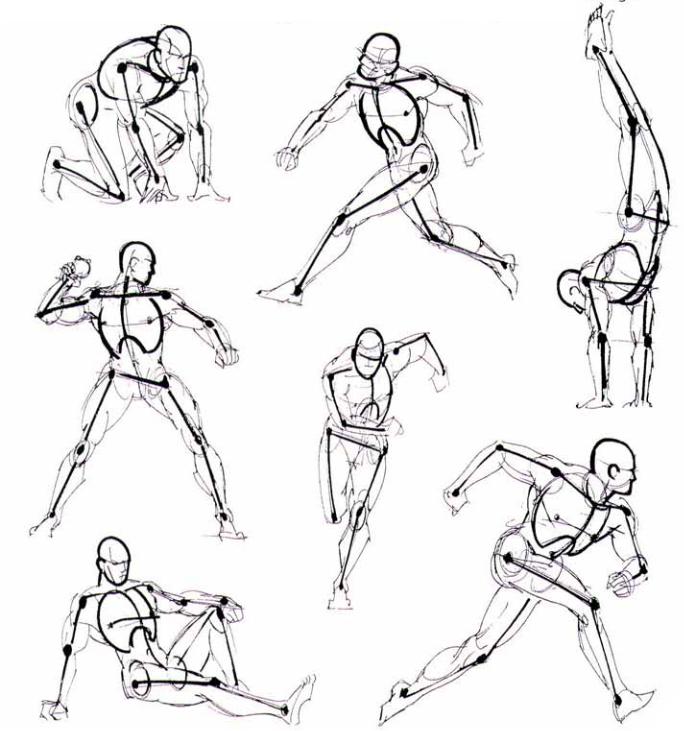
BODY BASICS
Look at the basic lines of the body. All its forces are working in harmony. The thick, black lines
indicate the position of the major bones, which serve as the foundation for every pose. You can see the weight and mass of the rib cage, the curve and direction of the spine, and the width of the pelvis.
Note that the collarbone is wide, like a ledge, which lays the foundation for a massive chest. The shoulder blades add width to the back. This visual shorthand provides the framework on which the finished drawing is hung. All of your figure drawings should begin with this underlying framework.
BUILDING AN ACTION POSE
Comic book heroes and villains are made to move, jump, leap, and soar. But when you start
to position your figure in dynamic poses, things can get tricky-unless you've taken care to maintain its essential building blocks. This is done by taking a moment to sketch out a solid rib cage, collar bone, pelvis, and the other major bones before executing the finished drawing.
Contrary to what your instincts might tell you, muscles alone do not make a character appear
sturdy. Solid bone structure does. That's because all muscles are attached to bones, so unless you have a solid foundation of bones, those muscles will appear rubbery. But that doesn't mean that you must
render a skeleton in painstaking detail. It can be done quickly, in a sketchy shorthand, as in these fine examples. While it's true that you'll erase many of these preliminary steps when you do the final "clean" version of your hero, your drawings will benefit immeasurably from them.
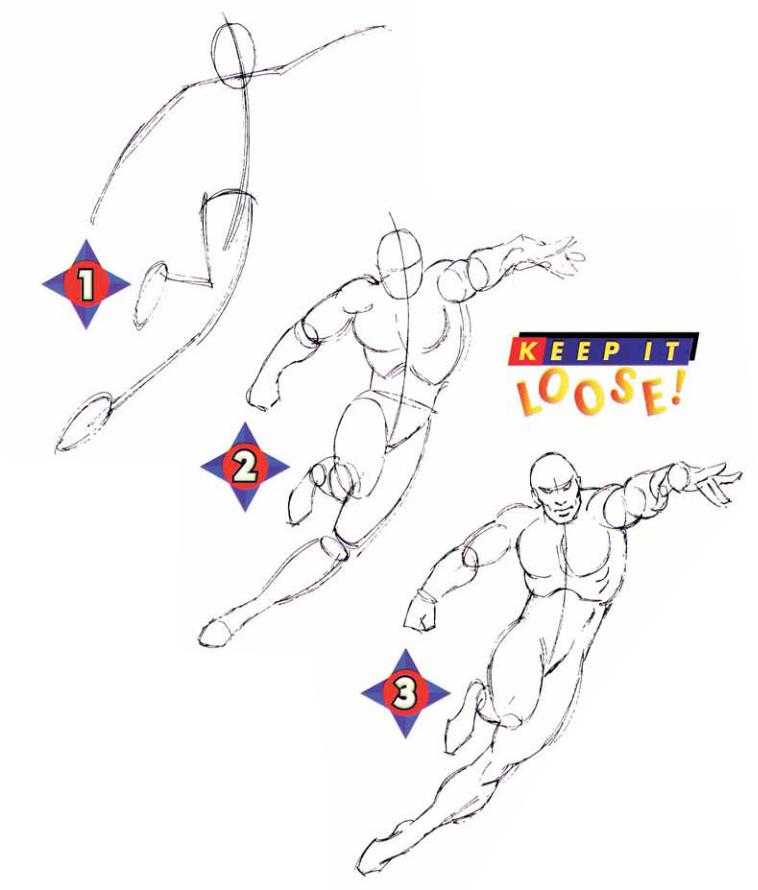
THE ACTION FIGURE, STEP BY STEP
N ow let's apply what we've learned, taking it step by step,
and finish with a detailed figure. Most pros start with the second step, because the first step has become second nature. But no pro starts with the precision of the fifth step. They always sketch roughly first. After you've gotten the hang of it, you'll begin at the second step, too.
Start with a simple line drawing. Keep it loose. Try to feel the flow and energy of the pose.
Sketch the large muscles and areas first. If a form has two sections, like an arm, sketch each section separately: first the upper arm, then the forearm. Sketch the upper leg, then the lower leg. Sketch the rib cage separately from the waist and so on.
Continue to define the form in this way. This will give your drawing more authority.
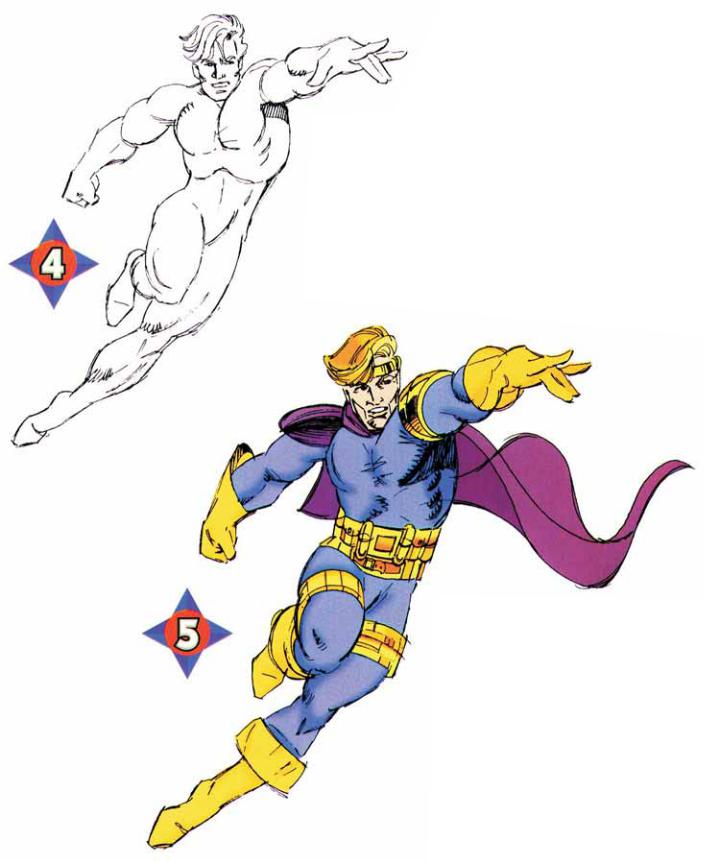
Now start to smooth out the figure by erasing the construction lines. The care you've taken with the underlying framework has paid off in a solidlooking figure. Draw the hands and feet in detail, and begin to indicate some shading possibilities.
Suit your character up in an eyecatching outfit and work out the details. The pros always add the fine points last. The beginner typically focuses on the details of the costume and tries to draw them early on, but keep in mind that the figure always suffers as a result.