the rough layout
Once the penciler decides on the best way to approach the script, he begins the rough layout. The most significant part of this stage is
to evaluate the general feeling of the page. Does the story flow, or does it seem like random panels jumbled together? Is it dramatic, or does it meander from picture to picture? Are the images within
each panel clear or cluttered? Does the largest
panel contain the most important action? Notice how a heightened sense of urgency is achieved by alternating close-up shots with full shots, as well as by alternating the angles. We're either looking up at someone or down at someone, but rarely are we looking at them head on. Also notice that the panels vary both in dimension and size. Variety keeps readers on the edge of their seats.
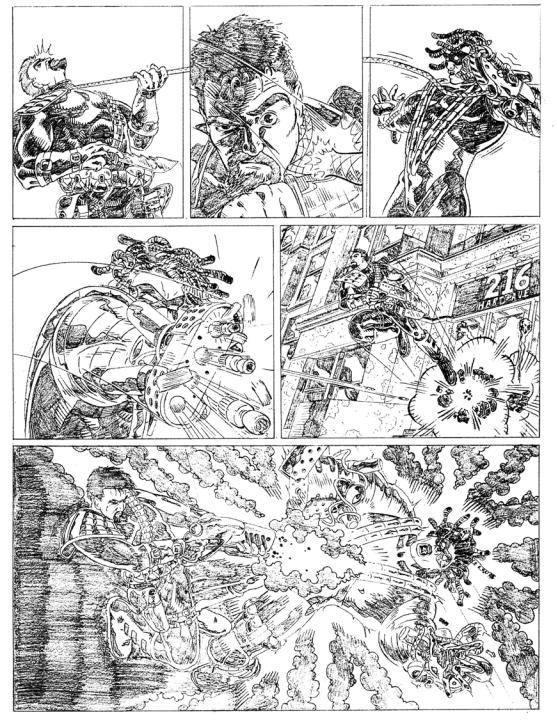
preparing a pencil layout for inking
A fter the rough layout, the penciler starts to work "tight." This means that everything must
be precise, because the inker, who works on it next, can't read the penciler's mind. If a line is missing, the inker may not put it in. If a sloppy line is there, the inker might ink it anyway. So the page should be perfect. Now is the time to work on the details. This is when it really counts.
Notice how much care is taken to save room for the large inked areas. Black areas add weight and melodrama to a scene and create contrast when juxtaposed with white or light colors. Note also the striking negative (white) space among the billows of black smoke in the bottom panel. An experienced penciler works to create such areas for the colorist, who can have a field day with them.
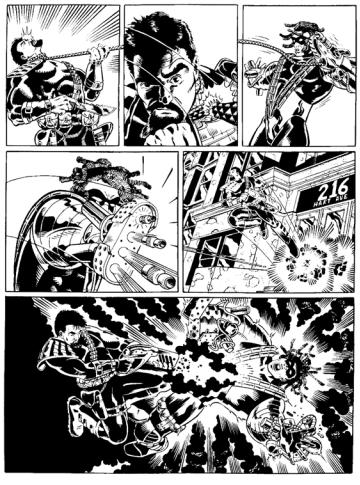
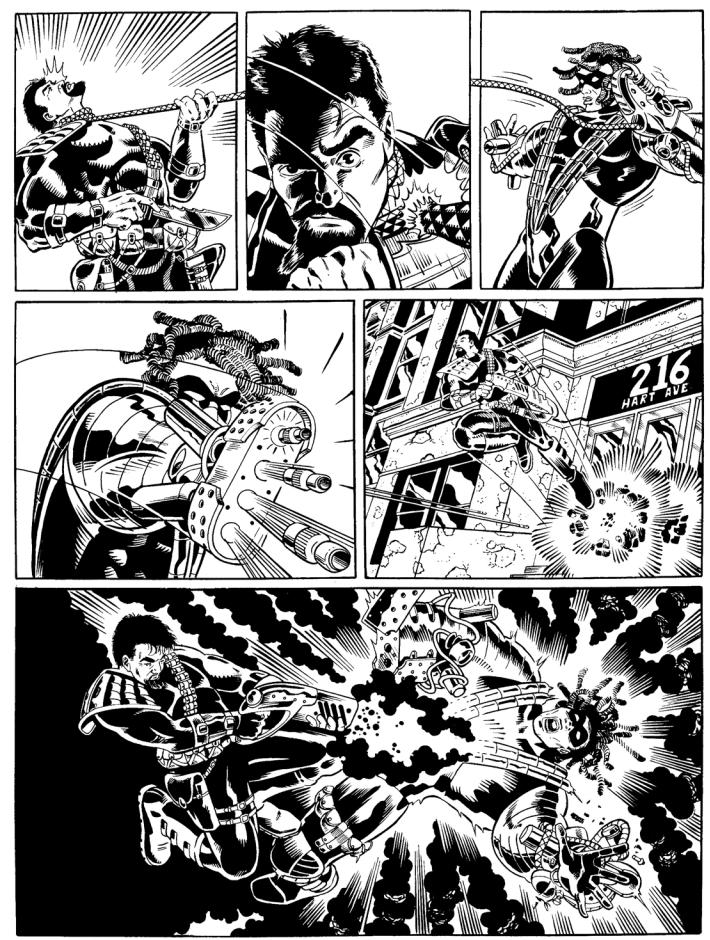
the final inked page
Inking is a tremendous skill. Professional pencilers know how valuable a good inker is, and they
actively lobby the publisher to get the best inker to ink their pencil drawings. The inker does more than just trace pencil lines in ink. He gives them shape and crispness. He is also constantly on the alert,
making sure that drawings read clearly in terms of ights and darks. In doing so, he may make small adjustments to the pencil drawing. The following are some of the flourishes that Frank McLaughlin, known for his deft pen work, has made to Alexander Morrissey's excellent pencil drawings.
Frank added a burst of energy around the character to heighten the urgency in the scene.
The cartridges around the missiles were left out because the image was sharp and effective without it.
The buckles on the hero's boots are rendered in white and black. If they were left black, they would blend into the black background.
Textural detail was added to the whip, and a touch of white was added to the character's beard for contrast.
Burst lines were added between
the clouds of smoke to fill in the page.
HERE ARE CERTAIN SKILLS that can't be mastered unless you're working in
the comic book field. That's because these techniques don't fit neatly under one category, but instead are acquired
over the course of a career. These techniques are usually shared over coffee with fellow cartoonists, as everyone discusses what they're working on. If you were there at that table, at that
diner, this is what you would have overheard....