

Build The Ultimate Custom PC (2005)
.pdfChapter 3 — Choosing a Suitable Case and Power Supply |
39 |
First Rule of PC Building — Strikes Again!
Remember “nothing is ever as simple as a single term makes it seem to be”? This is also true for case support for motherboards. While a case might describe itself as “ATX compatible” there are rare occasions when they’re just not compatible enough! For example, the BIT BX6 board is an ATX motherboard, but there are ATX cases for sale that simply won’t hold this board.
Don’t let this worry you right now — these incompatibilities are rare, and we mention them only so that you don’t feel alone if you happen to be extremely unlucky and encounter this type of problem. If you do find yourself in this situation, return the case and get a different one.
FIGURE 3-2: Screw threads hold the motherboard in place. This shows the relationship between the case and the motherboard.
So, you’re in the store looking at a selection of PC cases. What do you look for? What are the signs of a good case, and what are the warning signs of a bad one?

40 Part I — Choosing Components for Your PC
The elements to look for can be broken down into:
Size
Looks
Features
Stability
Ease of opening
Ease of closing
Interior
Size
Take a look at the outside of the case you are interested in. How big is it? Remember, you’re going to have to put that case somewhere. Ideally, your finished PC should be placed somewhere where it will have at least 6 inches (15 cm) of air space all around the case for optimum cooling. That massive tower PC might look great in the store, but it’s not going to look so great when you discover you have nowhere to put it. Measure the area where you plan for the finished PC to live, and take these measurements with you.
Looks
Now onto cosmetics. Do you like how the PC case looks? Some cases will be very plain and utilitarian, whereas others can be quite dramatic looking, with neon lights, LED decoration, clear and panel windows to see the inside of the PC. Still others are molded into fancy sculptures.
Although how your final PC will look might seem like a small consideration compared to, say, power or performance, it’s still an important and sometimes overlooked consideration. Think carefully about the PC and where it will go. A case that’s packed with glowing neon tubes and blinking LEDs can look great in the store, but will it look great when you get it home? If the PC is going to be in a shared work space, will the others that inhabit that work space enjoy the neon/LED light show? Will that “alien head” molding on the front of the PC fit in with the surroundings? Does it matter? Give this some thought, and work this into your thinking when buying a case.
All this might seem like very minor considerations but they are important and can make the difference between a final PC that you’re proud of and one you’re not. If you are uncertain about a nonstandard PC case design, then err on the side of restraint and get a “standard” case — you can always change the case later anyway.
Please don’t let looks alone be the deciding factor for a case! There are plenty of other, more serious considerations to bear in mind.
Chapter 3 — Choosing a Suitable Case and Power Supply |
41 |
Features
Many cases have a lot of bonus features on them, such as CPU and hard disk temperature displays, front-mounted USB and FireWire ports, and audio connectors. Bear in mind though that these will need motherboard support.
Stability
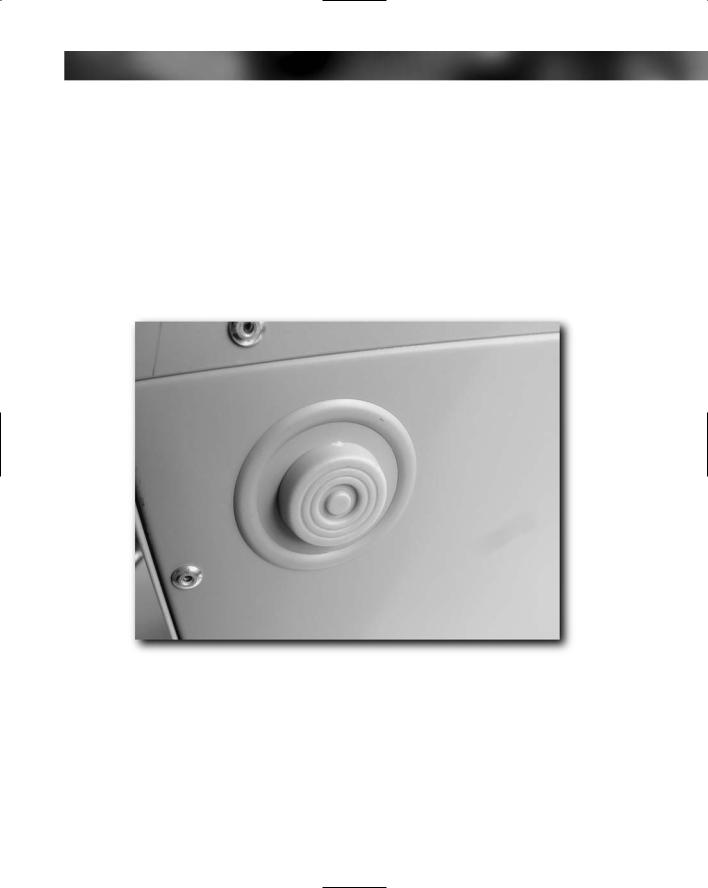
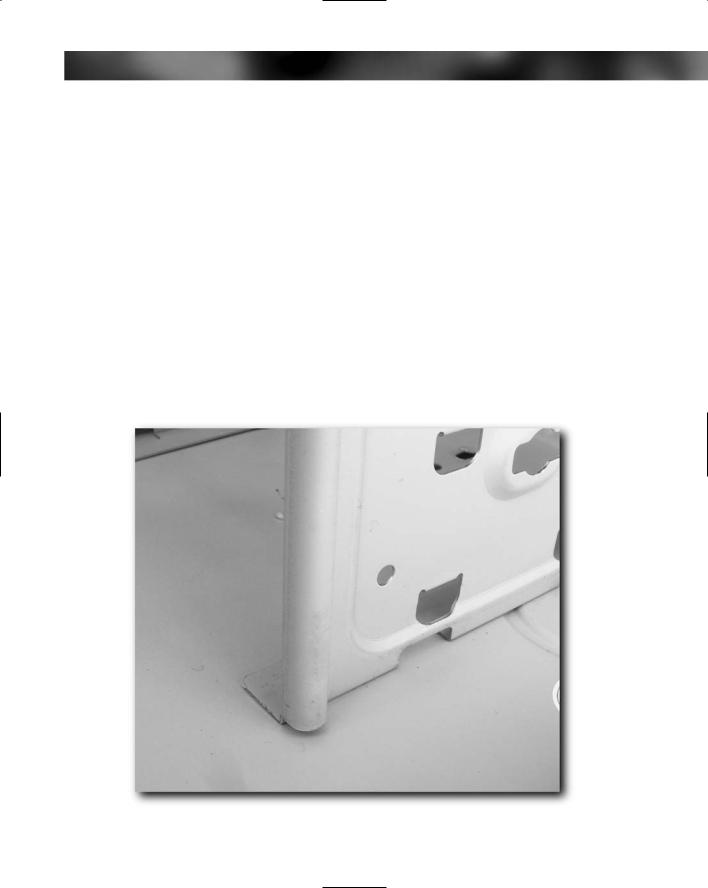
Stability of the case is important. Simple test — place the prospective case on a flat surface and check that it sits solidly without any wobbling. If not, reject it immediately. A good PC case will have four rubber feet that mold to the minute surface irregularities of your desk (see Figure 3-3). Cheaper cases have hard plastic feet, which aren’t as good and can result in more noise due to vibration.
FIGURE 3-3: Rubber feet on case reduce noise and mold more easily to irregular desk surfaces.
Opening the Case
Happy with the outside of the case? Good! Now it’s time to take a look inside. Before you pop the case open, however, read through the following list of questions. You will need to pay close attention to these items as you open the case. Ease of access to the inside of the case is an extremely important factor when building a PC.
42 Part I — Choosing Components for Your PC
As you open the PC case, ask and answer the following questions:
Does the case rattle? The absolute last thing you want is a case that rattles because this will drive you nuts in no time. The fans and vibration from the hard drives will amplify this vibration to the point of making the PC unbearable to use. The two reasons cases can rattle or otherwise make a noise include something not fitted right (which you can fix) or a problem with the case (something that you’re going to have to live with or try to repair).
What holds the case shut? Some cases will use screws, while others will make use of a screwless design, using press-in thumb tabs instead.
Was getting into the case easy? How robust are the thumb tabs? How much pressure did it take to press open the tabs (some can be murder on the thumbs!)?
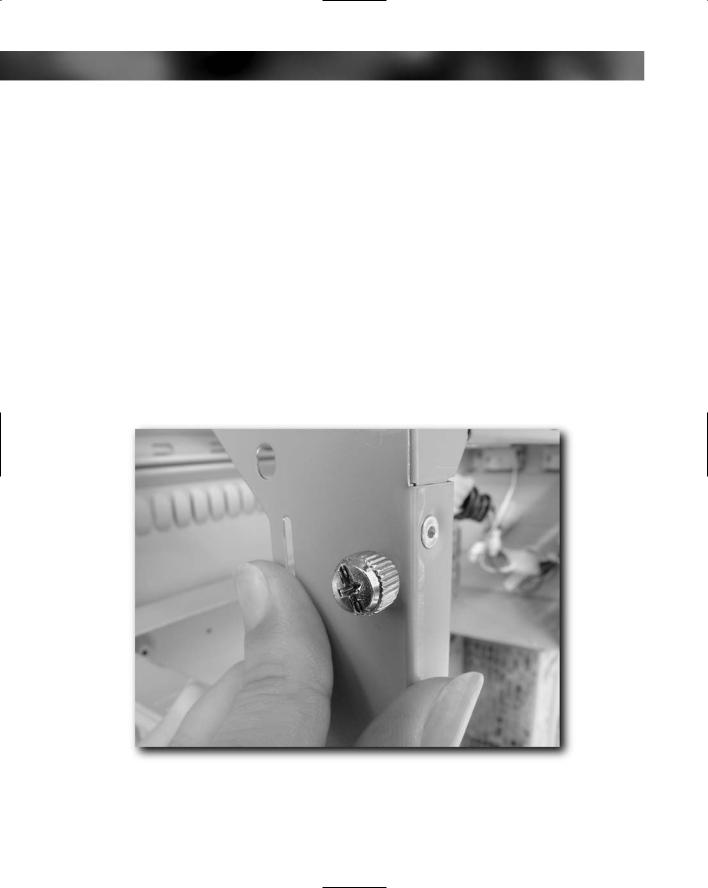
Which type you choose here is a personal one, but we strongly recommend against any case that has more than a couple of easy-to-use thumb screws holding the case together because they simply become a pain to open (see Figure 3-4). At all costs, avoid cases held together by dozens of screws that require a screwdriver. These become a major pain to open, and the screws are prone to loss.
FIGURE 3-4: Thumb screws that secure the cover can be difficult to open.

Chapter 3 — Choosing a Suitable Case and Power Supply |
43 |
Was it easy to open the case, overall? Remember, as a PC builder you will be opening and closing the case a lot more than the ordinary PC user.
What are the catches that hold the side onto the main body of the case made of? These catches need to be metal, as shown in Figure 3-5. Plastic is a nonstarter because, sooner or later, it will break off.
FIGURE 3-5: Metal catches that hold the case together are sturdier than plastic.
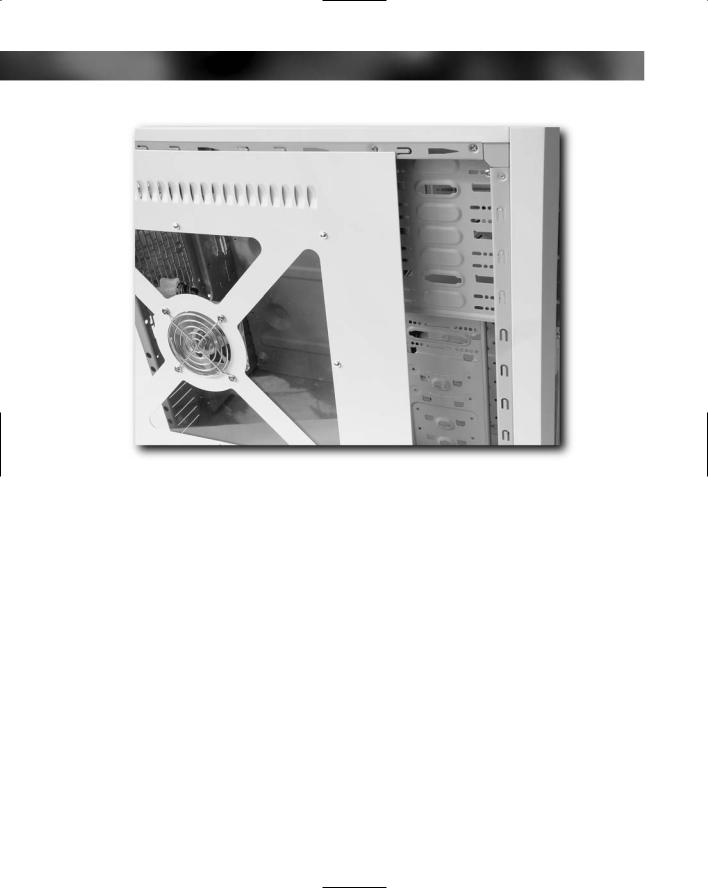
Does the side access panel on the PC come off or just hinge? (See Figure 3-6.) The lefthand side panel as you face the front of the case will be the main access panel, but remember that with towers you should be able to access both sides. A case with just a hinging side panel needs acres of space to fully open and is best avoided. Ideally, you want a case you can open and close when it’s in that 6 inches of space where it’s eventually going to live. If you need to clear your desk or, worse still, move furniture every time you want to get inside your PC, you’re going to regret your choice of case pretty quickly.
44 Part I — Choosing Components for Your PC
FIGURE 3-6: Side-opening cases make for easy access.
Closing the Case
Just as important as opening the case is closing the case. Here are some questions to ask as you test closing the case:
Is it easy or is there a struggle involved? A case that’s tricky to shut when new is unlikely to get much better with use (no matter what the salesperson might tell you!).
Does it snap into place easily and satisfyingly? Or is it hard to align the side with the case?
Does it seal perfectly or are there gaps? Reject any cases that don’t close properly.
How easy is it to fit the thumb screw? (If the case is not a screwless design.) One that’s tricky will eventually get left off and lost.
Finally, open the case again. Easy or not?
Chapter 3 — Choosing a Suitable Case and Power Supply |
45 |
Inside the Case
Now we come to another important aspect of PC case design — the inside. Until you’ve built a few PCs, it’s hard to know exactly what makes a good case because a lot depends on what kind of PC you intend to build. It’s possible to buy a case that’s far too big and too high-spec for the PC you intend to build, but in the early stages a good, well-designed, spacious case makes the build process much easier and eliminates unnecessary frustration. After you’ve fitted RAM modules or a hard drive a few times, you might eventually find yourself being able to do it by feel alone and not really need to have a roomy case. But for a first PC, why make things hard for yourself?
First thing — check the metal edges inside the case (see Figure 3-7). Do this VERY CAREFULLY because some cases have sharp edges that will give you a nasty cut. (You really don’t want to have to get a tetanus shot every time you venture inside the case.) We’re continually horrified by the number of cases filled with rough metal, pointed splinters, or, worse still, razorsharp edges. It’s possible to get some very deep and painful cuts from a badly made PC case. Take this threat seriously, and examine prospective cases very carefully, bearing in mind the serious concern that if there’s a risk you can cut yourself on a bit of ragged metal, someone else might have done so already! While the health risks are small, they surely exist. Visually examine all the metal edges of the case carefully. If not, you may regret it later on during the build stages!
FIGURE 3-7: Nice, safe, rolled edges prevent cuts!
46 Part I — Choosing Components for Your PC
Run your thumb across potentially sharp edges, not along them. This way you can feel for sharp edges without actually cutting yourself on them.
Once you’ve checked for sharp edges, next check out the quality of the metal. It is strong or weak and aluminum-foil-like? Dismiss any cases that are made of inferior metal because these cases will be structurally weak and prone to breakage. We’ve seen cases where there is a considerable amount of flexing and twisting displayed by the case, which can result in a number of problems, such as cracking the motherboard and causing expansion cards to pop out.
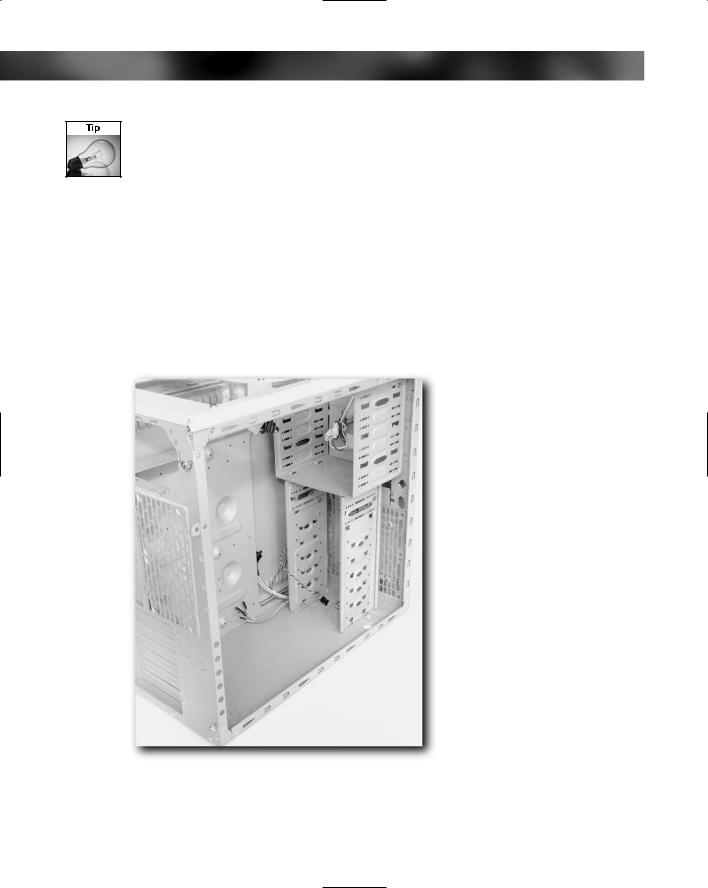
Next, have a general look inside the case (see Figure 3-8). Be on the lookout for clutter — some cases, even when empty, are cluttered and have strengthening bars across the opening on the left-hand side of the case (when you are facing the front of the case). Reject these types of PC cases — any bar or strengthener across the opening is going to get in your way when you’re building. You want a roomy case with easy, unhindered access to the interior.
FIGURE 3-8: Clutter-free interiors give you more space for your components.

Chapter 3 — Choosing a Suitable Case and Power Supply |
47 |
You might find that even the best case has a sharp corner or sharp edge — if you later come across some of these, you can always cover them with a little tape or fold them over with pliers. Never file them — the metal particles can go everywhere and cause short circuits!
Fans
Cooling the interior of your PC is going to be vitally important. A PC case is an effective heat trap, and you can have a temperature difference of many degrees between the air inside a PC case and the air in the room that the PC is situated in. You will want a way to remove that excess heat, and fans are the best way of doing this, by bringing cooler air into the PC using one fan and exhausting hot air with another.
Some big, full-sized towers might have louvers on the side of the case to allow cool air to enter — these are normally not required on smaller cases.
Make sure that any case you choose comes equipped with two fans (excluding the fan on the power supply unit): one of the front, one at the back. If fans aren’t included, then make sure that there are places to fit fans yourself.
Some cases have removable air filters to clean the incoming and expelled air. These are unnecessary and generally ineffective, clogging up quickly.
Port Accessibility
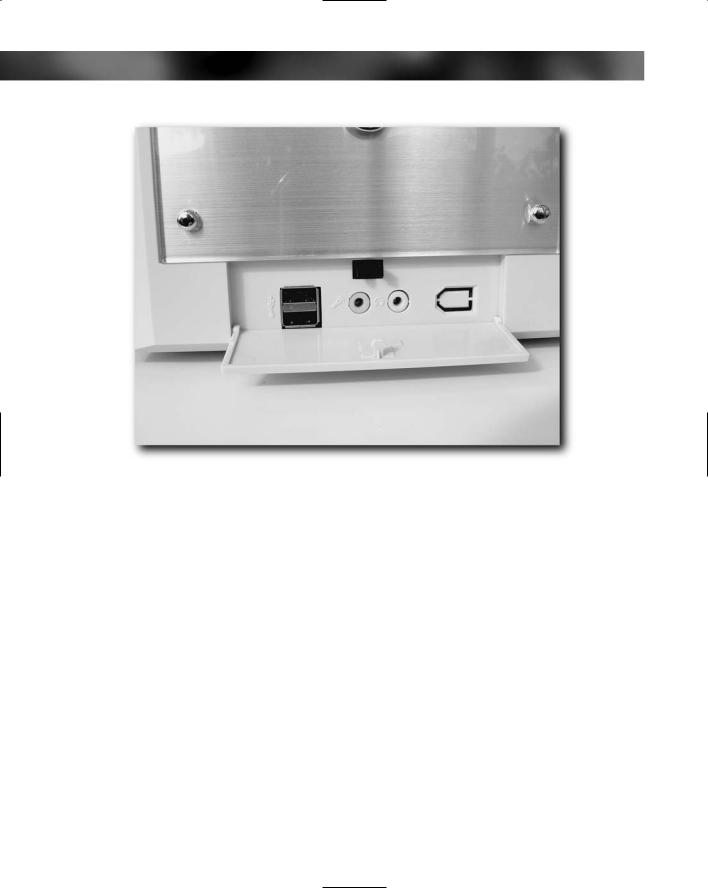
You’re going to want to connect stuff to your PC. Most modern PC cases have front-mounted audio, USB and/or FireWire ports (see Figure 3-9). These allow you to plug devices such as headphones, microphones, USB flash memory, card readers, video cameras, digital cameras, MP3 players, and so on into ports that are conveniently located. While not essential, they do make life a lot easier — climbing round the back of the system unit each time you want to connect something can become very tedious.
If the case you’ve chosen doesn’t have front-mounted USB ports, don’t worry, you can always add these on later. Many add-on kits exist to bring USB, FireWire, and even digital camera memory readers to the front of the unit.
Expansion Possibilities
There’s a good chance that after building your PC you are going to become the kind of person who adds and changes components regularly, adding new components, upgrading others.
Plan ahead for this expansion and for future upgrades. For the initial build, you might only want the case to contain two drive bays (one for a hard drive and one for an optical drive), but soon you might find yourself wanting to add more — so make sure that you take this into account now, and you’ll save yourself the cost and headache of having to swap cases later.
48 Part I — Choosing Components for Your PC
FIGURE 3-9: Front-mounted audio and USB ports on cases make it easier to access peripherals.
Power Supply Units
We’ve bundled power supply units (also known as PSUs) in with our discussion of PC cases because most PC cases come equipped with a PSU, and many readers will get their PSU bundled in with the case they have chosen.
The PSU is attached to the case by using a small number of screws. The PSU (shown in Figure 3-10) is fitted to the top of a tower at the rear. For a desktop case, the PSU will be situated at the back of the case, on the right. (Chapter 13 covers removal and fitting of a PSU, just in case you need to know how.)
There are a few things to look out for in a good PSU, including power output, power consumption, and noise.
Power Output
The main consideration with a good power supply is the amount of power it can deliver. A PSU that can’t deliver all the power your PC needs will cause you all manner of problems, from system lockups to crashes and random restarts.