Build The Ultimate Custom PC (2005)
.pdf
Introduction xix
with others what you learned during the building and testing process — a good way to do this is to start a website or blog about it. If you’ve got a digital camera, so much the better, you can show everyone what you did and the PC you ended up with!
After you’ve built your PC, we’d love to hear from you! When you get the chance visit us at www.kingsley-hughes.com/build-it or www.pcdoctor-guide.com and drop us a note — we’d love to hear from you! If you have a website, blog or photos on the web, send us a link. We’d love to see how you take the instructions in this book and customize them to your needs!
How This Book Is Structured
As we mentioned, we’re going to walk you through everything you need to know to be able to build a PC.
In Chapter 1, “Staying Safe,” you will get all the information you need to keep yourself and all the parts that you are going to buy and handle safe. This is vital reading for anyone planning to build a PC!
In Chapter 2, “Choosing the Tools You Need,” you will discover what you need to be able to build a PC (it’s probably a lot less than you imagine!).
In Chapter 3, “Choosing a Suitable Case and Power Supply,” you will look at the important considerations to bear in mind when choosing a case and power supply for your PC.
In Chapter 4, “Choosing a CPU and Motherboard,” you will get all the information that you need to make the right choices when it comes to buying the motherboard and CPU for your PC — the two most crucial parts of the build.
Chapter 5, “Choosing the Right RAM,” goes on to look at what kind of RAM you need for your PC and how much, and gives you information about making the right choices that will allow you to get the best performance out of your system.
In Chapter 6, “Choosing Hard Drives and Floppy Drives,” you will look at the storage needs of your new PC.
A modern PC isn’t complete without an optical drive, and in Chapter 7, “Choosing CD/DVD Drives,” we look at what optical drives are, what choices there are available, and how to choose the right kind of drive.
In Chapter 8, “Choosing Video Adapters and Monitors,” we demystify video adaptor cards and look at what you need to know when buying a video adaptor card for your PC. We also examine the pros and cons of using a video adaptor that might be built onto your motherboard.
Chapter 9, “Choosing Sound Capability,” looks at what you need to bear in mind when adding a sound system to your PC, and also examines the pros and cons of using a sound card integrated onto a motherboard.
No PC is complete without a raft of fittings and cables to hold it together and hook up components with. In Chapter 10, “A Tour of Cables and Fittings,” you will take a tour of the variety of cables and fittings inside a modern PC.

xx Introduction
By Chapter 11, “Checking and Testing Components,” we are assuming that you’ve bought all the parts that you need and that you’re now ready to begin building your PC. However, before you start it’s important to check and test the parts in case of defects or failures. This chapter shows you how!
Chapter 12, “Top 10 Things You Don’t Want to Forget,” is, just as the title says, a list of the common things that people forget when building a PC.
Now the chapter you’ve been waiting for! In Chapter 13, “Assembling the Case and Fitting the PSU,” you begin the PC building process, carry out any assembly needed on the case and fit the power supply unit.
Chapter 14, “Fitting the Basic Parts,” cranks up the building several notches when you add the motherboard, CPU, CPU cooler, RAM, and video card into the PC. We show you how to do this in simple steps.
In Chapter 15, “Adding Storage,” you will add a hard drive and a floppy drive to your system. We show you how to fit and wire-in the devices.
In Chapter 16, “Fire Up and Burn In” you will bring your PC to life and check that what you’ve done so far works. This will be an exciting phase in the build process, and it’s where all your research and hard work pay off! Just in case things go wrong, in Chapter 16 we also cover troubleshooting and what to do if your system doesn’t actually come on!
In Chapter 17, “Final Tweaks and Installing Windows XP,” we’ll show you how to load Microsoft Windows XP onto your new system!
Chapter 18, “Check and Test, Check and Test Again!” is all about testing and checking, and things to do before you button up the case.
Chapter 19, “Everything You Need to Know about Warranties” tells you everything you need to know about warranties and what to do if your PC goes wrong.
What You Need to Use This Book
You don’t need much to build your own PC. The two most important things that you will need are a screwdriver and a sense of adventure. Another thing that you will need is some spare time to read the book, do some research, shop for parts and actually build the PC.
Some other things that can come in handy are a grounding strap to protect your parts from electrostatic discharge (don’t worry if you don’t know what this is yet, by the end of Chapter 1 you will!) and a place to store your parts and build the PC.
A place with a dedicated workbench is handy, but people have built PCs in their living rooms, bedrooms, kitchens, greenhouses, garden sheds, attics; you can build a PC pretty much anywhere, including the outdoors if the weather is nice and there’s not much dust — in fact, about the only place we’d recommend you not try to build a PC is in the bathroom! For those still reading in a book shop, they probably won’t let you build a PC in there either. . . .
We hope that you enjoy building your PC! Remember, take your time, enjoy the process and have fun!

Choosing Components for Your PC
part
in this part
Chapter 1
Staying Safe
Chapter 2
Choosing the Tools You Need
Chapter 3
Choosing a Suitable Case
and Power Supply
Chapter 4
Choosing a CPU and
Motherboard
Chapter 5
Choosing the Right RAM
Chapter 6
Choosing Hard Drives and
Floppy Drives
Chapter 7
Choosing CD/DVD Drives
Chapter 8
Choosing Video Adapters
and Monitors
Chapter 9
Choosing Sound Capability
Chapter 10
A Tour of Cables and Fittings
Chapter 11
Checking and Testing
Components


Staying Safe
Whenever we poll people who want to build a PC for the reasons why they haven’t gone ahead and researched the topic more or even taken the plunge and actually built a PC, the top response
is always “Safety.”
This is not without good reason.
PCs run on electricity, and most of us learn from an early age that electricity is dangerous. Carelessness with electricity can kill, maim, injure, and cause a great deal of property damage. That alone might seem like a good reason why PC building should be left to the professionals. Truth is, though, that it is possible to make building a PC as safe as, if not safer than, changing a light bulb or using an extension cord.
Before looking at the tools and techniques involved in building your own PC, it is important to spend a little time looking at safety. Building your own PC is fun, and a big part of having fun is being able to carry out the build knowing that your working practices are safe.
Please read through this chapter before attempting to build a PC of your own. Okay, you’re eager to get going and a chapter all about safety doesn’t sound all that compelling, but your safety — and the safety of those around you — are of paramount importance. We don’t want to lose any of you in mid-build!
Also of great importance is the safety of the PC components you have bought. A millisecond’s carelessness can cost you hundreds of dollars.
In this chapter, you will look at the dangers that face you and the PC components you will be handling. Also, you will learn how you can avoid the dangers and build a PC safely.
A Breakdown of the Dangers
The key to safety is knowledge. Knowing what the dangers are in the first place. It’s easy to understand why some people are really jazzed about the idea of building a PC but worry about the dangers (maybe you reading this right now are one of these people).
chapter
in this chapter
˛Personal safety
˛Electrical safety
˛Creating a safe working environment
˛Dressing for safety
˛Component safety
˛Antistatic wrist straps
˛Antistatic and antimagnetic tools
˛ESD-safe bags
˛Antistatic work area

4 Part I — Choosing Components for Your PC
If you already are a PC owner, you probably have noticed that the back of the unit came with a few warning stickers that make proclamations of death and destruction. If you’ve ever gone as far as cracking open the case on your PC and taken a look inside (perhaps to carry out some repairs or maybe an upgrade), then you will more than likely have noticed a few more warnings with a similar theme.
You will typically find warning stickers on the PC’s power supply unit, the most dangerous part inside a PC.
These warnings are there for good reason. A PC that’s plugged into the electrical supply can, without doubt, be a dangerous environment. But the main thing to realize when building a PC is that for 95% of the time, the PC being built won’t be plugged into the power supply anyway, making it safe to work inside.
But what about the other 5% of the time?
Don’t worry! This book shows you how, with care, you can make it safe to have the system plugged in and running while the case isn’t all buttoned up.
You can break down the dangers associated with building a PC into two categories:
The dangers to you and those around you
The dangers to the components that you are assembling into a PC
Let’s begin by looking at the most important of these — the dangers to you!
Personal Safety
Inside a PC is a whole host of dangers awaiting you. The four big, most serious dangers are:
High-voltage things
Hot things
Sharp things
Spinning things
There are also some other miscellaneous dangers that face you too, but before we come to them let’s take a closer look at the big four.
High-Voltage Things
Without a doubt the biggest danger that you face when inside a PC is from high voltage. PCs are designed to take in voltage ranging from 110 volts to 250 volts, which is then converted into lower voltages that will be used by the motherboard, hard drives, optical drives (CD or DVD drives), and other devices, such as fans, that all live and work inside the PC.

Chapter 1 — Staying Safe |
5 |
It’s no joke or exaggeration to say that high voltage can kill. An electric shock in real life isn’t like it’s depicted in the movies where someone touches a live wire, is thrown 30 feet away and then gets up, face black, clothes smoldering but otherwise OK. According to the National Institutes of Health, some 1,000 people die in the United States each year because of electrocution. Electricity kills by stopping the heart and breathing, and it can kill instantly. If you are lucky enough to survive contact with electricity, then you are likely to suffer from burns and nerve, muscle, and tissue damage.
We’re not telling you this to scare you; on the contrary, we’re giving you the dangers straight so that you understand them and are able to know what is safe to do and what is not. Everything that we show or tell you in this book is 100% tried, tested, and safe. Follow the instructions and you’ll be OK.
If you are ever in any doubt, pause and reread the instructions.
The best way to protect yourself from electrocution is to limit your exposure to electricity. Most of the time when you are working on your PC you don’t need it plugged into the electrical supply. That way, no power is going into the PC and the dangers of electrocution are eliminated.
There may be times when you will want to run your PC without having the case all buttoned up. For example, you might want to check out whether all the fans inside the case are spinning properly. The best advice here is to keep your hands, head, and all hand tools out of the case. If you want to look at something, do so from a distance and use a flashlight to get a better view.
Whenever a PC is plugged into the electrical supply without having the case buttoned up, remember the old adage of “look but don’t touch.”
The biggest danger from electrocution comes after a PC has been plugged into the electrical supply and is then switched off. It’s very easy to forget that it’s been on and still connected and then set about to work inside. A visual marker that the PC is connected to the power outlet can be very handy. Here are two good techniques:
Tape a fluorescent bit of plastic, paper, or fabric to the power connector. You’ll find the power connector at the back of the PC. By taping something to the power connector, you have a handy visual reminder that your PC is still plugged in and live. Unplug the power socket from the back of the PC, and you make it safe again.
Equip your workplace with a hanger for the PC power cable. For this, a bent over bit of wire will do just fine. Make this a visible spot, and remember to hang the power cord on the hanger when working inside the PC (the fluorescent plastic, paper, or fabric tag makes it even easier to spot when the PC is safe!).
The following list includes additional safety tips:
Let others know what you are doing. It always helps if everyone else is clear about what you are doing. This way those around you will be appreciative of the risks that you are taking and hopefully ease off any practical jokes (those “pretend” electric shock gags get real old, real fast, anyway). Also, this way you get other people to keep an eye on you while you are working just in case anything does go wrong.

6 Part I — Choosing Components for Your PC
Keep liquids away from the PC work area. Spilling water or other liquids into a PC can cause short circuits and electrocution, as can working in a wet or damp environment. Wet rags, tools, and work surfaces can also conduct electricity. Keep liquids away from the work area, and keep the area clean and dry.
Use insulated electrical tools. These tools are the types that have a rubber or plastic handle that can’t conduct electricity. No matter how careful you are, accidents can happen. These tools can offer you protection against accidents but shouldn’t be used as a substitute for taking the proper safety steps.
Not all plastic or rubber handled tools offer protection from electricity. If you want to buy safety tools then make sure that the handle clearly states that the tool is insulated and also what the rating is (usually “electricians” tools protect the user from up to 1,000 or 10,000 volts, depending on the quality of the tool). Chapter 2, “Choosing the Tools You Need,” takes a more detailed look at the tools you should be using to build your PC.
Hot Things
Where there’s electricity, there’s usually heat. A PC that’s been switched on for a few minutes can generate a lot of heat, especially from the power supply, hard drives, and CPU, and this heat can be enough to give you a nasty burn. Getting a burn on the back of your hand while trying to do something can be bad enough, but it can also mean that you drop things or knock against things and cause further damage to your hand or your PC.
As a general rule of thumb, if a PC has been switched on for more than 5 minutes, then it’s a good idea to wait 5 minutes before setting to work inside it, and if it’s been on for an hour or more, then wait at least 10 minutes. Taking the side panels off the case will help it to cool down quicker.
If you want to test for hot components, then a good trick is to use the back of your hand. By moving the back of your hand close to the metal surfaces, you have a good, safe way to judge how hot components are. This method is far better than using your fingertips, which you don’t want to burn because you’ll be needing them later, and it’s hard to work with a bandage on!
Sharp Things
The inside of even the best PC case contains a number of sharp metal edges and corners all waiting to catch you. There are some things that you can do to help reduce the number of sharps that are present (check out Chapters 3, “Choosing a Suitable Case and Power Supply,” and 13, “Assembling the Case and Fitting the PSU”), but no matter how carefully you choose a case and how much you try to remove edges, some will still remain (the edges and corners of hard drives are particularly nasty!).
The best advice for working with sharp things? Take care and take your time. Working on a cool PC makes accidents from sharps less likely, too. Snatching your hand away from something hot is the number one cause of PC-related cuts, so it’s another good reason to give the system a cool-down period before setting to work on it.

Chapter 1 — Staying Safe |
7 |
Spinning Things
Many people are surprised by the number of exposed “spinning” things that are inside a PC. These are fans of one sort of another, and most are quite unlike other fans that you have in your home because many, if not all, have no wire guard to keep your fingers away from them.
However, there is little danger to fingers from the fans that live and work inside a PC. All of them will have blades made of light plastic, and while some might be big and spin quite fast (up to a rate of several thousand revolutions per minute), they have little power behind them.
You would hardly be able to feel the blades hit you, let alone have them cause you any damage.
In reality, the biggest danger from fans is getting your hair or clothing caught up in them. Keep your hair and clothing tidy, and keep them away from fans when they are in operation.
Creating a Safe Working Area
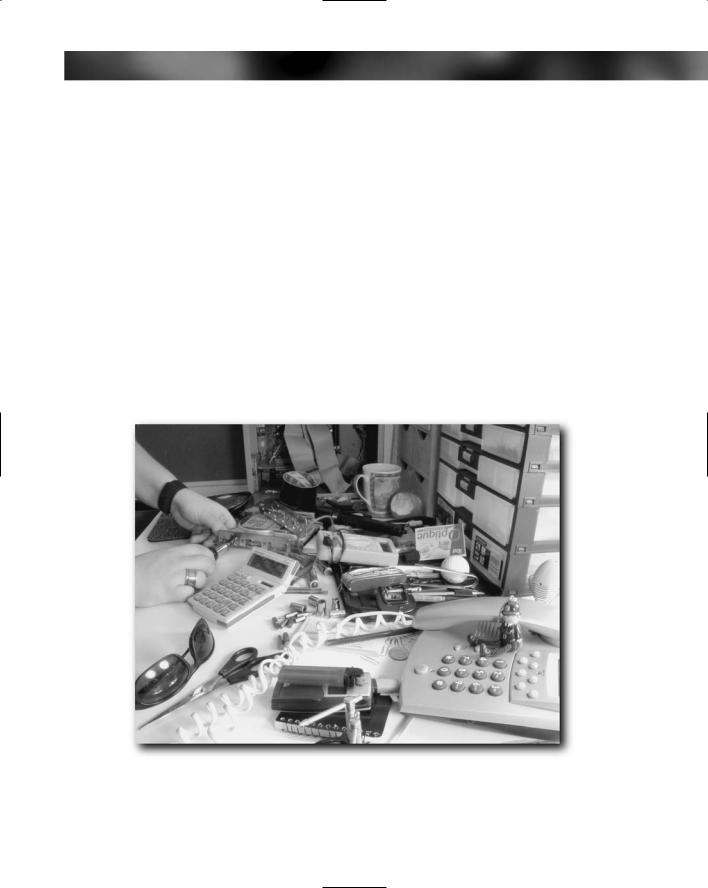
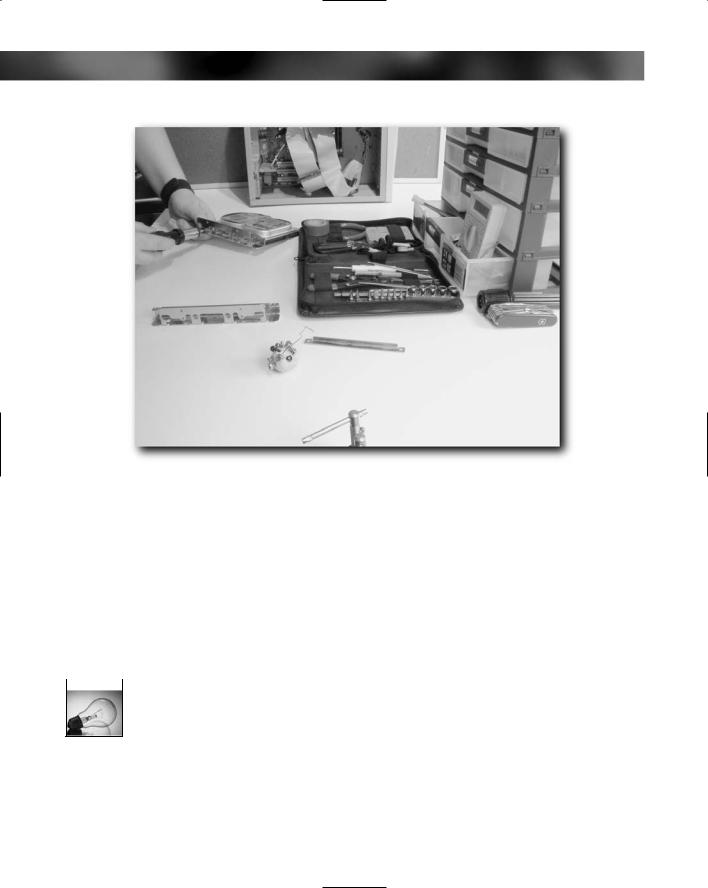
Another key to safety is a having a good working environment. There’s no need for you to dedicate a whole room or garage to building a PC, but having a good workspace makes the job of building a PC safer and easier. Figure 1-1 shows the wrong environment for building a PC, and Figure 1-2 shows the right one.
FIGURE 1-1: The wrong PC-building environment.

8 Part I — Choosing Components for Your PC
FIGURE 1-2: An example of a good PC-building environment.
Here are the top requirements of a good, safe working area:
Have an assigned work space and work area. Pick out the spot where you are going to work. Your work area is the place you’re going to be working in (corner of the living room, kitchen counter, bench in the garage), while the work space is the area you are going to be moving about in when working in the work area.
Find a large enough work area. The smallest work area we recommend is 3 ft by 2 ft. A table or bench is ideal. Ideally, you should be able to leave things on the bench or table for several hours of days until you are finished. If this isn’t possible, then make sure you have a space that you can pack everything away into when you’re done for the day.
 Throw a dust sheet over the project when you’re not working on it to keep contamination to a minimum.
Do not eat or drink around the PC as it is being built. A spilled soda or a poorly placed peanut butter and jelly sandwich can cause a major setback, not to mention damage.
Set up a bright and well lit work area. Natural lighting is best because it is diffuse and doesn’t cast harsh, dark shadows, but artificial lighting will do if you can’t work near a bright window. Augment what lighting you have present with a good flashlight.
