

Beginning ActionScript 2.0 2006
.pdfChapter 22
GET and POST are simply two different ways of encapsulating data sent with a URI. A URI is a Uniform Request Identifier. You can think of a URI as an http URL or ftp URL. A URI is sent via the URL with a header and an entity, or some partial combination of those.
The subject matter of URIs can be complex. Discussions about URIs and methods for transferring information can lead to overblown debates about the details of different URIs and methods for attaching data to them. Books are dedicated to the subject. Here, the focus is on GET and POST because these are the two methods Flash is capable of using.
GET and POST identify how an application is to encapsulate data to be sent to a server. A GET method appends the data to the URL itself as a string of ampersand-delimited name-value pairs. A POST is sent like a file upload with header information and an entity consisting of the data being sent. The header tells the server how to handle the entity.
In many languages, header information sent with a URI can be customized. Some ActionScript objects allow for this type of modification of a URL request. Flash will always add the basic required headers automatically. LoadVars.addRequestHeader, for example, enables you to set name-value pairs to append to the request header of a send or sendAndLoad call. When you do this and why is dependent upon the needs of the server you’re communicating with and the data format you’re using. For example, SOAP and RPC require different request header information.
Apples and Oranges
There is one fundamental difference between the GET and POST that should turn on the light bulb and illuminate the difference between the two. You can bookmark a URL that uses a GET method. If you reload that URL, you will be able to replicate the same request. A POST can’t be bookmarked (you’ll only bookmark the base URL if you try). Selecting the POST URL again will likely produce errors. You may have seen a POST error while using the back button of your browser. Such an error may have looked like, “The request previously contained POST data, and may produce errors.” The browser is simply letting you know that the base URL is intact, but the data you originally sent with it was a POST and is now gone.
To GET data on the Web, you must request the data from a server. When all you are doing is requesting a copy of assets from the server, it is safe to say you’re merely getting something. In the request you aren’t changing the state of the server whatsoever. The server got no assets from you, but merely listened to the request. This is a correct usage of GET. Specifying a GET URL literally means to request a copy of information.
To POST data on the Web, you must send the data to a server. You are literally sending the server a request to make a change to its system. This request can contain assets to POST to its system. Sometimes a POST request will remove data from the server. A POST literally means to make a change to the image of the server.
How Will You Know?
Think about what the request is doing to the server. There are obvious times you should use POST; for example, an email form or shopping cart transaction. In these instances you probably don’t want to allow the user to accidentally hit the back button and resubmit a purchase. That said, there are times when you’d like a user to be able to bookmark a query or share a URL with a friend, such as a site search.
558

Reading XML
In many ways POST is more powerful. GET is a literal String addition to the URL and so is affected by a limitation of the length of the URL. Some browsers, for example, can only reach 256 characters in a URL. A POST is not affected by this limitation.
One common misconception is that POST is more secure. This is often a statement made by misguided individuals based on the fact that a user can’t see the variables being appended to the URL when the request is made. This is semantics. Because you cannot see them in the URL in the user interface of a browser doesn’t mean they weren’t sent and easily captured by freely available tools.
Many more issues, concepts, and standards concerning this subject exist. However, you have learned the basic issues you need to understand when using URLs in ActionScript objects that allow GET and POST options. If you would like to know more about the subject, search the W3C documentation.
Using the XML Component
Flash provides you with components for automating many of the procedures you find in the XML object. You use these components as you would any component. You drag them onto the stage, while setting specific properties to tie them together.
Try It Out |
Load an XML File Using the XML Connector |
1.Open a new Flash document and save it in your work folder as XMLConnectSample.fla.
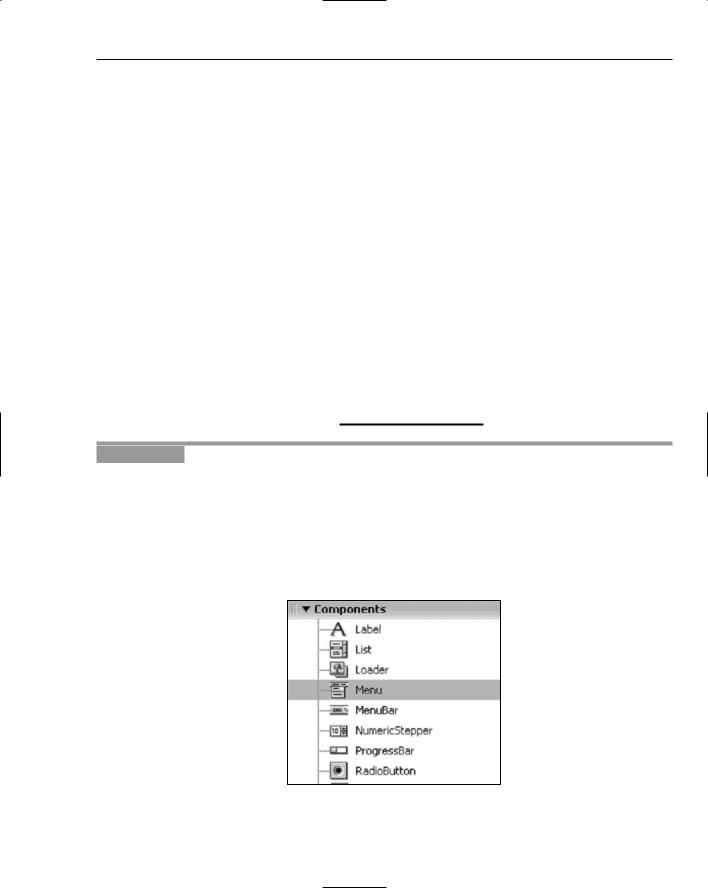
2.In the Components panel is a list of types of components. Expand the Data Components, and you see a list of components available to drag to the stage. Drag the component named XML Connector (see Figure 22-1) to the stage.
If you do not see the Components panel, press Ctrl+F7 or choose Window Components.
Figure 22-1
3.An instance of the connector appears on the stage as a small icon. Your library also reflects this addition. You can delete the instance from the stage because it is now accessible from the library.
4.Open your favorite text editor, create a text file, and enter the following code:
<?xml version=”1.0” encoding=”ISO-8859-1”?> <channels>
<Station identification=”104.1”> <Name>
559

Chapter 22
Rock And Roll Oldies! </Name>
<Desc>
Music great with hot chocolate! </Desc>
</Station>
<Station identification=”98.6”> <Name>
Rock and Roll </Name>
<Desc>
Music for waiting for Godot! </Desc>
</Station>
<Station identification=”102.5”> <Name>
Electronic Madness! </Name>
<Desc>
Arigato Rules! </Desc>
</Station>
<Station identification=”107.9”> <Name>
Electronic Madness 2! <Name>
<Desc>
Thunder Dome! </Desc>
</Station>
</channels>
5.Save the file as myData.xml and place it in the same folder as XMLConnectSample.fla.
6.Click the first frame in the timeline, open the Actions panel, and type the following ActionScript code:
import mx.data.components.XMLConnector; var myConnectorOn:Object = new Object();
myConnectorOn.result = function(eventObject:Object) { trace(eventObject.target.results);
};
var myConnector:XMLConnector = new XMLConnector(); myConnector.addEventListener(“result”, myConnectorOn); myConnector.addEventListener(“status”, myConnectorOn); myConnector.direction = “receive”;
myConnector.URL = “myData.xml”; myConnector.trigger();
7.Test the code by pressing Ctrl+Enter.
8.Verify that the XML component loaded the data by watching the output window. The window will show the codes captured by the listener result.
9.Save the FLA as xmlConnectorSample.fla. You’ll be using it in the next Try It Out section.
560
Reading XML
How It Works
The XML Connector component acts as a data fetcher for data display components. You can bind results of your XML connector using the binding parameters within the Flash IDE or use ActionScript. Because this book is about ActionScript, the example uses ActionScript to describe the URL and listener events.
Setting up event listeners is the same as adding an onLoad event to an XML object. In this case, however, the event itself is definable. Result is a property of the myConnector object. A listener specifically waits for changes to that value before triggering the function defined for that value.
When the component runs, a value is eventually populated into the result value. Your component does not need to do anything else. The listener then takes over and fires the function with the same name as the property that changed.
After the value is captured in the result event, you can do anything you want to it. You can treat it as a typical XML object, or you can begin to allow other components to work with the data using bindings or connect components by using some simple ActionScript.
It is important to note that the parameters, GET and POST, can be set when using the XML Connector.
Security issues for components remain the same for any other data loading objects. You should refer to the “Explaining Cross-Domain Security” section later in the chapter to see how you can work with ActionScript to allow external data in different domain situations.
Try It Out |
Bind XML Connector Data to a Display |
If you did not do the previous XML Connector Try It Out, you’ll need to do that now, because you need to make sure you have the myData.xml file.
1.Open XMLConnectSample.fla.
2.Open the Component panel. Expand the User Interface section and drag an instance of the Menu component to the stage. Delete the instance from the stage, because it is now available in the library (see Figure 22-2).
Figure 22-2
561

Chapter 22
3.Click the first frame in the timeline, open the Actions panel (Window Actions), and type the following ActionScript code:
import mx.data.components.XMLConnector; var myMenu = mx.controls.Menu.createMenu(); _root.myMenu.show(20, 20);
var myConnectorOn:Object = new Object(); myConnectorOn.result = function(eventObject:Object) {
myMenuData = new XML(); myMenuData.ignoreWhite = true;
myMenuData.parseXML(eventObject.target.results);
for (var i = 0; i<myMenuData.firstChild.childNodes.length; i++) {
myMenu.addMenuItem(myMenuData.firstChild.childNodes[i].attributes.identification);
}
};
var myConnector:XMLConnector = new XMLConnector(); myConnector.addEventListener(“result”, myConnectorOn); myConnector.addEventListener(“status”, myConnectorOn); myConnector.direction = “receive”;
myConnector.URL = “myData.xml”; myConnector.trigger();
4.Test the code by pressing Ctrl+Enter.
5.Verify that the XML component loaded the data into the Menu component by viewing the SWF file.
6.Save the FLA as xmlConnectorSample.fla.
How It Works
In this example you added a Menu component to populate some data from the XML Connector using ActionScript. By creating an XML object from the results in the result event listener you are able to iterate values obtained by the XML Connector and place them directly into a menu. Alternatively, you could have populated a list or data grid component.
In this example you could also present a button that shows and hides the menu, creating a true dropdown menu of your available channels. From there you could potentially allow for the media component to be populated with audio streams.
The advantage of using components is that with very little work you were able to set your XML and a GUI interface with just a few lines of ActionScript. This can be especially handy for rapid development of prototype applications, or for when you need standard GUI components inserted into your application.
It is important to note that you could in fact call the trigger() event on myConnector after specifying a brand new URL data source, and use the same code over and over.
Explaining Cross-Domain Security
Keep a few security considerations in mind when working with files. The difference between local and remote files can cause your code to act differently. A remote file generally resides on an HTTP server.
562

Reading XML
When an SWF file loads a data file from a server, the SWF either needs to be running from a local machine or reside on the same domain as the data file.
In Flash 6 player only the super domain was required to match. A super domain is the base URL of all URLs on a domain. That includes subdomains. For example, http://beta.myremoteWebSite.com and http://myremoteWebSite.com/aFolder have identical super domains. With Flash 7 and later, cross-accessing subdomains requires policy files as if they were entirely different domains.
This domain checking is often referred to as part of the Flash Security Sandbox. Security sandbox is a general computer term that refers to a space where code may run, but has limited access to outside resources.
Secure methods exist for allowing cross-domain access, and this section shows you how to implement the solution.
Understanding Why Flash Uses Domain Policies
Flash uses domain policies because of risks presented by would-be hostile SWF files. For example, a Flash player without cross-domain security could potentially be embedded into a page by a malicious user.
Consider a user community in which users can create profiles and link to SWF files within a profile. Because an SWF specified in the profile now resides on the web site’s page, it has potential script access to JavaScript cookies, as well as form submissions.
Other users can log on to the site and perhaps view the profile of the malicious user that contains the hostile SWF file. The SWF, now displayed on the average user’s machine, could then access the cookie information owned by the average user.
The SWF could potentially send the cookie data to a remote server or make form submissions and actions the average user might not approve of. You could imagine the SWF finding the cookie of the administrator of the site that would give the SWF perhaps root access to the web site. It wouldn’t take very much in that case to deface the entire web site. Imagine if this were a site that transacted money, services, or products. But cross-domain restrictions within Flash stop this from happening.
This concern, however, isn’t just with Flash. Browsers have long implemented cross-domain protection for precisely the same reason. Other avenues for exploitation exist when a security domain sandbox does not exist, but they wouldn’t work in Flash.
When the Flash security tools are used, and used well, you should have no reservations about building an application in Flash rather than a browser based on security concerns. Flash is constantly in development, and Macromedia is constantly keeping a close eye on any potential vulnerabilities found. Because of this, each Flash player release can and does handle security differently, with minor improvements with each release.
There are, of course, times when a developer is required to join systems to create a seamless application. This is especially so in light of new services of a Semantic Web, with corporations producing APIs allowing direct access to server-side controls.
In these cases these corporations want cross-domain activity. Of course, a few solutions are provided by Flash. These are policy files, shims, and proxies.
563

Chapter 22
Knowing When Policy Files Are Required
Knowing when a situation requires a policy file can be confusing. Consider this situation. You have an application on a server at http://www.someserver.com, and your Flash file loads data from the exact same site, http://www.someserver.com. Typically you wouldn’t expect any cross-domain issues to occur. However, the cross-domain policy for Flash is so strict that if the user were to type http://some server.com without using the www subdomain, most servers would send the content of the super domain without issue. Flash will present an error stating that the domain someserver.com does not match www.someserver.com. Also if the user were to type the IP address directly in lieu of a domain name, you’d find the same error describing a domain mismatch. In these cases Flash is smart enough to realize that something isn’t quite right. Rather than fail silently, the Flash movie presents the user with a dialog box asking him to verify that the movie should access the domain despite the minor mismatch.
Although you can use relative file paths to avoid most if not all of these situations, it is not recommended. To maximize legacy support, use the prescribed policy file methods, which are explained in the following section.
If these rare instances don’t bother you, you probably don’t need a policy file. But if it does in fact bother you, you’re going to need to place a policy file on the server that allows each URL variant users can use to access your web site to be used without an alert. Another way to avoid this situation is to exclusively use relative URLs avoiding any domain mismatch at all when working with a single domain.
Another situation is when you place Web services on a subdomain for convenience. Say that you have created a Web service that returns data, and that you have a Flash application that is served from the base URL of the same server. Call the Web service URL http://services.someserver.com, and say your Flash movie resides on http://www.someserver.com. In this case, when the Flash file attempts to access the services subdomain, it will fail silently. No alert box will appear. Flash assumes, in this case, that it has found a definite domain mismatch and simply disallows it without question or warning. The policy file would need to reside on the services subdomain and list every variation of super domain as allowed domains.
There is another situation, and hopefully, the most obvious. Say a Flash application on a corporate web site at intel.com is required to access data that resides on apple.com. This is a basic mismatch. The policy file would need to reside on apple.com and list intel.com as an allowed domain.
All of these rules also apply to XML sockets as well. A Flash file using a remote socket connection must be able to access a domain policy file on the socket server. Because a socket server may not be an HTTP server, it is important that the socket server allow http access to the policy file on the same domain as the socket itself or utilize the socket-specific method for policy files described in this section.
Setting Up Policy Files
One way in which your applications can load data from a different domain is to place a policy file on the server that is serving the data. The policy file is simple XML file that the Flash player automatically checks for and parses on its own. The XML policy file format allows for multiple types of solutions and tiers of access.
In the following examples, the syntax of the XML for policy files is explained. The syntax is very simple. When you set up a server to host SWF files that access data from the same domain, set up this type of simple policy file regardless of how you plan to access the data. The existence of the policy file can ease
564
Reading XML
debugging and ensure that Flash has free reign on the server from which it hails no matter the construction of the URL syntax.
Try It Out |
Set Up a Policy File for a Single Domain |
1.Open a new file in your favorite text editor and enter the following XML:
<?xml version=”1.0”?>
<!DOCTYPE cross-domain-policy SYSTEM “http://www.macromedia.com/xml/dtds/cross- domain-policy.dtd”>
<cross-domain-policy>
<allow-access-from domain=”www.someserver.com” /> <allow-access-from domain=”someserver.com” /> <allow-access-from domain=”192.168.1.1” />
</cross-domain-policy>
2.Save the file as crossdomain.xml. This is the only name the Flash player will check for. Deviating from this name will cause the policy file to fail.
3.Upload the file to the root of the base domain. In this case you would upload the file to someserver.com and experiment with different test data files and SWF files using different possible URL combinations to be sure you included all the domain possibilities.
How It Works
This file gives request access to the domains listed. Because they all reside on the same super domain, this specific policy file ensures that Flash files on your own site accessing your own data would never present a security alert to the user.
This example, however, doesn’t allow SWF files from other sites to access your data. To do that you need to explicitly add those domains to the same policy file.
In the next exercise, you use the same syntax to allow SWF files on a remote server to also have access to all of the data files and services as if they hailed from the same server. The remote server in this example is myFriendsWebsite.com.
Try It Out |
Set Up a Policy File for a Remote Domain |
If you did not complete the previous Try It Out, do it now. You need the crossdomain.xml file for this exercise.
1.Open crossdomain.xml and add the following XML to it:
<?xml version=”1.0”?>
<!DOCTYPE cross-domain-policy SYSTEM “http://www.macromedia.com/xml/dtds/cross- domain-policy.dtd”>
<cross-domain-policy>
<allow-access-from domain=”www.someserver.com” /> <allow-access-from domain=”someserver.com” /> <allow-access-from domain=”192.168.1.1” /> <allow-access-from domain=”myFriendsWebsite.com” />
</cross-domain-policy>
565

Chapter 22
2.Save the file.
3.Upload the file to the root of the base domain. In this case you would upload the file to someserver.com and experiment with different test data files and SWF files residing on myFriendsWebsite.com using different possible URL combinations to be sure you included all the domain possibilities you need.
How It Works
The preceding file would give request access to your friend’s web site when referred to as http://your FriendsWebsite.com as well as your own.
An SWF residing on http://myFriendsWebsite.com would be able to access your data. However, in this specific example, an SWF called from http://www.myFriendsWebsite.com would fail! You need to explicitly list www.myFriendsWebsite.com or use a wildcard symbol, which simply allows any string to reside within the place you enter it.
The next example shows how to use a wildcard to specify multiple subdomains. A wildcard is simply a * character.
Try It Out |
Use a Wildcard to Allow Domain Access |
If you did not complete the previous Try It Out example to create and save a crossdomain.xml file, you need to do that now.
1.Open the crossdomain.xml file you just created and add the following XML to it:
<?xml version=”1.0”?>
<!DOCTYPE cross-domain-policy SYSTEM “http://www.macromedia.com/xml/dtds/cross- domain-policy.dtd”>
<cross-domain-policy>
<allow-access-from domain=”www.someserver.com”/> <allow-access-from domain=”someserver.com”/> <allow-access-from domain=”192.168.1.1”/> <allow-access-from domain=”*.myFriendsWebsite.com”/>
</cross-domain-policy>
2.Save the file.
3.Upload the file to the root of the base domain. In this case you would upload the file to someserver.com and experiment with different test data files and SWF files residing on myFriendsWebsite.com using different possible URL combinations to be sure you included all the domain possibilities you need.
How It Works
In this case any subdomain on yourFriendsWebsite.com can access any of your data. So if an SWF is called from http://www.myFriendsWebsite.com, http://myFriendsWebsite.com, or http:// somesubdomain.myFriendsWebsite.com, no errors will occur.
566

Reading XML
I’m Offering Web Services; I Want to Allow Any Domain!
Never fear. You can use the wildcard to allow any SWF file from any domain or subdomain, or other URL variation, to access your data.
Try It Out |
Use a Wildcard to Allow Domain Access |
For this exercise, you need the crossdomain.xml file you saved in the preceding Try It Out.
1.Open crossdomain.xml and add the following XML to it:
<?xml version=”1.0”?>
<!DOCTYPE cross-domain-policy SYSTEM “http://www.macromedia.com/xml/dtds/; cross-domain-policy.dtd”>
<cross-domain-policy> <allow-access-from domain=”*”/>
</cross-domain-policy>
2.Save the file.
3.Upload the file to the root of the base domain. In this case you would upload the file to someserver.com.
How It Works
In this case any Flash file running from any configuration would be able to access your data. This method is common for public script services that allow REST, SOAP, RPC, and so on. Sometimes it’s tempting to do this for your own site and be done with worrying about the whole issue. You must realize, though, that you are completely disabling a security feature that was created for a very good reason. So the reason for using a root wildcard had better be better than that.
If you are offering Web services, do so only via a subdomain and offer the wildcard access to the subdomain only. You do this by placing the policy file on the subdomain rather than on the super domain.
Considering HTTPS
If you load the DTD URL specified in the DOCTYPE declaration tag of the sample XML file into a browser, you will see the definitions for the cross-domain policy XML files. One thing to notice is an attribute specified as secure with a Boolean variable type. Type the following URL into your browser to see the policy file DTD: www.macromedia.com/xml/dtds/cross-domain-policy.dtd.
Consider this situation. You have an HTTPS server that is serving data and an SWF file from the same HTTPS domain. Although HTTPS, you still have the single server issues of URL variants. Flash can access the policy file on HTTPS as well.
But say that you want a regular HTTP domain to access the data on an HTTPS server. The policy file on the HTTPS server must specify the remote domain as you did previously. However, Flash is smart enough to realize there is a security mismatch between HTTP and HTTPS, so an SWF running from an insecure domain must also present itself as being insecure. For the HTTPS policy file to allow the insecure SWF file, you need to set the secure attribute to false explicitly, as you do in the following Try It Out.
567