

SECTION 8 – FLIGHT PLANNING
Figure 8-10 Create FPL on MFD
3.Turn the small FMS knob to display the Waypoint Information Page. Turn the small FMS knob to enter the first character of the identifier of the departure waypoint. Turn the large FMS knob to move the cursor to the next character field. Repeat using the FMS knobs until the desired identifier has been entered.
1.Press the FPL key and press the smallFMS knob to activate the cursor.
2.Turn the small FMS knob to enter the first character of the flight plan starting identifier.
3.Turn the large FMS knob to move the cursor to the next character field.
4.Turn the smallFMS knob to enter the next character. Continue this process until the desired identifier is entered.
5.Press the ENT key and the cursor is now ready for entering of the next flight plan waypoint.
6.Repeat steps 2 through 5 to enter the identifier for each additional flight plan waypoint.
7.Once all waypoints have been entered, press the FMSknob to return to theActive Flight Plan Window.
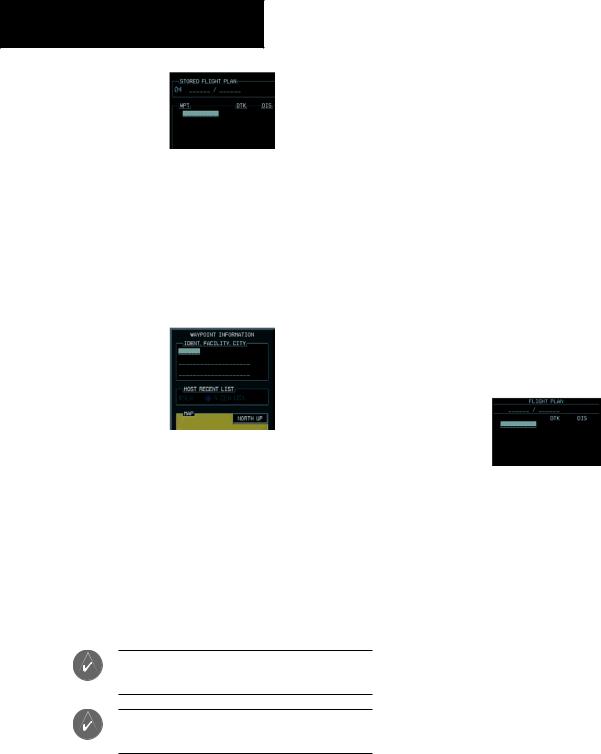
Figure 8-11 Waypoint Info Window
4.Press the ENT key.
5.Repeat step number 3 to enter the identifier for each additional flight plan waypoint.
6.When all waypoints have been entered, press the FMS knob to return to the Flight Plan Catalog Page. The new flight plan is now in the list.
Create a new flight plan using the PFD
NOTE: A flight plan cannot be entered using the PFD if another flight plan is active.
NOTE: After the first leg is entered (using the PFD only), it is immediately activated.
Figure 8-12 Creating Flight Plan on the PFD
8.8LOAD A DEPARTURE
See the Procedures section for a discussion on loading and activating departure procedures.
8.9LOAD AN ARRIVAL
See the Procedures section for a discussion on loading and activating arrival procedures.
8.10 LOAD AN APPROACH
See the Procedures section for a discussion on loading and activating approach procedures.
8-4 |
Garmin G1000 Cockpit Reference Guide for the Cessna Nav III |

8.11REMOVE A DEPARTURE,ARRIVAL, OR APPROACH FROM A FLIGHT PLAN
1.With theActive or Stored Flight Plan Page displayed, press the small FMS knob to activate the cursor.
2.Turn the large FMS knob to highlight the title for the approach, departure or arrival to be deleted. Titles appear in white directly above the procedure’s waypoints.
3.Press the CLR key to display a confirmation window. With‘OK’ highlighted,press the ENT key to remove the selected procedure.
8.12 STORE A FLIGHT PLAN
1.From the Flight Plan Page, press the FMS knob to activate the cursor.
2.Turn the large FMS knob to highlight the desired flight plan and press the MENU key to display the Flight Plan Page options.
3.Turn the large FMS knob to highlight ‘Store Flight Plan’ and press the ENT key.
4.With ‘OK’ highlighted, press the ENT key to store the flight plan.
SECTION 8 – FLIGHT PLANNING
4.Turn the FMS knobs to make the desired changes, then press the ENT key.
5.Press the FMS knob to return to the Flight Plan Catalog Page.
8.14DELETE A WAYPOINT FROM THE FLIGHT PLAN
1.Press the FPL key and turn the small FMS knob to display the Flight Plan Catalog Page.
2.Press the FMS knob to activate the cursor.
3.Turn the large FMS knob to highlight the desired flight plan and press the ENT key.
4.Turn the large FMS knob to select the waypoint to be deleted and press the CLR key to display a ‘REMOVE WAYPOINT’ confirmation window.
5.With ‘OK’ highlighted, press the ENT key to remove the waypoint. To cancel the delete request, turn the large FMS knob to highlight ‘CANCEL’ and press the ENT key.
6.Once all changes have been made, press the FMS knob to return to the Flight Plan Page.
Figure 8-13 Store Flight Plan Confirmation
8.13 EDIT A STORED FLIGHT PLAN
1.Press the FPL key and turn the small FMS knob to display the Flight Plan Catalog Page.
2.Press the FMS knob to activate the cursor.
3.Turn the large FMS knob to highlight the desired flight plan and press the ENT key.
Figure 8-14 Remove Waypoint Confirmation
8.15INVERT AND ACTIVATE A STORED FLIGHT PLAN
1.From the Flight Plan Catalog Page, press the FMS knob to activate the cursor.
2.Turn the large FMS knob to highlight the desired flight plan and press the MENU key to display the Page Menu options.
Garmin G1000 Cockpit Reference Guide for the Cessna Nav III |
8-5 |

SECTION 8 – FLIGHT PLANNING
3.Turn the large FMS knob to highlight ‘Invert Flight Plan’ and press the ENT key. The original flight plan remains intact in its flight plan catalog storage location.
4.With ‘OK’ highlighted, press the ENT key to invert the flight plan.
Figure 8-15 Invert Flight Plan
8.16 COPY A FLIGHT PLAN
1.From the Flight Plan Catalog press the FMS knob to activate the cursor, turn the large FMS knob to highlight the flight plan to be copied, then press the MENU key to display the Flight Plan Catalog Options.
2.Turn the large FMS knob to highlight ‘Copy Flight Plan #’ and press the ENT key.
3.A ‘Copy to flight plan?’ confirmation window is displayed. With ‘OK’ highlighted, press the ENT key to copy the flight plan. To cancel,turn the large FMS knob to highlight ‘CANCEL’ and press the ENT key.
8.17 DELETE A FLIGHT PLAN
1.From the Flight Plan Catalog Page, press the FMS knob to activate the cursor, turn the large FMS knob to highlight the flight plan to be deleted.
2.Press the MENU key to display the Flight Plan Catalog options.
3.Turn the large FMS knob to highlight ‘Delete Flight Plan’ and press the ENT key.
4.A ‘Delete flight plan?’ confirmation window is displayed. With ‘OK’ highlighted, press the ENT key to delete the flight plan. To cancel, turn the large FMS knob to highlight‘CANCEL’ and press the ENT key.
8.18 GRAPHICAL FLIGHT PLAN CREATION
1.Press the FPL key to display the Active Flight Plan Page.
2.Press the Joystick to activate the map pointer. Use the Joystick to move the pointer to the desired point on the map to be inserted as a waypoint in the flight plan.
3.Press the LD WPT softkey. The selected waypoint will be inserted at the end of the flight plan.
4.If the selected waypoint is to be placed elsewhere in the flight plan, press the FMS knob to activate the cursor. Waypoints are inserted ABOVE the cursor.
5.After placing the cursor at the desired point in the list of waypoints, press the LDWPT softkey.
8.19 TRIP PLANNING
1.Turn the largeFMS knob to select theAUX page group.
2.Turn the small FMS knob to select the first rectangular page icon.
8-6 |
Garmin G1000 Cockpit Reference Guide for the Cessna Nav III |

3.The current page mode is displayed at the top of the page: ‘AUTOMATIC’ or ‘MANUAL’. To change the page mode, press the AUTO or MANUAL softkey.
Figure 8-16 Trip Planning Page
4.For Direct-to planning, press the WPTS softkey and verify that the ‘from’ waypoint field indicates P.POS (present position). If necessary, press the MENU key and select ‘Set WPT to Present Position’ to display P.POS. Press the ENT key and the flashing cursor moves to the ‘to’ waypoint field. Turn theFMSknobs to enter the identifier of the‘to’ waypoint and press the ENT key to accept the waypoint. OR,
5.Forpoint-to-pointplanning,turntheFMS knobs to enter the identifier of the ‘from’ waypoint. Once the waypoints identifier is entered,press the ENT key to accept the waypoint. The flashing cursor moves to the ‘to’ waypoint. Again, turn the FMS knobs to enter the identifier of the ‘to’ waypoint and press the ENT key to accept the waypoint. OR,
SECTION 8 – FLIGHT PLANNING
6.For flight plan leg planning, press the FPL softkey (at the bottom of the display) and turn the small FMS knob to select the desired flight plan (already stored in memory), by number. Turn the large FMS knob to highlight the ‘LEG’ field and turn the small FMS knob to select the desired leg of the flight plan, or select ‘CUM’ to apply trip planning calculations to the entire flight plan.
7.Turn the largeFMS knob to highlight the departure time (DEP TIME) field.
8.Turn the FMS knobs to enter the departure time. Press the ENT key when finished. (Departure time may be entered in local or UTC time, depending upon unit settings).
9.Turn the FMS knobs to enter the fuel flow. Press the ENT key when finished. Note that in automatic page mode,fuel flow is provided by the system.
10.The flashing cursor moves to the fuel on board field. Turn the FMS knobs to modify the fuel on board. Press the ENT key when finished. Note that in automatic mode this is provided by the system.
11.The flashing cursor moves to the calibrated airspeed field. Turn the FMS knobs to enter an calibrated airspeed. Press the ENT key when finished.
Garmin G1000 Cockpit Reference Guide for the Cessna Nav III |
8-7 |

SECTION 8 – FLIGHT PLANNING
This page intentionally left blank.
8-8 |
Garmin G1000 Cockpit Reference Guide for the Cessna Nav III |