

8E - 70 INSTRUMENT PANEL AND GAUGES |
|
Ä |
|
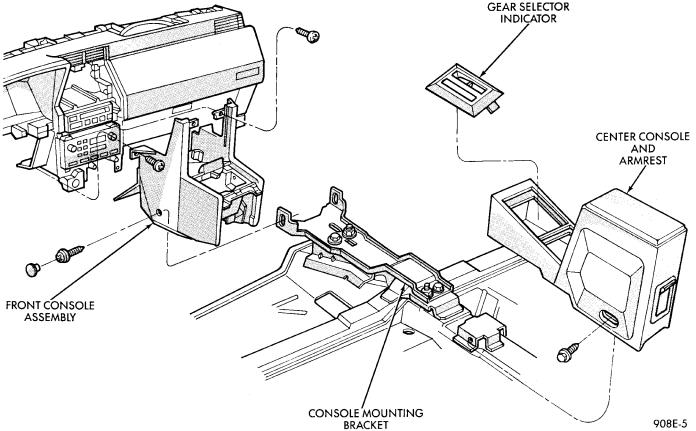
Fig. 28 Front and Center Console with Gear Selector Indicator
(2)Open hood and remove cowl top plastic cover.
(3)Remove windshield washer reservoir.
(4)Pull connector loose from the A/C resistor block, and push wiring and grommet through bulkhead into passenger compartment.
(5)Remove the console/consolette assembly.
(6)Remove the passive restraint seat belt logic control module wiring.
(7)Remove six attaching nuts securing the instrument panel to console support brace.
(8)Remove the instrument panel to console support brace with the Air Bag System Diagnostic Module attached.
(9)Remove right and left cowl side and scuff plate trim moldings.
(10)Remove left and right A-pillar trim moldings.
(11)Remove instrument panel top cover (Fig. 29).
(12)Remove lower steering column cover.
(13)Disconnect the steering column wiring at the 25-way connector.
(14)Disconnect park brake, stop lamp, and speed control wiring.
(15)Remove five steering column support nuts and lower steering column. Then remove two steering column attaching studs.
(16)Disconnect engine harness wiring at 18-way and 16-way connectors located on the left side panel support bracket.
(17)Remove glove box assembly.
(18)Remove the panel top cover assembly.
(19)Loosen the panel roll-down pivot bolts.
(20)Remove the defroster duct adapter from defroster duct.
(21)Remove screws which attach instrument panel to windshield fence line. Roll panel down, attach heavy wire to hold in position and remove defroster duct retaining screws.
(22)Disconnect body wiring at the right side 18way connector and left side 25-way connector.
(23)Disconnect temperature mode cable at in-line connector. Disconnect resistor block and blower motor wiring connectors.
(24)Disconnect antenna cable.
(25)Disconnect left and right demister hoses from demister outlets on the panel.
(26)Remove instrument panel from vehicle.
(27)For installation reverse above procedures.
INTERIOR LAMP REPLACEMENT
The Dome Lamp operates when the doors are open or headlamp switch is placed in courtesy position.
DOME LAMP
(1) Pry the forward or rearward edge of the dome lamp to free it from the retaining bracket.
Ä |
|
INSTRUMENT PANEL AND GAUGES 8E - 71 |
|
Fig. 29 Instrument Panel and Top Cover
(2)Pry either the forward or rearward edge of the lens away from the bezel and replace lamp.
(3)For installation, snap lens into bezel and then bezel into bracket.
TRUNK LAMP
Pry along rearward portion of lens and pivot out of trunk trim panel. Remove lens and replace lamp.
For installation, snap lens into trunk trim panel.