

Cisco Secure VPN Exam Certification Guide - Cisco press
.pdf148 Chapter 4: Configuring Cisco VPN 3000 for Remote Access Using Preshared Keys
Figure 4-11 Configuration | Quick | Address Assignment
Configuring User Authentication Method
Next, you determine how users connecting over the VPN tunnel are to be authenticated. Figure 4-12 shows the selection screen. Users can be authenticated from RADIUS servers, NT Domain controllers, external SDI servers, and the concentrator’s internal server. The option you select brings up the appropriate next screen so that you can continue configuring user authentication.
Figure 4-12 Configuration | Quick | Authentication
Configuring Users for Internal Authentication
The example shown in Figure 4-12 has selected the Internal Server option and brings up the User Database screen, shown in Figure 4-13, so that you can enter the usernames and passwords. This screen also requests an IP address and subnet mask because, in this case, the concentrator’s administrator selected Per User address assignment on the screen displayed in Figure 4-11.

VPN Concentrator Configuration 149
Figure 4-13 Configuration | Quick | User Database
There is a maximum combined number of groups and users that you can configure on a VPN 3000 Concentrator. The number varies by concentrator model, as shown in Table 4-2.
Table 4-2 Maximum Number of Combined Groups and Users per VPN Model
Model |
Maximum Combined Number of Groups and Users |
|
|
3005 |
100 |
|
|
3015 |
100 |
|
|
3030 |
500 |
|
|
3060 |
1000 |
|
|
3080 |
1000 |
|
|
Configuring the IPSec Tunnel Group
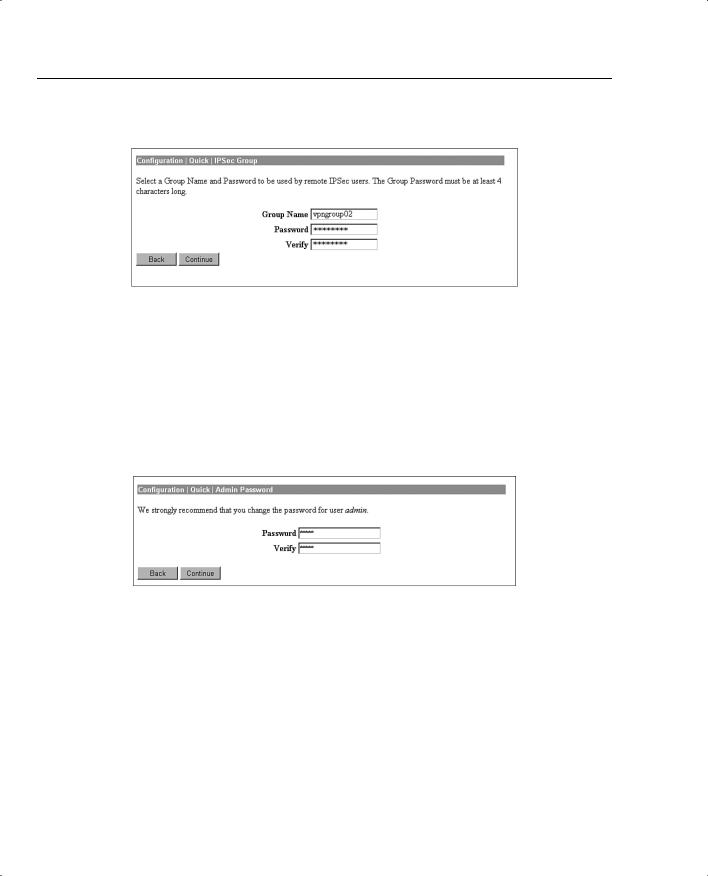
When you select IPSec as the tunneling protocol from the screen shown in Figure 4-10, the concentrator prompts you to define a group during the Quick Configuration phase. This group is used by every user unless you change the association later from the standard configuration section of the VPN Manager. Figure 4-14 shows the configuration information for the IPSec group. The password for this group becomes the preshared key for remote access users.
150 Chapter 4: Configuring Cisco VPN 3000 for Remote Access Using Preshared Keys
Figure 4-14 Configuration | Quick | IPSec Group
Configuring the Admin Password
The final setting that you should configure during the Quick Configuration is the password for the admin user. Figure 4-15 shows the Quick Configuration screen for completing this task and displays the message that strongly recommends changing the admin password. For maximum password security, select a password containing at least eight characters that are a mixture of uppercase and lowercase letters, numbers, and special characters.
Figure 4-15 Configuration | Quick | Admin Password
Saving Configuration Settings
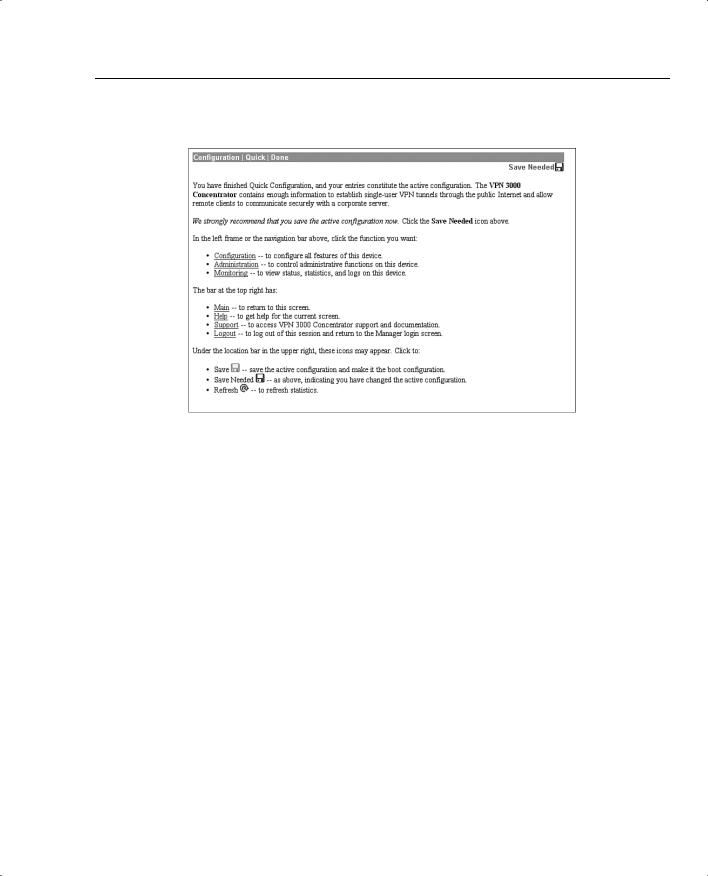
When you click the Continue button after changing the admin password, the VPN Manager presents you with the Quick Configuration Done screen, as shown in Figure 4-16. At this point, you have configured the system information, LAN and WAN interfaces, users, and IPSec group, completing the basic configuration of the VPN concentrator.
VPN Concentrator Configuration 151
Figure 4-16 Configuration | Quick | Done
Notice the Save Needed icon in the upper-right corner of the main screen. Click that icon to save the active configuration changes you have made to the boot configuration. As you continue with additional configuration steps, this icon appears from time to time. As you can see from Figure 4-16, the icon can display Save, Save Needed, or Refresh depending on the type of screen you are on and whether you have made modifications to the active configuration.
As with most Cisco products, configuration changes are done to the active configuration and take effect immediately. To ensure that your changes are still in effect after a system reboot, you must copy the active configuration to the boot configuration. The VPN Manager’s Save Needed reminder is a nice touch, providing a gentle reminder and an easy method of execution.
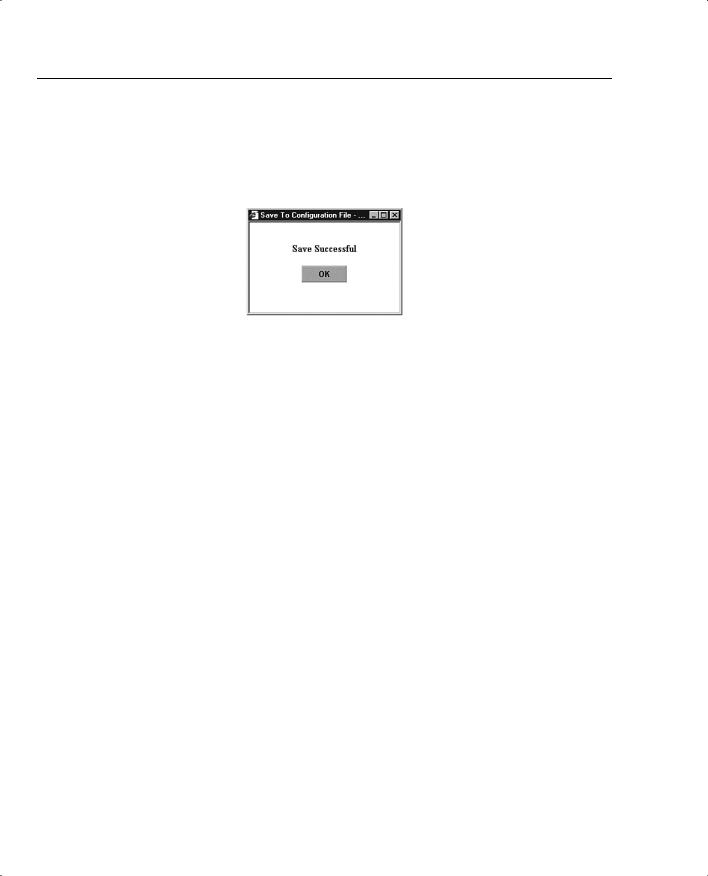
Clicking the Save Needed icon executes the requested save and provides you with a status screen. Figure 4-17 shows the screen that is returned upon the completion of a successful save. After you clear this screen by clicking the OK button, VPN Manager displays the Main Menu.
In addition to the Save, Save Needed, and Refresh options, the Configuration | Quick | Done screen shows Configuration, Administration, and Monitoring in the upper-left corner (refer to Figure 4-16). These three keys are the primary navigation tools for the daily VPN Manager functions. Similar to a directory display from a product such as Microsoft Windows Explorer,
152 Chapter 4: Configuring Cisco VPN 3000 for Remote Access Using Preshared Keys
the plus sign indicates that the indicated function has subfunctions. Clicking the plus sign displays an indented list of the subfunctions, and clicking the option takes you to the window for that function.
Figure 4-17 Save Successful Message
Configuring IPSec with Preshared Keys Through the VPN 3000 Concentrator Series Manager
The Quick Configuration allows you to configure the basic operational settings of the concentrator, but the IPSec settings have not been established yet. Those settings are made using features in the Configuration portion of the Cisco VPN 3000 Concentrator Manager.
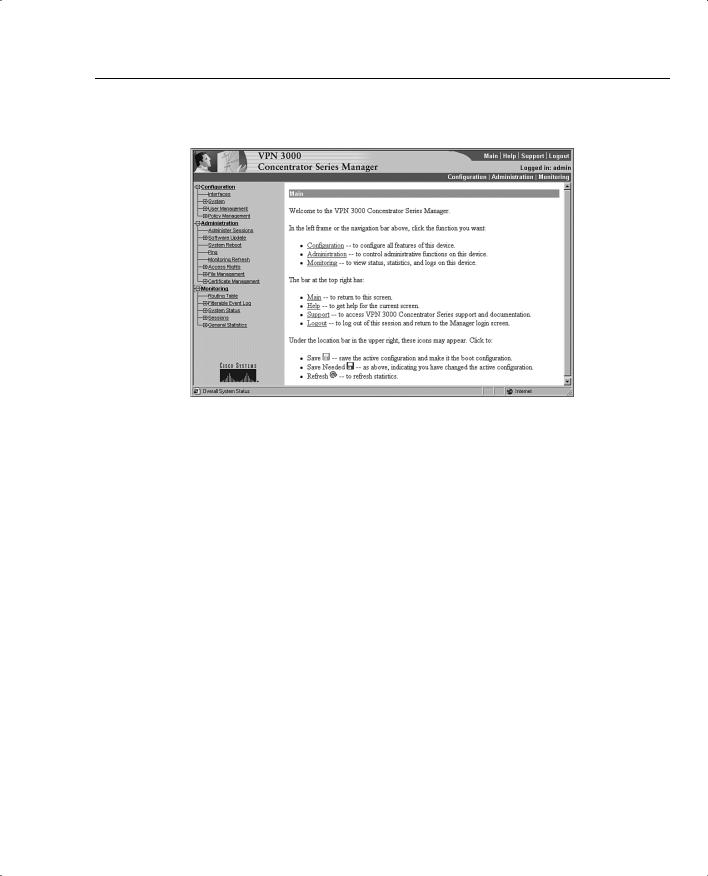
Figure 4-18 shows the Main screen that appears after you log in to the concentrator through VPN Manager. Normally the root Configuration, Administration, and Monitoring levels are the only options displayed in the table of contents. In this case, each of those major sections has been opened to the first layer of subfunctions. You can see the following major subfunctions under the Configuration option:
•Interfaces—Ethernet interfaces and power supplies
•System—System-wide parameters: servers, address assignment, tunneling protocols, IP routing, management protocols, events, and identification
•User Management—Groups and users
•Policy Management—Access hours, network lists, rules, security associations, filters, and NAT
VPN Concentrator Configuration 153
Figure 4-18 IPSec Configuration
The interfaces have already been configured using the Quick Configuration option. If you chose to use internal authentication, the Quick Configuration wizard then asked you to enter usernames and passwords and then requested a group name to use for IPSec traffic.
Recall from previous chapters that there is a hierarchy to the way groups are used on the Cisco VPN 3000 Concentrator. The following basic rules govern group usage:
•Groups and users have attributes that can be modified to control how they can use the services of the concentrator.
•Users are always members of groups, and groups are always members of the Base Group. The Base Group is a default group that cannot be deleted but which can be modified.
•Inheritance rules state that, by default, users inherit rights from groups, and groups inherit rights from the Base Group.
•A user can only be a member of one concentrator group and, if not explicitly assigned to a different group, is a member of the Base Group by default.
•Users and groups have names and passwords.
•If you change the attributes of a group, it affects all group members.
•If you delete a group, user membership reverts to the Base Group.
154 Chapter 4: Configuring Cisco VPN 3000 for Remote Access Using Preshared Keys
|
Because the Base Group had not been modified before Quick Configuration set up the new |
|
group for IPSec use, that new group has default settings that it inherited from the Base Group. |
|
Additionally, all the users that you created were placed in this single group. That might be |
|
adequate for your organization. The final step you need to perform to set up the concentrator |
|
for remote access using preshared keys is to validate the entries that were placed in the IPSec |
|
group. |
|
|
NOTE |
The discussions in this chapter assume that you would be performing the configuration on a new |
|
concentrator. You could be setting up remote access services on a concentrator that has been |
|
used for other purposes, such as LAN-to-LAN VPNs. In that case, you would start at this point |
|
in the configuration process. While this discussion looks at modifying the group that was |
|
established through Quick Configuration, you would simply need to add a new group from the |
|
Configuration | User Management | Groups screen. |
|
|
|
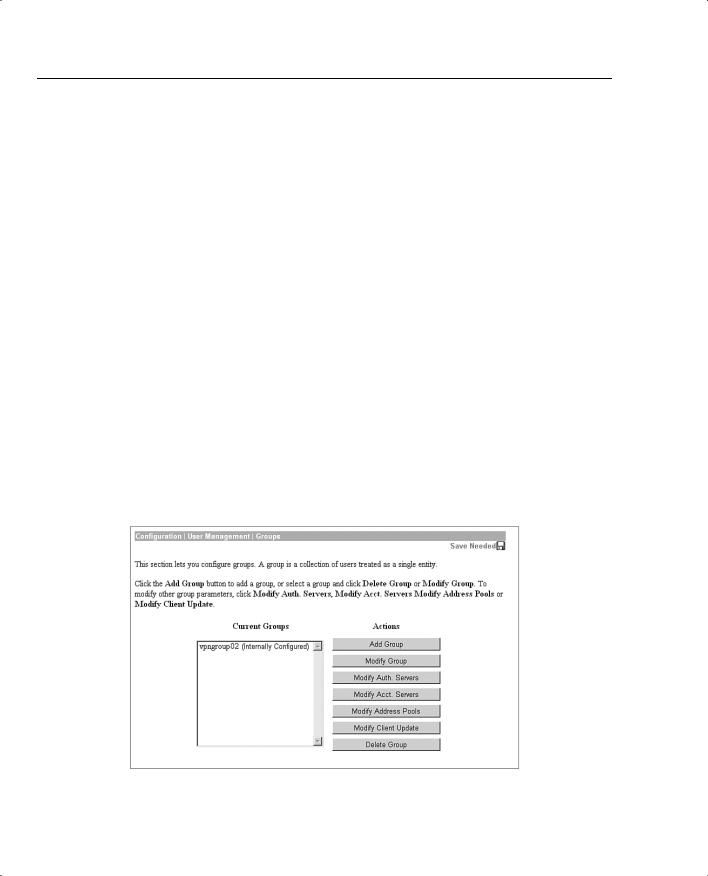
To modify the settings for the IPSec group previously created, work down to the Configuration | |
|
User Management | Groups screen (see Figure 4-19). In this screen, you find the vpngroup02 |
|
group listed in the Current Groups window. There are internal and external groups. External |
|
groups are those that would be used with external authentication servers such as RADIUS or |
|
NT Domain. The vpngroup02 group is an internal group and is to be used with internal database |
|
users. |
Figure 4-19 Configuration | User Management | Groups
VPN Concentrator Configuration 155
Modify Groups— Identity Tab
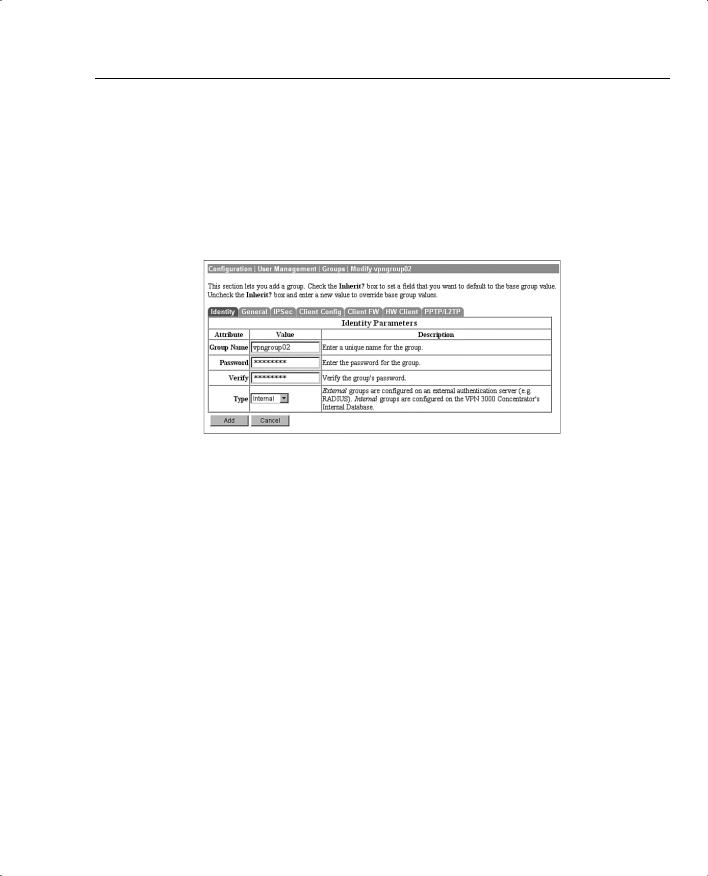
To modify the group, click the group to highlight it, and then click the Modify Group button. The screen shown in Figure 4-20 shows the Modify screen for an internal group. Internal groups have multiple tabs. External groups only have the Identity tab. The information in this screen should match the data you entered during Quick Configuration. If not, you can correct it here. When everything looks correct, click the General tab.
Figure 4-20 Configuration | User Management | Groups | Modify > Identity
Modify Groups— General Tab
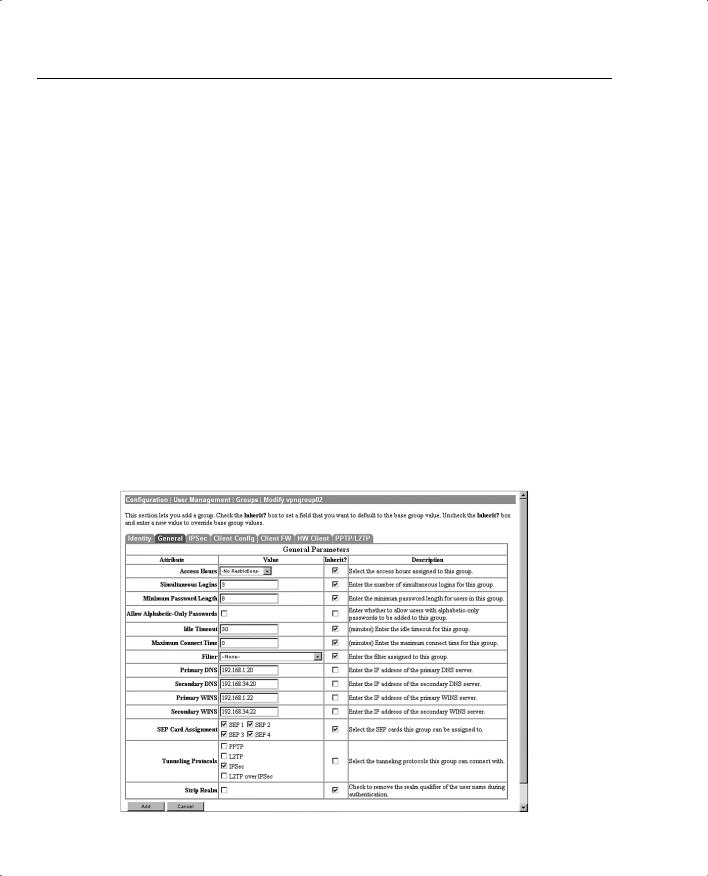
Figure 4-21 depicts the General tab for the group’s Modify function. Notice that each attribute listed has a Value, Inherit?, and Description column. If the Inherit? box is checked, that attribute’s value is inherited from the Base Group, regardless of what you enter into the Value field. To change the value for an attribute, uncheck the Inherit? box.
The following information is shown on the General tab:
•Access Hours—Selected from the drop-down menu, this attribute determines when the concentrator is open for business for this group. Currently set to No Restrictions, you could also select Never, Business Hours (9 a.m. to 5 p.m., Monday through Friday), or named access hours that you created elsewhere in the VPN Manager.
•Simultaneous Logins—Default is 3. Minimum is 0. There is no upper limit, but you should limit this value to 1 for security purposes.
•Minimum Password Length—The allowable range is 1 to 32 characters. A value of 8 provides a good level of security for most applications.
•Allow Alphabetic-Only Passwords—Notice that the Inherit? box has been unchecked. The default is to allow alphabetic-only passwords, which is not a good idea. This value has been modified.
•Idle Timeout—A value of 30 minutes is good here. The minimum allowable value is 1 and the maximum is a value that equates to over 4000 years! 0 disables idle timeout.
156Chapter 4: Configuring Cisco VPN 3000 for Remote Access Using Preshared Keys
•Maximum Connect Time—0 disables maximum connect time. The range here is again 1 minute to over 4000 years.
•Filter—Filters determine whether IPSec traffic is permitted or denied for this group. There are three default filters: Public, Private, and External. You can select from those or from any that you can define in the drop-down box. The default None option permits IPSec to handle all traffic.
•Primary/Secondary DNS/WINS—These have been modified from the Base Group’s default settings.
•SEP Card Assignment—Some models of the VPN concentrator can contain up to four Scalable Encryption Processing (SEP) modules that handle encryption functions. This attribute allows you to steer the IPSec traffic for this group to specific SEPs to perform your own load balancing.
•Tunneling Protocols—IPSec has been selected, but you could allow the group to use Point-to-Point Tunneling Protocol (PPTP), Layer 2 Tunneling Protocol (L2TP), and L2TP over IPSec as well.
•Strip Realm—The default operation of the VPN concentrator verifies users against the internal database using a combination of the username and realm qualifier, as in username@group. The @group portion is called the realm. You can have the VPN concentrator use name only by checking the value for this attribute.
Figure 4-21 Configuration | User Management | Groups | Modify > General

VPN Concentrator Configuration 157
Modify Groups— IPSec Tab
Clicking the IPSec tab brings up the screen shown in Figure 4-22. The attributes on this screen are as follows:
•IPSec SA—For remote access clients, you must select an IPSec Security Association (SA) from this list of available combinations. If you have created additional SA types, those are also displayed here as selection options. The client and server negotiate an SA that governs authentication, encryption, encapsulation, key management, and so on based on your selection here.
The following are the default selections supplied by the VPN concentrator:
—None—No SA is assigned.
—ESP-DES-MD5—This SA uses DES 56-bit data encryption for both the IKE tunnel and IPSec traffic, ESP/MD5/HMAC-128 authentication for IPSec traffic, and MD5/HMAC-128 authentication for the IKE tunnel.
—ESP-3DES-MD5—This SA uses Triple-DES 168-bit data encryption and ESP/MD5/HMAC-128 authentication for IPSec traffic, and DES-56 encryption and MD5/HMAC-128 authentication for the IKE tunnel.
—ESP/IKE-3DES-MD5—This SA uses Triple-DES 168-bit data encryption for both the IKE tunnel and IPSec traffic, ESP/MD5/HMAC-128 authentication for IPSec traffic, and MD5/HMAC-128 authentication for the IKE tunnel.
—ESP-3DES-NONE—This SA uses Triple-DES 168-bit data encryption and no authentication for IPSec traffic, and DES-56 encryption and MD5/HMAC-128 authentication for the IKE tunnel.
—ESP-L2TP-TRANSPORT—This SA uses DES 56-bit data encryption and ESP/MD5/HMAC-128 authentication for IPSec traffic (with ESP applied only to the transport layer segment), and it uses Triple-DES 168-bit data encryption and MD5/HMAC-128 for the IKE tunnel. Use this SA with the L2TP over IPSec tunneling protocol.
—ESP-3DES-MD5-DH7—This SA uses Triple-DES 168-bit data encryption and ESP/MD5/HMAC-128 authentication for both IPSec traffic and the IKE tunnel. It uses Diffie-Hellman Group 7 (ECC) to negotiate Perfect Forward Secrecy.
This option is intended for use with the movianVPN client, but you can use it with other clients that support D-H Group 7 (ECC).
•IKE Peer Identity Validation—This option applies only to VPN tunnel negotiation based on certificates. This field enables you to hold clients to tighter security requirements.