

Introduction to V-Ray
.pdfINTRODUCTION TO V-RAY Chapter04-V-RayLights
INTRODUCTION TO V-RAY
CHAPTER 04 - V-RAY LIGHTS
Software Used: V-Ray, 3ds Max
This month we are going to go over Vray lights and other lighting solutions available in Vray, along with a quick look on caustics, HDRI and Vray Sun.
A: VRAY LIGHT
The basic lights can be used within Vray should you want a physically accurate light distribution, this particular light gives very good results but is not the fastest to render especially if you use broad area shadows, let’s look at how it works.
Firstly, Vray lights have two basic settings, power and size, as in real world, meaning a light source of 100W diffusing light from 10cm² surface will not be as powerful as a 1W light source emitting from a 100m² surface (yes meters).
(Fig.01) light power 10, light size 25cm-150cm (Fig.02) light power 10, light size 50cm-150cm
Intensity: Straightforward; increase for more light; however the power of this light means you have the opportunity to use different units in accordance with the scene units and the Vray Physical Camera.
You can use the default image unit which is close to max’s standard light setting, but you can also set the light power as luminous power, luminous, radiant, or radiance.
Luminous power (lm): using the unit system, the light power will not depend on light size, as a reference a standard 100W bulb emits 1500 lumens.
Luminance: using this unit the light power will depends on its size.
Radiant power (W): a tricky unit as it is not measured as you would think, for a 100W bulb
only a couple watts emitted are visible, this unit also does not use light size.
Radiance: same as above but depends on light size.
Multiplier: light intensity
You can either use intensity or color to set the intensity of the light.
Invisible: defines whether or not the light source is directly visible by the camera or thru reflections/refractions, not that you can still see the light source in windows or such should you keep the affect specular box checked.
(Fig.03) notice how the ceiling light is not seen in the render
|
|
|
|
|
|
|
|
|
|
www.3dtotal.com |
page31 |
Chapter04 |
No decay: physically correct lights have an inverse square light decay, so that light intensity fades with distance, you can disable this by unchecking this box.
Skylight portal: when using Image base lighting, this option makes the light source take its intensity from the environment behind it.
Simple portal: speeds up rendering while using skylight portal, by ignoring light casting behind it.
Store with irradiance map: will compute light casting within the GI solution, this will slow down the GI render time, while speeding up final image render time, you can obviously store the solution for quick renders.
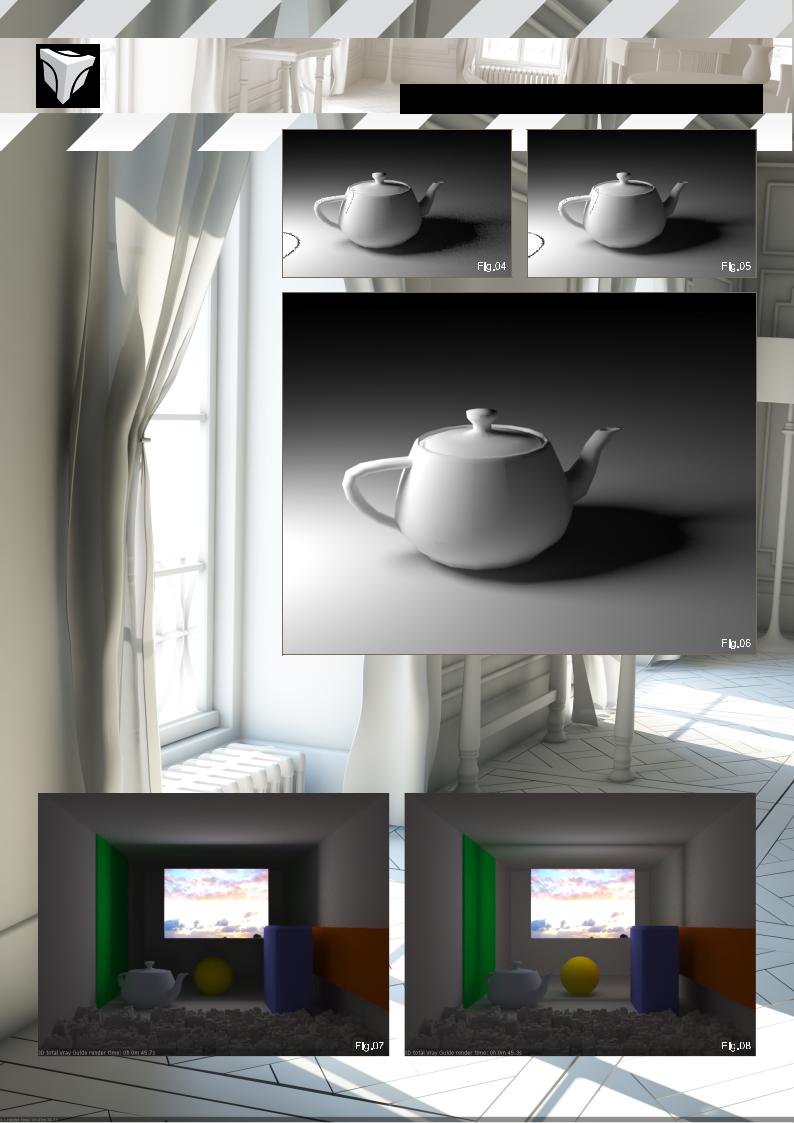
Subdiv: used for area shadow calculations, increasing it will produce smoother results, while slowing down the render time.
(Fig.04) Fig 72: 8 sampling subdiv (Fig.05) Fig 73: 32 sampling subdiv (Fig.06) Fig 74: 64 sampling subdiv
Shadow Bias: tricky setting, as it will translate the shadows away from objects, this can create strange looking renders, with shadow leaks.
Cutoff: sets a maximum value for light, can be useful in scenes with many lights, keep at 0.0 to have accurate lights; you can always save your
Chapter04-V-RayLights INTRODUCTION TO V-RAY
image in 16 or 32 bits to have some margin in compositing.
Texture: you can also use Vray lights as a texture projector, only with rectangle, dome, or mesh lights, leave adaptiveness at 1.0,
Note: it is recommended to use GI with texture mapped lights or mesh lights.
(Fig.07) Fig 75: single sided (Fig.08) Fig 76: double sided
|
|
|
|
|
|
|
|
|
|
|
|
|
|
www.3dtotal.com |
page32 |
Chapter04 |
||||
INTRODUCTION TO V-RAY Chapter04-V-RayLights
B: IMAGE BASED LIGHTING
With Dome lights you can light an entire scene using IBL, works best with HDR images, you can control the orientation of the image both in the light settings and in the material settings.
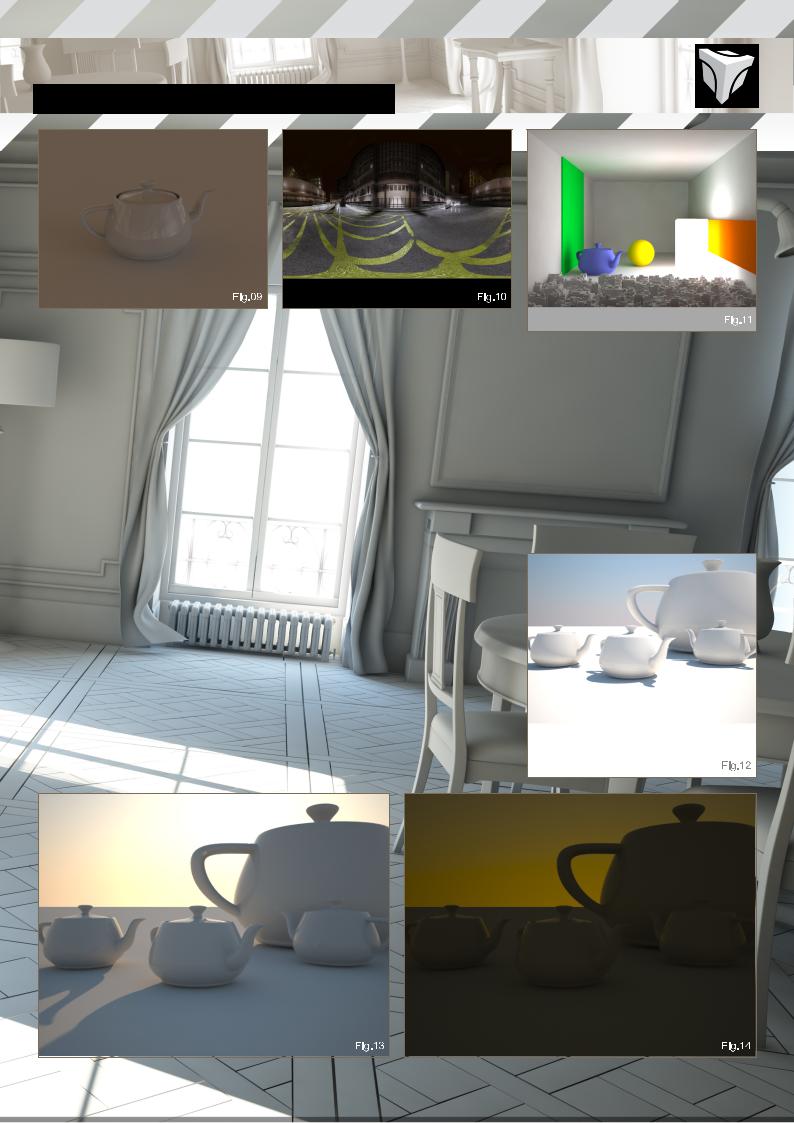
(Fig.09) Fig 78: teapot light with only a dome light, notice it also affect reflections.
(Fig.10) Fig 79: spherical map used
C: VRAY LIGHT MTL
Vray light material is a powerful tool, in its most basic form it works as a planar Vray light, you can add a texture map to it, make it double sided etc.
It also works with complex mesh and particle instances, remember that the larger the surface emitting will be the more hemispherical subdivisions you will have to compute in order to have a smooth and correct render, resulting most of the time, in very long render times. (Fig.11) Fig 80
D: VRAY SUN
A particular plugin of Vray can used to simulate sunlight and skylight, depending on the light height and orientation it will automatically change the sky’s and lights color, useful for quick setups.
Size: When increasing it will create more diffuse shadows, as decreasing it will make sharper ones, you control the shadow quality with shadow subdivisions, simply increase it for smoother shadows should you get too much noise, however this affects render time.
Turbidity: simulates the amount of dust/pollution present in the air thus creating yellow overall sky and light color; decrease this value for a clear sky, increase it should you need a post apocalyptic mood.
Intensity: normally the height of the sun controls the intensity of the light, however you can bypass this with the intensity multiplier; note:
you can also switch to Vray physical camera, increase the ISO setting, lower shutter speed etc… more on this next month.
Ozone: this will change the overall color of the light, increase for bluish mood.
(Fig.12) basic sun with Vray physical cam (Fig.13) Fig 82: sun height 500
(Fig.14) Fig 83: sun height -500
|
|
|
|
|
www.3dtotal.com |
page33 |
Chapter04 |
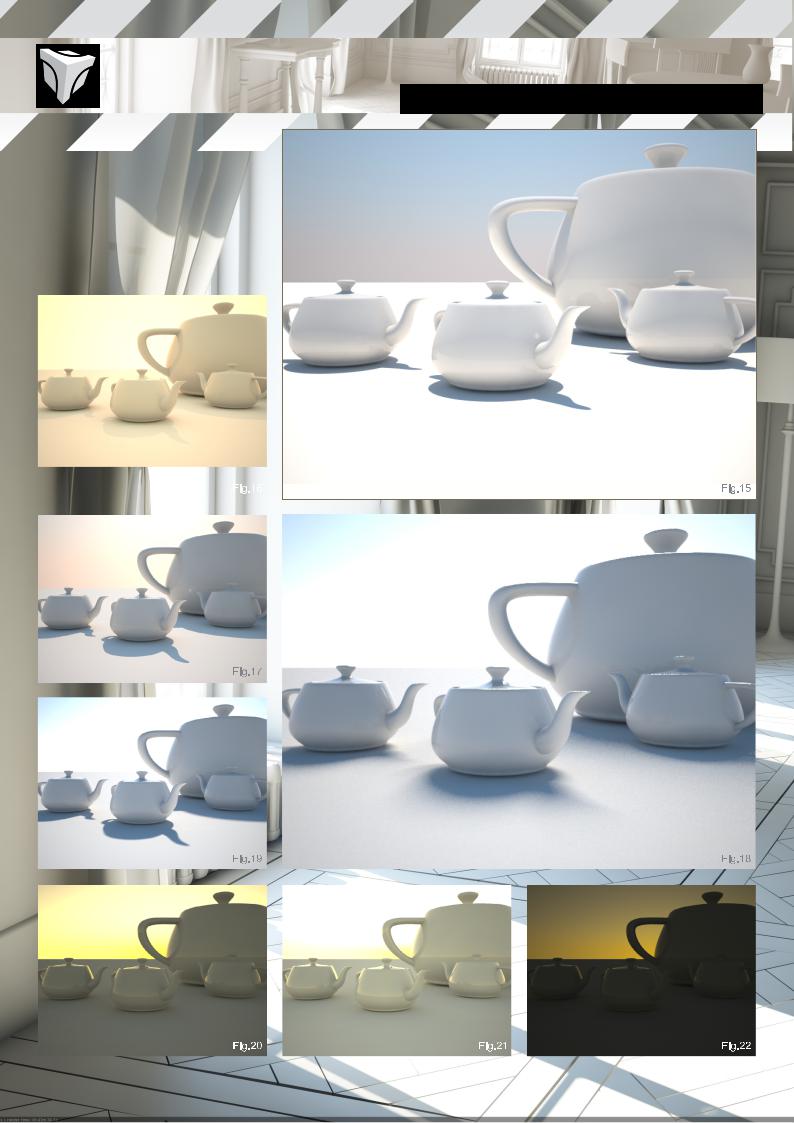
(Fig.15) Fig 84: sun height 5000 (Fig.16) Fig 85: turbidity 15 (Fig.17) Fig 86: turbidity 5 (Fig.18) Fig 87: size multiplier 50 (Fig.19) Fig 88: size multiplier 5
(Fig.20) Fig 89: height -150, intensity 1 (Fig.21) Fig 90: height -150, intensity 3 (Fig.22) Fig 91: height -150, intensity 0.1
Chapter04-V-RayLights INTRODUCTION TO V-RAY
|
|
|
|
|
|
|
|
|
|
|
|
|
|
|
|
|
|
|
|
|
|
|
|
|
|
|
|
|
|
|
|
|
|
|
|
|
|
|
|
www.3dtotal.com |
page34 |
Chapter04 |
INTRODUCTION TO V-RAY Chapter04-V-RayLights
E: EXTRA
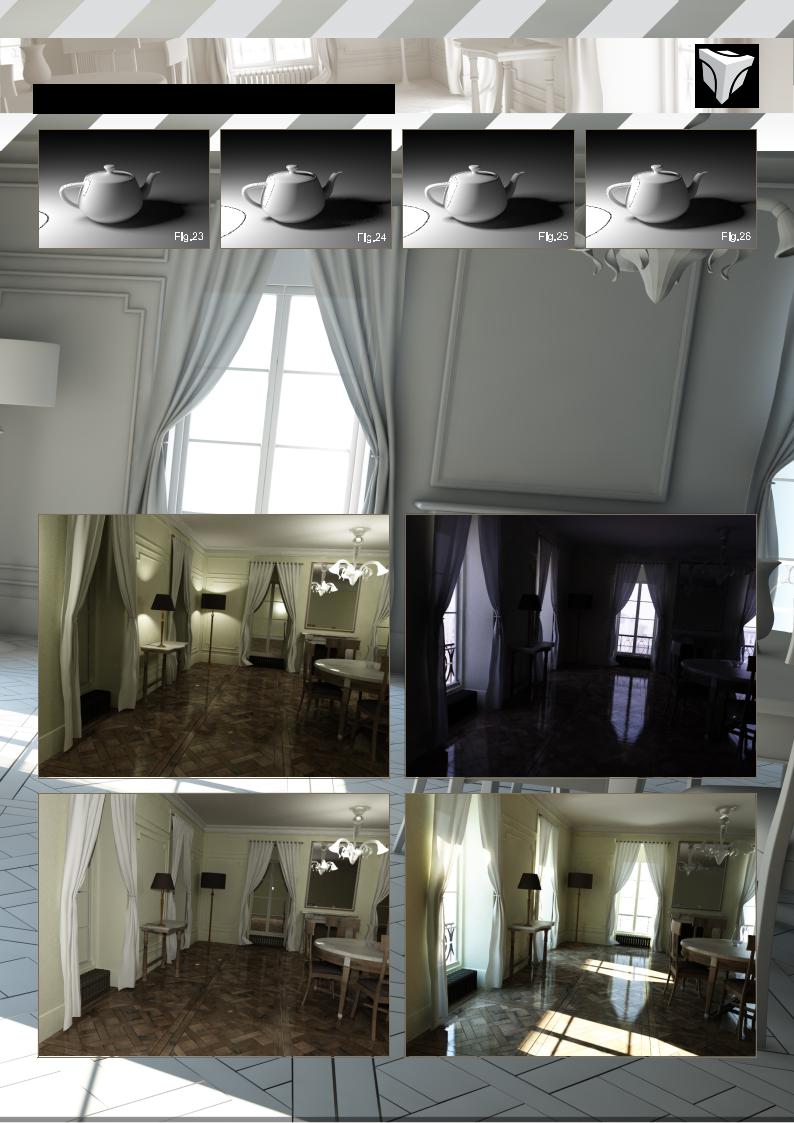
You can also use Vray shadow solution with standard max light, simply select Vray shadow in the shadow scroll, this is the fastest way to have correct area shadows with Vray. It renders faster than Vray lights, and can easily look the same; however you cannot use Vrays intensity units, and in some cases it might take longer to render.
(Fig.23) Fig 92: Vray light 32 shadow subdiv, this took 22 seconds render.
(Fig.24) Fig 93: standard max with area
shadows light, 28 second render, but with artifacts.
(Fig.25) Fig 94: standard max light with Vray shadow with area shadows activated, 13 second render and 8 subdivisions.
(Fig.26) Fig 95: standard max light with Vray shadow, with area shadows activated, 13 second render and 16 subdivisions.
This concludes the Lights chapter, I trust you have read the previous ones about GI and Vray’s advanced settings to take full advantage
of Vray’s render engine, this series is to be concluded next months, with a look on Vray’s plugins.
ERIC ENNIS
For more from this artist visit
http://www.Eric-Ennis.com
|
|
|
|
|
www.3dtotal.com |
page35 |
Chapter04 |
CHAPTER 05
V-RAY PLUGINS
INTRODUCTION TO V-RAY Chapter05-V-RayPlugins
INTRODUCTION TO V-RAY
CHAPTER 05 - V-RAY PLUGINS
Software Used: V-Ray, 3ds Max
For the final installment we will be looking at some of Vrays extras, some are very important such as displacement, physical camera, or Vray proxy; others are just for fun.
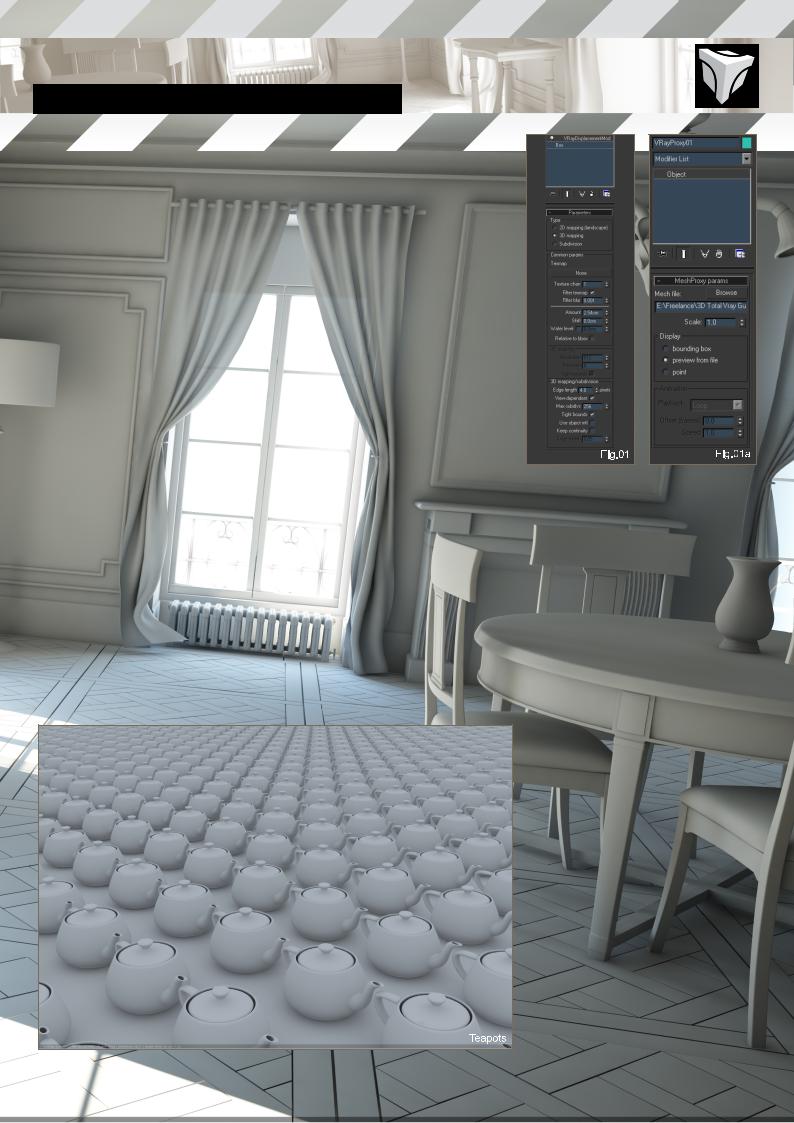
A: VRAY DISPLACEMENT
With Vray you don’t plug the displacement map in the material editor. You have to add an object modifier in order to use displacement. (Fig.01)
There are three types of displacement mapping in Vray, 2D, 3D and subdivision.
2D is preferred in most cases, this solution keeps all the detail of the displacement map and may use from 8 to 32 bit floating images which gives much better detail, however 2D mapping needs to store the texture during render which can take up a lot of RAM. In such cases render times will become very long and sometimes, max might even crash the computer. In these cases you can either use 3D mapping solutions, or use a very high resolution mesh using Vray proxy. Another downside: 2D mapping doesn’t work with procedural maps.
Resolution: preferably match with the textures resolution if the map is 2048*2048 set it to 2048.
Precision: Lower this setting for planar objects to 1, increase for curved objects, if you get spots on the mesh increase this value.
Tight bonds: Check for faster renders, without loss of quality in most cases.
3D Works with procedural maps but only uses 0.0 to 1.0 values, no negatives, and this will not keep all the map details.
Edge length: Controls the edge minimum size of subdivided triangles, lower values means higher quality with longer render times.
View dependent: determines if the edge length is computed on a screen size, or world units. Check this for faster render times this is very useful for landscapes.
Max subdivisions: Controls the number of subdivisions per object triangle squared. For example a value of 64 means for every triangle Vray will subdivide it 64*64=4096 at the most. Simply Increase for more details.
Keep continuity: Check to remove holes in the displaced mesh.
Subdivision Will work the same way as 3D mapping, but will also smooth the object.
In most cases 2D mapping has the best quality and renders faster, why bother with the others.
Note: Vray’s displace does not work with max’s standard shadow maps
B: VRAY OBJECTS
Vray proxy: Now here is one of Vrays super powers. Vray proxy lets you render as much polys as you like, far more that Max’s limit.
It’s quite simple, convert your object into a simple mesh with UV data, whether it is
animated or not, export it to your hard drive as a vrmesh file, then, re-import it with proxy object.
If you don’t know where to find the Vray export window, just right click in max, then Vray mesh export. (Fig.01a)
Note: Once more Vray proxy does not work with standard shadow maps.
Fig: Teapots
|
|
|
|
|
www.3dtotal.com |
page37 |
Chapter05 |
Here is a render of 10000 teapots each taking around 9000 polys which makes 90 million polygons! It was rendered with GI; all as Vray proxy and a Vray plane and rendered in 2K format. Apart from the hard drive swap RAM used was under 400Mo, and above all it rendered in 2 minutes and 11 seconds.
Vray plane
This is a very useful object. It creates an infinite plane displayed very simply in the viewport.
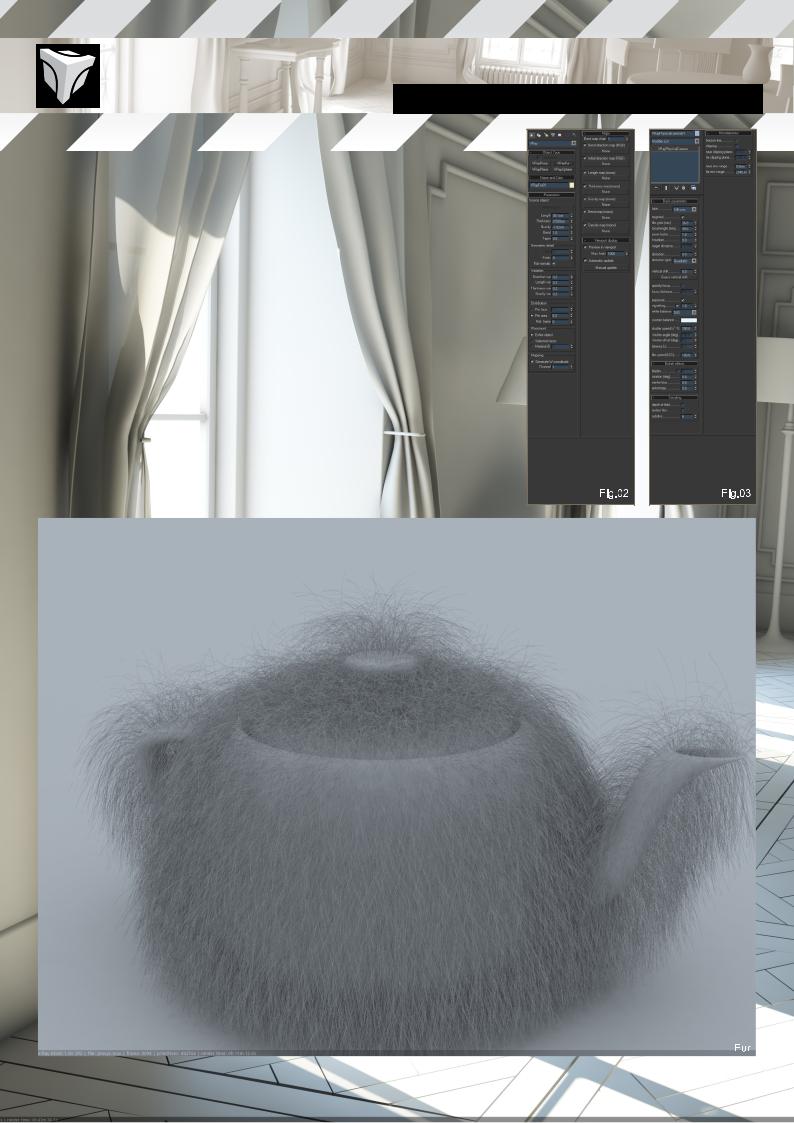
Vray fur
This is a simple procedural fur plugin within Vray. It is pretty straightforward, but has no dynamics. It would be useful for stills with grass. (Fig.02)
Fig: Fur
Chapter05-V-RayPlugins INTRODUCTION TO V-RAY
C: VRAY CAMERA
A very interesting part of Vray, and quite useful, this is a physically correct camera, with all
the settings you would find in a DSLR, a Film camera, and a DVcam. In order to really use this you need some understanding of photography I suggest looking for some info about the basics of photography. With this information you will be at home with these settings. (Fig.03)
Note: the cameras shutter speed override motion blur, same for the depth of field.
ERIC ENNIS
For more from this artist visit
http://www.Eric-Ennis.com
|
|
|
|
|
|
|
|
|
|
www.3dtotal.com |
page38 |
Chapter05 |
Images from 3ds Max + Vray version of this eBook |
3DTOTAL.COM |
|
Visit 3DTotal.com to see our full range of training products
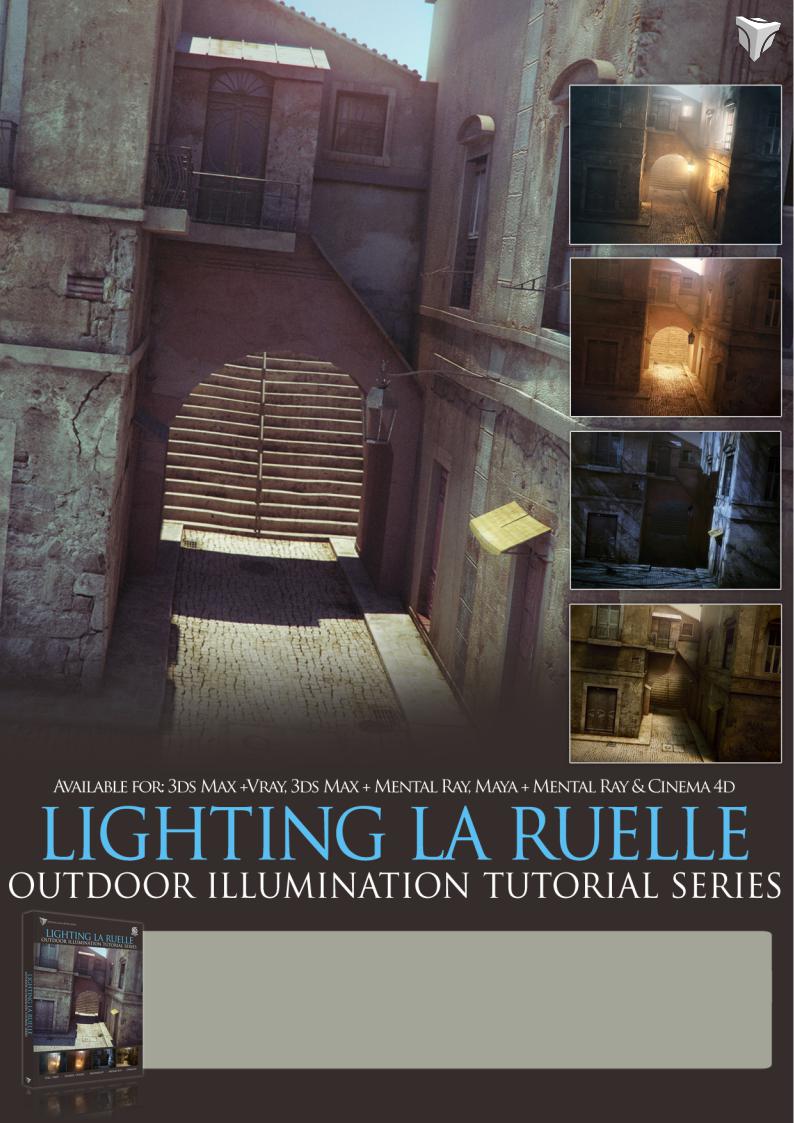
Lighting La Ruellle is our new Outdoor Illumination eBook which focuses on lighting a base scene under very different atmospheric conditions. Each tutorial will show how to build a light rig and set up the renderer to portray an environment which includes fog/mist, sunrise/sunset, moonlight, midday sun and overcast.
Throughout the five chapters you will be provided with a step by step account of how the scene can be transformed into one of the above environments, encompassing a range of techniques that will present a comprehensive insight into both lighting and rendering exterior scenes
Original Author: 3DTotal.com Ltd | Original Scene by: Richard Tilbury | Format: DOWNLOAD ONLY PDF
3DTOTAL.COM
Visit 3DTotal.com to see our full range of training products
Using 3ds Max and Photoshop this eBook teaches you how to create a fantasy scene inspired by real world architecture, and how to correctly and effectively use reference photos of your chosen source of inspiration to get stunning effects quickly and easily.
This eBook provides and instructs a great system to creating 3DStills in the quickest way whilst still getting great results!
Original Author: 3DTotal.com Ltd | Platform: Suitable for all 3D software | Format: DOWNLOAD ONLY PDF