

Cisco Secure VPN Exam Certification Guide - Cisco press
.pdf138 Chapter 4: Configuring Cisco VPN 3000 for Remote Access Using Preshared Keys
Once you have entered the correct login name and password, the concentrator displays a welcome screen, as shown in Example 4-1.
Example 4-1 Quick Configuration Welcome Screen
Welcome to
Cisco Systems
VPN 3000 Concentrator Series
Command Line Interface
Copyright (C) 1998-2001 Cisco Systems, Inc.
--: Set the time on your device. The correct time is very important,
--: so that logging and accounting entries are accurate.
--: Enter the system time in the following format:
-- : HH:MM:SS. Example 21:30:00 for 9:30 PM
> Time
Quick -> [ 08:57:13 ]
Setting the System Time, Date, and Time Zone
At this point, the concentrator is waiting for you to verify the current time by pressing Enter or to type in a new time, as shown in Example 4-2. Notice that the system prompt changes to Quick -> to indicate that the system is waiting for you to confirm or enter data. The following example also shows the entries that are required (in boldface type) to complete the configuration of the date, time zone, and daylight-savings time support information.
Example 4-2 Setting the System Time and Date
Quick -> [ 08:57:13 ] 08:15:22
-- : Enter the date in the following format.
-- : MM/DD/YYYY Example 06/12/1999 for June 12th 1999.
> Date
Quick -> [ 03/29/2002 ] 09/01/2002
--: Set the time zone on your device. The correct time zone is very
--: important so that logging and accounting entries are accurate.
--: Enter the time zone using the hour offset from GMT:
-- : -12 |
: |
Kwajalein |
-11 |
: Samoa |
-10 |
: Hawaii |
-9 |
: Alaska |
|
-- : |
-8 |
: |
PST |
-7 |
: MST |
-6 |
: CST |
-5 |
: EST |
-- : |
-4 |
: |
Atlantic |
-3 |
: Brasilia |
-2 |
: Mid-Atlantic |
-1 |
: Azores |

VPN Concentrator Configuration 139
Example 4-2 Setting the System Time and Date (Continued)
-- : |
0 |
: GMT |
|
+1 |
: Paris |
+2 |
: Cairo |
+3 |
: |
Kuwait |
-- : |
+4 |
: Abu |
Dhabi |
+5 |
: Karachi |
+6 |
: Almaty |
+7 |
: |
Bangkok |
-- : |
+8 |
: Singapore |
+9 |
: Tokyo |
+10 |
: Sydney |
+11 |
: |
Solomon Is. |
|
--: +12 : Marshall Is.
>Time Zone
Quick -> [ 0 ] -6
1)Enable Daylight Savings Time Support
2)Disable Daylight Savings Time Support
Quick -> [ 1 ] 2
Configuring the Private LAN Interface
The next phase of the CLI Quick Configuration steps is to configure the Private LAN interface. This is simply a matter of setting the IP address and subnet mask information and then specifying the speed and duplex mode to use for the interface. Those steps are shown in the output in Example 4-3, which is displayed as soon as you enter your preference for daylight-savings support.
Example 4-3 Configuring the Private Interface
This table shows current IP addresses.
Intf Status IP Address/Subnet Mask MAC Address
-------------------------------------------------------------------------------
Ether1-Pri|Not |
Configured| |
0.0.0.0/0.0.0.0 |
| |
Ether2-Pub|Not |
Configured| |
0.0.0.0/0.0.0.0 |
| |
-------------------------------------------------------------------------------
DNS Server(s): DNS Server Not Configured DNS Domain Name:
Default Gateway: Default Gateway Not Configured
** An address is required for the private interface. **
> Enter IP Address
Quick Ethernet 1 -> [ 0.0.0.0 ] 192.168.1.3
Waiting for Network Initialization...
> Enter Subnet Mask
Quick Ethernet 1 -> [ 255.255.255.0 ]
1) Ethernet Speed 10 Mbps
continues

140 Chapter 4: Configuring Cisco VPN 3000 for Remote Access Using Preshared Keys
Example 4-3 Configuring the Private Interface (Continued)
2)Ethernet Speed 100 Mbps
3)Ethernet Speed 10/100 Mbps Auto Detect
Quick Ethernet 1 -> [ 3 ] 2
1)Enter Duplex - Half/Full/Auto
2)Enter Duplex - Full Duplex
3)Enter Duplex - Half Duplex
Quick Ethernet 1 -> [ 1 ] 2
1)Modify Ethernet 1 IP Address (Private)
2)Modify Ethernet 2 IP Address (Public)
3)Save changes to Config file
4)Continue
5)Exit
In Example 4-3, the administrator wanted to use a 24-bit subnet mask. When he entered a Class C IP address for the interface, the system automatically brought up the 24-bit Class C default subnet mask. The administrator simply pressed Enter to accept this subnet mask setting. Also notice that the administrator explicitly set the speed of the interface to 100 Mbps and to Full Duplex rather than accepting the default automatic detection settings.
From the menu displayed at the end of the previous output display, you can see that you have the option of also configuring the Public interface. If the hardware configuration had additional interfaces, you would see menu options for configuring those interfaces, too.
The browser-based manager is the configuration tool of choice for the VPN 3000 Concentrator. The CLI is used only to enable network connectivity so that you can communicate with the concentrator through the network from your administration workstation. Configuration of additional interfaces and all remaining concentrator settings is accomplished through the browser-based manager.
To finish the CLI initial configuration of the VPN concentrator, simply save your changes to the Config file and then exit the Quick Configuration mode. Those steps are shown in the output in Example 4-4.
Example 4-4 Saving Configuration Settings and Exiting the CLI
1)Modify Ethernet 1 IP Address (Private)
2)Modify Ethernet 2 IP Address (Public)
3)Save changes to Config file
4)Continue
5)Exit
Quick -> 3
1) Modify Ethernet 1 IP Address (Private)

VPN Concentrator Configuration 141
Example 4-4 Saving Configuration Settings and Exiting the CLI (Continued)
2)Modify Ethernet 2 IP Address (Public)
3)Save changes to Config file
4)Continue
5)Exit
Quick -> 5
The concentrator only presents the Quick Configuration process upon initial bootup using the default configuration. After you have configured the concentrator, the normal CLI menus look as follows:
Model 3005 menu:
1)Modify Ethernet 1 IP Address (Private)
2)Modify Ethernet 2 IP Address (Public)
3)Configure Expansion Cards
4)Save changes to Config file
5)Continue
6)Exit
Quick -> _
Model 3015–3080 menu:
1)Modify Ethernet 1 IP Address (Private)
2)Modify Ethernet 2 IP Address (Public)
3)Modify Ethernet 3 IP Address (External)
4)Configure Expansion Cards
5)Save changes to Config file
6)Continue
7)Exit
Quick -> _
If you need to go through the Quick Configuration again for any reason, simply select the
Reboot with Factory/Default Configuration option from the Administration | System Reboot menu in the VPN 3000 Concentrator Manager.
This finishes the CLI configuration steps. The remainder of the configuration steps are completed using the Cisco VPN 3000 Concentrator Manager application that is resident on each VPN concentrator and is accessible using the web browser on your administrator PC.
Quick Configuration Using the Browser-Based Manager
Now that you have configured the Private interface on the VPN concentrator, make sure that your workstation has an IP address on the same subnet as the concentrator and verify that you can reach the concentrator by pinging to it from the workstation. Once you have verified connectivity, open your web browser application and connect to the concentrator by entering the IP address of the concentrator in the Address field of the browser, as shown in Figure 4-3.
142 Chapter 4: Configuring Cisco VPN 3000 for Remote Access Using Preshared Keys
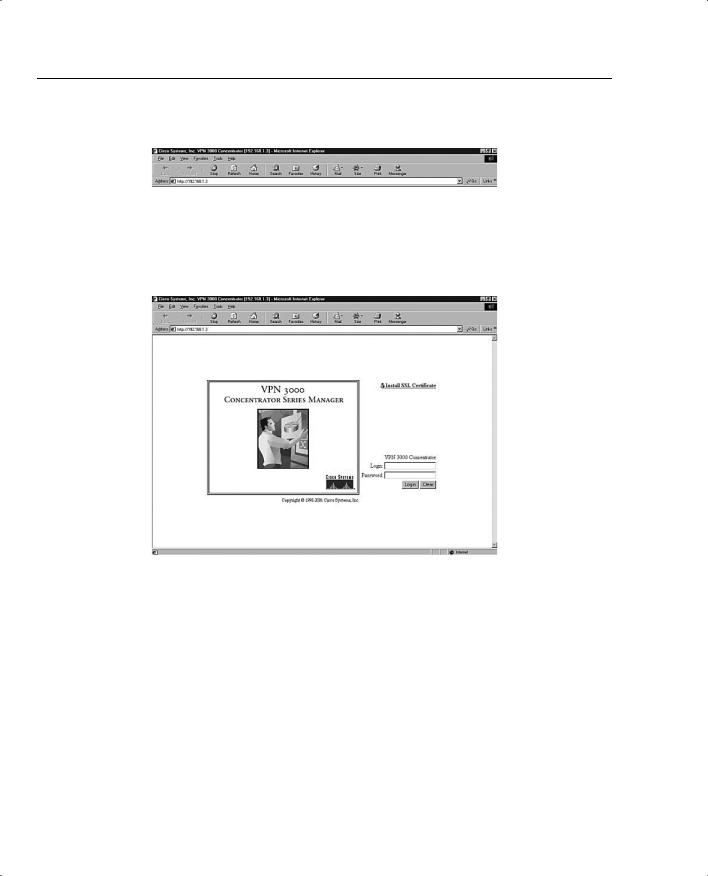
Figure 4-3 HTTP Addressing for VPN 3000 Concentrator Series Manager
The browser connects to the VPN concentrator and presents the initial login screen, as shown in Figure 4-4.
Figure 4-4 VPN 3000 Concentrator Series Manager Login Screen
Notice the hotlink option on the screen labeled Install SSL Certificate. You can use Secure Sockets Layer (SSL) encryption to establish a secure session between your management workstation and the concentrator. Using this secure session capability encrypts all VPN Manager communications with the concentrator at the IP socket level. SSL uses the HTTPS protocol and uses https:// addressing on the browser. You might want to use SSL if your VPN Manager workstation connects to the concentrator across a public network. There can be a slight performance penalty when using SSL, depending on the capability of the administration workstation, but it should not be a serious consideration for management functions.
When the VPN concentrator boots for the first time, it generates a self-signed SSL server certificate. To use SSL with your browser, install this server certificate into the browser. If you have multiple concentrators, you must install the certificate from each of the concentrators into your browser, but you only need to do that once for each concentrator. Once the SSL server certificate is installed, you can begin using HTTPS for communications with the concentrator.

VPN Concentrator Configuration 143
Clicking the Install SSL Certificate hotlink takes you to the browser’s certificate installation wizard. Netscape and Microsoft browsers have slightly different installation routines, but in either case, accept the default settings presented, supply a nickname for the certificate if requested, and continue through the installation process by clicking Next or Finish. You can then immediately connect to the concentrator using HTTPS once the installation wizard has finished.
To continue with the Quick Configuration that you started from the CLI, log in with the administrator login name and password. Using the login screen shown in Figure 4-4, follow these steps:
Step 1 Position your cursor in the Login field.
Step 2 Type admin and the press Tab.
Step 3 With the cursor in the Password field, type admin again. The window displays *****.
Step 4 Click the Login button to initiate the login process.
If you make a mistake, click on the Clear button to refresh the screen so that you can start over.
After the VPN concentrator has accepted your administrator login, the screen shown in Figure 4-5 is displayed in your browser window.
Figure 4-5 First-Time Quick Start Option Menu
Applicaton
Toolbar

144 Chapter 4: Configuring Cisco VPN 3000 for Remote Access Using Preshared Keys
The top portion of the screen is the application toolbar, and it is displayed on every other manager screen. Because this is a consistent header, it is not shown in subsequent screen displays.
On the right-hand portion of the header, you see the standard toolbar, which contains the following elements:
•Hotlinks to the following items:
—Main menu
—Manager’s Help system
—A support page that provides web addresses and phone numbers to Cisco support sites
—Logout, so that you can exit the system or log in as a different user
•Information on the login name of the current user
•Hotlinks to the Main Menu screen for the three major sections of the VPN 3000 Concentrator Manager system:
—Configuration
—Administration
—Monitoring
The first time that you enter the VPN Manager after booting from the default configuration, you are presented with a screen that allows you to enter the Quick Configuration mode to continue the process that you started at the CLI. Figure 4-5 shows this screen.
If you click here to start Quick Configuration, the VPN Manager leads you through a series of screens to complete the 11 initial configuration steps. This is a continuation of the Quick Configuration wizard that was started at the CLI. You only have this opportunity once.
If you click here to go to the Main Menu, you can configure the same settings, but you must select the configuration windows from the table of contents. After you have completed the Quick Configuration, this screen is not displayed again, and the system boots into the standard VPN Manager window.
Configuring Remaining Interface Settings
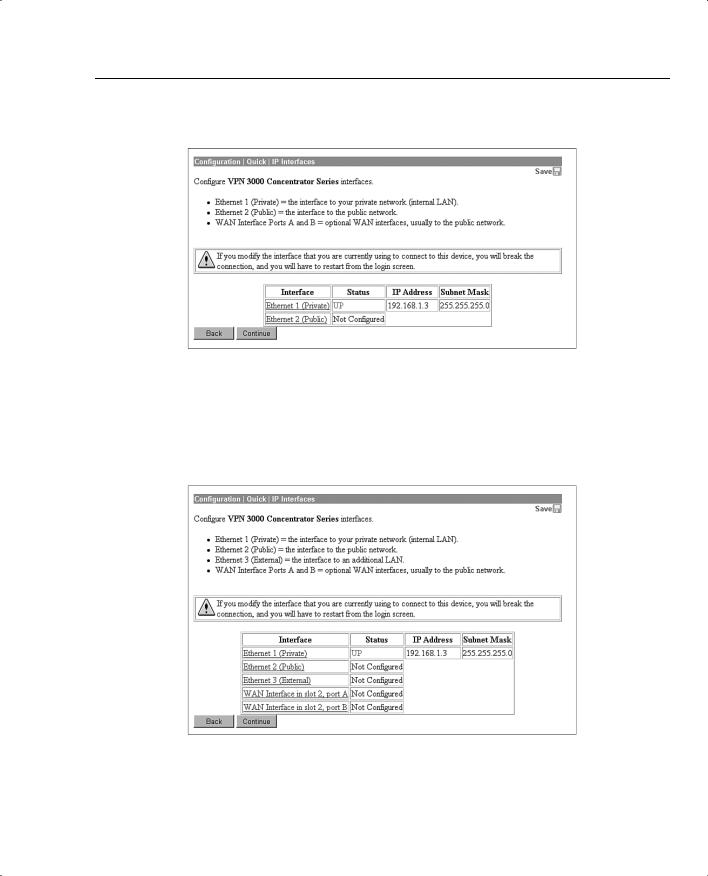
When you click to start Quick Configuration, the VPN Manager displays the IP Interfaces screen. If your system is a 3005 series with only two fixed interfaces, the screen looks like that shown in Figure 4-6. Notice that the screen’s title bar shows the complete path to this screen (Configuration | Quick | IP Interfaces), as it would be shown if you had worked down to this screen through the table of contents. This 3005 display shows that the Private interface is configured and operational and that the Public interface is not yet configured.
VPN Concentrator Configuration 145
Figure 4-6 3005 Concentrator—Configuration | Quick | IP Interfaces
Figure 4-7 shows the IP Interfaces screen for the Model 3015–3080 VPN Concentrator. This system has two unconfigured Ethernet interfaces and two unconfigured WAN interfaces. The listings in the Interface column are hotlinks to the configuration screen for each of the interfaces.
Figure 4-7 3015–3080 Concentrator—Configuration | Quick | IP Interfaces
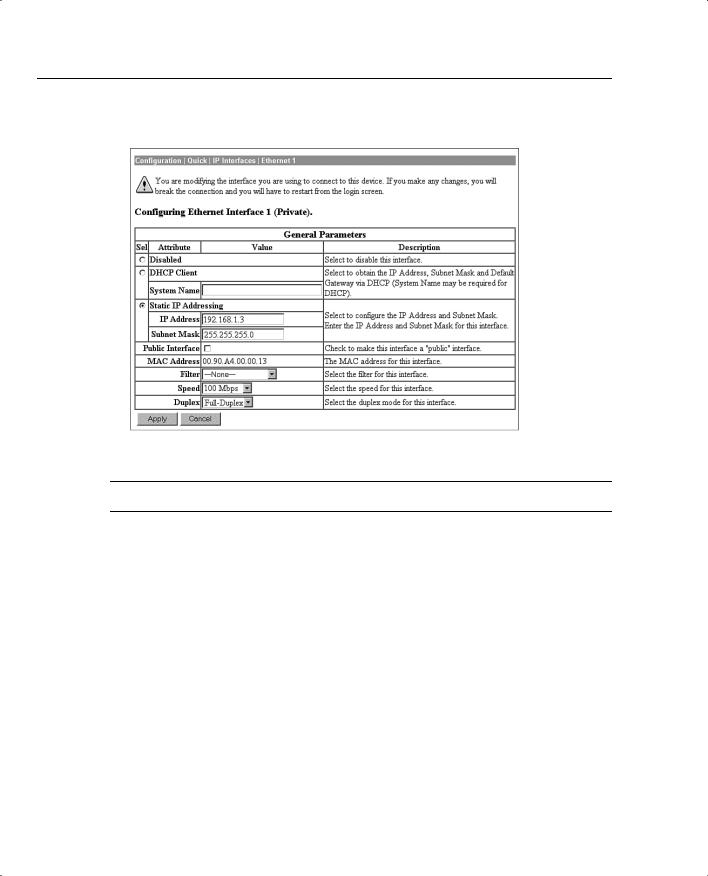
If you click the hotlink to Ethernet 1 (Private), the configuration screen for Ethernet 1 appears, as shown in Figure 4-8. You can select to disable the interface, to obtain addressing from a DHCP server, or to assign static IP addressing.
146 Chapter 4: Configuring Cisco VPN 3000 for Remote Access Using Preshared Keys
Figure 4-8 Configuration | Quick | IP Interfaces | Ethernet 1
NOTE If you disable the Private interface, you lose your browser connection to the concentrator.
The Speed and Duplex settings were configured from the CLI in this example. The default settings for these two fields are 10/100 Auto and Auto, respectively, allowing the systems to negotiate speed and duplex mode.
When you have completed entering the configuration settings for an interface, click the Apply button to save the settings and return to the IP Interfaces screen. Once you have configured all the interfaces, click the Continue button to proceed to the next Quick Configuration screen.
Configuring System Information
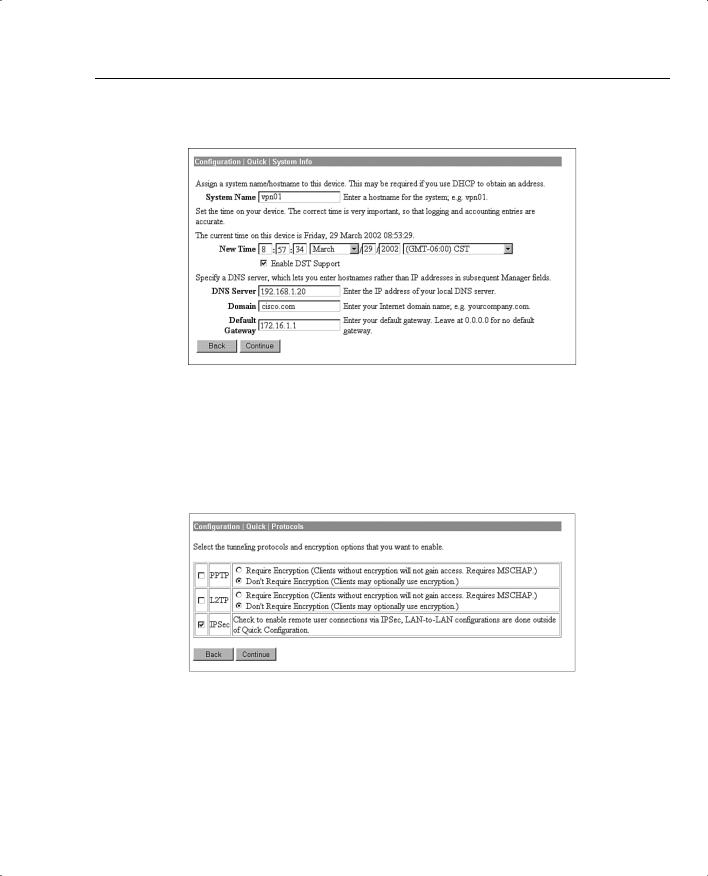
The System Info screen is the next screen displayed. Figure 4-9 shows this screen. The date and time settings were entered during the CLI configuration steps. You can enter a system name here along with DNS server, domain name, and default gateway information.
VPN Concentrator Configuration 147
Figure 4-9 Configuration | Quick | System Info
Configuring the Tunneling Protocol
Clicking the Continue button takes you to the Protocols screen, as shown in Figure 4-10. You can select all protocols, if you like. The configuration described in this chapter works with IPSec only, so that is the only protocol selected on this screen.
Figure 4-10 Configuration | Quick | Protocols
Configuring Address Assignment Method
After you have selected the protocol to use, you must select the method the VPN concentrator is to use to assign an address to clients as they establish tunnels with the concentrator. The method of address assignment selected in Figure 4-11 is to use a DHCP server. You could select multiple methods; the concentrator tries each method in order until it is successful in assigning an address to the client.