

ASP .NET Web Developer s Guide - Mesbah Ahmed, Chris Garrett
.pdf310 Chapter 7 • Introduction to ADO.NET: A Simple Address Book
Table 7.1 Continued
|
|
SqlDbType from |
Native SQL Server |
System.Data.SqlTypes |
System.Data |
|
|
|
Numeric |
SqlNumeric |
Numeric |
Nvarchar |
SqlString |
NVarChar |
Real |
SqlSingle |
Real |
Smalldatetime |
SqlDateTime |
SmallDateTime |
Smallint |
SqlInt16 |
SmallInt |
Smallmoney |
SqlMoney |
SmallMoney |
sql_variant |
Object |
Variant |
Sysname |
SqlString |
VarChar |
Text |
SqlString |
Text |
Timestamp |
SqlBinary |
TimeStamp |
Tinyint |
SqlByte |
TinyInt |
Uniqueidentifier |
SqlGuid |
UniqueId |
Varbinary |
SqlBinary |
VarBinary |
Varchar |
SqlString |
VarChar |
|
|
|
Creating Connection Strings
The first step to connecting to a data source, after choosing the Managed Provider, is to create the connection string.The connection string is a list of key/value pairs that the Connection object will parse; it will use the information to find the Data Source, authenticate, and establish a connection. Depending on the namespace used, the connection string will vary a little. Basically the connection string for a SqlConnection does not have the Provider attribute, while the connection string for an OleDbConnection does.
Connection to SQL Server is done using the System.Data.SqlClient namespace.This namespace contains the classes for the SqlConnection object. As described earlier, the connection string is the hardest part of creating a connection.Table 7.2 lists some common keys, and the default values with some simple explanations.
www.syngress.com

|
Introduction to ADO.NET: A Simple Address Book • Chapter 7 |
311 |
|
Table 7.2 Connection String Properties |
|
|
|
|
|
|
|
Name |
Default |
Description |
|
|
|
|
|
Connect Timeout |
15 |
Seconds to try and make the con- |
|
-or- |
|
nection. When these are up, an |
|
Connection Timeout |
|
exception is thrown. |
|
Data Source |
<User Defined> |
The name or IP address of the SQL |
|
-or- |
|
Server to make the connection |
|
Server |
|
with. For servers with multiple |
|
-or- |
|
instances of SQL Server, this would |
|
Address |
|
be <servername>\ |
|
-or- |
|
<instancename>. |
|
Addr |
|
|
|
-or- |
|
|
|
Network Address |
|
|
|
Initial Catalog |
<User Defined> |
The name of the database. If this is |
|
-or- |
|
not specified you will get a connec- |
|
Database |
|
tion to the default database |
|
|
|
defined for the User ID. |
|
Integrated Security |
‘false’ |
Whether SQL Server will use the NT |
|
-or- |
|
user credentials, or expect a SQL |
|
Trusted_Connection |
|
Server username and password. |
|
Password |
<User Defined> |
The password for the SQL Server |
|
-or- |
|
account logging on. For integrated |
|
Pwd |
|
security, this is not specified. |
|
Persist Security Info |
‘false’ |
When set to ‘false,’ security- |
|
|
|
sensitive information, such as the |
|
|
|
password, is not returned as part of |
|
|
|
the connection if the connection is |
|
|
|
open or has ever been in an open |
|
|
|
state. Resetting the connection |
|
|
|
string resets all connection string |
|
|
|
values including the password. |
|
User ID |
<User Defined> |
The SQL Server login account. |
|
For example, this connection string could be used to connect to a SQL Server that is named “Dataserver” with a user name of “Chapter7” and a password of “Chapter7.”The initial catalog, or database, to connect to is “Chapter7”:
strConn = "Password=chapter7;User ID=Chapter7;Initial _
Catalog=Chapter7;Data Source=Dataserver"
www.syngress.com
312 Chapter 7 • Introduction to ADO.NET: A Simple Address Book
Now you have a connection string that you can use with an SqlConnection object. A trick you can use is to create a text file with .udl as the file extension. Executing this file would start the connection wizard and enable you to step through creating the connection string.When finished, open the file in notepad and copy the completed connection string. For an SqlConnection you would remove the Provider attribute.
Where to Put the Connection String
In the Address Book example, you are putting the connection string in the web.config file.The web.config file has a root node named <configuration>. Under this node is the <system.web> node and you will add another node at this level called <AppSettings>.You then add a new key using the <add> tag.This new item is a key/value pair that you refer to when you need a connection string.
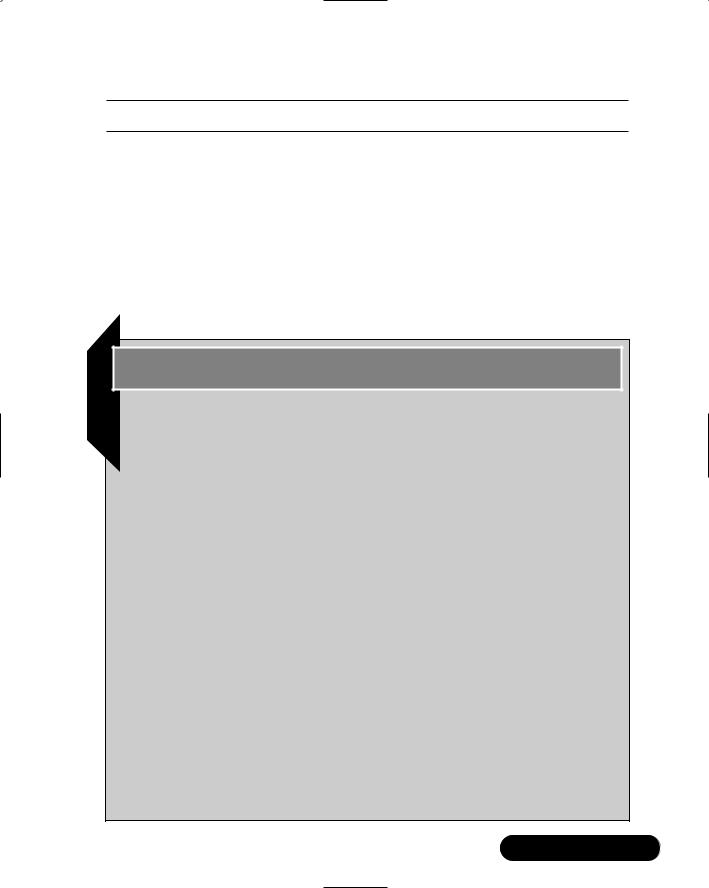
The web.config is an XML document that belongs in the root of your Web application. Figure 7.4 is the abbreviated text from the web.config in the sample Address Book which is included on the CD that accompanies this book. Notice the relationship of the system.web node and the AppSettings node; they are at the same child level in the document.
Figure 7.4 web.config (cs\web.config)
<configuration>
<system.web>
……
</system.web>
<appSettings>
<add key="appStrConnection" value="PWD=pword;UID=webUser;…">
</AppSettings>
</configuration>
To retrieve the value in the data access layer or Code-Behind file, you use the syntax in Figure 7.5 (A and B).
Figure 7.5 (A and B) Retrieving a Connection String from the web.config File
Figure 7.5A C#.NET
strConnection = ConfigurationSettings.AppSettings("appStrConnection");
www.syngress.com
Introduction to ADO.NET: A Simple Address Book • Chapter 7 |
313 |
Figure 7.5B VB.NET
strConnection = ConfigurationSettings.AppSettings("appStrConnection")
For ASP 2, and 3, Microsoft Developers Network—the help files for many Microsoft development tools—has many examples of connection strings in the Global.asa.The Global.asa could be compromised using a buffer overrun attack with the end result of giving out the user name and password to your customers’ data.The managed code nature of the Common Language Runtime should eliminate the buffer overrun attack as a source of entry for unauthorized access.You should feel secure with leaving the connection string in your web.config file; however, heed the advice in the sidebar titled “Connection Strings and Security.”
Developing & Deploying…
Connection Strings and Security
In past versions of ASP, it was common to place the connection string in the Global.asa. This had two problems. First, the file was well known. Its name and location were dictated by the architecture of ASP. Second, this file could be compromised using simple attacks. The attacks were mitigated by patching IIS, but the fact remained that an incorrectly configured server could allow access to this file.
Due the compiled nature of the Common Language Runtime and ASP.NET it is unlikely that these problems will follow you into the future, however, it is still recommended to leave all sensitive data out of the AS(x)X files in ASP.NET. You do have a few options, such as the web.config file in the Address Book example. You can create a component that does nothing but return the connection string to a properly authenticated caller. You could create a text file, and encrypt the connection string in this file. Read it on application start and save it in a variable. This is one area where creativity will pay off.
In addition to putting the connection string in a safe place, the username you use for the application should have minimum access rights to get the job done. In SQL Server this would entail creating a user who has execute permissions to stored procedures but who does not have select permissions to the tables. Then all data access and manipulation is handled using stored procedures. This is a very simple example but is very powerful, at least as far as SQL Server is concerned.
www.syngress.com
314 Chapter 7 • Introduction to ADO.NET: A Simple Address Book
Creating an Address Book Application
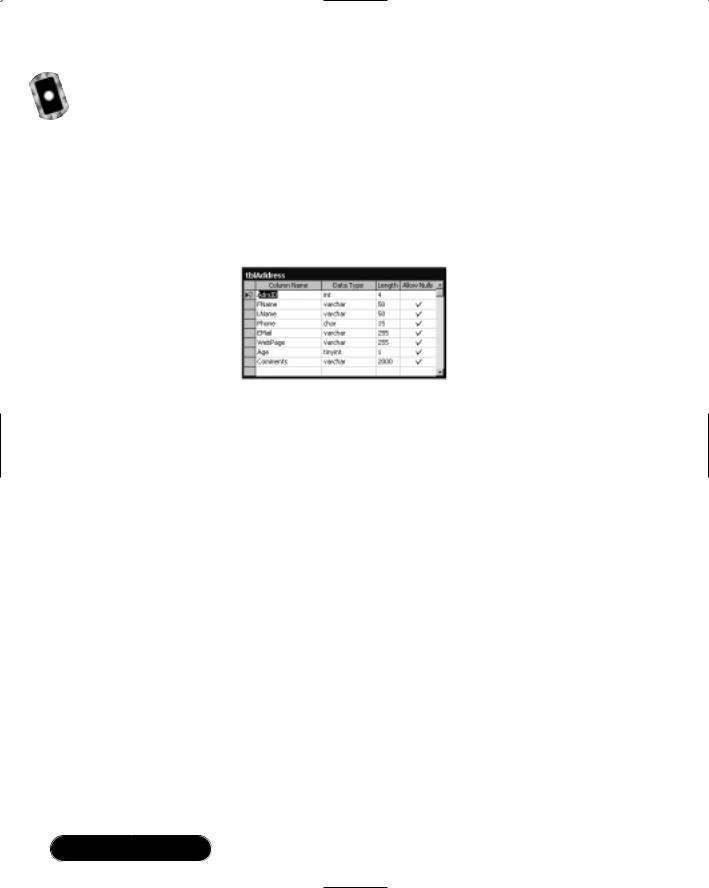
The example application is a simple address book.This example will explore the major topics for data access.We will cover inserting, selecting, and updating data using a simple ASP.NET page with a DataList and a couple of templates. Figure 7.6 contains the table layout for the application.This table has seven columns of various data types plus a primary key that is of data type Int.The primary key is an auto-incrementing field that will be used to uniquely identify a row.
Figure 7.6 tblAddress Layout
The Web form consists of a DataList that is bound to the address table on page load. A DataList is a server-side control that you format using templates.You can bind data to a DataList from a DataReader or a DataSet. Our example uses a DataReader, and this is the most common scenario you should expect to find.The DataSet is a wonderful tool, with a lot of power. For our example we are going stick to the DataReader; the basics of the DataSet will be explained at the end of the chapter.
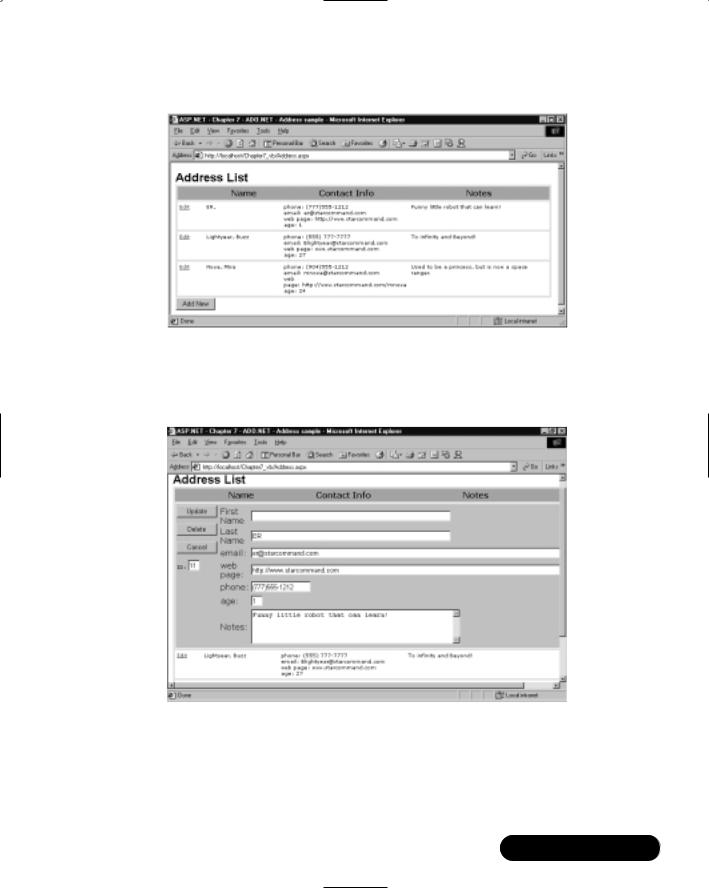
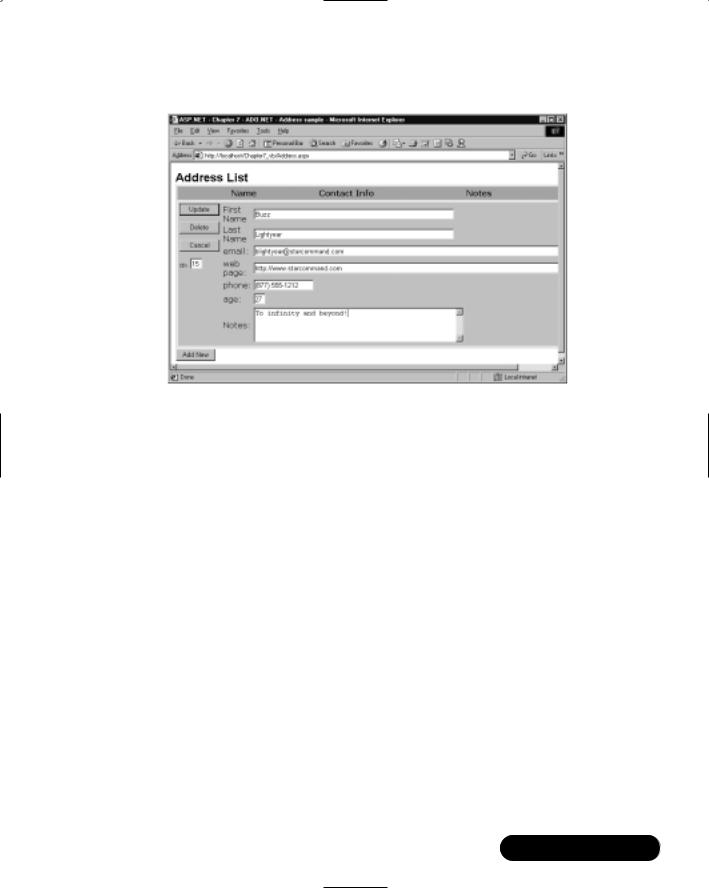
Address.aspx is the primary form for the Address Book. On load you bind the data to the DataList and display the records in a read-only grid. Refer to Figure 7.7 for a screen shot of the standard view.
Notice the Edit link in the left-hand column of each row. Click this button to activate the edit template. Several things are going on here. First, when we created our DataList in the .aspx file, we specified an OnEditCommand.This command receives two parameters from the caller, or in this case, the edit link from our row. Using these parameters in the subprocedure specified by the OnEditCommand property of the DataList, we can interrogate the row and read its values at runtime.We then set the editItemIndex of the DataList to the ItemIndex of the arguments were passed into the subprocedure.This allows the DataList to display the row we selected in our Edit template.The Edit template consists of a table with textboxes and three buttons.These buttons enable us to delete, update, and cancel.
www.syngress.com
Introduction to ADO.NET: A Simple Address Book • Chapter 7 |
315 |
Figure 7.7 Standard View of Our Address Application
Figure 7.8 shows the resulting Edit template.The DataList enables us to specify several templates.Table 7.3 is a listing of the templates and a basic description.
Figure 7.8 Editing a Record in Our Address Book
www.syngress.com

316 Chapter 7 • Introduction to ADO.NET: A Simple Address Book
Table 7.3 Templates Supported by the DataList
Template Name |
Description |
|
|
HeaderTemplate |
Optional template provides for specifying the |
|
layout and content of the header. If this template is |
|
not defined, a header will not be displayed. |
ItemTemplate |
This template is the default layout for each row in |
|
the DataList. This template will be repeated for |
|
each row in the Data that is bound to the DataList. |
|
This template is required. |
AlternatingItemTemplate |
This template is substituted on a configurable basis |
|
for the ItemTemplate. It will default to replacing |
|
every other ItemTemplate, but could be configured |
|
to replace every 2, 3, 4, etc. |
SelectedItemTemplate |
Optional template for displaying the selected row |
|
in the DataList. |
EditItemTemplate |
Optional template that will specify the format and |
|
layout of the row to be edited in the DataList. |
SeparatorTemplate |
Optional template to separate each row. If this |
|
template is not specified, no separator will be |
|
displayed. |
FooterTemplate |
Optional template will provide layout for the footer |
|
of the DataList. If a footer template is not specified, |
|
then a footer will not be rendered. |
To add records, insert a blank record with some default data and then bind the DataList to the new record in edit mode.The stored procedure to add the record returns the Identity of the new record.You use this new identity to call the getByID function of the DAL, and bind the resulting DataReader to your DataList. You then set the EditItemIndex to the first record in the DataReader and let the Edit Template fill up with your new record. Figure 7.9 shows the DataList with your new record in edit mode. After you finish adding your data, click the Update button and the data is posted back to the database.The Page_OnLoad event populates the DataList, and you see your new record.
To get started with the sample application, you can find the sample database on the CD that accompanies this book. Follow the directions for your database as outlined in the following steps.
www.syngress.com
Introduction to ADO.NET: A Simple Address Book • Chapter 7 |
317 |
Figure 7.9 Adding a Record to the Address Book
To set up the Database in SQL 2000:
1.You must have SQL Server 2000 installed.You must have 4 MB of space.
2.Copy the following files from this book’s CD to your local hard drive.
■db\Chapter_7.mdf
■db\Chapter_7.ldf
3.Open the SQL Server Enterprise Manager and right-click on the
Databases node. Select All Tasks\Attach Database, and select the
Chapter_7.mdf from the files you copied to your hard drive.
To set up the database in SQL 7.0:
1.You must have SQL Server 7.0 installed.You must have 4MB of space.
2.Open the Query Analyzer. Choose File\Open, and navigate to the
Chapter7\DB Setup directory. Select the genDataBase.sql file and click OK.
3.Edit the script by replacing the file path <your path here> with the location you would like your database files.
4.Execute the script by pressing the F5 button.The script should have run without errors.
www.syngress.com

318 Chapter 7 • Introduction to ADO.NET: A Simple Address Book
To set up the database in Access:
1.Copy the Chapter7.mdb file from the db directory on the CD-ROM that accompanies this book to your application directory.
The first step to create the Web application is to open Visual Studio .NET and create a new application.We will call it Chapter7_cs (if you are using VB, then name the application Chapter7_vb).Then we will copy the front-end code into the project. Finally we will step through adding the DAL into our project and tying it to the front end.
1. Copy the following files from the CD into the root of your application:
■cs\Address.aspx (or vb\Address.aspx for VB)
■ |
cs\Address.aspx.cs (or vb\Address.aspx.vb for VB) |
■ |
cs\Address.css (or vb\Address.css for VB) |
2.Right-click on the Project name in the Solution Explorer, and select Add\Class from the pop-up menu.
3.Name the class CDalAddress.cs(.vb for VB.NET) and click Open. Visual Studio will create the file and open it in the visual designer window.
4.Right-click on our new file in the solution explorer and select View Code.
After you have performed the steps above, the code similar to Figure 7.10 (A and B) should have been generated for you.
Figure 7.10 (A and B) Empty Class Created Using the Visual Studio Class Wizard
Figure 7.10A Empty Class in C#.NET
using System;
namespace Chapter7_cs
{
///<summary>
///Summary description for CDalAddress.
///</summary>
public class CDalAddress
{
Continued
www.syngress.com

Introduction to ADO.NET: A Simple Address Book • Chapter 7 |
319 |
Figure 7.10A Continued
public CDalAddress()
{
//
// TODO: Add constructor logic here
//
}
}
}
Figure 7.10B Empty Class in VB.NET
Public Class CDalAddress
End Class
This will be our workspace.The presentation has already been taken care of so we will only be concerning ourselves with the data access code in our
CDalAddress class.
Connecting to a Database: Exercise
Making a database connection in ADO.NET is really very simple.The most difficult part of creating the connection is the Connection string.This is a semi-colon delimited string of name—value pairs that we discussed earlier in the chapter. If you have worked with ODBC, or even OLE-DB, then they are basically the same with a twist for the SqlConnection object.
It has become common to create what is referred to as the DAL, or Data Access Layer.This implies a multi-tiered approach to application architecture, and ADO.NET lends itself quite well for this purpose. Seeing as how the System.Data namespace doesn’t really care about the data source or connection, the data container objects such as the DataSet and the DataList can be populated from any provider that can understand how to connect between them and the data source. So, if our Web form has a page-level DataList, it can be populated from an OleDbDataReader object, or the SqlDataReader object.We can decide on the data source at runtime if we have to, with very little effort. But for now let’s focus on the connection part of the DAL in our example.
www.syngress.com