

Visual Web Developer™ 2005 Express Edition For Dummies - Alan Simpson
.pdf140 Part II: Building Your Web Site
|
So at this point, the Anonymous Template for the LoginView control |
|
contains a Login link. If you click the Common Tasks button for the |
|
LoginView control, you should see AnonymousTemplate in the |
|
Common Tasks menu, and the Login link inside the LoginView1 control |
|
as shown in Figure 7-13. |
|
|
|
|
Figure 7-13: |
|
Login |
|
View |
|
control’s |
|
Anonymous |
|
control |
Drag |
contains a |
|
Login |
|
Status |
|
control. |
|
|
|
|
|
5.To choose what authenticated users will see in the control, click the Common Tasks button for the LoginView1 control and choose LoggedInTemplate.
The Login link disappears because it’s on the Anonymous Template, not the LoggedIn Template.
6.In the LoginView1 control, type the word Hello followed by a blank space.
7.Drag a LoginName control from the Toolbox into the LoginView1 control, just to the right of the word Hello.
8.Drag a LoginStatus control from the Toolbox into the LogingView1 control.
At this point, the LoggedInTemplate should look like Figure 7-14. When you view the Common Tasks menu for the LoginView1 control, it should show LoggedInTemplate, as shown in the figure.
The LoginStatus control always shows the word Login in Design view. Don’t worry about that. Later, when you actually use the page in a Web browser, it will show Logout to authenticated users.
You can’t open a Master Page on its own in a Web browser, so you can’t choose View in Browser to test the page immediately. But that is not a problem. You’ll be able to put things to the test a little later in this chapter. For now, just close and save the Master Page.

Chapter 7: Working with ASP.NET Controls 141
Multiple views for multiple roles
The LoginView control isn’t limited to showing two different views. If your site contains numerous roles, you can use the Edit Role Groups option on the Common Tasks menu to define multiple views for multiple roles. In the RoleGroup Collection Editor, use the Add button to add a RoleGroup placeholder to the left column. Then, to the right of the Roles column in the right column type a valid role name from
your site, and then click OK. You can repeat the process to add multiple role groups.
After you’ve created a RoleGroup, you can design what it shows to its members by clicking the Views option on the Common Tasks menu and choosing the new RoleGroup name. In other words, whatever you put in the Login View control at this point is visible only to people in the specified role.
Figure 7-14:
LoggedIn
Template
contains
text and
Login
Name and
Drag
Login
Status controls.
Letting Users Manage Passwords
People forget their passwords all the time. And the last thing you need is to be spending all your time reminding people of their forgotten passwords. So your site needs a means of allowing users to retrieve their own passwords.
Likewise, users have to be able to change their own passwords, so your site will need that capability too. In the Login category of the Toolbox, the
PasswordRecovery and ChangePassword controls are just the ticket.
Using the PasswordRecovery control
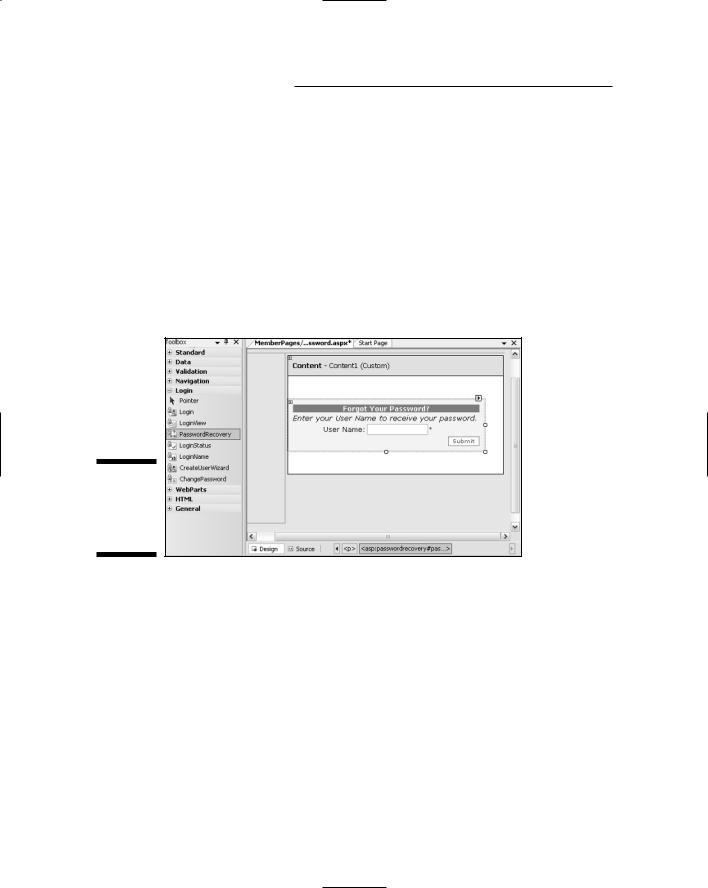
The PasswordRecovery control provides a way for a user to retrieve a forgotten password. (Actually, with the default hashed encryption used in Visual Web Developer, it sends them a new password that they can use to log on). In
142 Part II: Building Your Web Site
the browser, the control first asks the user to enter a user name and click Submit. If the user name exists in the database, the second page appears showing the user’s secret question. When the user enters the correct answer and clicks Submit, the control e-mails a password to the user’s e-mail address, and provides a “Your password has been sent to you” confirmation message.
To use the control, create a new page or open the page on which you want to place the control. For my example I created a new page named Recover Password.aspx that uses my Master Page. Just drag the control onto the page, like any other server control. You can choose a color scheme from the Auto Format option on the control’s Common Tasks menu. I applied the Classic scheme to the PasswordRecovery control shown in Figure 7-15.
Figure 7-15:
The
Password
Recovery
control.
The PasswordRecovery tool is unique in that there are a couple of extra steps involved in getting it to work. Furthermore, the page has to be configured to work on the Web server, not your local PC, so you may need to just leave that page as-is, and then remember to finish it later after you’ve copied the site to a Web server.
One thing you need to configure is the return e-mail address. This will likely be an e-mail address you create using your own domain name (after you have set up your own domain name). You enter that return mailing address into the Properties sheet by following these steps:
1.With the page open and visible in Design view, click the PasswordRecovery control to select it.
2.In the Properties sheet, expand the Behavior and MailDefinition categories.

Chapter 7: Working with ASP.NET Controls 143
3.Type your return e-mail address as the From property.
Figure 7-16 shows an example where I’ve entered the hypothetical address support@yourdomain.com.
Figure 7-16:
Set the
From property to an address for your own domain.
4. Optionally, you can also fill in the Subject line for the message.
In addition to defining a return address, your site must be configured to use the SMTP (Simple Mail Transfer Protocol) server provided by your hosting service. You won’t know what that is until you’ve set up an account with a hosting provider, so don’t knock yourself trying to get the PasswordRecovery control to work on your own PC. The PasswordRecovery control doesn’t even need to work on your PC: It only has to work on the Web server.
So the only smart thing to do is close and save the page that contains the PasswordRecovery control, and forget about it for now. If you try to test it in a Web browser, you’ll just get an error message when it tries to e-mail the password. When you’ve chosen a hosting provider, they will tell you how to configure your site to use their SMTP mail server. It may be something as simple as adding the following lines to your Web.config file:
<smtpMail
serverName=”localhost”>
</smtpMail>

144 Part II: Building Your Web Site
Testing RecoverPassword on your Local PC
I don’t mean to imply that it’s absolutely impossible to test the RecoverPassword.aspx page on your local PC. The fact is, if you know how to configure IIS, understand virtual directories, and have access to an e-mail server, you could get the control to work. However, doing so doesn’t really solve anything because getting
the control to work on your local PC is irrelevant. The control only needs to work on the Web server. Even if you did get the control to work on your local PC, you’d probably still have to reconfigure on the Web server to get it to work in your actual, live Web site.
But keep in mind that I said it may be something as simple as that. Only your hosting provider can tell you specifically what’s needed to get your Password Recovery control to work on their Web servers. Furthermore, and this is important enough to put in a warning:
If you add the <smtpMail> tag shown above to the Web.config file on your local PC, you might create a situation where your site doesn’t work at all. Wait until you’ve actually posted your site to a Web server to configure SMTP mail for your site.
Even though you can’t put the RecoverPassword.aspx page to the test yet, you still need to provide a link to the page so that once the page is published, people can get to the page. And ideal place for the link would be the Login. aspx page, where users will likely first discover they’ve forgotten their password. Figure 7-17 shows an example where I’ve added a link to the Login. aspx page that asks if the user has forgotten his password. The target of that link is the RecoverPassword.aspx page.
Figure 7-17:
“Forgot your password?” This link was added to Login. aspx.

Chapter 7: Working with ASP.NET Controls 145
The ChangePassword control
As its name implies, the ChangePassword control lets a logged-in user change her password. Unlike other pages you’ve created in this chapter, a “Change Password” page applies only to logged-in users. An anonymous user can create an account and password, using the CreateAcct.aspx page described earlier. An anonymous user can also recover a lost password, assuming he or she has set up an account in the past and has simply forgotten their password. That user would access the RecoverPassword.aspx page to get their password. But again, you won’t be able to really put RecoverPassword.aspx to the test until after the site is on a Web server.
Because only logged-in users can change their password, you can put the page that allows password changes into the protected MemberPages folders. The other pages described in this chapter, CreateAcct.aspx, Login.aspx, and RecoverPassword.aspx, need to be in the root folder, or some other folder to which anonymous users have access.
To put the ChangePassword.aspx page in the MemberPages folder, rightclick that folder name in Solution Explorer and choose Add New Item as shown in Figure 7-18. In the Add New Item dialog box that opens, be sure to choose Web Form. I named my page ChangePassword.aspx, but you can name yours as you see fit.
Figure 7-18:
About to add a new page to the Member Pages folder.
As with any page, you can add text, tables, pictures, or whatever to make it look however you like. The only control you must add to the page is a ChangePassword control. Just drag that control name from the Login category of the Toolbox onto the page, as shown in Figure 7-19.

146 Part II: Building Your Web Site
Figure 7-19:
Change
Password Drag control
added to a page.
In the figure, I applied the Classic scheme to the ChangePassword control, just to give it some color. But even that step is optional. The control doesn’t require any further configuration, so you can just close and save the page.
Testing Membership
At this point, you have built some more of your site’s membership infrastructure. When you test pages by viewing them in a Web browser, you will be experiencing the site exactly as strangers who are visiting the site will experience it. That can be very confusing if you forget about the access rules you defined back when you were first configuring membership.
For example, if you right-click the ChangePassword.aspx page and choose View in Browser, you might be shocked to discover that the ChangePassword.aspx page doesn’t open. Instead, the Login.aspx page opens! Most confusing indeed! But it’s not an error or a problem. It’s the way things are supposed to work. Here’s why.
Any page that’s stored in the MemberPages folder is off-limits to anonymous users (assuming you created an access rule to make it off-limits, as described in Chapter 3). When an anonymous user attempts to open a page in the Member Pages folder, she is automatically redirected to the Login.aspx page. If you’re not signed into an account when you try to open ChangePassword.aspx, the same rule applies to you. Opening ChangePassword.aspx automatically redirects you to Login.aspx.
If you sign into a user account on the Login.aspx page and click the Submit button, then you’ll be taken to the ChangePassword.aspx page. It’s important to understand how that works, otherwise you’ll drive yourself absolutely batty trying to open members-only pages from the standpoint of an anonymous user, because every page you try to open will take you to Login.aspx until you actually log into a user account.

Chapter 7: Working with ASP.NET Controls 147
The new LoginView control at the top of the Master Page is a big help in that regard. Because any time you open in a Web browser a page that uses that Master, you’ll see your current status right away. If you’re currently testing things out as an anonymous user, you’ll see a Login link in the Master, as shown at the top of Figure 7-20. When you’re testing things out as a logged-in user, you’ll see Hello, your current user name, and a Logout link, as shown at the bottom side of that same figure.
Figure 7-20:
Login
View control as seen by anonymous user (top) and authenti-
cated users (bottom).
Keep in mind, too, that any user accounts that you create through the CreateUserWizard control are actual user accounts that will be stored in the database. You can view all current user accounts at any time via the Web Site Administration tool. Here’s how:
1.From Visual Web Developer’s menu bar, choose Website ASP.NET
Configuration.
2.In the Web Site Administration tool, click the Security tab.
3.Click Manage Users.
4.To see what role any user is in, click the Edit Roles link in that user’s role.
For example, in Figure 7-21 I created a new user account for a hypothetical user named Testy. Clicking the Edit Roles link for that user shows that the user has indeed been added to the SiteMembers role, as per the code added to the page to ensure that each new user is assigned to the SiteMembers role.
Because there’s no way to recover a forgotten password on your local PC, if you forget the password for any sample user account you create, your best bet would be to just delete the account by clicking the Delete User link next to the account name. Then you can re-create the account with a password you’ll

148 Part II: Building Your Web Site
remember. You can create the account using either the Web Site Administration Tool, or your CreateAcct.aspx page. It doesn’t matter which you use because the result will be the same: The user is added to the database.
Figure 7-21:
Testy is
added to
the Site
Members
role.
Server Controls in Source View
When you drag a server control from the Toolbox to the page, you add a pair of <asp:>...</asp:> tags that define that control to the Source of your page. You can see for yourself by clicking the Source button after adding a server control to a page. For example, the tags representing a Login control would look something like this:
<asp:Login ID=”Login1” runat=”server”>
</asp:Login>
Most of the server controls you create should follow the same general syntax, as summarized here:
<asp:controlType ID=”yourName” runat=”server”>
</asp:controlType>
where
controlType is the type of control, and matches the name shown in the Toolbox.
yourName is the name that uniquely identifies the control. VWD creates a default name, such as Login1. You can replace the default name with a name of your own choosing.
runat=”server” identifies the item as a server control, to be executed on the Web server rather than on the client computer.

Chapter 7: Working with ASP.NET Controls 149
The tags for a control really don’t look like much, especially if you just keep the default settings for the control. In fact, from looking at the tags in Source view, you’d wonder how they accomplish anything at all — there’s really not much to them.
But, as is often the case, first appearances don’t tell all. There are actually lots of attributes and settings hidden inside the <asp>...</asp> tags. These attributes are just intentionally hidden so as to avoid cluttering up the Source view of the page.
If you switch back to the Design view, and use the control’s Common Tasks menu to convert the control to a template, the <asp>...</asp> tags in Source view will change, often dramatically. Even if converting a control to a template has absolutely no visible effect on the control in Design view, chances are the switch has had a big effect on the content of the <asp>...</asp> tags.
For example, when you convert a Login control to a template, and switch to Source view, the number of tags between the Login control’s opening and closing asp tags increases — dramatically. In fact, I can’t show all the tags here — they’d take several pages to display.
Included in the expanded template view of the server control are the actual HTML tags used to render the control in the user’s Web browser. You can edit any attribute in any tag you like (you can even design your controls that way).
In Design view, choosing Reset from the Common Tasks menu collapses the control back to its smaller size in Source view. But remember, the Reset option also cancels out any customization you did while in the template view.
I imagine most people would find it tedious to design things by tinkering with individual attributes in a templated server control. But then again, it all depends on your background and experience. There’s no rule that says you must work in Source view. But you can if you want to — do what works.
Relaxing Password Constraints
By default, Visual Web Developer requires that passwords be at least seven characters long and contain at least one non-alphanumeric character. This provides for strong security — perhaps stronger than your site really needs. If you’re not storing personal or financial information about users, you may want to relax the rules a little so users can make up passwords that are easier for them to remember.