

Visual Web Developer™ 2005 Express Edition For Dummies - Alan Simpson
.pdf180 Part III: Personalization and Databases
where propertyName is one of the property names you created yourself. For example, Profile.FirstName refers to the first name of whatever user happens to be viewing the page at the moment.
To copy the contents of a text box into a profile property, make the profile property “equal to” the Textbox control’s contents. The C# syntax for that looks like this:
Profile.propertyName = txtBoxID.Text;
Here propertyName is one of your profile property names and txtBoxID is the ID of its corresponding text box. The semicolon (;) at the end of the line is a C# requirement. In Visual Basic, you just omit the semicolon.
If you forget the semicolon, the C# Editor shows a little red squiggle where the semicolon should be. Type in the semicolon and your code should work properly.
The following is a line of C# code that copies the contents of the txtFirstName control to the current user’s Profile.FirstName property:
Profile.FirstName = txtFirstName.Text;
To copy the contents of every text box to the user’s Profile properties, you need several lines of code, like this:
Profile.FirstName = txtFirstName.Text;
Profile.LastName = txtLastName.Text;
Profile.Address1 = txtAddress1.Text;
Profile.Address2 = txtAddress2.Text;
Profile.City = txtCity.Text;
Profile.StateProvince = txtStateProvince.Text;
Profile.ZIPPostalCode = txtZipPostalCode.Text;
Profile.Country = txtCountry.Text;
Tying code to an event
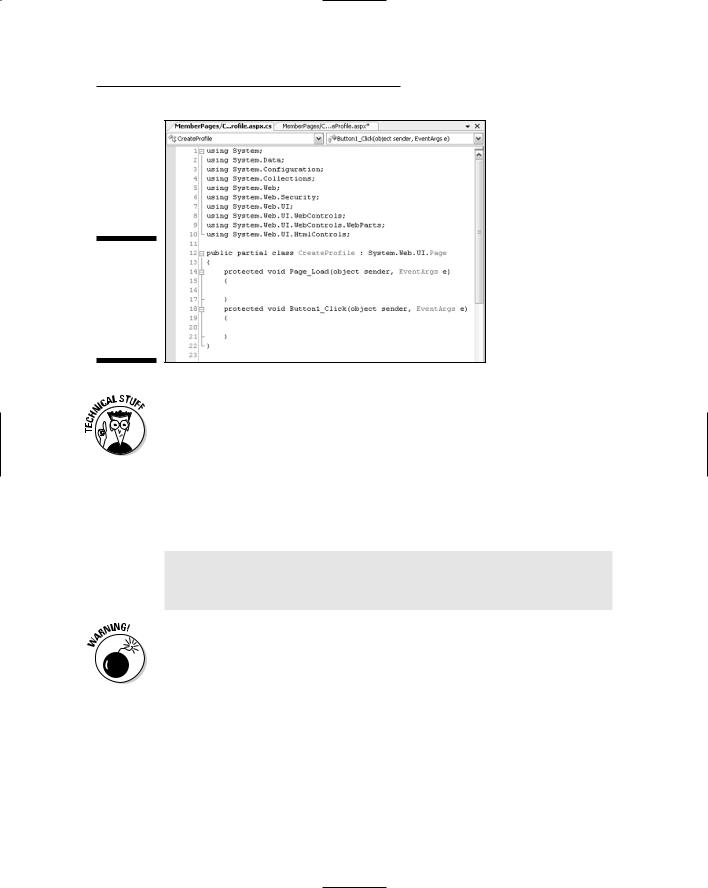
To ensure that the code is executed only when the user clicks the Submit button, tie the code to the Click event for Button1. The easy way to tie code to a button is to simply double-click the button in Design view. The codebehind page (where all code is kept) for the page opens, looking something like Figure 9-8.
The code-behind page is the place where you put the logic of a page — the code that tells computers what to do, rather than stuff the user actually sees on the screen. After it’s opened, the code-behind page appears in its own tabbed document window. You can switch back and forth between the .aspx page and the code-behind page by clicking their tabs.
Chapter 9: Using Personalization 181
Figure 9-8:
Codebehind page for my
Create
Profile
example.
When using C# as your programming language, the code-behind page has the same name as the .aspx page followed by a .cs extension. For example, the code-behind page for CreateProfile.aspx is named
CreateProfile.aspx.cs.
At the top of the code-behind page is a bunch of using directives followed by more C# code. Basically, you don’t want to change or remove anything that’s in the page unless you really know what you’re doing. Just now, all you want to do is add some code to the Button1_Click event handler — which appears near the bottom of the page and looks like this:
protected void Button1_Click(object sender, EventArgs e)
{
}
Do not confuse the Button1_Click procedure with the Page_Load procedure that precedes it. You’ll use the Page_Load procedure later. Make sure you get the cursor between the correct procedure’s opening and closing curly braces before you start typing.
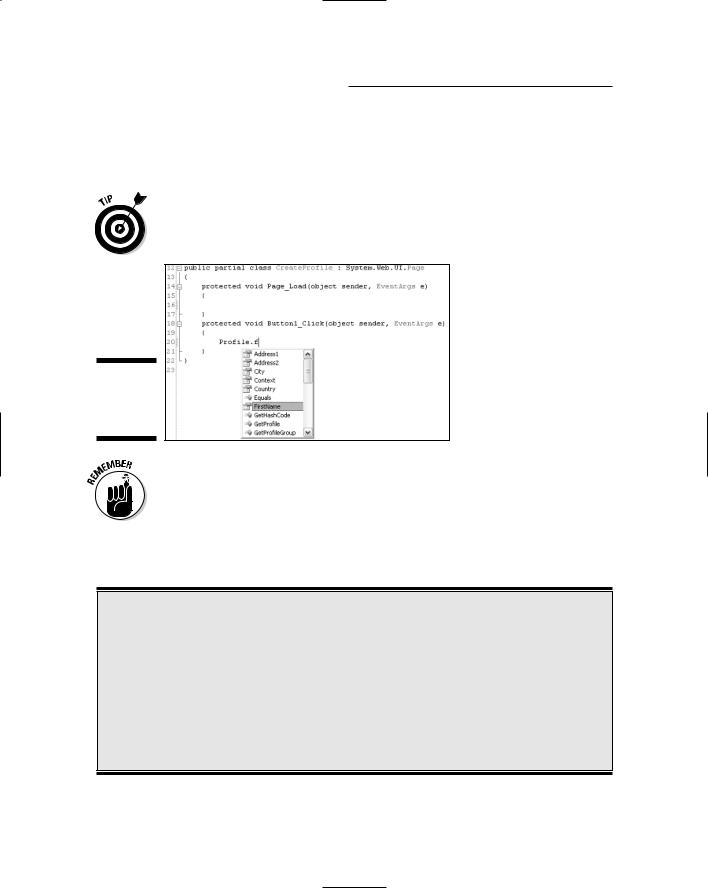
Type the properties code you created in the previous section here. When typing code, there is no margin for typographical errors. So you want to use IntelliSense as much as possible to minimize those errors. For example, when typing the first line, you can type Prof and then press Enter to choose Profile from the IntelliSense menu.
182 Part III: Personalization and Databases
Next, type the dot (period), and the IntelliSense menu shows valid words/ names you can type there, as in Figure 9-9. Again, to get the word you want, you can just keep typing, press Enter when the highlighter is on the word you want in the IntelliSense menu, or double-click the word you want in the IntelliSense menu.
Yellow highlights near line numbers indicate lines that have been added or changed but not yet saved.
Figure 9-9:
Sample
IntelliSense
menu.
When typing C# code, remember to type a semicolon (;) at the end of each statement. If you forget the semicolon, the editor gives you a little red squiggly line showing where to put it.
When you’ve finished typing all the code, your code-behind page should look something like Figure 9-10.
The wrong page opened!
Normally you can view any page in your site by right-clicking its name in Solution Explorer and choosing View in Browser. However, when you start using privileged content in your site, it doesn’t always work that way. By default, when an anonymous user attempts to access a page that requires authentication, they’re automatically redirected to the login page.
When you right-click a protected page in Solution Explorer and choose View in Browser, the same thing happens if you’re not logged in — you’re instantly redirected to your own login page, making it look as though the wrong page has opened! To get around this problem, you simply log in to a valid user account and then open the restricted page.

Chapter 9: Using Personalization 183
Figure 9-10:
Here’s the
Button1_
Click event handler, ready to go.
When you’re finished typing your code, just close and save the file as you would any other, by clicking the Close (X) button in its upper-right corner. The original .aspx page will still be open. The code you wrote doesn’t affect its appearance or behavior in Design view. The code won’t actually do anything until you open the page in a browser.
Determining where to put the profile information
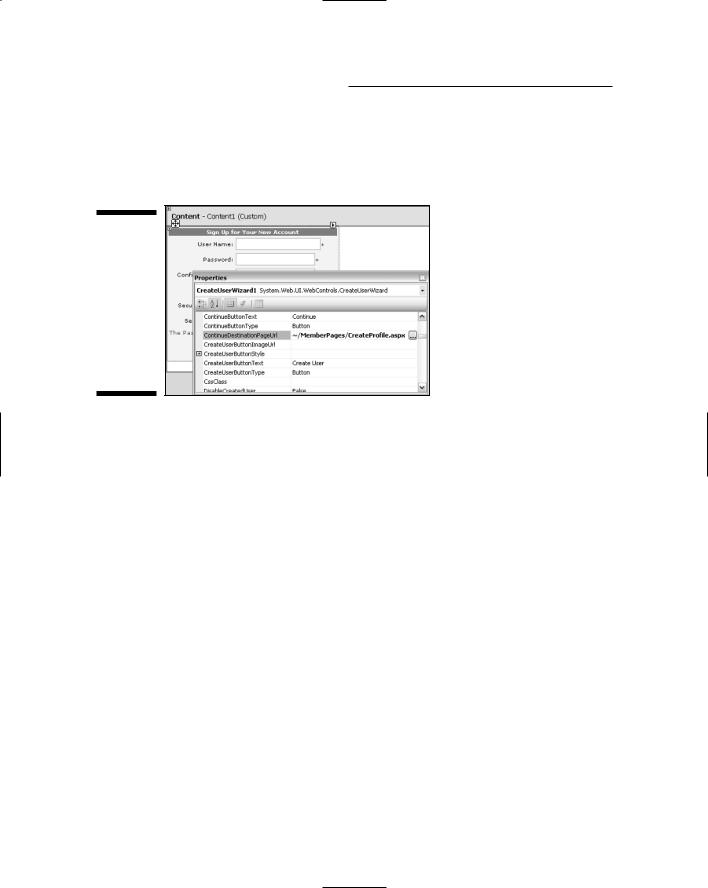
The next thing to consider is when users enter profile information. Of course, you can provide a link to the page from any place you want (though a good time to grab users is right after they finish successfully creating their individual user accounts). If you used a CreateUserWizard control to let users set up accounts, the job is easy. You just set the ContinueDestinationPageURL property of the CreateUserWizard control to the CreateProfile.aspx page.
For example, back in Chapter 7 I created a page in my sample site named CreateAcct.aspx. I would just open that page in Design view, click the control
184 Part III: Personalization and Databases
to select it, and then scroll through the (lengthy) set of properties until I got to ContinueDestinationPageURL. There I’d click the property, click the Build button, navigate to my CreateProfile.aspx page, and click OK. The property then shows the path to that page, as shown in Figure 9-11.
Figure 9-11:
The
Continue
Destina
tionPage URL property of a
Create
User
Wizard
control.
Close and save the CreateAcct.aspx page — and that takes care of allowing users to create accounts and enter profile information.
Though I didn’t specifically mention it, I was thinking about Web site security the whole way through the above scenario. I don’t want anonymous users to have any access to profiles, so I put the CreateProfile.aspx page in my MemberPages folder. That way an anonymous user can’t get to that page. The only way to get to that page is by first successfully creating a valid user account.
The word “successfully” is key there. I wouldn’t want people to sneak around setting up accounts. But that’s not going to happen; only users who successfully create an account can reach the ContinueDestinationPageURL. That restriction is built right into the logic of the CreateUserWizard (so I don’t have to worry about it).
If you’re going to allow users to enter profile information, you’ll also have to let them change their own information. I haven’t done anything about that yet. But I can do so pretty quickly.
Letting users edit their profiles
So far I’ve only created a form that can store information in a user’s profile. We haven’t come up with a means to retrieve a user’s profile properties. If we want users to edit their own profiles, we need a page that can retrieve the profile information, show it on a form for the user to view (or edit), and if need be, send any changes back to the database.

Chapter 9: Using Personalization 185
Getting data from the profile to the text box is just the opposite of getting data from the text box to the profile. That is, rather than making the profile property equal to the text box’s text, you make the text box text equal to the profile property. For example, to copy the user’s FirstName profile property to a control named txtFirstName, the C# statement is:
txtFirstName.Text = Profile.FirstName;
You could whip this profile-retrieval page together quickly just by making a copy of CreateProfile.aspx and renaming it to EditProfile.aspx. To do this, open the EditProfile.aspx page, then double-click some empty space on the page background (or the content placeholder). Or you can just double-click EditProfile.aspx.cs in Solution Explorer. Either way, the code-behind page opens.
You want the profile properties to be loaded into the page as soon as the page opens so the user sees their information and can make changes. To execute code as soon as a page opens, put that code in the page’s Page_Load event handler.
There’s just one catch. With ASP.NET programming, every time a user does something on your page, a postback gets sent to the Web server. The postback causes the Page_Load event handler to execute again — which is fine in some cases — sometimes (as in this situation) the Page_Load code should execute only when the user first opens the page — not every time they click a button on the page.
To prevent code from being executed on postbacks, you can add some “If not postback, then . . .” C# logic to your Page_Load procedure, as follows:
protected void Page_Load(object sender, EventArgs e)
{
if (!Page.IsPostBack)
{
}
}
In C#, an exclamation point (!) means not — so if (!Page.IsPostBack){} is the C# way of saying, “If the page has already been loaded into the user’s browser, don’t execute the code in my curly braces.” The code you add to copy profile properties to text boxes must go in the if (!Page.IsPost Back){} block’s curly braces, as shown below:
protected void Page_Load(object sender, EventArgs e)
{
if (!Page.IsPostBack)
{
txtFirstName.Text = Profile.FirstName;
186 Part III: Personalization and Databases
txtLastName.Text = Profile.LastName; txtAddress1.Text = Profile.Address1; txtAddress2.Text = Profile.Address2; txtCity.Text = Profile.City; txtStateProvince.Text = Profile.StateProvince; txtZIPPostalCode.Text = Profile.ZIPPostalCode; txtCountry.Text = Profile.Country;
}
}
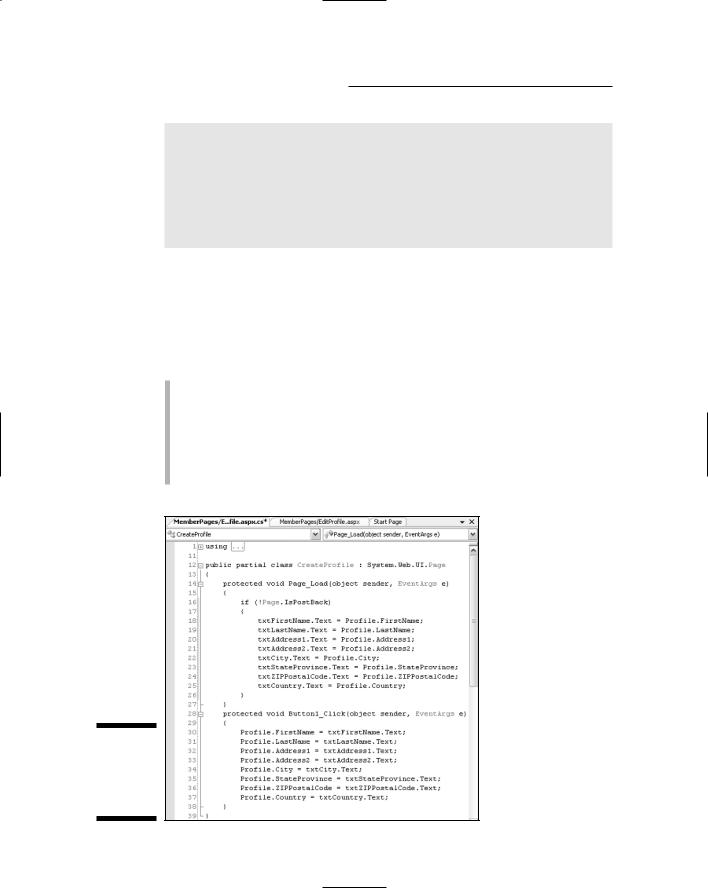
Figure 9-12 shows how the EditProfile.aspx.cs page looks with all the right code in place. (Please note that I clicked the – sign next to the first using statement to collapse and hide it. But I did not delete anything up there.)
Now the EditProfile.aspx.cs page has two C# procedures, each of which plays a different role in the page:
Page_Load: Copies the contents of the user’s profile from the Web server database to Textbox controls on the user’s Web page. This happens when the user first opens the page.
Button1_Click: Copies the contents of the Textbox controls on the Web page to the user’s profile on the database. This happens when the user clicks the Submit button. If the user never clicks the Submit button, nothing gets copied to the database.
Figure 9-12:
The
EditProf
ile.aspx
.cs page.
Chapter 9: Using Personalization 187
Where are profile properties stored?
The profile properties are stored in the same database as the rest of the membership stuff — the database you see when you click the Database Explorer tab instead of Solution Explorer. Specifically, the profile properties are
stored in the aspnet_Profile table. But the profiles aren’t stored in a traditional manner, so you don’t want to go rummaging around in that table unless you really know what you’re doing.
That takes care of allowing users to view and edit their own profile information. To put it all to the test, you can start by opening (in a Web browser) the page for creating a user account. Then actually create a new account, click Continue, and you should then be able to add some profile properties to the new account via your CreateProfile page. You should also be able to view and edit a user’s profile using your EditProfile page.
If you put your CreateProfile and EditProfile pages in a protected folder, don’t be surprised if your login page opens when you try to view either one in a Web browser. When you’re in a Web browser, you’re just another user. Like everyone else, you have to log in to a valid user account before you can access any page in your site’s protected folder(s).
Of course, if you made even the tiniest mistake when writing your code, or doing any other step in the overall process, you’ll get error messages rather than working Web pages. In that case, you’ll need to fix whatever is wrong before you can get the pages to work.
Using profile properties with Visual Basic
I used C# as the language in the above example. But in Visual Basic, the techniques and code are basically the same: Double-click the page background to get to the Page_Load event for the page and double-click a button to get to its event handler.
In Visual Basic, you’d use the If . . . End If block shown below in place of the C# if{} block. The rest of the lines are identical to the C# code, minus the semicolon at the end of each line (prompting some C programmers to refer to C# as “Visual Basic with semicolons”).
Partial Class ProfileVB
Inherits System.Web.UI.Page
Protected Sub Page_Load(ByVal sender As Object, _

188 Part III: Personalization and Databases
ByVal e As System.EventArgs) Handles Me.Load
If Not Page.IsPostBack Then
txtFirstName.Text = Profile.FirstName txtLastName.Text = Profile.LastName txtAddress1.Text = Profile.Address1 txtAddress2.Text = Profile.Address2 txtCity.Text = Profile.City txtStateProvince.Text = Profile.StateProvince txtZIPPostalCode.Text = Profile.ZIPPostalCode
End If
End Sub
Protected Sub Button1_Click(ByVal sender As Object, _
ByVal e As System.EventArgs) Handles Button1.Click
Profile.FirstName = txtFirstName.Text
Profile.LastName = txtLastName.Text
Profile.Address1 = txtAddress1.Text
Profile.Address2 = txtAddress2.Text
Profile.City = txtCity.Text
Profile.StateProvince = txtStateProvince.Text
Profile.ZIPPostalCode = txtZIPPostalCode.Text
Profile.Country = txtCountry.Text
End Sub
End Class
Using Validation Controls
The sample forms I presented earlier in this chapter have one weakness: They accept anything the user types into the boxes. In fact, they accept the form even if the user leaves every text box empty. That might be okay if you don’t want to force users to enter personal information. But if getting profile data from users is important, you may have to reject empty fields or fields that contain meaningless data.
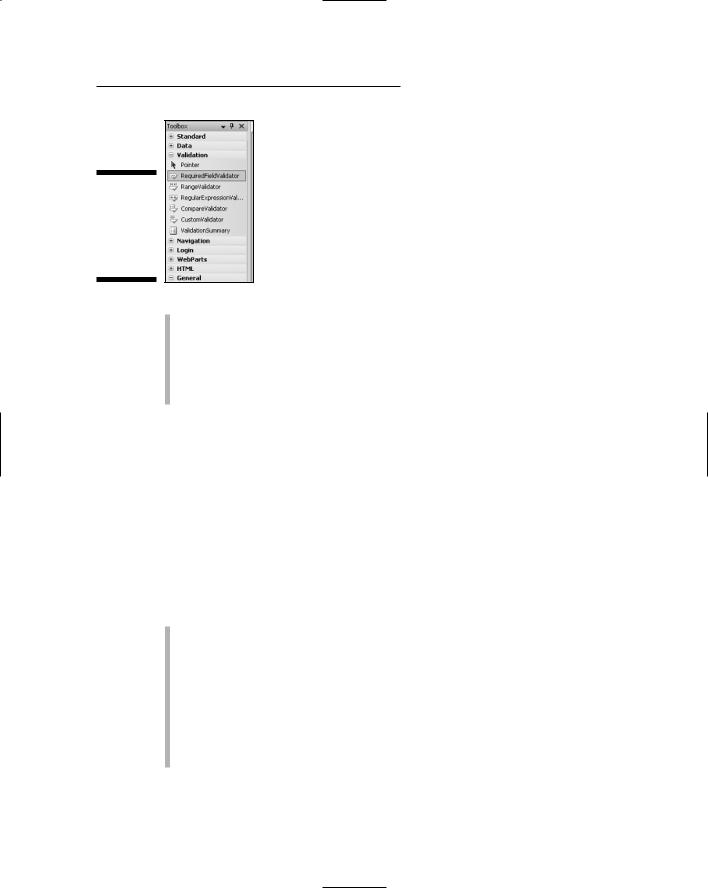
The ASP.NET validation controls, available in the Validation section of the Toolbox, make it easy to verify form data (see Figure 9-13). To use a validation control, you first need a place to put it on your form. You’ll want to put it near the control you’re validating, because the control will display an error message if the user’s entry isn’t valid.
Most validation controls have certain properties that must be set in order for the validation to work. The main properties are these:
ControlToValidate: Specify the name (ID) of the Textbox control that should be validated.
Display: Choose Dynamic so the error message takes up no space on the screen unless a user’s entry fails the validity test.
Chapter 9: Using Personalization 189
Figure 9-13:
Validation
controls
hanging
around in
the Toolbox.
ErrorMessage: Any text you type here is used in a ValidationSummary control (if any) on the current page. This is not the error message that appears near the control.
Text: Whatever you type here appears next to the control, but only if a user’s entry fails to pass validation. It can be a simple asterisk (*) or a more descriptive message such as Required Field!.
The different kinds of validation controls available to you are described, one by one, in the following sections.
RequiredFieldValidator
The most commonly used validation control is the RequiredFieldValidator, which prevents users from leaving a text box empty. It’s super-easy to use: You just drag the control to your page, and then set its ControlToValidate property to the programmatic name (ID) of the control that you don’t want left blank. Figure 9-14 shows an example; here’s how I set it up:
I added a third column to a table, and then dragged a RequiredField Validator control to the cell to the right of my txtFirstName Textbox control.
I set the ControlToValidate property to txtFirstName to ensure that the text box would not be left blank. I set the Display property to
Dynamic, and the ErrorMessage to First name required.
I set the Text property to an asterisk (*) — which reduced the size of the control to an asterisk. You can see the control selected, in the upperright table cell, in Figure 9-14.