


Installing ArcIMS
1.If you are upgrading from a previous version of ArcIMS, review upgrading instructions for your version in the ArcIMS Installation Guide. Steps 6 and 7 tell how to open this guide. Otherwise, continue to step 3.
2.Collect the following information for the environment in which you intend to install ArcIMS. For this step, do not concern yourself with the environments your users will use to view your Web site. If you are installing ArcIMS on more than one machine (if you’re not using the Typical installation option), you must collect this information for each machine and apply the steps in this procedure to each machine.
Operating system (OS): ______ (for example, Windows 2000, SP 4)
Web server1: ______________________________________
Servlet engine2: ____________________________________
RAM: ___________________________________________
Available disk space: ________
ArcIMS registration number(s): _______________________
(Your ArcIMS packaging includes a registration card with one or more registration numbers.)
3.Go to http://support.esri.com, click Knowledge Base, then click System Requirements. Next, select the environment options that match your environment, then click Go. In the resulting page, review all the information to ensure that your machine meets the system requirements for all of the ArcIMS components that you are installing and that you’re familiar
with any limitations or any procedures you must perform that are specific to your environment.
If you are upgrading your ArcIMS version, skip to step 6.
If you are not setting up your production (live) site or if you are using the Typical installation option, proceed to step 4.
If you are setting up your production site or if you are not using the Typical installation option, there are design decisions to make, limitations to be aware of, and load balancing information to consider before proceeding to step 4. For more information on these issues, see the ArcIMS Installation Guide. Steps 6 and 7 tell how to open this guide. Additional information can be found in the Knowledge Base, at http://support.esri.com, and in the ArcIMS Help, available after you install ArcIMS.
4.If you haven’t already, install a Web server supported by ArcIMS and, if needed, a servlet engine. For more information on installing your Web server for use with ArcIMS, go to http://support.esri.com and open Knowledge Base article 25867, then click the link that corresponds to your environment.
5.Configure your Web server and servlet engine so that they work together. If you haven’t already, open Knowledge Base article 25867 per step 4 for configuration instructions.
A Knowledge Base topic with instructions specific to your environment appears. Follow the instructions step-by-step until you get to the step that tells you to install ArcIMS.
1ArcIMS, like all software used to deploy Web applications, requires a Web server. If you do not have one, you can download one of the free Web servers available on the Internet, such as Apache’s at http://www.apache.com. For a complete list of Web servers supported by ArcIMS, review system requirements as described in step 3.
2Servlet engines are required only for Web servers, such as Apache and IIS, that do not support servlets natively. An evaluation copy of New Atlanta’s ServletExec servlet engine is provided on the ArcIMS CD. Some servlet engines, such as Jakarta’s Tomcat (http://jakarta.apache.org/tomcat), are available for free on the Internet. You can review system requirements as described in step 3 to see if your Web server requires a servlet engine and, if so, which ones it supports.
INSTALLATION AND STARTUP |
23 |
Make sure you follow the instruction that tells you how to test that your Web server and servlet engine are communicating.
Print this Knowledge Base topic for reference, then close this article by closing your Web browser.
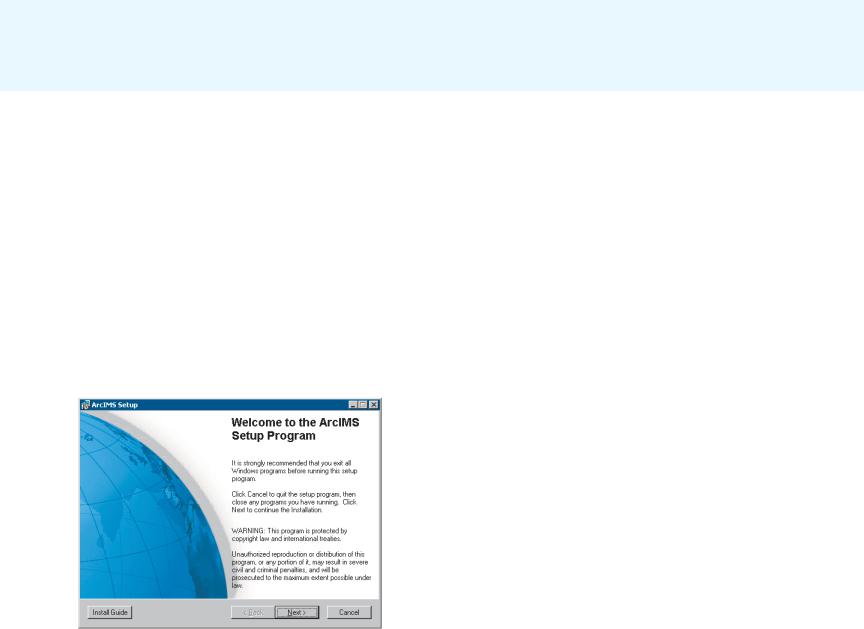
6.Insert the ArcIMS installation CD into your CD–ROM drive.
Microsoft Windows: Make sure you have administrator privileges for the machine on which you are installing. If your machine has CD autorun capabilities, it automatically launches the ArcIMS installation wizard. If it doesn’t, manually start the wizard:
From the Start menu, select Run. Type:
<drive>:/setup
where <drive> is the letter of your CD drive.
UNIX: For security reasons, do not install ArcIMS as a super user1. Run the SetupArcIMS script on the ArcIMS CD.
The first panel of the ArcIMS installation wizard appears.
7.In the panel, click Install Guide.
The ArcIMS Installation Guide opens. View all of the topic titles in the table of contents by opening the booklets in the left pane. Print all of the installation and configuration topics that pertain to your environment and desired configuration, then close the guide by closing your Web browser. You will not need postinstallation instructions or viewer installation instructions at this time.
8.Follow the instructions in the installation wizard panels. As you click Next through the panels, when you need more information for your specific configuration, consult the installation instructions you opened in step 7.
When you come to the Select Features panel, you can choose which ArcIMS components you wish to install and what your ArcIMS installation directory will be. You can remove and add components at any time after this installation without uninstalling ArcIMS.
9.In the last installation panel, which tells you that ArcIMS has successfully been installed, click OK to close the wizard.
The ArcIMS postinstallation wizard appears. You can choose to perform the postinstallation now or at a later time. In either case, before you perform the postinstallation, you must first register ArcIMS. You can register the product at a later time too.
10.If you haven’t already, go to http://service.esri.com and register your ArcIMS product. You must register it in order to activate a mechanism that authorizes your use of the product and allows you to use the product. You will be given additional instructions for completing the authorization process when you register your product.
1 Super user refers to a level of permissions associated with user login credentials. The super user level grants the highest degree of access available to user groups.
24 |
GETTING STARTED WITH ARCIMS |
11.Use the ArcIMS postinstallation wizard to configure ArcIMS for your environment, including configuring communication among the Web server, servlet engine, and ArcIMS. This wizard opens after you have successfully completed the installation wizard, but you can close it and perform the configuration at a later time. To access this postinstallation wizard later, in Windows, from the Start bar menu click Start | ArcGIS | ArcIMS | Post Installation. In UNIX/Linux, run the SetupArcIMS_PostInstall script located in <ArcIMS Installation Directory>/arcims/tools.
The postinstallation automates the configuration tasks for a few of the more common Web server–servlet engine combinations. If your combination is not one of these, refer to the Knowledge Base topic you opened in step 5 of this procedure and the ArcIMS Installation Guide and perform the steps for your combination. The instructions in this Knowledge Base topic walk you through a test to ensure your manual postinstallation configuration was successful.
12.After you’ve installed, configured, and tested your ArcIMS installation, remove the ArcIMS CD from your CD–ROM drive and replace it with the ESRI Software Documentation Library CD.
If you are using Windows, an installation wizard may appear. Close this wizard.
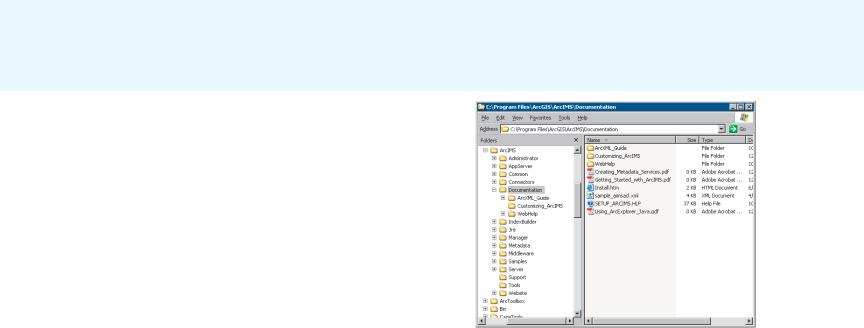
Copy the contents of the ArcIMS directory to your <ArcIMS installation directory>arcims/Documentation directory. Be careful not to change the directory structure of the files as you copy them. When you are finished, your <ArcIMS installation directory>/arcims/Documentation directory should have Getting_Started_with_ArcIMS.pdf at its top level and should resemble the following graphic.
This step ensures that cross-document links work so you can easily and quickly access all documentation.
Now you are ready to start up and use ArcIMS. Before you start ArcIMS, if you haven’t already, review Chapter 1, ‘About ArcIMS and this guide’ to become familiar with ArcIMS directory structure and file locations.
Installation tips
•If you want more than one Spatial Server in your site configuration and you want one to reside on a second CPU, you need an additional registration number. To install the second Spatial Server on the second CPU, run the installation wizard choosing only the Spatial Server component, then run the postinstallation wizard, supplying the second registration number as prompted. Then, in Administrator, add the Spatial Server to a Virtual Server.
•ArcIMS Manager and Java Viewers require a system registered Java 2 Platform Standard Edition Java (J2SE) JRE version 1.3.1 or higher with a few exceptions. At the time of
INSTALLATION AND STARTUP |
25 |

publication, ArcIMS does not support J2SE JRE versions 1.3.1_03, 1.3.1_04, 1.4.0_01, and 1.4.0_03. A J2SE JRE does not have to be installed on your machine prior to installing ArcIMS. The postinstallation wizard lets you install and configure a system registered J2SE JRE version 1.4.2. Or you can configure ArcIMS to use an existing Java Virtual Machine (the JRE includes the Java Virtual Machine) as long as the version of the Java Virtual Machine is supported by ArcIMS. A list of supported JRE versions is provided in the ArcIMS system requirements page at http://support.esri.com.
You can have more than one Java Virtual Machine per machine. You can download a Java Virtual Machine for free from the Sun Web site, http://java.sun.com. A Java Virtual Machine is included in both the JRE and the Java Developer Kit (JDK) available on the Sun Web site.
•You can view help for common Windows tasks when installing ArcIMS by viewing Knowledge Base article 23714.
•Record in a safe place any username and password you’re asked to specify during the postinstallation. Usernames and passwords cannot contain spaces or vertical bars. For tips on creating safe passwords and instructions on changing passwords used in ArcIMS, see ArcIMS Help.
•You can administer ArcSDE instances with ArcIMS Service Administrator by installing the ArcSDE Services Monitor on the ArcSDE Server machine. The ArcSDE Services Monitor is a component you can select in the ArcIMS installation wizard.
•If you want to have more than one ArcMap Server in your site configuration and you want one to reside on a second CPU, you need an additional registration number. To install it on the second CPU, run the installation wizard, choosing the ArcMap Server component, then run the postinstallation wizard, supplying the second registration number as prompted. Then, in Administrator, add the ArcMap Server to a Virtual Server. See the ArcIMS Installation Guide and ArcIMS Help for more information.
•If you wish to install ArcMap Server or the ActiveX Connector and they are not listed in the Select Features panel, verify you’ve met the system requirements for those features.
26 |
GETTING STARTED WITH ARCIMS |