

Office PowerPoint2003
.pdfCreating a Photo Album
This feature lets you create your own picture collection in a presentation. You can apply different templates, and add captions to your pictures. In addition, you can also modify picture properties such as contrast, brightness or rotation.
Step 1: Click File>New. To open the Photo Album dialog box, choose  from the New Presentation task pane
Step 2: To add/modify pictures use the dialog box as follows
Choose a layout for your pictures
Photo Album Dialog Box
Change picture  properties
Preview picture layout
Click on this icon to browse through the pictures in your local drives.
Click this icon to get the pictures from an external device such as a scanner or digital camera connected to the computer.
Click this option to locate a text slide after the selected one.
Step 3: After you have completed adding and modifying pictures, click the <Create> button to have PowerPoint built the photo album. This is pretty easy.
GETTING STARTED WITH POWERPOINT 2003
P O W E R P O I N T 11
Saving a Presentation
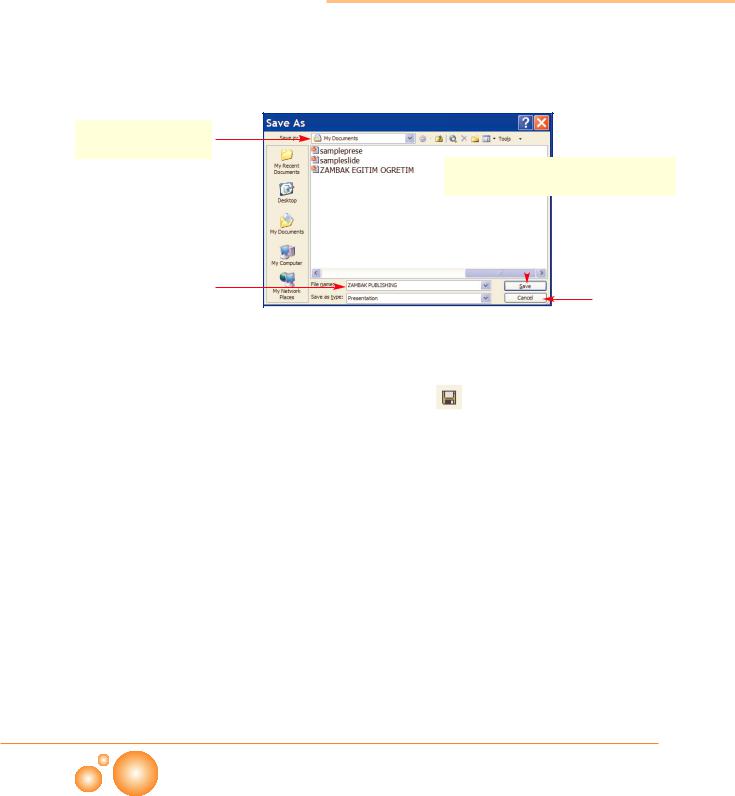
When you first save the presentation, save as dialog box appears and prompts you to enter a name for the presentation. Click the
 button.
Choose the location
to save the file
Click this button to close the dialog box after saving the file.
|
|
|
|
|
|
|
|
|
|||||
Enter a |
name for |
|
|
|
|
|
|
||||||
|
|
|
|
|
|
|
Click cancel to close |
||||||
your presentation |
|
|
|
|
|
|
the |
dialog |
box |
||||
|
|
|
|
|
|
|
Save As Dialog Box |
|
|
|
without saving. |
|
|
|
|
|
|
|
|
|
While saving subsequent times, you can use the <CTRL+S> |
||||||
|
|
|
|
|
|
|
keystroke, or the |
button on the standard toolbar. |
|
||||
|
|
|
|
|
|
|
while saving a document, PowerPoint uses ppt |
(abbreviation for |
|||||
|
|
|
|
|
|
|
PowerPoint Show) format by default. PowerPoint offers different |
||||||
|
|
|
|
|
|
|
variety of formats for different purposes. The other format is the |
||||||
|
|
|
|
|
|
|
mht format which offers to start the presentation in the web |
||||||
|
|
|
|
|
|
|
browsers. Click Save as Type and choose the appropriate format. |
||||||
|
|
|
|
|
|
|
|||||||
Format |
Starts in |
|
|
Explanation |
|
|
|||||||
|
|
|
|
|
|
||||||||
ppt |
PowerPoint |
|
Presentation file for reviewing purposes |
|
|
||||||||
|
|
|
|
||||||||||
pps |
Automatically runs |
in |
Runs the show automatically. It can be opened in PowerPoint too. |
||||||||||
|
|
|
full screen |
|
|
|
|
|
|
|
|
||
|
|
|
|
|
|||||||||
mht |
Web browsers |
|
Single file -it is used to deliver the presentation on the Internet. |
|
|||||||||
|
|
|
|
||||||||||
pot |
PowerPoint |
|
Presentation template - used to save the presentation design to use in |
||||||||||
|
|
|
|
|
|
|
the future presentations. |
|
|
|
|
|
|
|
|
|
|
|
|
|
|
|
|
|
|
|
|
|
|
|
|
|
|
|
|
|
|
|
|
CHAPTER 1 |
|
|
|
|
|
|
|
|
|
|
|
|
|
|
|
|
|
|
|
|
|
|
|
|
|
|
|
|
|
12 P O W E R P O I N T

Opening a Presentation
Both the File menu and the Getting Started task pane allow you to open presentations. They both display a list of recentlyaccessed Presentation files.
You can open any one of the PowerPoint presentations using File> Open or  button on the Standard toolbar. Using the Look in pull-down list, navigate and select the presentation.
Choose the location of your file.
Open Dialog Box
Closing a Presentation
Click on the cross icon located at the top-right corner of the window or,
presentation. (Several presentation files might be open. The rest of the files will remain open.)
Double-click the name to open the presentation immediately.
Preview of the selected  presentation helps you to select the right one
Customizing a Presentation
How to deliver your presentation
You have to decide how to use your presentation based on the equipment you have available while presenting.
GETTING STARTED WITH POWERPOINT 2003
P O W E R P O I N T 13
Print Handouts
If you need a feedback for your show, you can print handouts to give out the audience. It helps the audience to follow the presentation and remember the details after the presentation. Handouts are widely used with the presentations for marketing and educational purposes. It is also useful when you can not show your presentation due to the lack of equipment.
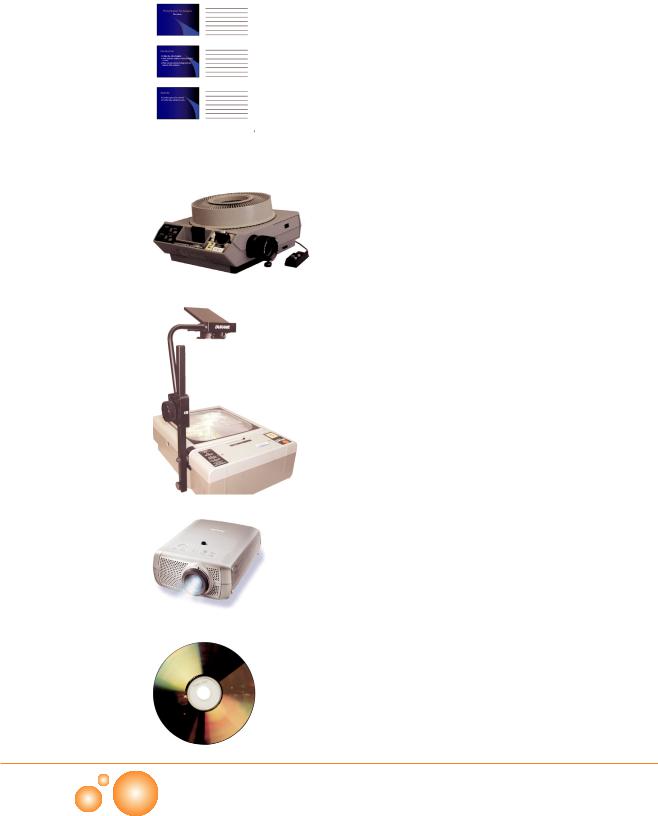
35mm Slide Show
It requires 35mm Slide Show Projector. Do not forget that you will lose all the animations and effects. You will be able to use only the static pages. This option is cheap and it offers bright and vivid colors. On the other hand, this show can be counted as out of date.
Overhead Transparencies
This method is quite well-known in education. You can print your slides on a special transparent paper (acetate) and you can use them with Overhead Projectors. It is good for large groups. But this feature also supports only static slides. It means that you will not be able to use your effects or animations.
Presentation from a Computer
This feature allows you to use all the abilities of PowerPoint program. A data projector will help you to reflect the show onto a screen. As they become cheaper, data projectors are more widely used nowadays.
Presentation from a CD
A new feature is added to PowerPoint 2003 to deliver your presentation. If you use Package for CD option, the presentation will be copied to a CD. You will need a CD burner to copy the files. When you insert the CD, the presentation will run automatically even though PowerPoint is not installed on the computer since the CD includes a PowerPoint viewer program.
CHAPTER 1
14 P O W E R P O I N T
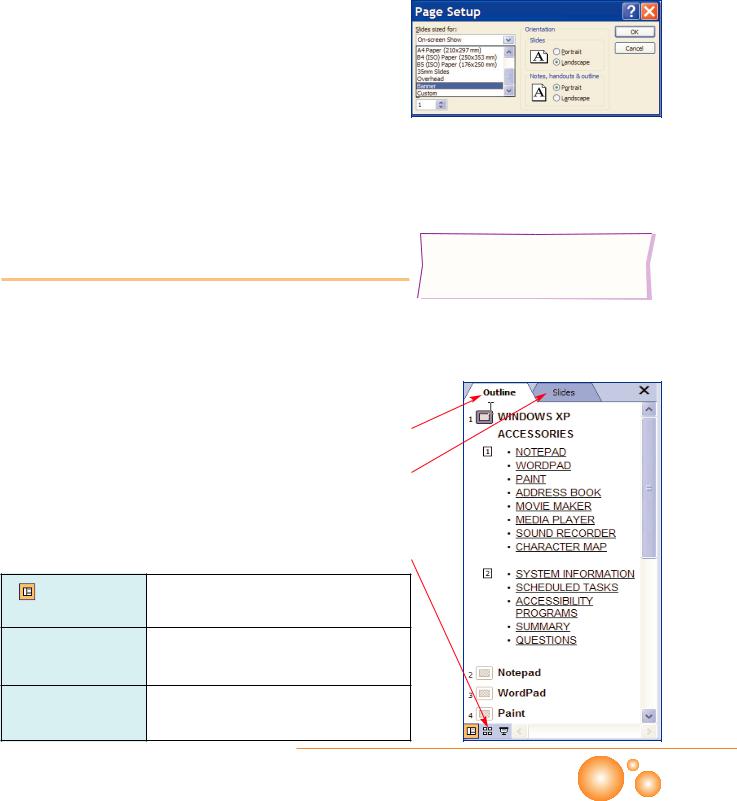
Page setup
Select the paper size in case you want to print the presentation. The default selection for this option is On-screen Show.
Step 1: Click File>Page Setup to get Page Setup dialog box.
Step 2: Choose the slide size suitable for your presentation. While 35mm slides use Landscape orientation, OHP prefers Portrait orientation in most cases.
Step 3: Click <OK> to accept changes and close the dialog box.
Viewing a Presentation
Page Setup Dialog Box
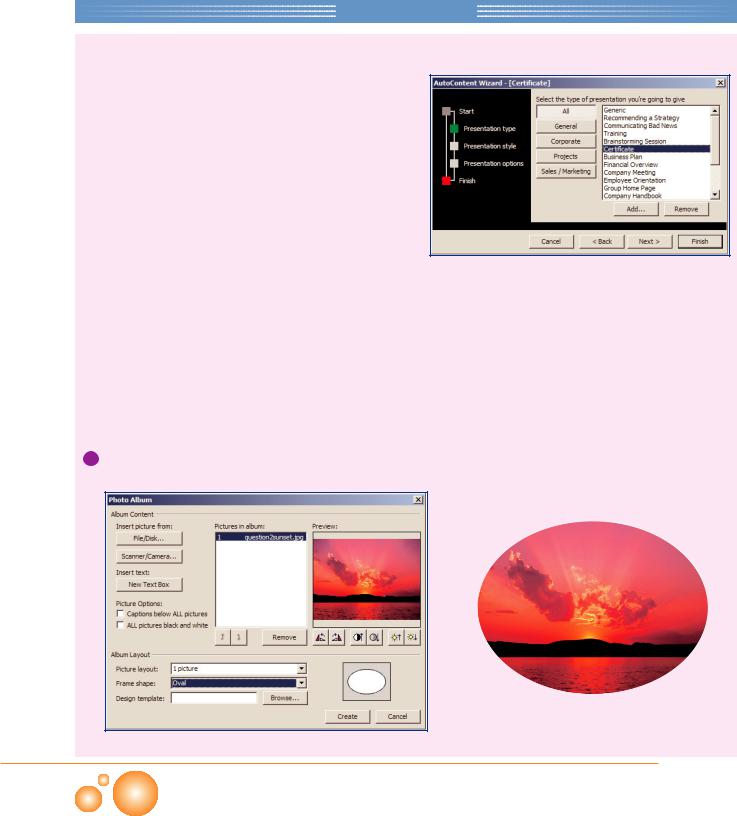
Thumbnail is a miniature representation of the slide.
Sometimes, viewing the whole content during the design might be helpful to decide how to continue or how to modify the information. PowerPoint offers different types of views to look your presentation from different aspects. View bar is located at the bottom-left of the window.
Outline |
Better to modify the information since it shows the |
|
text in slides as shown in the picture on the right. |
||
|
||
|
|
|
Slides |
Shows the slides as thumbnails on the left of the |
|
|
screen to make switching graphically easy. |
View Bar
|
Normal view |
Shows the outline of your presentation, |
current slide and notes for that slide.
 Slide Sorter view Shows all your slides as thumbnails.
 Slide Show view displays your presentation as a slide show.
GETTING STARTED WITH POWERPOINT 2003
P O W E R P O I N T 15
Projects
1. Designing a Certificate Using AutoConent Wizard
 Create a presentation using AutoContent Wizard
 Choose Certificate as your design template.
 Replace the [Company Name] with your school name
 Change 'Certificate of Excellence' to 'Certificate of Success'
2. Create your photo album
 Gather some of your pictures in a folder. Create a photo album using the wizard.
 Change the slide layout and write a descriptive text for each picture. Apply the changes to the album as in the figure.
CHAPTER 1
16 P O W E R P O I N T

Review
In this chapter you have learned the basic features of PowerPoint;
 What the PowerPoint is used for
 How to open a PowerPoint presentation
 Starting a new presentation
 creating a presentation by using AutoContent Wizard
 creating a photo album
 Saving, opening, and closing a presentation
GETTING STARTED WITH POWERPOINT 2003
P O W E R P O I N T 17

Questions
1.Technological improvements helped the computer users to use computers to create dynamic, colorful and visually effective presentations. (T)(F)
2.Presentations can not contain information, sound, picture, animation etc. (T)(F)
3.A presentation is the collection of slides which is shown on a screen or monitor. (T)(F)
4.PowerPoint has an easy-to-learn interface that enables you to create professional presentations with the help of templates and step by step guides. (T)(F)
5.When PowerPoint is open; you can start a new presentation by using <CTRL+M> keystroke
(T)(F)
6.When PowerPoint is open, you can start a new presentation by;
I. clicking the ( ) button on the standard toolbar
II. choosing the File>New command, then Blank Presentation from the task pane
III. using <CTRL+N> keystroke |
|
||
A) I-II |
B) I-III |
C) II-III |
D) I-II-III |
7.How can you deliver your presentation? I. Print Handouts
II. 35mm Slide Show
III. Overhead Transparencies
IV. Presentation from a computer V. Presentation from a CD
VI. All of the above
A) I-IV B) II-IV C) II-III-IV D) VI
8. In which view you can make changes on your
presentation? |
|
|
|
I. Normal view |
|
|
|
II. Slide Sorter view |
|
|
|
III. Slide Show view |
|
|
|
IV. None of the above |
|
|
|
A) I-II |
B) I-III |
C) II-III |
D) IV |
9.Where is the Notes pane located?
A)On the Formatting toolbar
B)On the Task pane
C)Inside the Tools menu
D)Under the Slide pane
10.Which ones are true?
I. The Slide Sorter displays all the slides in the presentation as large thumbnails
II. The Outline displays a title and text outline of each slide
III. The Action Buttons displays thumbnails
enabling text editing
IV. The Slide Show views the slides in full screen
A) I-IV |
B) II-IV |
C) II-III-IV D) I-II-IV |
11.Which ones are PowerPoint extensions? |
||
I. ppt |
|
|
II. pps |
|
|
III. mht |
|
|
IV. pot |
|
|
A) I-II |
B) I-II-III |
C) II-IV D) All of them |
CHAPTER 1
18 P O W E R P O I N T

Formatting Slide Design
Slide Design Pane
Edit Color Scheme
Adding a New Slide
You may apply a template to your slide. In the following example, the template which is named as teamwork is selected. You can select any template you like.
Step 1: Click Format> Slide Design
Step 2: Select the slide design from the task pane showing them as thumbnails.
If you don't like the default colors of your template, or you would like another color for background or hyperlink, you can customize the color of your design by clicking the the Color Schemes on the top of task pane.
Step 3: Select any scheme and click Edit Color Schemes located at the bottom of task pane. The dialog box shown below will open. You can customize your slide by choosing your favorite colors for different options.
Step 4: After modifying colors, click the  button to accept the changes and close the dialog box. If you want to view how the slide looks before applying the changes, click the
button.
Adding a Slide
To add a new slide;
Click Insert>New Slide or,
Use <CTRL+M> keystroke or,
Click the  button on the formatting toolbar
Slide panel on the view pane.
slide will be inserted following the one you are working on, and the slide layout will appear. Choose a proper layout according
slide content.
CHAPTER 2
20 P O W E R P O I N T