

Office PowerPoint2003
.pdfWorking with Text
Adding a Text
To insert a text;
You can use Text Box on the Insert menu or,
You can simply click the  button on drawing toolbar.
Formatting a Text
You can change the format of the text by using the formatting toolbar. It is the fastest way to format a text.
Font list arrow |
Font size list arrow |
Italics |
Shadow |
Center |
Numbering |
Increase Font Size |
Increase Indent |
Font Color |
New Slide |
Font list |
Font size list |
Bold |
Underline |
Align left |
Align right |
Bullets |
Decrease Font Size |
Decrease Indent |
Slide Design |
|
|
|
|
Formatting Toolbar |
|
|
|||
CREATING A SLIDE SHOW |
|
|
|
|
|
|
|
|
|
P O W E R P O I N T 21
Fill Color |
Line Color |
Font Color |
Line Style |
Dash Style |
Arrow Style |
Shadow Style |
3-D Style |
Figure a
Figure b
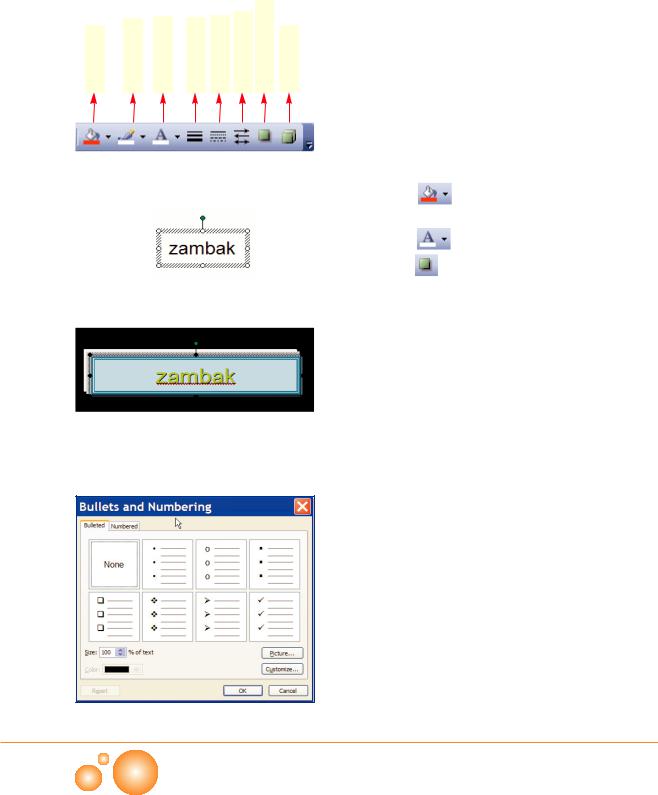
You can customize the text box borders, and fill color from the drawing toolbar. Use the following icons on the drawing toolbar, to transform the text from figure a to figure b,
Follow these steps to cary out the transformation.
Step 1: Click  to add a line if the figure does not have a border. If it has a line already, you can use the same icon to change its color.
Step 2: Click  to change the line style. In the example, three lines have been selected as the border style.
Step 3: Click |
to change the background color for the text |
box. |
|
Step 4: Click |
to change the font color. |
Step 5: Use ( |
) if you want to add a shadow effect to the text |
box. |
|
Creating a Bulleted List
When giving a speech, conveying his/her message to the audience is important for a speaker. With the help of bulleted text, you can categorize your speech to increase the understanding, or show the steps in your speech in brief explanations, or explain a continuous cycle in steps etc. You can simply create a bulleted list by activating Format>Slide Layout and selecting the appropriate placeholder for the bulleted list.
You can modify the bullet style for your pleasure. Use Format>Bullets and Numbering to change the bullet style.
Bullet Styles
CHAPTER 2
22 P O W E R P O I N T
There exist several styles on the menu. You can apply any one of them by double-clicking on it. If you want to use a style which is not included in the list, you can
click the  button to add a symbol.
Click  to use a picture from the clipart gallery.
By using the  button, you can add your own pictures as a bullet.
You can import your own pictures as bullet style.
Modifying a Text
To change the current text in the text box, select any part of or the |
|
whole text. You can select any part of the text by using |
|
<SHIFT>+<arrow> key combinations. After selection, you can |
<SHIFT>+ |
|
|
apply different formatting to the selected text, or remove or copy |
|
it etc. |
|
CREATING A SLIDE SHOW
P O W E R P O I N T 23

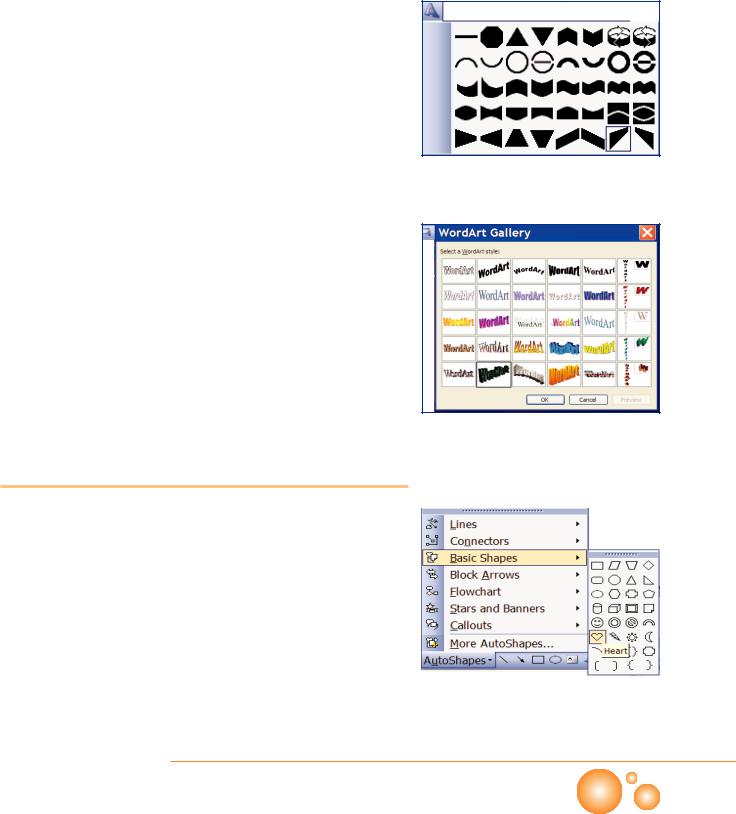
WordArt Gallery
Edit WordArt Text
A sample WordArt Object
WordArt
WordArt is used to create fancy texts. It is a good option to ornate a text, but you should be careful not to weaken the message you want to give to the audience.
Step 1: Click the  icon on the drawing toolbar.
Step 2: Select any one of the styles in WordArt Gallery and click
<OK> to continue to the next step.
Step 3: Start typing to replace the text “Your Text Here” with your own text.
Step 4: Click <OK> to accept the changes you made. Your text will be created with the style you selected. The WordArt toolbar will appear together with the WordArt object.
Modifying a WordArt Object
Insert WordArt |
Edit Text |
WordArt Gallery |
Format WordArt |
WordArt Shapes |
Same Letter Heights |
Vertical Text |
Alignment |
Character spacing |
WordArt Toolbar
CHAPTER 2
24 P O W E R P O I N T
Once a WordArt object is created, WordArt toolbar appears automatically. If it does not, you can select View>Toolbars>WordArt to activate the toolbar.
You can modify the text by double clicking on it, or hitting Edit Text... button on WordArt Toolbar.
You can modify the WordArt object style after creating the object.
step 1: Select the WordArt object.
step 2: Change the style by using two of the icons from the WordArt Toolbar as shown in figures.
WordArt Shapes
WordArt Gallery
Working with Images
Inserting a Shape
The Drawing toolbar offers options to draw different geometrical shapes. These shapes are often used to add esthetics and visuality to the presentations. You can draw a heart easily by using the drawing toolbar.
Step 1: Click on the drawing toolbar as shown in the figure.
Step 2: Move the cursor over the area where you want the heart to be located without releasing the left button.
Step 3: Let us spice up our heart a bit. Click triangle of the icon |
Auto Shapes on Drawing toolbar |
|
|||
on the drawing toolbar. |
|
|
|
|
|
CREATING A SLIDE SHOW |
|
|
|
|
|
P O W E R P O I N T |
25 |
|
|
|
|
|
|
|
|||
|
|
|
|||
|
|
|
|
|
|
|
|
|
|
|
|
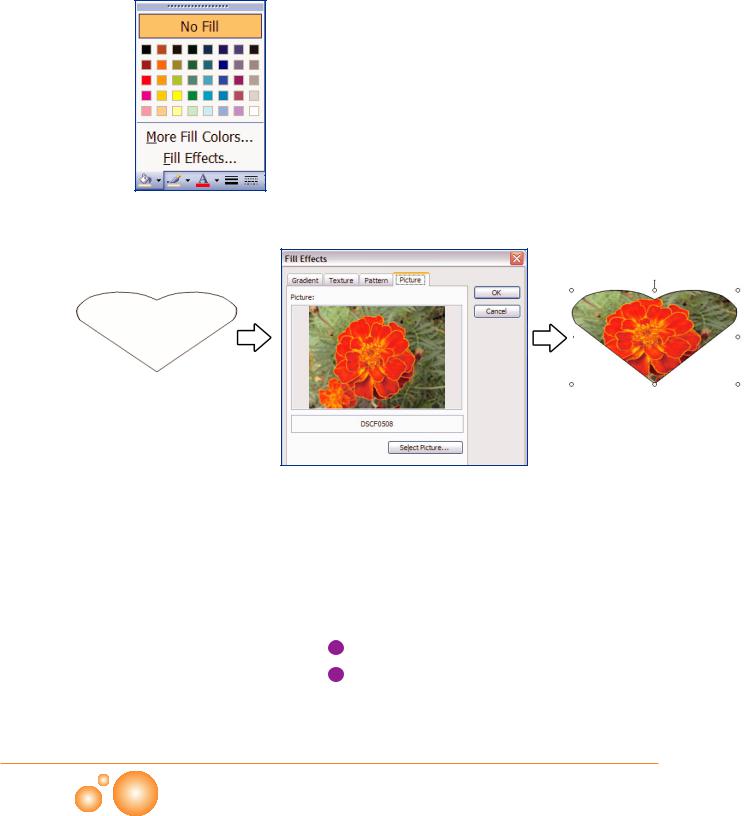
Step 4: Choose Fill Effects from the menu. In this option you will be able to fill in your shape with a picture or color.
Fill Color popup Window on the Drawing |
In this example, the heart shape is basically filled in with a picture. |
|
|
Toolbar |
|
Inserting Clipart
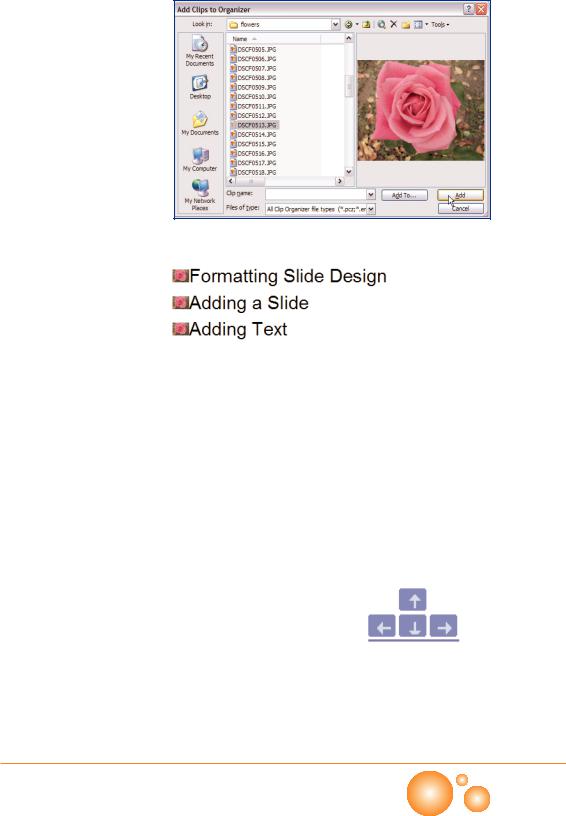
PowerPoint has pre-installed graphic images under categories which make slides more dynamic, creative and colorful. You can access them via Microsoft Clipart Gallery. Clipart Gallery is a handy tool that lets you categorize the clipart images in your computer. You can search images through your local disks or web and import them.
Click insert>picture>clipart.
on the right hand side of the screen. You can either type a text into Search for text box to find clipart object, or you can select the clipart object from
the Organize clips... option.
CHAPTER 2
26 P O W E R P O I N T
Inserting a Picture from a File
 Click insert>picture>From File... An Insert dialog box appears. Choose the picture you want to insert and click the insert button.
 Furthermore, you can copy a picture from another program and paste it to a PowerPoint slide instantly.
You can locate your clipart object on the slide by using Copy-Paste option.
Using Organizational Charts
Using an Organizational Chart is a good way of illustrating the hierarchical structure within a company or an organization.
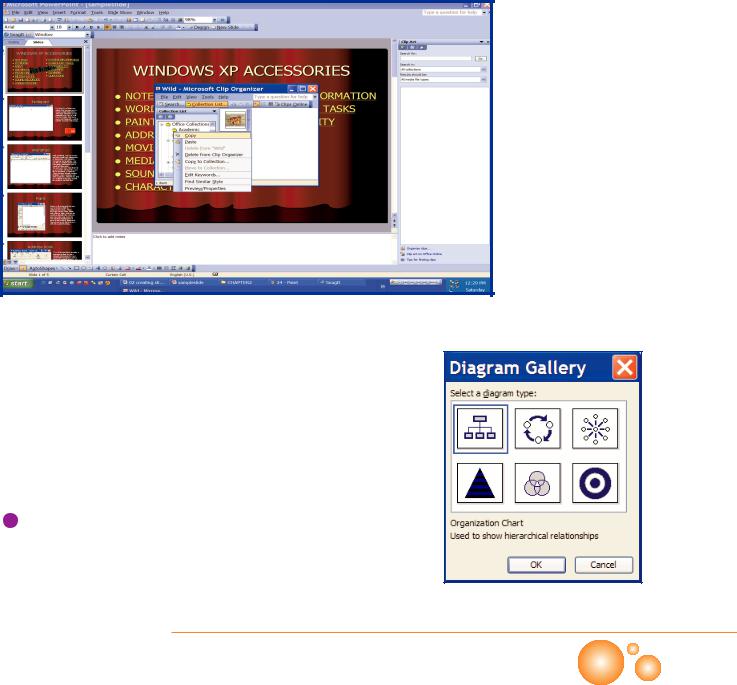
Click Insert>Diagram or,
 Click the
  icon on the Drawing Toolbar and choose the type you need from the Diagram Gallery. And then Click <OK>.
Diagram Gallery
CREATING A SLIDE SHOW
P O W E R P O I N T 27

Organization Chart
Cycle Diagram
Hierarchical relationships are shown in this type.
Continuous cycle process can be illustrated by using this type.
Dependency of the elements to a main element is illustrated.
Shows the relationship where each element is the foundation for the next one.
Shows overlapping between the elements.
Shows the steps towards a goal.
Diagram samples
Formatting Image Objects
When you insert a picture or clipart object on a slide, a Picture Toolbar that gives you many different formatting options for your images will appear. You can use the Picture Toolbar option to make changes on the image object.
|
|
|
|
|
|
|
|
|
|
|
|
|
|
|
|
|
|
|
|
|
|
|
|
|
|
|
|
|
|
|
|
|
|
|
|
|
|
|
|
|
|
|
|
|
|
|
|
|
|
|
|
|
|
|
|
|
|
|
|
|
|
|
|
|
|
|
|
|
|
|
|
|
|
|
|
|
|
|
|
|
|
|
|
|
|
|
|
|
|
|
|
|
|
|
|
|
|
|
|
|
|
|
|
|
|
||
|
|
|
|
Less Contrast |
|
|
|
|
|
|
|
|
|
|
|||
|
|
|
|
|
|
|
|
|
|
||||||||
|
|
|
|
|
|
|
|
|
|
|
|
More Brightness |
|
||||
|
|
|
|
|
|
|
|
|
|
|
|
||||||
|
|
|
|
|
|
|
|
|
|
|
|||||||
|
Less Brightness |
|
|
|
|
|
|
|
|
|
|
|
|
||||
|
|
|
|
|
|
|
|
|
|
|
|||||||
|
|
|
|
|
|
|
|
|
|
|
|
|
|
|
|
||
|
|
|
|
|
|
|
|
|
|
|
|
Crop |
|||||
|
|
|
|
|
|
|
|
|
|
|
|||||||
|
|
|
Rotate Left 90° |
|
|
|
|
|
|
|
|
|
|
|
|||
|
|
|
|
|
|
|
|
|
|
|
|
|
|
||||
|
|
|
|
|
|
|
|
|
|
||||||||
|
|
|
|
|
|
|
|
|
Line Style |
|
|
|
|
||||
|
|
|
|
|
|
|
|
|
|
|
|
|
|
||||
|
|
|
|
|
|
|
|
|
|
|
|||||||
|
|
|
|
|
|
|
|
|
|
|
|
|
|
|
|
|
|
Compress Pictures |
|
|
|
|
|
|
|
|
|
|
|||||||
|
|
|
|
Recolor Picture/ |
|||||||||||||
|
|
|
|
||||||||||||||
|
|
|
|
|
|
|
|
|
|
|
|
AutoShape |
|||||
|
|
Format Picture/ |
|
|
|
|
|
||||||||||
|
|
|
|
AutoShape |
|
|
|
|
|
|
|
|
|
|
|
||
|
|
|
|
|
|
|
|
|
Set Transparent |
|
|||||||
|
|
|
|
|
|||||||||||||
|
|
|
|
Reset Picture |
|
|
|
|
|
Color |
|
||||||
|
|
|
|
|
Color |
|
|
|
|
|
|
Insert Picture |
|
||||
|
|
|
|
|
|
|
|
|
|
|
|
More Contrast |
|
||||
|
|
|
|
|
|
|
|
|
|
|
|
|
|
|
|
|
|
|
|
|
|
|
|
|
|
|
|
|
|
|
|
|
|
|
|
|
|
|
|
|
|
|
|
|
|
|
|
|
|
|
|
|
|
|
|
|
|
|
|
|
|
|
|
|
|
|
|
|
|
|
|
Picture toolbar
CHAPTER 2
28 P O W E R P O I N T

Working with Tables
Creating a Table
Sometimes you need to show your information in an organized, neat manner, or you may want to show your information under certain categories. Table option will help you to create a table and enter information in rows and columns.
To create a table, use one of the followings;
From the menu bar click Insert>Table . Type the number of rows and columns into the dialog box and click the OK button or,
Click the  icon on standard toolbar or,
also use slide layout task pane to insert a table by choosing the corresponding layout. Click the icon below from layout to create a table.
Age |
Grain |
Vegetables |
Fruits |
Dairy |
Meat |
All ages |
32 |
39 |
18 |
26 |
41 |
2-18 years |
35 |
22 |
21 |
35 |
23 |
? 60 years |
26 |
42 |
29 |
6 |
36 |
|
|
|
|
|
|
A Sample Table
Modifying a Table
After creating a table, you can resize, add or remove rows/columns, or color your table for a better view.
Resizing
Move the mouse over the circles on the table until the mouse pointer turns to arrow shape that shows the type of resizing. If you move the cursor inside the table over the borders you can resize the cells too.
Mouse Shape |
Function |
Moves the table
Resizes the table proportional
Resizes the corresponding row or column
CREATING A SLIDE SHOW
Insert Table Dialog Box
Resizing a Table
P O W E R P O I N T 29
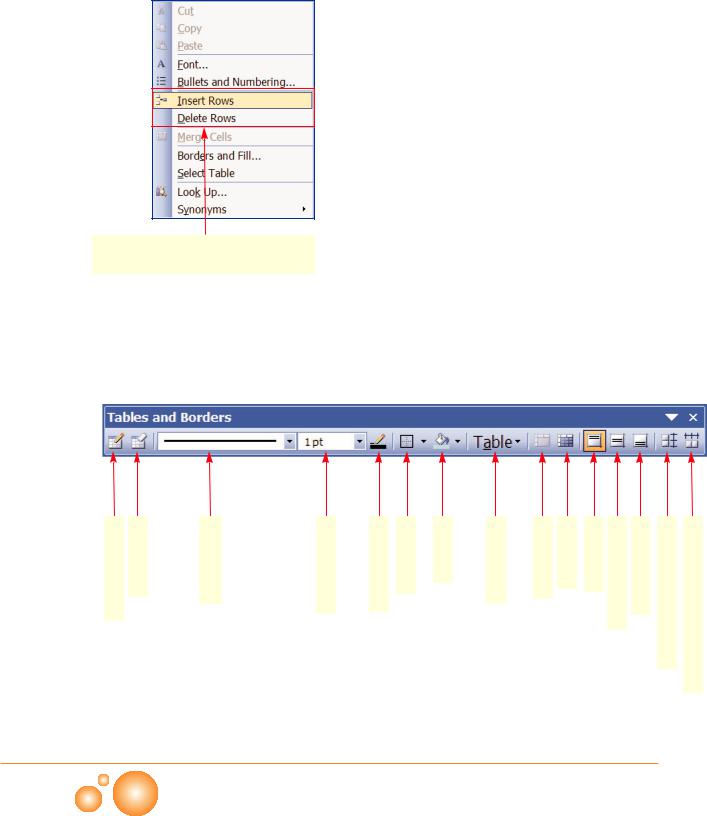
Inserting and Deleting a Row/Column
If you want to insert a row, simply click the right button and choose insert rows option from the menu. The row where the cursor is on will be shifted down whilst a new row is inserted.
Deleting a row is almost the same procedure. Select delete rows option from the right-mouse menu.
Inserting a column is a little bit different. If you want to insert a column, in addition to inserting a row, you have to select the neighboring column, and click insert columns from the rightmouse menu. Besides, you can use table toolbar to insert a column. Click <Table> and choose Insert Columns to the Left or Insert Columns to the Right.
Use this section to add/remove rows.
Right-Mouse Menu for Table
Changing the Table Format and Using the Table Toolbar
Draw table tool |
Eraser tool |
Border Style |
Border Width |
Border Color |
Border List |
Fill Color |
Table button |
Marge Cells |
Split Cells |
Align Top |
Center Vertically |
Align Bottom |
Distribute Rows Evenly |
Distribute Columns Evenly |
You can use the table toolbar to create and modify tables easily and visually.
CHAPTER 2
30 P O W E R P O I N T