![](/user_photo/2706_HbeT2.jpg)
- •Contents at a Glance
- •Contents
- •Foreword
- •About the Authors
- •About the Technical Reviewer
- •Acknowledgments
- •Introduction
- •Who This Book Is For
- •An Overview of This Book
- •Example Code and Companion Web Site
- •Contacting the Authors
- •Overview of HTML5
- •The Story So Far—The History of HTML5
- •The Myth of 2022 and Why It Doesn’t Matter
- •Who Is Developing HTML5?
- •A New Vision
- •Compatibility and Paving the Cow Paths
- •Utility and the Priority of Constituencies
- •Interoperability Simplification
- •Universal Access
- •A Plugin–Free Paradigm
- •What’s In and What’s Out?
- •What’s New in HTML5?
- •New DOCTYPE and Character Set
- •New and Deprecated Elements
- •Semantic Markup
- •Simplifying Selection Using the Selectors API
- •JavaScript Logging and Debugging
- •window.JSON
- •DOM Level 3
- •Monkeys, Squirrelfish, and Other Speedy Oddities
- •Summary
- •Using the Canvas API
- •Overview of HTML5 Canvas
- •History
- •What Is a Canvas?
- •Canvas Coordinates
- •When Not to Use Canvas
- •Fallback Content
- •CSS and Canvas
- •Browser Support for HTML5 Canvas
- •Using the HTML5 Canvas APIs
- •Checking for Browser Support
- •Adding a Canvas to a Page
- •Applying Transformations to Drawings
- •Working with Paths
- •Working with Stroke Styles
- •Working with Fill Styles
- •Filling Rectangular Content
- •Drawing Curves
- •Inserting Images into a Canvas
- •Using Gradients
- •Using Background Patterns
- •Scaling Canvas Objects
- •Using Canvas Transforms
- •Using Canvas Text
- •Applying Shadows
- •Working with Pixel Data
- •Implementing Canvas Security
- •Building an Application with HTML5 Canvas
- •Practical Extra: Full Page Glass Pane
- •Practical Extra: Timing Your Canvas Animation
- •Summary
- •Working with Scalable Vector Graphics
- •Overview of SVG
- •History
- •Understanding SVG
- •Scalable Graphics
- •Creating 2D Graphics with SVG
- •Adding SVG to a Page
- •Simple Shapes
- •Transforming SVG Elements
- •Reusing Content
- •Patterns and Gradients
- •SVG Paths
- •Using SVG Text
- •Putting the Scene Together
- •Building an Interactive Application with SVG
- •Adding Trees
- •Adding the updateTrees Function
- •Adding the removeTree Function
- •Adding the CSS Styles
- •The Final Code
- •Summary
- •Working with Audio and Video
- •Overview of Audio and Video
- •Video Containers
- •Audio and Video Codecs
- •Audio and Video Restrictions
- •Browser Support for Audio and Video
- •Using the Audio and Video API
- •Checking for Browser Support
- •Accessibility
- •Understanding Media Elements
- •Working with Audio
- •Working with Video
- •Practical Extras
- •Summary
- •Using the Geolocation API
- •About Location Information
- •Latitude and Longitude Coordinates
- •Where Does Location Information Come From?
- •IP Address Geolocation Data
- •GPS Geolocation Data
- •Wi-Fi Geolocation Data
- •Cell Phone Geolocation Data
- •User–Defined Geolocation Data
- •Browser Support for Geolocation
- •Privacy
- •Triggering the Privacy Protection Mechanism
- •Dealing with Location Information
- •Using the Geolocation API
- •Checking for Browser Support
- •Position Requests
- •Building an Application with Geolocation
- •Writing the HTML Display
- •Processing the Geolocation Data
- •The Final Code
- •Practical Extras
- •What’s My Status?
- •Show Me on a Google Map
- •Summary
- •Using the Communication APIs
- •Cross Document Messaging
- •Understanding Origin Security
- •Browser Support for Cross Document Messaging
- •Using the postMessage API
- •Building an Application Using the postMessage API
- •XMLHttpRequest Level 2
- •Cross-Origin XMLHttpRequest
- •Progress Events
- •Browser Support for HTML5 XMLHttpRequest Level 2
- •Using the XMLHttpRequest API
- •Building an Application Using XMLHttpRequest
- •Practical Extras
- •Structured Data
- •Framebusting
- •Summary
- •Using the WebSocket API
- •Overview of WebSocket
- •Real-Time and HTTP
- •Understanding WebSocket
- •Writing a Simple Echo WebSocket Server
- •Using the WebSocket API
- •Checking for Browser Support
- •Basic API Usage
- •Building a WebSocket Application
- •Coding the HTML File
- •Adding the WebSocket Code
- •Adding the Geolocation Code
- •Putting It All Together
- •The Final Code
- •Summary
- •Using the Forms API
- •Overview of HTML5 Forms
- •HTML Forms Versus XForms
- •Functional Forms
- •Browser Support for HTML5 Forms
- •An Input Catalog
- •Using the HTML5 Forms APIs
- •New Form Attributes and Functions
- •Checking Forms with Validation
- •Validation Feedback
- •Building an Application with HTML5 Forms
- •Practical Extras
- •Summary
- •Working with Drag-and-Drop
- •Web Drag-and-Drop: The Story So Far
- •Overview of HTML5 Drag-and-Drop
- •The Big Picture
- •Events to Remember
- •Drag Participation
- •Transfer and Control
- •Building an Application with Drag-and-Drop
- •Getting Into the dropzone
- •Handling Drag-and-Drop for Files
- •Practical Extras
- •Customizing the Drag Display
- •Summary
- •Using the Web Workers API
- •Browser Support for Web Workers
- •Using the Web Workers API
- •Checking for Browser Support
- •Creating Web Workers
- •Loading and Executing Additional JavaScript
- •Communicating with Web Workers
- •Coding the Main Page
- •Handling Errors
- •Stopping Web Workers
- •Using Web Workers within Web Workers
- •Using Timers
- •Example Code
- •Building an Application with Web Workers
- •Coding the blur.js Helper Script
- •Coding the blur.html Application Page
- •Coding the blurWorker.js Web Worker Script
- •Communicating with the Web Workers
- •The Application in Action
- •Example Code
- •Summary
- •Using the Storage APIs
- •Overview of Web Storage
- •Browser Support for Web Storage
- •Using the Web Storage API
- •Checking for Browser Support
- •Setting and Retrieving Values
- •Plugging Data Leaks
- •Local Versus Session Storage
- •Other Web Storage API Attributes and Functions
- •Communicating Web Storage Updates
- •Exploring Web Storage
- •Building an Application with Web Storage
- •The Future of Browser Database Storage
- •The Web SQL Database
- •The Indexed Database API
- •Practical Extras
- •JSON Object Storage
- •A Window into Sharing
- •Summary
- •Overview of HTML5 Offline Web Applications
- •Browser Support for HTML5 Offline Web Applications
- •Using the HTML5 Application Cache API
- •Checking for Browser Support
- •Creating a Simple Offline Application
- •Going Offline
- •Manifest Files
- •The ApplicationCache API
- •Application Cache in Action
- •Building an Application with HTML5 Offline Web Applications
- •Creating a Manifest File for the Application Resources
- •Creating the HTML Structure and CSS for the UI
- •Creating the Offline JavaScript
- •Check for ApplicationCache Support
- •Adding the Update Button Handler
- •Add Geolocation Tracking Code
- •Adding Storage Code
- •Adding Offline Event Handling
- •Summary
- •The Future of HTML5
- •Browser Support for HTML5
- •HTML Evolves
- •WebGL
- •Devices
- •Audio Data API
- •Touchscreen Device Events
- •Peer-to-Peer Networking
- •Ultimate Direction
- •Summary
- •Index
![](/html/2706/1189/html_AbQ0sDPLvd.78Bm/htmlconvd-1wDg8G242x1.jpg)
CHAPTER 10 USING THE WEB WORKERS API
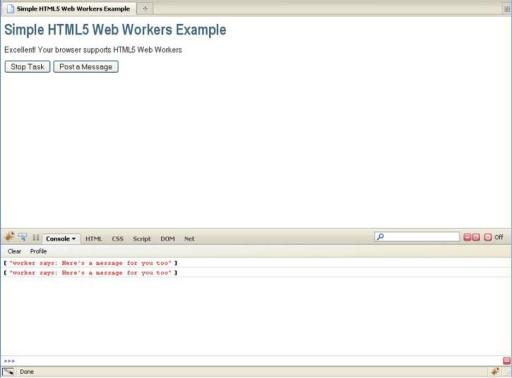
Figure 10-3. A simple web page that uses Web Workers
To set up proper communication with your Web Worker, code has to be added to the main page (the page that calls the Web Worker) as well as the worker JavaScript file.
Coding the Main Page
To communicate from the page to the Web Worker, you call postMessage to pass in the required data. To listen to incoming messages and errors that are sent by the Web Worker to the page, you set up an event listener.
To set up communication between the main page and the Web Worker, first add the call to postMessage to the main page, as follows:
document.getElementById("helloButton").onclick = function() { worker.postMessage("Here's a message for you");
}
In the preceding example, a message is sent to the Web Worker when the user clicks the Post a Message button. Next, add an event listener to the page that listens for messages from the Web Worker:
worker.addEventListener("message", messageHandler, true);
245
CHAPTER 10 USING THE WEB WORKERS API
function messageHandler(e) {
// process message from worker
}
Coding the Web Worker JavaScript File
You must now add similar code to the Web Worker JavaScript file—event handlers must be set up to process incoming messages and errors, and communication with the page is handled with a call to postMessage.
To complete the communication between the page and the Web Worker, first, add the call to postMessage; for example, inside a messageHandler function:
function messageHandler(e) {
postMessage("worker says: " + e.data + " too");
}
Next, add an event listener to the Web Worker JavaScript file that handles messages coming from the main page:
addEventListener("message", messageHandler, true);
In this example, the messageHandler function is called immediately when the message is received so that the message can be echoed back.
Note that if this was a shared worker, you would use a slightly different syntax (using a port):
sharedWorker.port.addEventListener("message", messageHandler, true); sharedWorker.port.postMessage("Hello HTML5");
In addition, the worker can listen to a connect event for incoming connections. You can use this to count active connections.
Handling Errors
Unhandled errors in a Web Worker script fire error events on the Web Worker object. Listening for these error events is especially important when you are debugging scripts that make use of Web Workers. The following shows an example of an error handling function in a Web Worker JavaScript file that logs errors to the console:
function errorHandler(e) { console.log(e.message, e);
}
To handle the errors, you must add an event listener to the main page:
worker.addEventListener("error", errorHandler, true);
Most browsers don’t have a great way to step through Web Worker code yet, but Google Chrome offers Web Worker debugging capabilities in its Chrome Developer Tools (in the Scripts tab, look for Worker inspectors), as shown in Figure 10-4.
246
![](/html/2706/1189/html_AbQ0sDPLvd.78Bm/htmlconvd-1wDg8G244x1.jpg)
CHAPTER 10 USING THE WEB WORKERS API
Figure 10-4. Web Worker debugging options in Chrome Developer Tools
Stopping Web Workers
Web Workers don’t stop by themselves; but the page that started them can stop them. If the page is closed, Web Workers will be garbage-collected, so rest assured you won’t have any zombie workers hanging around performing background tasks. However, you may want to reclaim resources when a Web Worker is no longer needed―perhaps when the main page is notified that the Web Worker has finished its tasks. You may also wish to cancel a long-running task in response to user actions. Calling terminate stops the Web Worker. A terminated Web Worker will no longer respond to messages or perform any additional computations. You cannot restart a worker; instead, you can create a new worker using the same URL:
worker.terminate();
Using Web Workers within Web Workers
The Worker API can be used inside Web Worker scripts to create subworkers:
var subWorker = new Worker("subWorker.js");
247
![](/html/2706/1189/html_AbQ0sDPLvd.78Bm/htmlconvd-1wDg8G245x1.jpg)
CHAPTER 10 USING THE WEB WORKERS API
Lots of Workers
Peter says: “If you spawn a Worker that recursively spawns subworker with the same JavaScript source file, you will see some interesting results, to say the least.”
Using Timers
Although Web Workers cannot access the window object, they can make use of the full JavaScript timing API, typically found on the global window:
var t = setTimeout(postMessage, 2000, "delayed message");
Example Code
For completeness, Listings 10-2 and 10-3 show the code for the simple page and the Web Worker JavaScript file.
248
CHAPTER 10 USING THE WEB WORKERS API
Listing 10-2. Simple HTML Page That Calls a Web Worker
<!DOCTYPE html>
<title>Simple Web Workers Example</title> <link rel="stylesheet" href="styles.css">
<h1>Simple Web Workers Example</h1>
<p id="support">Your browser does not support Web Workers.</p>
<button id="stopButton" >Stop Task</button> <button id="helloButton" >Post a Message</button>
<script>
function stopWorker() { worker.terminate();
}
function messageHandler(e) { console.log(e.data);
}
function errorHandler(e) { console.warn(e.message, e);
}
function loadDemo() {
if (typeof(Worker) !== "undefined") { document.getElementById("support").innerHTML =
"Excellent! Your browser supports Web Workers";
worker = new Worker("echoWorker.js"); worker.addEventListener("message", messageHandler, true); worker.addEventListener("error", errorHandler, true);
document.getElementById("helloButton").onclick = function() { worker.postMessage("Here's a message for you");
}
document.getElementById("stopButton").onclick = stopWorker;
}
}
window.addEventListener("load", loadDemo, true); </script>
Listing 10-3. Simple Web Worker JavaScript File
function messageHandler(e) {
postMessage("worker says: " + e.data + " too");
}
addEventListener("message", messageHandler, true);
249