

0470045272
.pdf10_045275 ch04.qxp 11/28/06 8:27 PM Page 81
Chapter 4 Wireless Flash Photography with the CLS 81
SB-800 in Master mode |
3. Scroll down to CSM number 19 – |
||
|
|
||
To set the flash mode on the SB-800 in |
Flash mode and push the multi- |
||
selector right. |
|||
Master mode: |
4. Scroll down to Commander |
||
|
|
||
1. |
Enter the CSM on the Speedlight. |
mode and push the multi- |
|
selector right. |
|||
|
Press the Select button (SEL) for |
||
|
|
||
|
two seconds to get there. |
5. Select the desired flash |
|
2. |
Use the + or – and the left and |
mode: TTL, AA, or M. Push the |
|
multi-selector right to save settings. |
|||
|
right zoom buttons to choose |
||
|
Note that when M is selected you |
||
|
the wireless settings menu. The |
||
|
must choose the flash output level |
||
|
menu has the icon of a flash with |
||
|
before you can save the settings. |
||
|
an arrow next to it. |
||
|
|
||
3. |
Use the + or – button to select |
To set the flash modes using the built-in |
|
|
Master. |
Speedlight on the D200: |
|
4. |
After the setting is in the master |
1. Turn on the camera and press |
|
|
mode, press the mode button to |
||
|
the Menu button to the left of |
||
|
choose the desired flash mode. |
||
|
the LCD. |
||
|
Choose from TTL, M, or AA. |
||
|
|
||
5. |
Press SEL to highlight the Group |
2. Enter the CSM (Custom Settings |
|
menu). Use the multi-selector to |
|||
|
A settings. Change these setting |
||
|
scroll down to the pencil icon. |
||
|
as necessary. Use the same proce- |
||
|
|
||
|
dures to change Groups B and C. |
3. Use the multi-selector button to |
|
6. |
Press the SEL button again to |
highlight CSM e – Bracketing/ |
|
Flash. Push the multi-selector |
|||
|
highlight the Channel settings. |
||
|
right. |
||
|
Choose the proper channel using |
||
|
|
||
|
the + or – buttons. |
4. Use the multi-selector to scroll |
|
7. |
Press the On/Off button to set. |
down to setting e3 – Built-in |
|
Flash. Push the multi-selector |
|||
|
|
||
right.
Using a built-in
Speedlight
To set the flash modes using the built-in Speedlight on the D70/D70s:
1.Turn on the camera and press the Menu button to the left of the LCD.
2.Enter the CSM (Custom Settings menu). Use the multi-selector to scroll down to the pencil icon.
5.Use the multi-selector to highlight Commander mode. Push the multi-selector right.
6.Use the multi-selector to highlight the built-in flash mode.
Use the multi-selector to move up and down to select the preferred flash mode. Press the Enter button to set the changes.

10_045275 ch04.qxp 11/28/06 8:27 PM Page 82
82 Part II Creating Great Photos with the Creative Lighting System
Setting Channels
After you get the flash mode set, you decide on the channel. As discussed earlier, you have four channels from which to choose. All four channels operate exactly the same so it doesn’t matter which channel you use as long as all of your remote Speedlights are set to the same one.
SB-800 in Master mode
To set channels on the SB-800 in Master mode:
1.Enter the CSM on the SB-800 Speedlight. Press the Select button (SEL) for two seconds to get there.
2.Use the + or – and the left and right Zoom buttons to choose the wireless settings menu. The menu has the icon of a flash with an arrow next to it.
3.Use the + or – buttons to select Master.
4.After the setting is in the Master mode, press the Mode button to choose the desired flash mode (TTL, M, or AA).
5.Press SEL to highlight the Group A settings. Change these settings as necessary. Use the same procedures to change Groups B and C.
6.Press SEL again to highlight the Channel settings. Choose the proper channel using the + or – buttons.
7.Press the On/Off button to set the changes.
Using a built-in
Speedlight
The D70 can only be used on one channel: channel 3. Be sure to set your remote Speedlight to channel 3, Group A.
To set channels using the built-in Speedlight on the D200:
1.Turn on the camera and press the Menu button to the left of the LCD.
2.Enter the CSM using the multiselector to scroll down to the pencil icon.
3.Use the multi-selector button to highlight CSM e – Bracketing/ Flash. Press the multi-selector right.
4.Use the multi-selector to scroll down to setting e3 – Built-in Flash. Press the multi-selector right.
5.Highlight Commander mode.
Press the multi-selector right.
6.Highlight the Channel setting by pressing the mulit-selector to the right.
7.Select the channel you want to use.
8.Set the channel by pressing the Enter button.
Wireless remote flash
To set the channels on the SB-600 wireless remote flash:
1.Go into the CSM by pressing the Zoom and – buttons simultaneously for about two seconds.
10_045275 ch04.qxp 11/28/06 8:27 PM Page 83
Chapter 4 Wireless Flash Photography with the CLS 83
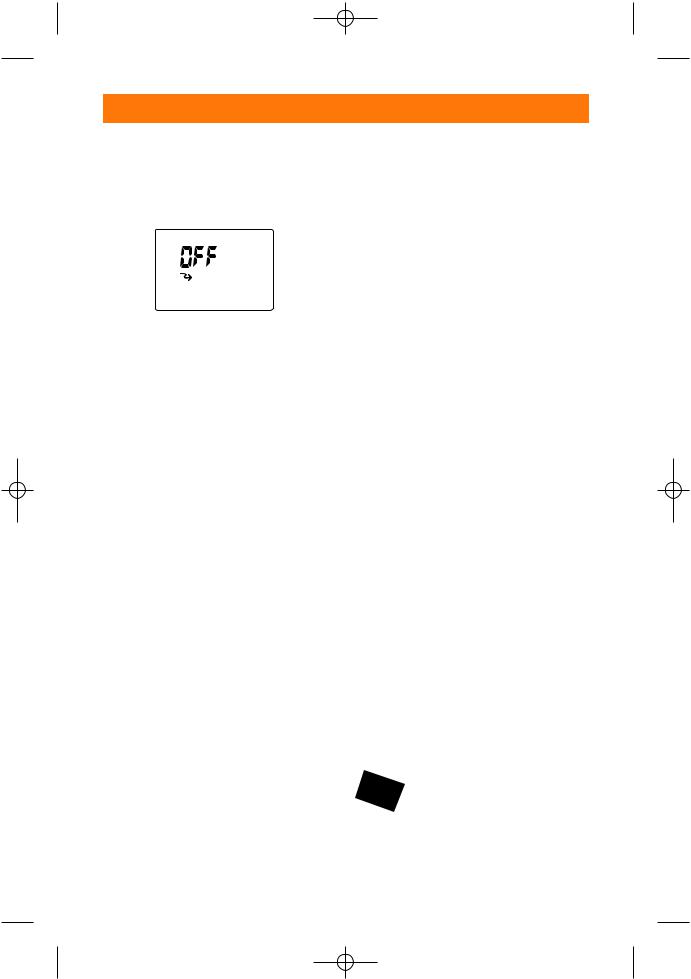
2.Press the + or – buttons to cycle through the CSM until you see a squiggly arrow that says Off above it.
4.3 The Off icon/menu setting on the SB-600
3.Press the Zoom or Mode buttons to turn the remote setting on.
4.Press the Power button. This brings you to the wireless remote settings menu.
5.Press the Zoom button to set the flash zoom to match the focal length of the lens you’re using.
6.Press the Mode button to select the channel. When the channel is ready to be changed it flashes.
7.Use the + or – buttons to change the channel.
8.Press the Mode button again.
This sets the channel and moves you to the Group setting. The group letter flashes when ready to be changed.
9.Use the + or – to change the setting.
To set the channels on the SB-800 wireless remote flash:
1.Enter the CSM on the SB-800 Speedlight. Press the Select button (SEL) for two seconds to get there.
2.Use the + or – and the left and right zoom buttons to choose the wireless settings menu. The menu has the icon of a flash with an arrow next to it.
3.Use the + or – button to select Remote.
4.After the setting is in the remote mode, press SEL to highlight the channel number.
5.Use the + or – buttons to select the desired channel.
6.Press SEL again to set the channel and highlight the Group settings.
7.Select the Group you want the flash used with. Choose A, B, or C.
Setting Up Groups
You use the Group settings to control the remote Speedlights individually, so the output of each group can be varied to achieve the desired lighting pattern. Whether you have one Speedlight in a group or one hundred, all of the Speedlights in that particular group will function the same. This includes the flash mode and any exposure compensation that has been set.
10.Press the Mode button again to set the changes.
Note |
The Group setting must be set |
|
on each individual Speedlight |
|
in order for them to function |
|
properly. |

10_045275 ch04.qxp 11/28/06 8:27 PM Page 84
84 Part II Creating Great Photos with the Creative Lighting System
SB-600
To set up a group using the SB-600:
1.Go into the CSM by pressing the Zoom and – buttons simultaneously for about two seconds.
2.Press the + or – buttons to cycle through the CSM until you see a squiggly arrow that says Off above it.
3.Press the Zoom or Mode buttons to turn the remote setting on.
4.Press the Power button. This brings you to the wireless remote settings menu.
5.Press the Zoom button to set the flash zoom to match the focal length of the lens you’re using.
2.Use the + or – and the left and right zoom buttons to choose the wireless settings menu. The menu has the icon of a flash with an arrow next to it.
3.Use the + or – button to select Remote.
4.After the setting is in the remote mode, press SEL to highlight the channel number.
5.Use the + or – buttons to select the desired channel.
6.Press SEL again to set the channel and highlight the Group settings.
7.Select the Group you want the flash used with. Choose A, B, or C.
6.Press the Mode button to select the channel. When the channel is ready to be changed, it flashes.
7.Use the + or – buttons to change the channel.
8.Press the Mode button again.
This sets the channel and moves you to the Group setting. The group letter flashes when ready to be changed.
9.Use the + or – to change the setting.
10.Press the Mode button again to set the changes.
SB-800
To set up a group using the SB-800:
1.Enter the CSM on the SB-800 Speedlight. Press the Select button (SEL) for two seconds to get there.
Setting Output Level
Compensation
You use output level compensation to finetune the settings to achieve the desired look of the overall image. The output levels can be adjusted for each individual group.
As with the flash modes the output compensation must be set in the commander unit. The output levels apply to all remote flash units in the group.
With the SB-800 set to Master
To set output level compensation using the SB800 set to Master:
1.Press the SEL button on the master flash to highlight M.
2.Use the + or – buttons to adjust the output level.
10_045275 ch04.qxp 11/28/06 8:27 PM Page 85
Chapter 4 Wireless Flash Photography with the CLS 85
3.Press the SEL button again to highlight Group A.
4.Use the + or – buttons to adjust the output level.
5.Repeat the steps to adjust Groups B and C.
Using a built-in
Speedlight
To set output level compensation using the built-in Speedlight on a D70/D70s:
1.Turn on the camera and press the Menu button to the left of the LCD.
2.Enter the CSM using the multiselector to scroll down to the pencil icon.
3.Scroll down to CSM number 19 – Flash mode and push the multiselector right.
4.Scroll down to Commander mode and push the multiselector right.
5.Select the desired flash mode: TTL, AA, or M. Push the multiselector right to save settings.
6.While pressing the D70/D70s flash level button, use the front control dial to set the desired level of exposure compensation.
Note |
Because the D70/D70s built-in |
||
|
Speedlight |
only |
controls one |
|
group of |
remote |
Speedlights, |
|
the output |
compensation level |
|
|
applies to all remote Speedlights. |
||
4.4 Flash exposure level compensation button on the D70
10_045275 ch04.qxp 11/28/06 8:27 PM Page 86
86 Part II Creating Great Photos with the Creative Lighting System
To set output level compensation using the built-in Speedlight on a D200:
1.Turn on the camera and press the Menu button to the left of the LCD.
2.Enter the CSM using the multiselector to scroll down to the pencil icon.
3.Use the multi-selector button to highlight CSM e – Bracketing/ Flash. Push the multi-selector right.
4.Use the multi-selector to scroll down to setting e3 – Built-in Flash. Push the multi-selector right.
5.Use the multi-selector to highlight Commander mode. Push the multi-selector right.
6.Use the multi-selector to highlight the built-in flash mode.
Use the multi-selector up and down to select the preferred flash mode.
7.Press the multi-selector right to highlight the compensation levels. Press the multi selector up and down to adjust the exposure compensation.
8.Repeat steps six and seven to adjust Groups A and B.
Note |
If the group is set to “ --- “ the |
|
flash is not set to fire, therefore, |
|
you cannot select the exposure |
|
compensation level to adjust it. |

11_045275 ch05.qxp 11/28/06 8:25 PM Page 87
Setting Up a
Wireless
Studio
Aportable studio is a handy thing to have. It enables you to go on location and photograph your subjects in their own environment. This way you can take your studio
to your client. A portable studio should be exactly that — portable. You should be able to fit everything you need into a minimum amount of space and be able to transport it quickly and with little effort.
The great thing about the Nikon CLS, or Creative Lighting System, is that it enables you to make your portable studio even more portable and easier to set up. You no longer need bulky studio lights in order to create professional looking images. The Nikon SB-600 and SB-800 are small and affordable, and best of all they can be used wirelessly off camera.
With the prosumer Nikon dSLR camera bodies, such as the D70, D70s, and the D200, the built-in Speedlight acts as a controller for the CLS-compatible flashes. Nikon’s pro level cameras lack a built-in Speedlight, therefore, you have to purchase an SU-800 wireless commander or use an SB-800 as the commander. While the consumer level D50 has a built-in Speedlight, for some reason Nikon chose not to have it function as a commander. As with the pro level cameras, you can achieve this function with the SU-800 or the SB-800
Note |
The SB-600 functions as a remote flash only when |
|
using CLS. It cannot be used as a commander for |
|
other flash units. |
C 5H A P T E R
In This Chapter
Introduction to the portable studio
Choosing umbrellas
Using a softbox
Backgrounds and background stands
Space requirements
Traveling with your wireless studio
11_045275 ch05.qxp 11/28/06 8:25 PM Page 88
88 Part II Creating Great Photos with the Creative Lighting System
Introduction to the Portable Studio
A portable studio should include, but should not be limited to at least one Speedlight, a reflector of some sort to fill in the harsh shadows created by strobes, an umbrella or softbox to soften the light for a more pleasing effect, and one or more light stands.
Ideally, your portable studio has at least two or more Speedlights, depending on the types of subjects you shoot. Also handy, but not absolutely necessary for all subjects, are backgrounds and background stands.
Tip |
Although I recommend using a |
|
professional reflector disk, you |
|
can use lots of different items as |
|
a reflector. White foam board |
|
(available at any art supply |
|
store) works particularly well. In |
|
a pinch almost anything white |
|
or silver works — a lid from a |
|
Styrofoam cooler or even a |
|
white t-shirt. |
5.1 These reflector disks fold up to a very convenient size.
Choosing Umbrellas
Photographic umbrellas are basically the same as an umbrella you would use to keep the raindrops from falling on your head, but photographic umbrellas are coated with a material to maximize reflectivity. Photographic umbrellas are used to diffuse and soften the light that is emitted from the light source, be it continuous or strobe lighting.
If you are already familiar with the various pieces of studio photography equipment, you likely already know that umbrellas do the same thing that a softbox does. What you may not know is that umbrellas are more affordable and are easier to use than softboxes, as an accessory for your Nikon Speedlight. (This isn’t to say, though, that softboxes aren’t useful — they are.)
There are three types of umbrellas to choose from:
Standard. The most common type of umbrella has a black outside with the inside coated with a reflective material that is usually silver or gold in color. These are designed so that you point the Speedlight into the umbrella and bounce the light onto the subject, resulting in a non-directional soft light source.
Shoot-through. Some umbrellas are manufactured out of a one piece translucent silvery nylon that enables you to shoot through the umbrella, such as a softbox. You can also use this type of umbrella to bounce the light, as mentioned previously.

11_045275 ch05.qxp 11/28/06 8:25 PM Page 89
Chapter 5 Setting Up a Wireless Studio 89
Convertible. The third type of umbrella is a convertible umbrella. This umbrella has a silver or gold lining on the inside and a removable black cover on the outside. You can use these umbrellas to bounce light or as a shoot-through when the outside covering is removed.
Photographic umbrellas come in various sizes usually ranging from 27 inches all the way up to 121⁄2 feet. The size you use is dependent on the size of the subject and the degree of coverage you would like to get. For standard headshots, portraits, and small to medium products, umbrellas ranging from 27 inches to about 40 inches supply plenty of coverage. For full length portraits and larger products, a 60to 72inch umbrella is generally recommended. If you’re photographing groups of people or especially large products, you will need to go beyond the 72-inch umbrella.
The larger the umbrella, the softer the light falling on the subject from the Speedlight is. It is also true that the larger the umbrella, the less light that falls on your subject. Generally the small to medium umbrellas lose about a stop and half to two stops of light. Larger umbrellas generally lose two or more stops of light because the light is being spread out over a larger area.
Smaller umbrellas tend to have a much more directional light than do larger umbrellas. With all umbrellas, the closer you have the umbrella to the subject the more diffuse the light is.
5.2 An SB-600 with a standard umbrella
For setting up a wireless/portable studio, I’m convinced that the umbrella is the way to go. They fold up nice and small, are simple to use, are relatively inexpensive, and attach to the light stand with an inexpensive bracket which is available at any photography store for less than $15. This bracket also includes a shoe mount for attaching your Speedlight.

11_045275 ch05.qxp 11/28/06 8:25 PM Page 90
90 Part II Creating Great Photos with the Creative Lighting System
Choosing the right umbrella is a matter of personal preference. Some criteria to keep in mind when choosing your umbrella include the type, size, and portability. You also want to consider how it works with your Speedlight. For example, regular and convertible umbrellas return more light to the subject when bounced, which can be advantageous because a Speedlight has less power than a studio strobe. And, the less energy the Speedlight has to output, the more battery power you save. On the other hand, shoot-through umbrellas lose more light through the back when bouncing, but are generally more affordable than convertible umbrellas.
Using a Softbox
Softboxes, as with umbrellas, are used to diffuse and soften the light of a strobe to create a more pleasing light source. Softboxes range in size from small 6-inch boxes that you mount directly onto the flash head to large boxes that usually mount directly to a studio strobe. Softboxes come in a variety of shapes, too — anywhere from a small, square shaped softbox to very large, octagonal softbox designed to simulate umbrellas.
Flash-mount softboxes
The small flash-mounted softboxes are very economical and easy to use. You just attach it directly to the flash head and use it with your flash mounted on the camera or on a flash bracket. This type of softbox is good to use while photographing an event, informal portraits, wedding candids, or just plain old snapshots of your friends and family. You generally lose about one stop of light with these and should adjust your flash exposure
compensation accordingly. For shooting small still life subjects or simple portraits, this may be all you need to get started with your wireless/portable studio.
Stand-mounted softboxes
When photographing in a studio type of setting you really need a larger softbox that is mounted, along with your Speedlight, onto a suitable light stand. For a larger softbox, you need a sturdier stand to prevent the lighting setup from tipping over. Bogen/Manfrotto, manufacturers of high quality stands and tripods, have a basic six foot stand that works well for this application.
The reason that you may want to invest in a softbox rather than an umbrella for your portable studio is that softboxes provide a more consistent and controllable light than umbrellas do. Softboxes are closed around the light source thereby eliminating unwanted light from being bounced back on to your subject. The diffusion material gives less of a chance of creating hotspots on your subject. A hotspot is an overly bright spot on your subject usually caused by bright or uneven lighting.
Softboxes are generally made for use with larger studio strobes. They attach to these strobes with a device called a speedring. Speedrings are specific to the type of lights to which they are meant to attach. Luckily for photographers, some companies, such as Chimera, manufacture a type of speedring that mounts directly to the light stand and allows you to attach one or more Speedlights to the light stand as well. You mount the speedring to the stand, attach the softbox to the speedring, attach the Speedlight with the flash head pointed into the softbox, and you’re ready to go.