

Build The Ultimate Custom PC (2005)
.pdfChapter 12 — Top 10 Things You Don’t Want to Forget 199
You might have already been supplied with one. Sometimes a case comes with a power cord; sometimes it doesn’t. If you don’t have one, then you can borrow the one off an existing PC until you get a spare.
There’s also a pretty good chance that if you have been supplied with a power cord that it’s the wrong one for your country (especially if you live outside the United States or the United Kingdom). Don’t bother trying to find an adaptor for an incorrect power cord; it’s far cheaper and safer to buy a new cable.
No. 5: Internal Cabling
As you’re about to find out, the inside of a PC houses a lot of cables, each of which is important and serves a vital purpose. Be short one cable, and you’re going to have to delay the build.
A lot of the cables you need are going to be attached to the PC case or the power supply unit and aren’t detachable, which does make life simpler. However, there are some cables that you might still have to source separately.
Here is a list of the standard cables you will need:
Cable to connect hard drive to motherboard. Generally, these are ribbon IDE cables, but if you’ve chosen a SATA drive you’ll need cables specific for this. (See Figure 12-3.) One IDE ribbon cable can connect up to two IDE devices (either hard drives or CD/ DVD drives) to the motherboard. A SATA cable can connect only one device to the motherboard.
If you buy a hard drive in what’s known as a “retail kit” this will contain a cable, but “bare” drives come with nothing, and you have to provide your own cable.
We recommend that you get two cables even if you only intend on fitting two IDE devices (one per cable) because this will give you the best in terms of performance and scope for upgrade in the future.
Floppy drive cable (if you plan on fitting a floppy drive). You will only need one of these.
CD/DVD to sound card audio cable. Not all drives require this cable (most modern CD and DVD drives are capable of digital audio extraction). Generally, if you need this cable, it will be provided.

200 Part II — Building Your PC
FIGURE 12-3: Internal cabling.
No. 6: Drive Rails
There are two types of drive bay in your PC:
5-1⁄4 inch drive bay
3-1⁄2 inch drive bay
The idea is that hard drives fit into the 3-1⁄2 inch bay and CD/DVD drives fit into the 5-1⁄4 inch drive bays. However, many people prefer to fit hard drives into 5-1⁄4 inch bays because they’re generally better placed and it’s easier to both route the cables that way, and also since the bays are bigger there’s more space to work in.

Chapter 12 — Top 10 Things You Don’t Want to Forget 201
Problem is, a 3-1⁄2 inch hard drive won’t fit directly into a 5-1⁄4 inch drive bay because it’s too large. The answer to this problem is to get drive rails that fit over the hard drive, making it fit into the 5-1⁄4 inch bay. The drive rail simply screws into the screw holes on the drive and makes the drive wider (see Figure 12-4).
FIGURE 12-4: Drive rail set.
Some people prefer to fit hard drives into the bigger 5-1⁄4 inch bay because it allows more air to flow around the drive, helping to keep it cool. This does help when you have a midsized or fullsized tower and generally you have enough 5-1⁄4 inch drives to space a few for hard drives.
No. 7: Screws and Fittings
There are a lot of screws and other fittings that go into holding a PC together, and you don’t want to be skimping on screws when it comes to the build just because you didn’t plan ahead.
202 Part II — Building Your PC
Some cases come with screws supplied, but these screws are generally low-quality “one-size fits all.” It is preferable to use screws supplied with a particular device over generic screws.
Here are just a few of the screws and fittings that you will need to have:
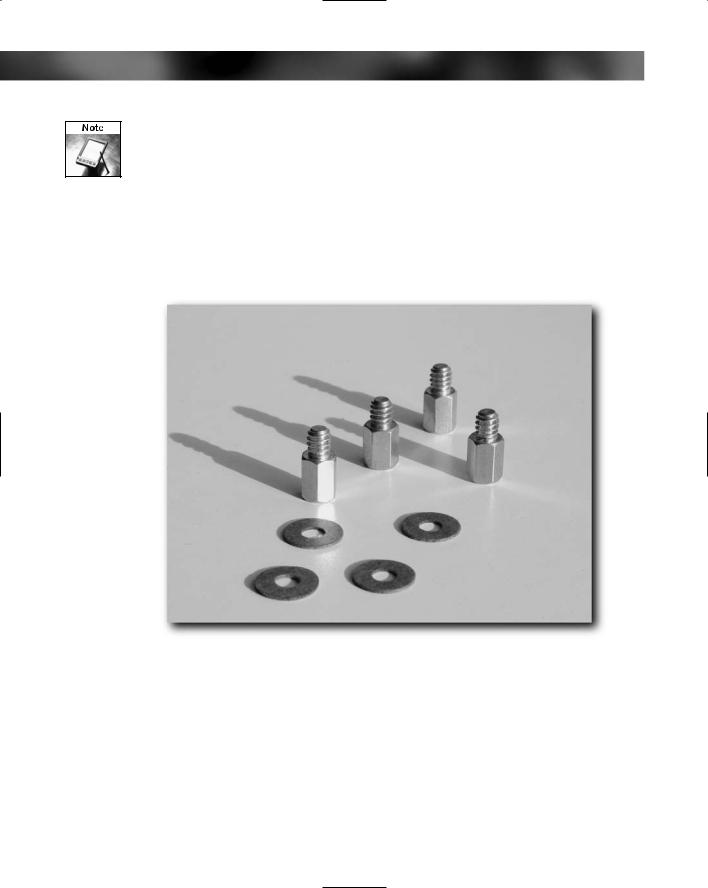
Motherboard to chassis fittings. Because these can vary from case to case, generally they are supplied with the case. Sometimes “stand-off ” type screws are used to keep the board from touching the metal case, and other times the stand-offs are built into the case. See Figure 12-5.
FIGURE 12-5: Metal motherboard to chassis fittings.
Case screws. These screws are six-gauge wire with 32 threads per inch American National Coarse Thread (UNC) machine screws that are cut to accept a both a Phillips No. 2 screwdriver and a 1⁄4 inch hex driver and are 5⁄16 inch long. See Figure 12-6.

Chapter 12 — Top 10 Things You Don’t Want to Forget 203
FIGURE 12-6: Case screws.
Hard drive screws. Hard drives are connected to the case using pan head screws that accept a Phillips No. 2 screwdriver. Specifically, these are six-gauge wire with 32 threads per inch American National Coarse Thread (UNC) machine screws, just like case screws, only the heads and length (3/16 inch) are different. See Figure 12-7.
Never mount a hard drive using case screw. It’s too long and can damage the drive!
You can use a maximum of four screws per drive (two either side). At minimum, you can use is two (one either side), but this isn’t recommended. Remember, if you are using drive rails you will need more screws (supplied with the rails).

204 Part II — Building Your PC
FIGURE 12-7: Hard drive screws.
CD/DVD drive screws. These are similar to the screws that hold hard drives or drive rails in place. However, “similar” doesn’t mean “same.” These drive screws are 5 mm long M3x0.5 (3 millimeter wire with a 0.5 mm thread pitch) machine screws with integral
washer and are cut to accept a No. 1 Phillips head screwdriver. Some also have a both a 7⁄32 inch hex head (odd indeed for a metric screw!). Modern optical drives spin the discs at high speed and can generate a lot of vibration. It is vital then that drives are firmly attached by using all four screws. See Figure 12-8.

Chapter 12 — Top 10 Things You Don’t Want to Forget 205
FIGURE 12-8: CD/DVD drive screws.
Drive rails. Never skip on the screws used to attach the rail to the drive or the drive to the case. Use four screws to fit the drive to the rail and use four to fit the rail to the PC case. These come supplied with their own screws for fitting (they use hard drive screws).
Floppy drive screws. Each drive is secured to the case with four screws that initially look like the same as the ones used to fit optical drives. The thread is the same as optical drives, but the head is different (these have a domed head that only accepts a No. 1 Phillips head screwdriver). Also, they are shorter, at 4 mm in length. See Figure 12-9.

206 Part II — Building Your PC
FIGURE 12-9: Floppy drive screws.
Don’t forget the screwdrivers you need, either!
No. 8: CPU Cooler
Every CPU needs a cooler. Gone are the days where a CPU could safely be run without any sort of heatsink or fan. See Figure 12-10.
Never run a modern CPU without a cooler — even for a few minutes. The heat build-up occurs quickly and can easily wreck the CPU!

Chapter 12 — Top 10 Things You Don’t Want to Forget 207
FIGURE 12-10: CPU cooler assembly.
These coolers consist of a heatsink (a fancy name for a machined block of copper or aluminum designed to carry the excess heat away from the CPU) and an electric fan designed to blow cooling air over the heatsink. Sometimes these coolers are bundled with the CPU and sometimes they’re not. If you don’t have one, then you’ll need to get a cooler that’s compatible with your CPU. There’s a wide selection of types, ranging from small and cheap to massive and pricey! As long as you get a cooler designed for your type and speed of CPU, then it should be adequate for the job of keeping it cool. However, if you run your PC in a hot environment, it might require some more effort to cool, and you’ll need to buy a bigger and more expensive cooler.
If you have to buy a heatsink/fan combo, then don’t forget the thermal compound that goes between the heatsink and CPU (see Figure 12-11). This is vital for proper transfer of the heat from the CPU to the heatsink.

208 Part II — Building Your PC
FIGURE 12-11: Thermal compound.
Never fit a fan without applying a thin coating of thermal compound to the joint because the heat build-up, at worst, can destroy the CPU and at best dramatically shorten its life!
No. 9: Boot Disk/CD
You’re going to need some form of boot disk to bring the PC to life and load on the operating system. The old floppy disk has now given way to bootable CD-ROMs, which have a greater data capacity and are a lot less prone to damage.
No matter what you want to load onto the PC — Windows XP or a Linux distro — you will find the system will boot from the CD and will allow you to carry out the installation of the operating system.
However, the boot floppy disk shouldn’t be considered to be totally obsolete — you will see us making use of one later on for testing the system for faults. They are quick to make, simple, and you don’t need to have an optical drive connected.