

3D Game Programming All In One (2004)
.pdf488 Chapter 16 ■ Making Weapons and Items
3.In the Launch dialog box, make sure that the Multiplayer Mission box is cleared.
4.Select Water World from the mission list.
5.Click Launch.
6.After the game loads, look around for your tree poking up from a hill behind that block where you found the Health Kit.
7.Run over to the tree and admire your handiwork.
8.Try to run through the tree. If you hurt your head, you know where the first-aid kit is!
The Billboard Tree
The billboard tree is the Ferrari of game trees. It looks good and is so low on polygons that if you remove one polygon, it vanishes! But it is specialized and you can't do much with it.
Create a new empty document in MilkShape.
1.Select the Vertex tool and place three vertices in an equilateral triangle formation.
2.Use the Face tool and create a face, as shown in Figure 16.19.
3.On the Materials tab, create a new material, using C:\3DGPAi1\RESOURCES\CH16\spruce.jpg as the bitmap.
n o t e
There is a quirk in MilkShape when using bitmaps that have alpha channels in them. Because of this, when we make a model that uses a texture with an alpha channel, like the billboard tree, we need to make another version of the texture without the alpha channel, but with the same name (not including extension). So although in the game we will use the spruce.png texture file, we need to use spruce.jpg in the MilkShape model material.
4. Name the material "spruce: Trans". The ": Trans" part tells the exporter that the alpha channel for this material should be set to translucent mode.
5. With the new material selected, move the right-hand slider to the middle position. This will tell the exporter to enable alpha transparency for this material.
Figure 16.19 The tree triangle.
Team LRN
Trees 489
6.Select the triangle using the Groups tab, and assign the spruce material to it.
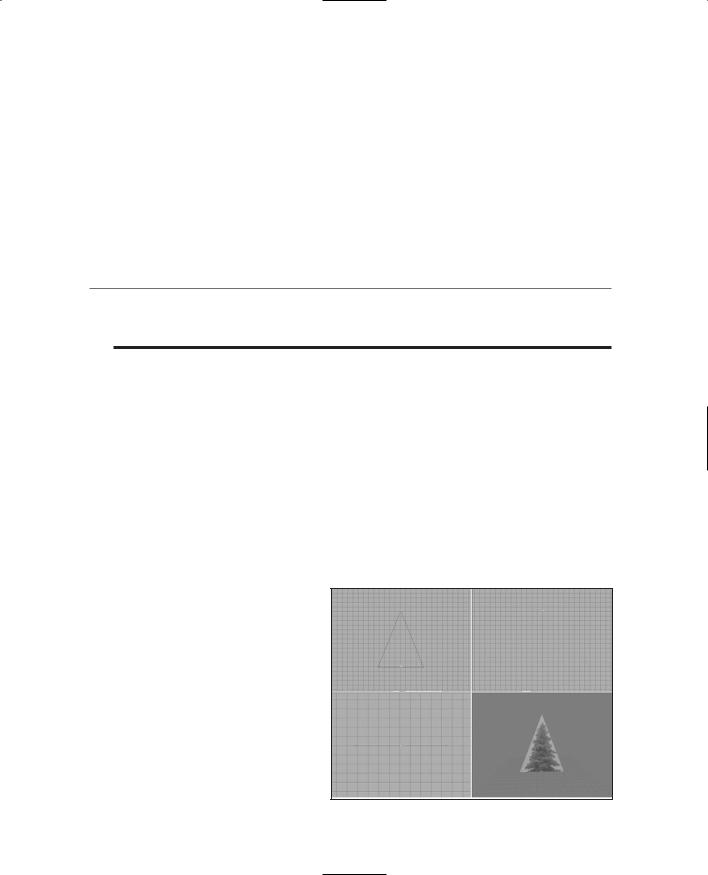
7.Make sure that the 3D view has been set to Texture mode. You should see the textured tree there, as shown in Figure 16.20.
8.Rename the triangle in the Groups tab as "firstface: BillboardZ". This identifies the polygon as a billboard-z type.
9.Create a special material. This is a material that tells the exporter how to do certain things. The directive is embedded in the name—in this case call the material "opt:size=100". There is nothing else needed for the material. This directive tells the exporter to scale the object up by 100 times.
n o t e
A billboard is a single polygon object with a texture that always faces toward the player in the game. Some kinds of billboards only face the player horizontally. If you get above them, they don't face up. These are called billboard-z.
10.Save your work.
11.After saving your work, choose File, Export, Torque Game Engine DTS.
12.You want to take all the defaults (Collision Mesh should be set to None).
13.Export the box to C:\3DGPAi1\fps\data\shapes\organic\tree2.dts. Click Yes if you get an alert asking if you want to replace an existing file with that name.
Testing the Billboard Tree
The billboard tree has no collision mesh—you can't bump the tree but instead you just go right through it. You also can't climb it, though you probably wouldn't want to.
1.Browse to C:\3DGPAi1 and click the Run fps Demo shortcut.
2.Click Start Mission.
3.In the Launch dialog box, make sure that the Multiplayer Mission box is cleared.
4.Select Water World from the mission list.
5.Click Launch.
6.After the game loads, your tree is actually a group of trees poking up from a hill behind that block where you found the
Health Kit. |
Figure 16.20 The textured tree. |
|
Team LRN
490 Chapter 16 ■ Making Weapons and Items
7.Run over to the trees and take a look.
8.Try to run through any of the trees. If you hurt your head, go back and check your model! You may have inadvertently left a collision mesh in it.
As you can see, the billboard tree is kind to your video card and will keep your frame rates right up there. In fact, you can build forests of these things and only have as many polygons as one of the solid trees!
The Tommy Gun
The famous Thompson submachine gun is a somewhat obsolete weapon that most people are familiar with visually, even if they don't know what it's called.
The technique we will use is the Extrusion method. When it comes to modeling weapons, Extrusion is probably the method of choice for the simple reason that it often works well when using photographs for source material. There are dozens and dozens of books and many Internet resources available that have photographs and technical drawings of weapons, but remember that much of the source material is copyrighted.
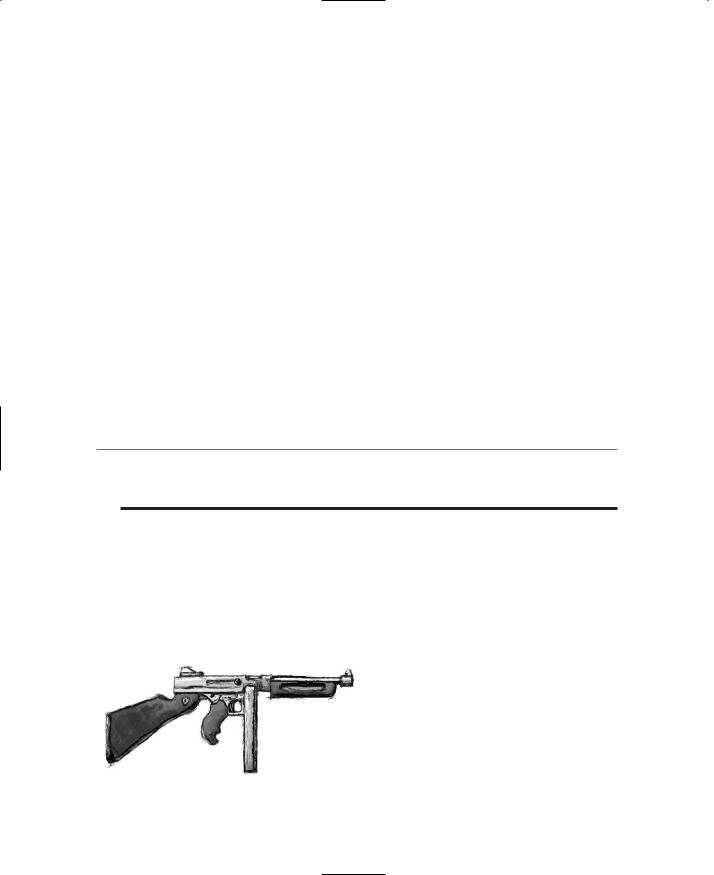
For our Tommy gun, I'll work from a sketch I made, shown in Figure 16.21.
t i p
To create your weapons, you can use a photograph or detailed diagram of your own if you like, however, you are perfectly free to use my sketches and artwork in any way you want to. The choice is yours.
The sketch is rough and not very detailed, but it will do just fine for our purposes. This model will have as few polygons in it as I think we can get away with. I've made two versions of it for you to use: one for the skin and one to act as the extrusion reference image.
Making the Model
Get MilkShape running and warming up in the driveway, and we'll get started in a minute.
|
We will use C:\3DGPAi1\RESOURCES\ |
|
|
||
|
CH16\tommygun.png as the texture for |
|
|
the Tommy gun's skin. You can find the |
|
|
extrusion guide sketch at C:\3DGPAi1\ |
|
|
RESOURCES\CH16\tommygun_ref.bmp. |
|
|
You need to set the latter as the back- |
|
|
ground image for the Side view window in |
|
|
MilkShape; we'll use the former later in |
|
Figure 16.21 Tommy gun sketch. |
||
this section. |
||
|
Team LRN
1.Select the Vertex tool, making sure that the Auto Tool check box is cleared.
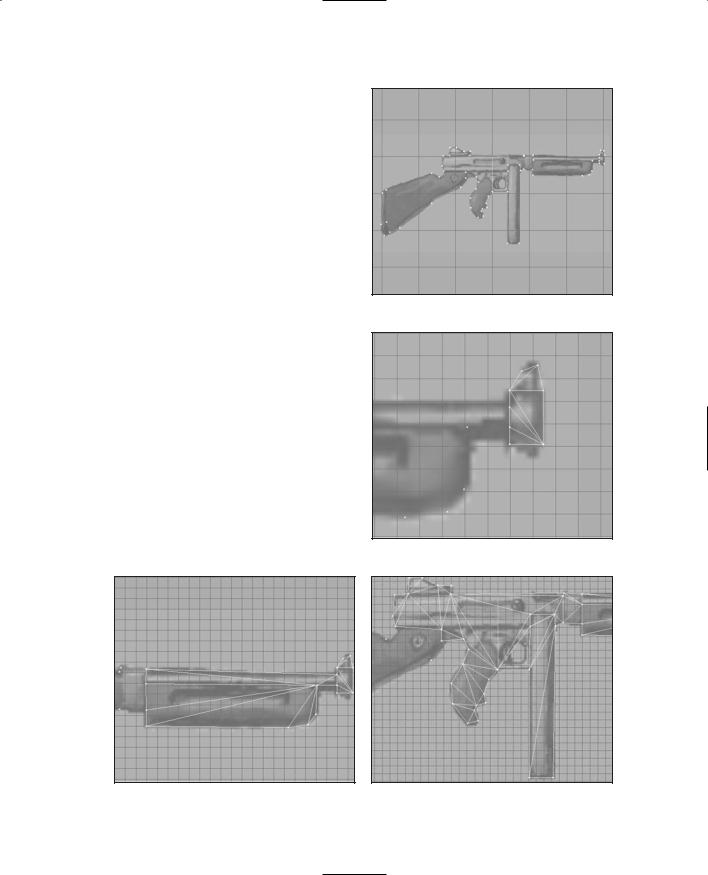
2.In the Side view, start placing vertices at all the major corners and points around the components of the gun. See Figure 16.22 for reference.
3.Start making faces. No! I meant in the model, not at me! You will probably have to zoom in some to get enough separation between the vertices.
Be careful as you move along, making sure you get all the faces. For tips and other information on faces, check back to Chapter 15. Figure 16.23 shows the finished polygon faces around the muzzle, which can be a bit fiddly. Notice how far I zoomed in.
Figure 16.24 shows the barrel and forestock faces. A warning about the barrel is in order here, I think. In this model we will stick with a straight extrusion exercise—but I highly recommend that after you complete this section you rework the model and make the barrel a cylinder object. The results will be nicer.
Figure 16.24 Tommy gun barrel and forestock faces.
The Tommy Gun 491
Figure 16.22 Tommy gun vertices.
Figure 16.23 Tommy gun muzzle faces.
Figure 16.25 Tommy gun metal body faces.
Team LRN
492 Chapter 16 ■ Making Weapons and Items
Figure 16.26 Tommy gun shoulder stock faces.
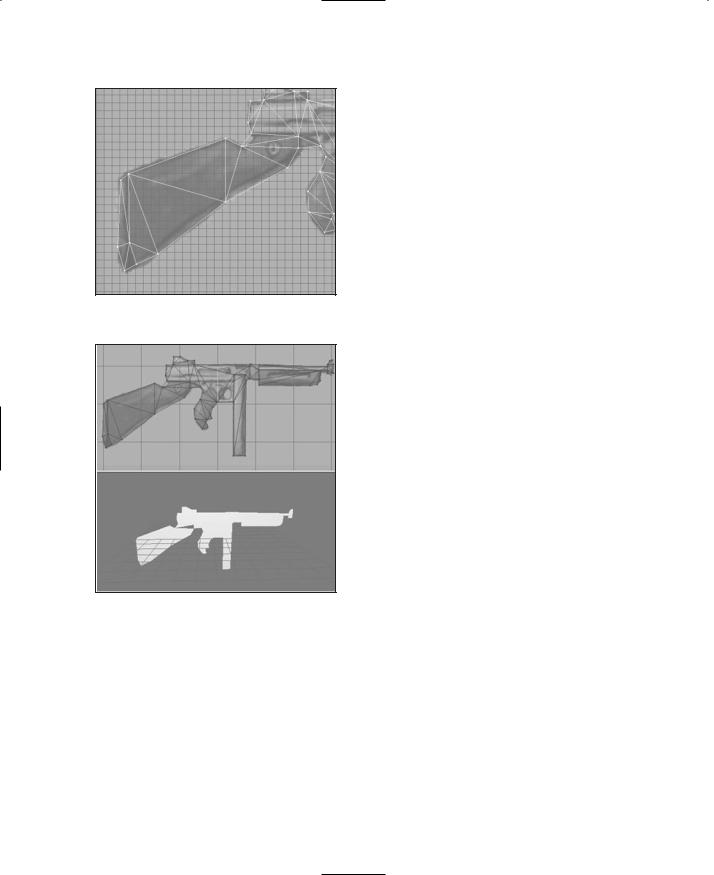
Figure 16.27 Tommy gun loses face—film at 11.
Figure 16.25 shows the faces completed for the grip, the receiver, the magazine, and other metal parts of the main body of the gun. Note that I haven't modeled the trigger or the trigger guard hole—leaving these out saves a ton of polygons. If you want you can add in the detail for the trigger, but you will probably take a hit on frame rate in the game.
Figure 16.26 shows the faces of the wooden shoulder stock.
Now take a look at Figure 16.27. Notice the missing polygon down there in the 3D view? It's not evident by looking at the wire-frame view that the polygon was missed, but its absence really shows in the 3D view. Don't let this happen to you! Heh.
If it does happen to you, fix up the wayward faces and we'll move on to the extrusion.
4.Select all the faces.
5.Use an X value of 2.0 and then click the Extrude button. Do not deselect the highlighted faces after this operation. You should get something that looks like Figure 16.28.
Next, we will have to cap off one end of the extrusion, like we did with the car model. It's a simple operation but sometimes a bit touchy.
6.Choose Edit, Duplicate Selection.
7.Use the Move tool to drag the copy of the faces back over to the side of the model, using the Front view window to monitor the activity.
8.Zoom in on a few of the vertices in the Front view and make sure that the copy of the faces perfectly aligns with the edge vertices on this side of the model.
9.Select all vertices in the model and then choose Vertex, Snap To Grid. One or two of the vertices might snap to an awkward location, so go ahead and manually fix them.
Team LRN
The Tommy Gun 493
10.Choose Vertex, Weld Together.
The model as built so far is fine, except that it was created at a scale four times larger than we want for use in game. This was deliberate—a larger scale allows
us to use larger reference images for the background image, which gives us access to more detail. Also, the larger the scale, the finer the granularity available when we want to snap
points to the grid. So after all Figure 16.28 Extruded Tommy gun. this work, we need to scale the
model back to the correct size.
11.Select all parts of the model.
12.Use the Scale tool to set the scale to 0.25 in all three axes.
13.Click the Scale button to the right of the axis boxes. The gun will shrink and should appear roughly as shown in Figure 16.29.
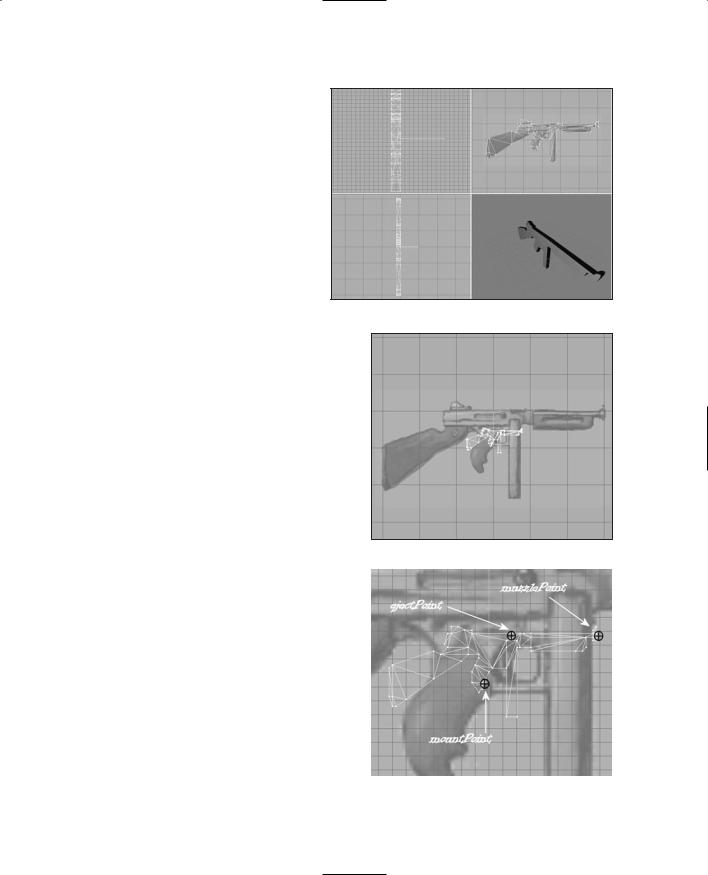
Next, we have three nodes to add—one to indicate where the gun is held, one
to indicate where the muzzle is, and |
Figure 16.29 |
Shrunken gun. |
|
one to indicate where expended shells |
|||
|
|
||
are ejected. These nodes inform the |
|
|
|
engine where these spots are; a script |
|
|
|
that will be defined later dictates how |
|
|
|
they are used. |
|
|
|
14. Create three unconnected joints, |
|
|
|
positioned and named as shown in |
|
|
|
Figure 16.30. The three node names |
|
|
|
are mountPoint, ejectPoint, and |
|
|
|
muzzlePoint. |
|
|
|
We have one more thing to do. We |
|
|
|
need the gun to have the correct pos- |
|
|
|
ture when held by the player model. |
Figure 16.30 |
The Tommy gun nodes. |
Team LRN
494Chapter 16 ■ Making Weapons and Items
15.In the Top view, select all faces.
16.Rotate the gun about 8 degrees to the left, as shown in Figure 16.31.
17.Move the nodes to align them with the gun, using Figure 16.31 as a guide.
Voilá! Insta-gun. Save your work.
Skinning the Tommy Gun
Way back in Chapter 13 you learned how to use UVMapper and Paint Shop Pro to create a skin for objects. In this chapter we'll look at using the built-in Texture Coordinate Editor in MilkShape to accomplish the same thing. It can be awkward to use but is suitable for our purpose here because we will already have a texture to use for the skin—in this case we will use a version of my original sketch.
1.Create a new material, using the file tommygun.bmp as the bitmap for the texture.
2.Assign the new material to the Tommy gun object.
If you have more than one object, select all of the faces in all of the objects, then regroup them. After that, you can assign the new material to the single object.
3.Use the Groups tab, and select the Tommy gun object.
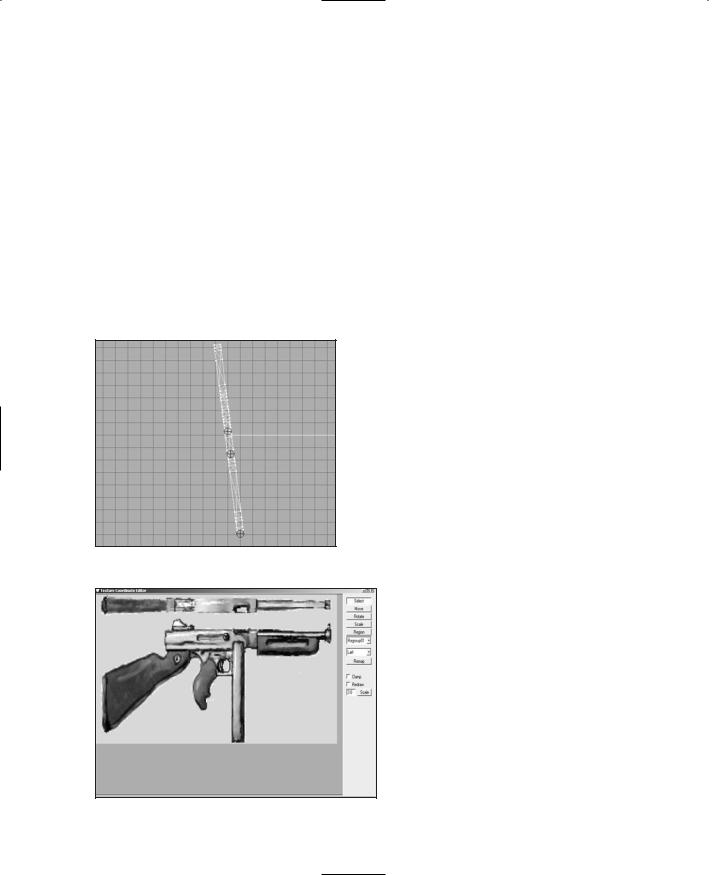
4.Choose Window, Texture Coordinate Editor. You will get the Texture Coordinate Editor dialog box, as shown in Figure
Figure 16.31 The rotated Tommy gun. |
16.32. |
When the Texture Coordinate Editor first opens, you often see just some confusing white lines over the top of the texture assigned to the object you are skinning. Not to worry.
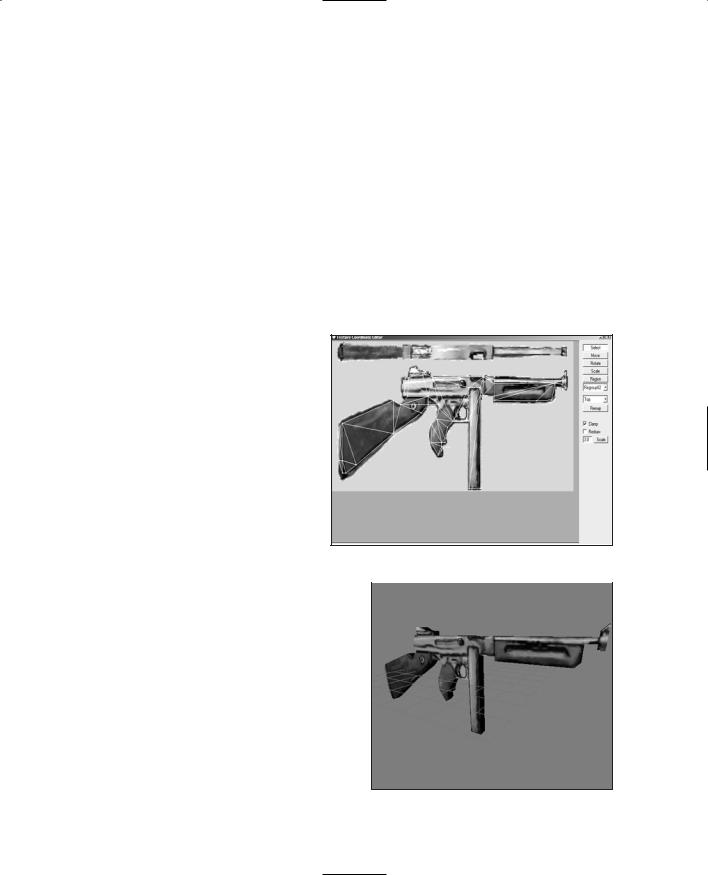
5. Select the appropriate view from the view selection combo box at the right side of the dialog box. In the case of the Tommy gun, this is the Left view.
6. Click the Remap button. You
Figure 16.32 Texture Coordinate Editor dialog box. should get something like that shown in Figure 16.33. The shape
Team LRN
The Tommy Gun 495
of the Tommy gun may not line up with the texture, so go ahead and use the Select and Move buttons inside this editor to move the vertices until they are in place. Figure 16.33 is a good guide to what the final result should look like.
7.Close the Texture Coordinate Editor dialog box and take a look in your 3D view (make sure that it is set to texture mode). There it is—your Tommy gun! Compare your work with Figure 16.34. As you examine it closely, you will see why it might be a good idea to redo the barrel as a cylinder.
Testing the Tommy Gun
In order to test the Tommy gun, we first need to export it from MilkShape.
1.After saving your work, choose File, Export, Torque Game Engine DTS. You will see the Torque Game Engine (DTS) Exporter appear.
2.Use the defaults, but make sure they are correct.
You want to have Export Animation and Export Material Information enabled, and the Collision Mesh set to None (this is automatic if the exporter finds that there is not a mesh whose name starts with "Collision"). Items that are used as weapons don't need to have a collision mesh created—the Torque
Engine knows how to handle |
Figure 16.33 Remapped view. |
|
them without the collision |
|
|
mesh. Click OK when ready. |
|
|
3.Export your Tommy gun to DTS format as C:\3DGPAi1\fps\data\shapes\ Tommygun\Tommygun.dts.
Next, you need to edit the script that controls |
|
the weapon so that it will look for your |
|
model, and not the default one. We'll use the |
|
simple futuristic blaster-style rifle in the fps |
|
demo that comes with Torque. It might sound |
|
funny, and the bullets will look weird, but |
|
that's okay—we just want to see our Tommy |
|
gun model in a gamelike environment. |
Figure 16.34 Finished Tommy gun. |
Team LRN

496 Chapter 16 ■ Making Weapons and Items
1.Locate the file C:\3DGPAi1\fps\server\scripts\rifle.cs and open it with UltraEdit.
2.Find the line that says this:
shapeFile = "~/data/shapes/buggy/buggy.dts";
and replace it with this line:
shapeFile = "~/data/shapes/car/car.dts";
3. Then find the line that says this:
pickUpName = "a rifle";
And replace it with this line:
pickUpName = "a tommygun";
4. Save the file.
Okay, now it's time to run the fps demo.
1.Browse to C:\3DGPAi1 and click on the Run fps Demo shortcut.
2.Click Start Mission.
3.In the Launch dialog box, make sure that the Multiplayer Mission box is cleared.
4.Select Water World from the mission list.
5.Click Launch.
6.After the game loads, look around for a big gray block jutting out from the side of a hill into the water. Figure 16.4 in the earlier section about the Health Kit shows what the block (marked by the arrow) looks like.
7.Run over to the block. On top of it you will find the Tommy gun.
8.Run over the gun to automatically pick it up. You will see a message in your chat window telling you that you've picked it up.
9.Look elsewhere on the block—there are ammo boxes at the other corner. Go pick them all up by running over on top of them.
10.Find something to shoot at and let go!
After a short while, a new copy of the Tommy gun will reappear at the spot where you picked up the first one. Head back over there so you can admire your modeling handiwork as it gently rotates in the, errr…breeze. Yeah, a circular breeze—that's what it is!
There is also a primitive crossbow located on the bridge, if you are of the mind to go and check it out. Press the 1 key or the 2 key to switch back and forth between the weapons if you have more than one.
Team LRN

Moving Right Along |
497 |
The Tommy Gun Script
Just as we encountered with the runabout in Chapter 15, making the model for a weapon is not the whole job. We have yet to create the weapon script that defines how the weapon works. That is something we will cover later, in Chapter 22, when we look at the code that brings all of these models together in our sample game.
Moving Right Along
This chapter was a bit of a review of techniques covered in earlier chapters, but we applied these techniques to a few different kinds of items with different features: collision meshes, no collision meshes, billboard textures, and translucent textures. This helps demonstrate the wide variety of characteristics that modeled items can have in a game world.
We also looked at the MilkShape's Texture Coordinate Editor a little bit, enough to be able to use it to tweak texture maps if the situation warrants.
In the next chapter, we'll learn a new sort of 3D modeling tool and use it to make structures.
Team LRN