

3D Game Programming All In One (2004)
.pdf528 Chapter 18 ■ Making the Game World Environment
And add the following two datablocks before those last two lines:
new Precipitation(RainStorm) {
position = "-45.0071 -29.016 244.517"; rotation = "1 0 0 0";
scale = "1 1 1"; nameTag = "rs"; dataBlock = "HeavyRain"; offsetSpeed = "0.25"; minVelocity = "1.5"; maxVelocity = "3";
color1 = "1.000000 1.000000 1.000000 1.000000"; color2 = "-1.000000 0.000000 0.000000 1.000000"; color3 = "-1.000000 0.000000 0.000000 1.000000"; percentage = "1";
maxNumDrops = "5000"; MaxRadius = "60";
};
new Lightning(ElectricalStorm) { position = "200 100 300"; rotation = "1 0 0 0";
scale = "250 400 500"; datablock = "LightningStorm"; strikesPerMinute = "30"; strikeWidth = "2.5"; chanceToHitTarget = "100"; strikeRadius = "250"; boltStartRadius = "20";
color = "1.000000 1.000000 1.000000 1.000000"; fadeColor = "0.100000 0.100000 1.000000 1.000000"; useFog = "1";
locked = "true";
};
That should do it. Launch your game, and enjoy the storm!
Storm Materials
You will have noticed that when you copied those files from the book's resources directory, there were DML (material definition) and PNG files for both the lightning and rain. If you look inside the rain.dml file, you will see this one line:
rain.png
Team LRN
Storms 529
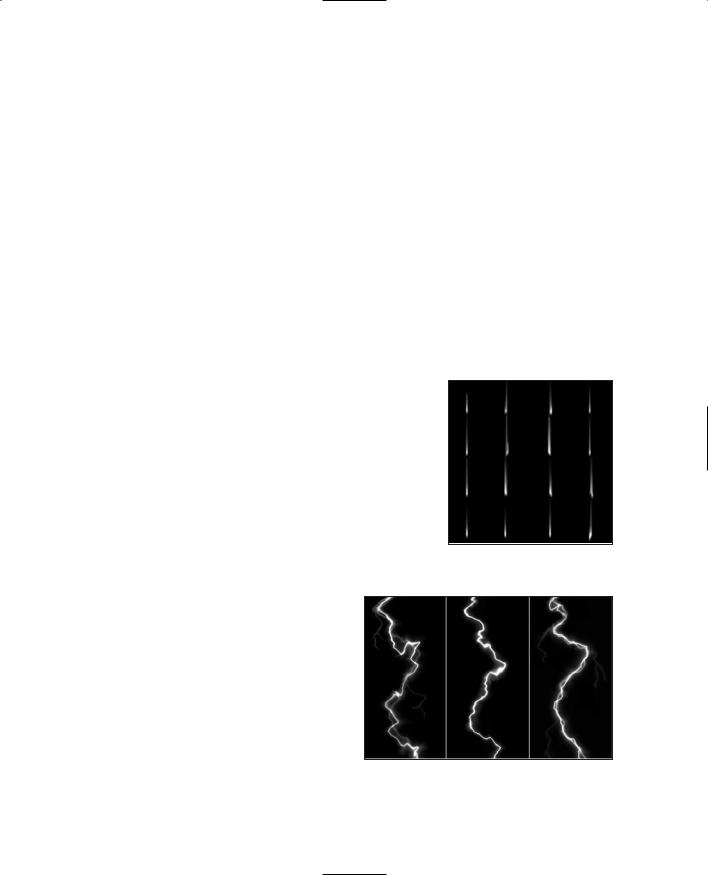
Figure 18.14 shows what this texture looks like. It has 16 images of raindrops in a 4 by 4 grid arrangement.
Now, the actual texture file has a difference—the areas shown in black in Figure 18.14 are really transparent when viewed in the file. To create your own such file, make a new file in Paint Shop Pro, and set it to 128 pixels square, 16 million colors (24 bits), and transparent using the New Image dialog box. Then choose View, Change Grid Guide and Snap Properties, and set the vertical and horizontal values in the Current Image Settings to 32 for both. A 4 by 4 grid will appear in your view of the new blank image. Draw your version of each of the 16 drops in a grid box on the image. The grid is not part of the image. Save the file and deposit it in the same place where you had put the rain.png file. Then edit the rain.dml file to point to your new version instead of the original.
The same process applies to the lightning images, except that the lightning images are not grids. Instead, the lightning.dml material file looks like this:
lightning1frame1
lightning1frame2
lightning1frame3
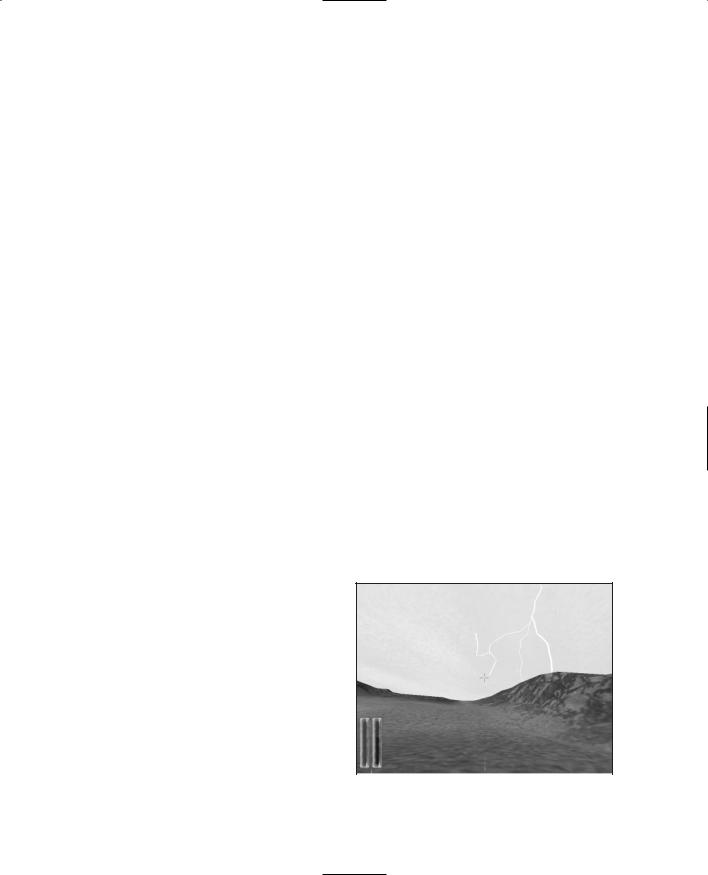
The lightning.dml material file is a list of lightning image files that are displayed in sequence as the lightning stroke occurs. Figure 18.15 shows each of these images in order, from left to right.
When making the lightning frame files, you need to make them 128 pixels wide by 256 pixels high. Draw your lightning bolts on a black background—all the areas you leave black will be treated as transparent. That is, they really are black and are not just rendered that way for purposes of the picture, as was the case back with Figure 18.14.
Figure 18.14 Raindrop images.
Lightning
Now, let's take a look at what makes lightning tick, as it were. There are two significant declarations: one is the LightningData datablock in the server code, and the other is the Lightning object definition that resides in the mission file. The datablock is transmitted to the client when the mission is
loaded with the Lightning object definition Figure 18.15 Lightning stroke images.
Team LRN

530 Chapter 18 ■ Making the Game World Environment
getting transmitted to the client. The datablock describes what resources are used to create the lightning visuals and sound effects, as follows:
datablock LightningData(LightningStorm)
{
strikeTextures[0] = "~/data/maps/lightning.dml"; thunderSounds[0] = ThunderCrash1Sound; thunderSounds[1] = ThunderCrash2Sound; thunderSounds[2] = ThunderCrash3Sound; thunderSounds[3] = ThunderCrash4Sound;
};
Every time Torque triggers the thunder, one of the listed thunderSoundn properties is chosen randomly.
The Lightning object defines how the lightning actually works in the game, as follows:
new Lightning(ElectricalStorm) { position = "200 100 300"; rotation = "1 0 0 0";
scale = "250 400 500"; datablock = "LightningStorm"; strikesPerMinute = "30"; strikeWidth = "2.5"; chanceToHitTarget = "100"; strikeRadius = "250"; boltStartRadius = "20";
color = "1.000000 1.000000 1.000000 1.000000"; fadeColor = "0.100000 0.100000 1.000000 1.000000"; useFog = "1";
};
Obviously, it's important to indicate which datablock to use. This is done with the datablock property. There are then a couple of self-evident properties: strikesPerMinute and chanceToHitTarget. Then strikeWidth indicates the scale factor applied to the image overlay of the lightning bolt that comes from the image files.
When a bolt is generated, a random spot within a circular area is chosen to be the place where the bolt begins, and then another random spot within a different circular area is chosen to be the spot where the bolt hits. The size of the starting area is defined by boltStartRadius, and the size of the strike area is defined by strikeRadius.
The centers of the start and strike areas are defined by the position property. The whole shebang can be made larger or smaller based on the scale property. The rotation property has no effect.
Team LRN
Storms 531
The color property defines a coloring that is applied when the bolt first appears, and the color values are changed over the life of the bolt until they reach the settings in fadeColor.
The useFog property indicates whether the fog defined by the stormFogn property in the Sky mission object will be used.
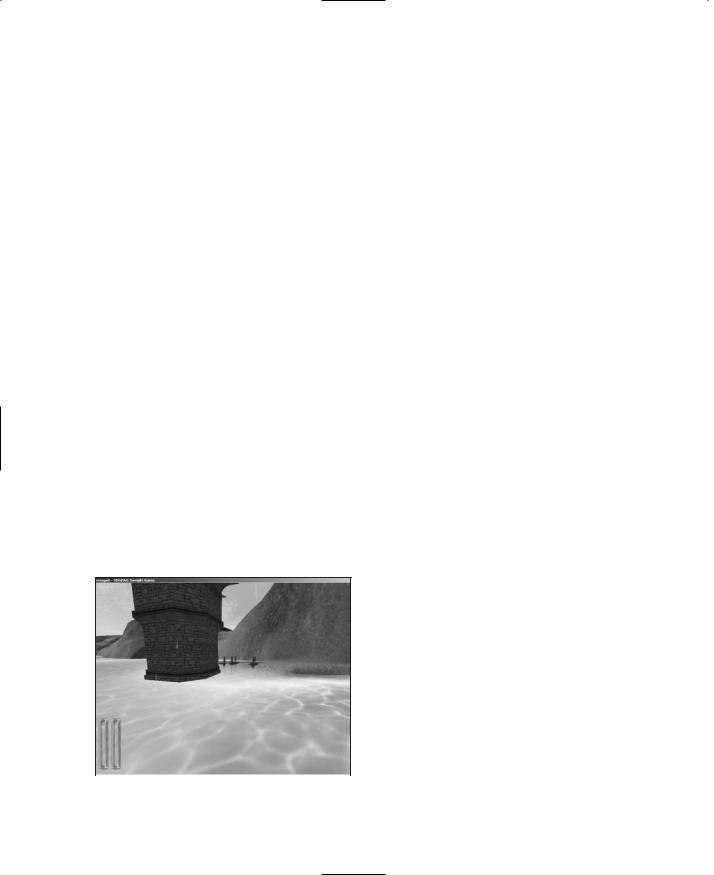
In Figure 18.16 you can see a lighting bolt coming out of the sky in the game setting.
Rain
You can make it rain in much the same way as you make thunder and lightning, though there are differences in the details.
For one thing, the Precipitation datablock is much bigger.
datablock PrecipitationData(HeavyRain)
{
type = 1;
materialList = "~/data/maps/rain.dml"; soundProfile = "HeavyRainSound"; sizeX = 0.1;
sizeY = 0.1; movingBoxPer = 0.35; divHeightVal = 1.5; sizeBigBox = 1; topBoxSpeed = 20; frontBoxSpeed = 30; topBoxDrawPer = 0.5; bottomDrawHeight = 40; skipIfPer = -0.3; bottomSpeedPer = 1.0; frontSpeedPer = 1.5; frontRadiusPer = 0.5;
};
Significant properties here are sizeX |
and |
|
sizeY, which dictate the scaled size of the |
||
drops. |
|
|
The rest of the properties are not well doc- |
||
umented and are hard to decipher. Of |
||
course, you are free to fiddle with them to |
||
your heart's content. The settings included |
|
|
in the preceding code work well. |
|
Figure 18.16 A lightning bolt. |
Team LRN

532 Chapter 18 ■ Making the Game World Environment
If you do experiment with the datablock, realize that the rain is generated at the client. Other players don't see the exact same raindrops at the same instant that you do—it would be lunacy to try to make the server track each drop! Therefore, the rain is generated in a box that envelops the player and moves around as the player moves. The drops are initiated at the top of the box and tracked and rendered as they move down, pulled by gravity. That little bit of detail might help you with your experimentation.
The Precipitation object declaration looks like this:
new Precipitation(RainStorm) {
position = "-45.0071 -29.016 244.517"; rotation = "1 0 0 0";
scale = "1 1 1"; dataBlock = "HeavyRain"; offsetSpeed = "0.25"; minVelocity = "1.5"; maxVelocity = "3"; percentage = "1"; maxNumDrops = "5000"; MaxRadius = "60";
};
The significant properties here are offsetSpeed, which describes how quickly the rain moves across in front of you, and minVelocity and maxVelocity, which describe the lower and upper bounds (respectively) of randomly chosen drop velocities. The latter two keep the rain from falling as a uniform sheet, thus giving it a more realistic appearance.
The percentage property dictates the density of the drops, while maxNumDrops indicates the upper bounds of the number of drops to create. MaxRadius is the outer bounds of the area surrounding the player where the engine can create drops.
A Perfect Storm
Okay, so it may not be perfect, but it is neat. There are two useful object methods that you can use to move a storm in and out gradually without the need to manipulate the stormrelated objects in detail.
The first is the stormCloud method that belongs to the Sky object. It looks like this:
Sky.stormCloud (flag, fade)
Set the flag to 1 if you want to create storm clouds and 0 if you want them to go away. To use the method, you would first call Sky.stormCloud (0, 0) as soon as your game starts to ensure that the clouds are not visible—all you would see is the skybox.
Team LRN

Water Blocks |
533 |
Then, at the moment you decide to call up a storm with your wand, you would call Sky.stormCloud (1, 60) somewhere in your script. This will cause the engine to gradually fade in your clouds over a 60-second time frame. When the storm clears, you make them go away gradually by calling Sky.stormCloud (0, 60). Of course, you could use a different fade value, making it as long or short as you desire.
The second method is a nice complement to the stormCloud method. It is called stormPrecipitation and belongs to the Precipitation object. It looks like this:
Precipitation.stormPrecipitation(flag, fade)
It works the same way as stormCloud but obviously applies to the precipitation.
Use the two methods together, with appropriate fade values, to get a nice storm effect. Try them out in your sample game by entering the commands manually in the console.
Water Blocks
Water blocks are special objects that we can insert into our game world via a mission file. Here is a water block:
new WaterBlock(Water) { position = "-1024 -1024 0"; rotation = "1 0 0 0"; scale = "2048 2048 125"; UseDepthMask = "1"; surfaceTexture = "./water"; liquidType = "OceanWater"; density = "1";
viscosity = "15"; waveMagnitude = "1"; surfaceOpacity = "0.75"; envMapIntensity = "0.7"; TessSurface = "50"; TessShore = "60"; SurfaceParallax = "0.5"; FlowAngle = "0"; FlowRate = "0"; DistortGridScale = "0.1"; DistortMag = "0.05"; DistortTime = "0.5"; ShoreDepth = "20"; DepthGradient = "1"; MinAlpha = "0.03";
Team LRN
534 Chapter 18 ■ Making the Game World Environment
MaxAlpha = "1"; removeWetEdges = "0";
specularColor = "1.000000 1.000000 1.000000 1.000000"; specularPower = "6";
params0 = "0.32 -0.67 0.066 0.5"; extent = "100 100 10"; textureSize = "32 32";
params2 = "0.39 0.39 0.2 0.133"; envMapOverTexture = "./day_0007"; params3 = "1.21 -0.61 0.13 -0.33"; params1 = "0.63 -2.41 0.33 0.21"; seedPoints = "0 0 1 0 1 1 0 1"; floodFill = "1";
};
Water blocks repeat in the same way that terrain blocks repeat, and because water blocks are flat, the only positioning information of real interest is the height. Table 18.2 describes the significant properties (and there are many!).
Water block textures, as described in various places in Table 18.2, can be created in exactly the same way as cloud textures. In fact, you can even get away with using cloud textures in a pinch!
Take a look at Figure 18.17 to see a water block in action.
Terraforming
You've already seen in Chapter 12 how to create a terrain using height maps. Torque also has a built-in Terrain Editor that you can use to manually modify the terrain height map
and square properties.
|
Terrain editing is done using a Terrain |
|
brush. The brush is a selection of terrain |
|
points centered on the mouse cursor in |
|
either a circular or square configuration of |
|
different selectable sizes, as you can see in |
|
Figure 18.18. |
|
The brush can also be either a hard brush |
|
that has a uniform effect across the surface |
|
of the brush or a soft brush whose influ- |
|
ence on terrain diminishes toward the |
Figure 18.17 Water in a game setting. |
edges of the brush. You can adjust the soft |
Team LRN

Terraforming |
535 |
Table 18.2 Water Block Properties
Property |
Description |
surfaceTexture |
Specifies the texture generally used for the surface. |
ShoreTexture |
Specifies the texture used in shallow areas. |
envMapOverTexture |
Defines the environment map texture used when looking over the fluid |
|
surface. |
envMapUnderTexture |
Defines the environment map texture used when looking under the fluid |
|
surface. |
surfaceOpacity |
Specifies the maximum opacity of the surface (0.0 -> 1.0). |
envMapIntensity |
Specifies the intensity of the applied environment map (0.0 -> 1.0). |
|
Setting the intensity to 0 results in the environment map pass being |
|
skipped, which increases performance slightly. |
UseDepthMask |
Toggles the depth map feature on and off. |
ShoreDepth |
Specifies the depth at which the shore texture will start being applied. |
|
Larger values result in larger shore texture areas. |
DepthGradient |
Specifies the gradient that the shore textures will interpolate between |
|
MinAlpha and MaxAlpha. The value of 1 equates to linear interpolation, |
|
whereas values 0 -> 1 equate to fast fade-out/slow fade-in and the |
|
values 1 -> inf equate to slow fade-out/fast fade-in (from deep to |
|
shallow). |
MinAlpha/MaxAlpha |
Specifies the alpha levels used from shore to deep fluid. The MinAlpha |
|
can be used to prevent totally transparent areas. You will always be able |
|
to see underneath the fluid surface, so use the fog volumes from the Sky |
|
object to restrict visibility underwater. |
TessSurface/TessShore |
Specifies the number of times the textures are repeated over the water |
|
block surface for surface/shore textures. |
SurfaceParallax |
Renders the surface as two layers. When the surface is distorting or |
|
flowing, then this controls the ratio of one surface with respect to the |
|
other. If you set this to 0.5, then one surface will move at half the speed |
|
of the other. |
FlowAngle/FlowRate |
Specifies the way the fluid flows. The FlowRate controls how fast the |
|
fluid flows, and the FlowAngle is a polar angle controlling its direction. |
|
Using a FlowRate of 0 completely stops the fluid from flowing. |
DistortGridScale/ |
Controls the distortion effect of the fluid surface. This allows you to |
DistortMag/DistortTime |
create many different surfaces. To control the speed, use DistortTime. |
|
Use DistortMag to control the overall magnitude of the distortion. |
|
DistortGridScale normally does not need adjusting but can be used to |
|
adjust a setting for a small water block that may not look correct on a |
|
large one. |
Team LRN
536 Chapter 18 ■ Making the Game World Environment
|
brush fall-off rate in the Terrain Editor |
|
|
Settings dialog box, found under the |
|
|
menu Edit, Terrain Editor Settings. |
|
|
1. |
Run your sample game, and when |
|
|
you have spawned into the game, |
|
|
press F8 to switch to fly mode. |
|
2. |
Fly up a fair bit to get a good |
|
|
overview of the surrounding ter- |
|
|
rain. |
|
3. |
Press F11 to switch to the Editor |
|
|
GUI. |
Figure 18.18 Terrain brush. |
4. |
Choose Window, Terrain Editor. |
5.Wave your cursor over the terrain, and notice the Terrain brush marked on the terrain.
6.Drag your mouse up and down after clicking over some area of terrain. You will see your terrain change to conform.
7.Experiment with using different actions to see how the Terrain Editor works.
t i p
Every now and then while in the Terrain Editor, press Alt+L to redo the lighting. The cursor will freeze for a few moments while the lighting is done. This will cause the new terrain changes you've made to properly generate shadows.
8. Every now and then remember to save your work.
Table 18.3 describes the Terrain Editor functions that are available in the Action menu.
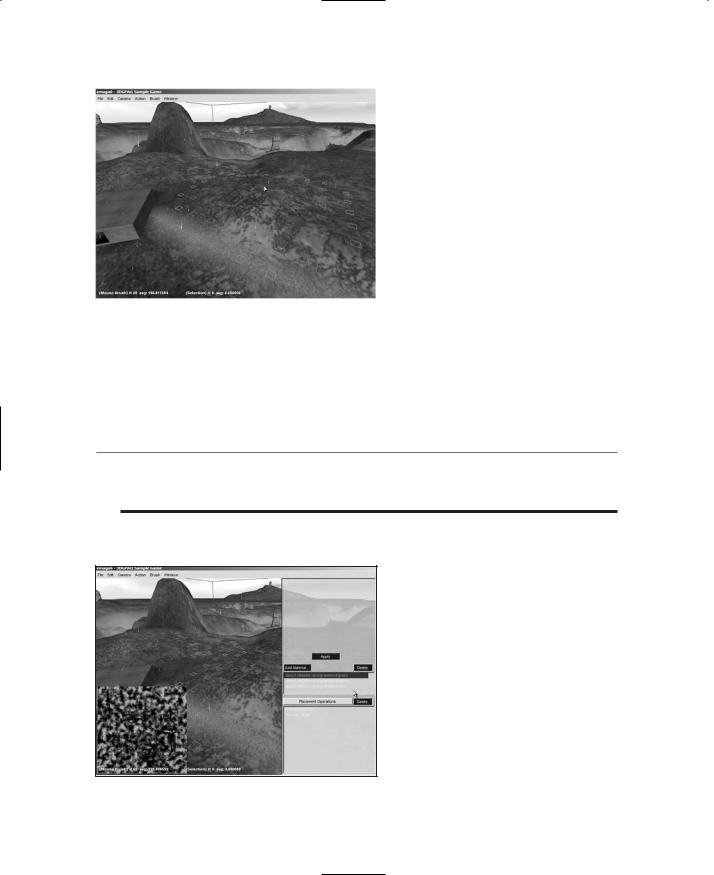
Table 18.4 describes the functions of the Terrain Terraform Editor (see also Figure 18.19), the one we used in Chapter 12 dealing with height maps.
Figure 18.19 Terrain Terraform Editor.
Team LRN

Terraforming |
537 |
Table 18.3 Terrain Editor Functions
Function |
Description |
Select |
Selects grid points that will be painted with the brush. |
Adjust Selection |
Raises or lowers the currently selected grid points as a group. |
Add Dirt |
Adds "dirt" to the center of the brush. |
Excavate |
Removes "dirt" from the center of the brush. |
Adjust Height |
Drags the brush selection to raise or lower it. |
Flatten |
Sets the area bounded by the brush surface to be a flat plane. |
Smooth |
Smoothes, within the bounds of the brush, rough areas of varying terrain height. |
Set Height |
Sets the terrain within the brush to a constant height as specified in the Terrain |
|
Editor settings. |
Set Empty |
Converts the squares covered by the brush into holes in the terrain. |
Clear Empty |
Makes the squares covered by the brush solid. |
Paint Material |
Paints the current terrain texture material with the brush. |
Table 18.4 Terrain Terraform Editor Functions
Function |
Description |
fBm Fractal |
Creates bumpy hills. |
Rigid Multifractal |
Creates ridges and sweeping valleys. |
Canyon Fractal |
Creates vertical canyon ridges. |
Sinus |
Creates overlapping sine wave patterns with different frequencies |
|
useful for making rolling hills. |
Bitmap |
Imports an existing 256 by 256 bitmap as a heightfield. |
Turbulence |
Perturbs another operation on the stack. |
Smoothing |
Smoothes another operation on the stack. |
Smooth Water |
Smoothes water. |
Smooth Ridges/Valleys |
Smoothes an existing operation on edge boundaries. |
Filter |
Filters an existing operation based on a curve. |
Thermal Erosion |
Erodes an existing operation using a thermal erosion algorithm. |
Hydraulic Erosion |
Erodes an existing operation using a hydraulic erosion algorithm. |
Blend |
Blends two existing operations according to a scale factor and |
|
mathematical operator. |
Terrain File |
Loads an existing terrain file onto the stack. |
Team LRN