

3D Game Programming All In One (2004)
.pdf318 Chapter 9 ■ Skins
4. Using the selected object with the thicker lines in Figure 9.15 as a guide, trace a shape around the cab triangles that cover the roof and the C-pillar. You click at a start location and then click again at each place around the cab where the object's line will change direction. Each click defines a node of the object.
5. When you have made the last node of your object, click on the Object Selection tool (bottom icon of the Tools toolbar). The
Figure 9.15 Tracing the cab roof. object will now be surrounded by a rectangle with reshaping handles (black squares).
6.If you are not happy with the shape you've made, select it again with the Object Selection tool (if it isn't already selected), and then click the Pen tool. In the Tool Options palette in the Mode section, click on the little white arrowhead icon, which is the Edit Mode button (see Figure 9.16).
Figure 9.16 Edit Mode button.
7.Move your cursor down to your object and reshape the object by grabbing and moving the little square node handles (see Figure 9.17) that are located at the places where you clicked when creating the object—these are the nodes.
8.Once you've finished, change the fill color of the object you've just created to the color of your choice, and make the line color transparent. By drawing the object in this way, you don't have the fill color obscuring your template while you trace the outline. Using red line color when you are drawing helps to differentiate between the template's black lines and the lines you are making.
9.After you've finished with the cab roof, right-click anywhere on the drawing to deselect the object you just drew, and then set the line color back to red and the fill color
Figure 9.17 Arrows indicate the editable node handles.
back to transparent.
10.Next, draw an outline around the entire cab template, following the outside edges. When finished, click the Object Selection tool.
Team LRN
Making a Vehicle Skin |
319 |
11.Set the fill of this new object to a dark green-gray color, and set the line color to transparent. The new object should now obscure both the earlier roof object plus the rest of the cab template.
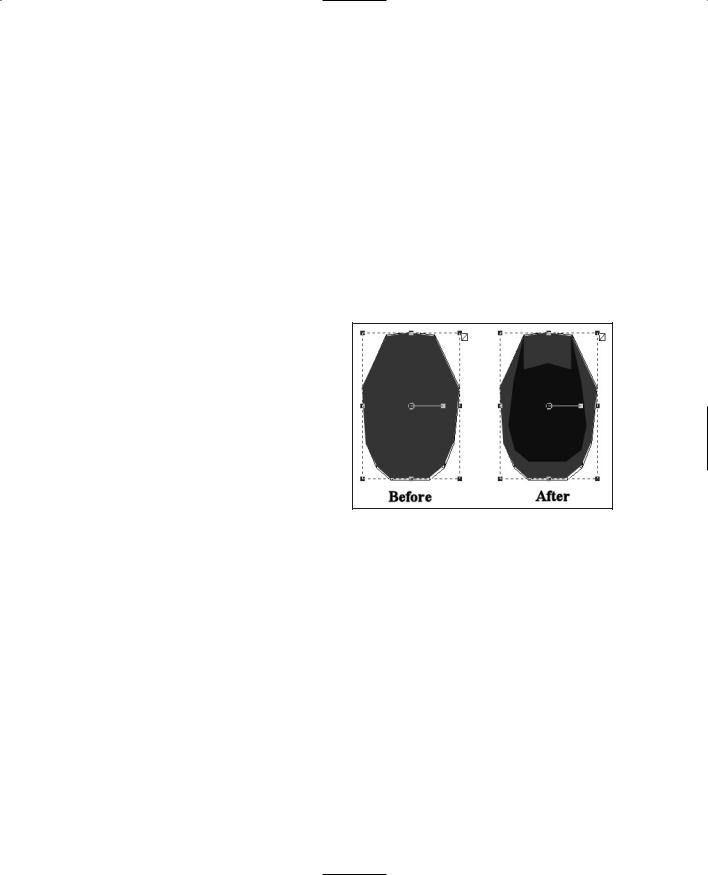
12.Select the new object with the Object Selection tool, and then choose Objects, Arrange, Send to Bottom. This will move the last object you created to be positioned underneath the first object you made that covered the roof. See Figure 9.18 to see what the before and after should look like.
13.Next, create a new raster layer by right-clicking the Layer palette and choosing New Raster Layer. Accept the defaults and click OK in the dialog box that appears.
14.Now find the Paint Brush tool (the seventh one down), but instead of just clicking the icon, click the little black triangle or arrow on the right side of the icon. A popup icon list will appear, from which you should select the Air Brush.
15.Set your foreground color to be the same blue (or whatever) color you used for the cab roof.
16.Now set your Air Brush tool options to match those in Table 9.3.
17.Use the Air Brush to spray over the outline of the car's body, as shown in Figure 9.19. Remember to make sure that the new raster layer you created (probably called Raster 1) is
|
selected in the Layer palette, other- |
Figure 9.18 Before using Send to Bottom, and |
||
|
wise your airbrushing will be |
after using it. |
||
|
applied to the wrong layer. |
|
|
|
|
|
|
|
|
|
Table 9.3 Air Brush Settings |
|
|
|
|
Setting |
Value |
|
|
|
Shape |
Round |
|
|
|
Size |
32 |
|
|
|
Hardness |
9 |
|
|
|
Step |
1 |
|
|
|
Density |
100 |
|
|
|
Thickness |
100 |
|
|
|
Rotation |
0 |
|
|
|
Opacity |
35 |
|
|
|
Blend Mode |
Normal |
|
|
|
Rate |
5 |
|
|
|
|
|
|
|
Team LRN

320 Chapter 9 ■ Skins
Figure 9.19 Spray-painting the body base color.
Figure 9.20 Spray-painting the accent color.
18.Now change to a light blue foreground color, and set the Air Brush size to 16 and the opacity to 12.
19.Spray on the accent color, as shown in Figure 9.20. When I did it, I sprayed one long line from left to right, and then I went back and used short spurts to make the line more irregular.
20.Next you'll apply a fancy racing stripe. Select the Pen tool, and change it to Drawing Mode by clicking on the little pencil icon next to the Edit Mode arrow we used earlier.
21.Make sure that Create as vector is set in the Tool Options palette, and then select Freehand for the Segment Type, also in the Tool Options palette.
22.Set the line color to be yellow.
23.Draw a squiggly line, with a shape like the one in Figure 9.21, from left to right on the car body. You can edit the shape of the line by twiddling the node handles, just like you did earlier when we made the cab roof. To make your line look more like Figure 9.21, choose the Object Selection tool, and deselect the line.
So, there you have it—the car's body paint job is done. Notice that we used a different approach than we did with the cab. It just goes to show that there's more than one way to skin a cat…er, car! I meant car! Honest.
Well, I guess it's time to get back to work. The last bits left are the four wheel-well, fender thingies. We'll do these in a fashion similar to the way we did the cab.
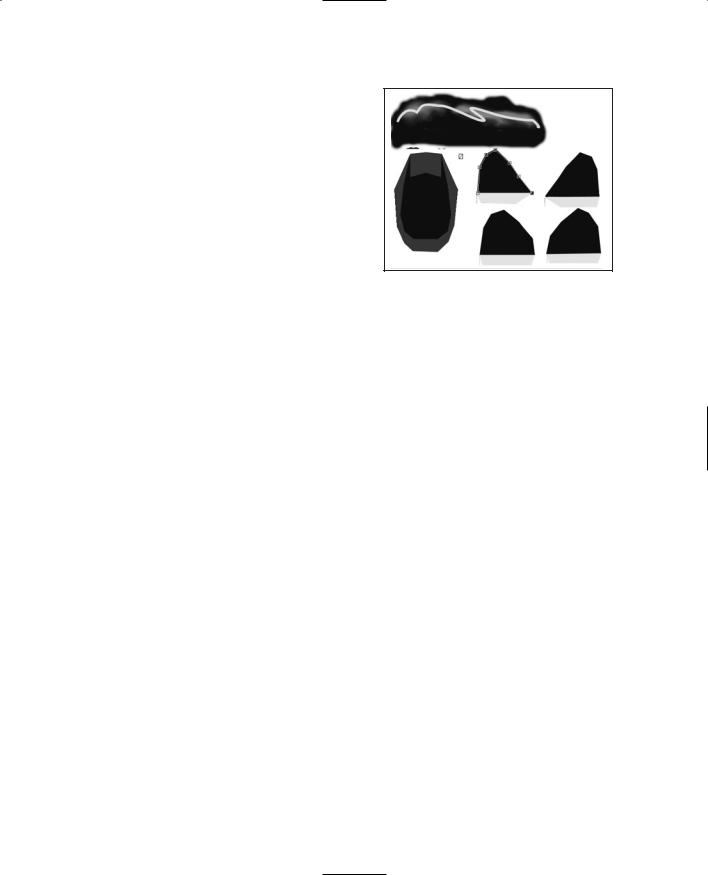
24.Using Figure 9.22 as a reference and using the Pen tool set to Point to Point Segment Type, draw an outline of the upper part of the upper-left fender thingy and fill it with the basic blue we've been using.
25.After creating the last node, choose the Object Selection tool and make sure the object you just made is selected.
26.Choose Edit, Copy to copy the object to the Clipboard.
Figure 9.21 Adding the racing stripe. |
27. Choose Edit, Paste, Paste As New Layer. |
|
The new object will be pasted in its |
||
|
||
|
own layer. |
Team LRN
Making a Vehicle Skin |
321 |
28.Choose Image, Mirror. This will cause your new object to face left instead of right, or vice versa. This is why I used Paste as New Layer, instead of Paste as New Vector Selection. When you use the Image, Mirror menu or the Image, Flip menu, all the objects on the current layer are affected. By creating a new layer with just the one object, you avoid this problem.
29.Place your new copy of the object over
the upper-right fender thingy template, |
Figure 9.22 The fender thingies. |
|
adjusting it with the Pen tool in edit |
||
|
||
mode if necessary. |
|
30.Repeat steps 24 to 29 for the bottom two fenders.
31.Now repeat all of steps 24 to 30, but this time create the fender skirts with a fill color of yellow, which stylishly matches the racing stripe.
32.When you are finished, save your file one final time as C:\3DGPAi1\resources\ch9\myauto.psp. This is your source file.
33.Now save your skin as C:\3DGPAi1\resources\ch9\myauto.jpg.
34.Once again, you will get an alert saying that the software will have to save the file as a merged image, and asking if you want to continue. Choose Yes.
Testing the Runabout Skin
Now it's time to take our little creation out for a spin around the block, so to speak. We'll use the Show Tool just like we did with the soup can.
1.Browse your way to C:\3DGPAi1 and then double-click on the Show Book Models shortcut.
2.The Torque Engine will fire up the Show Tool. Click on Load Model.
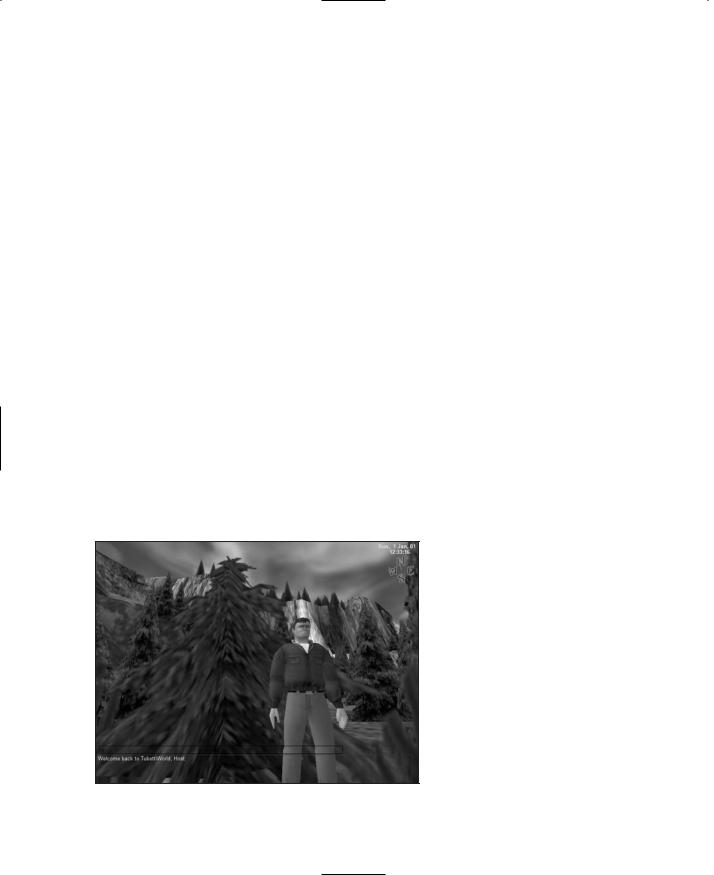
3.Find myauto.dts and load it. A fine job, indeed! Notice the lack of wheels, the same as with the dune buggy you looked at earlier.
4.Don't forget to use the navigation keys to move the car back and forth, and rotate it about the various axes. See Table 9.1 for the Show Tool key commands.
5.You can view my original runabout skin by loading the runabout.dts model.
Unfortunately, we'll have to wait until the later modeling chapters before we can take the runabout out for a real test drive. That's okay, though—we've plenty to do in the meantime!
Team LRN
322 Chapter 9 ■ Skins
Making a Player Skin
Now for the Big One—the player skin, or more accurately, the character skin, because the following section could apply equally as well to computer-controlled characters sometimes called AI (Artificial Intelligence) players or NPCs (Nonplayer Characters).
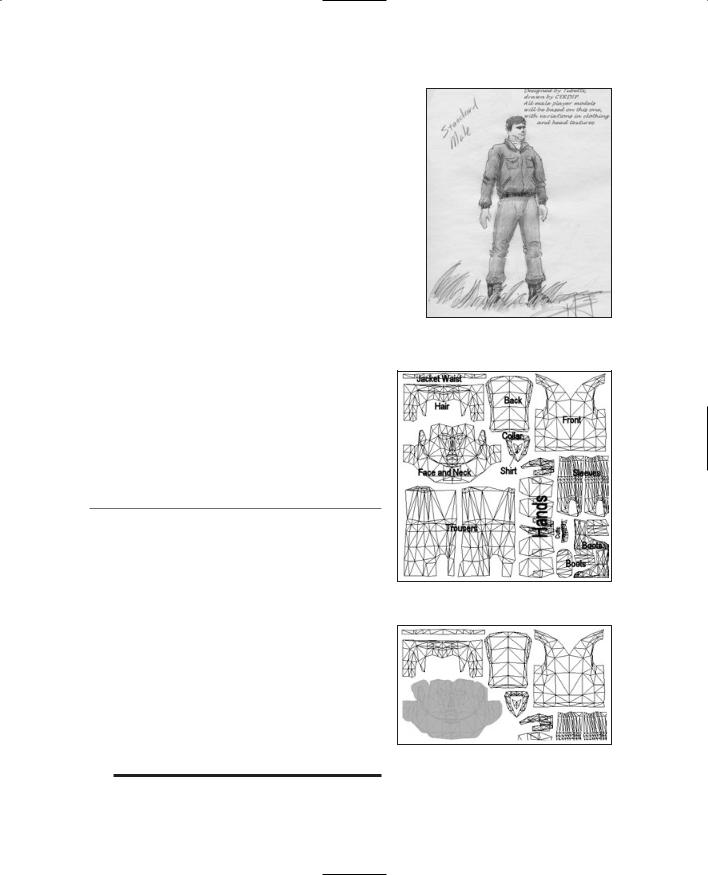
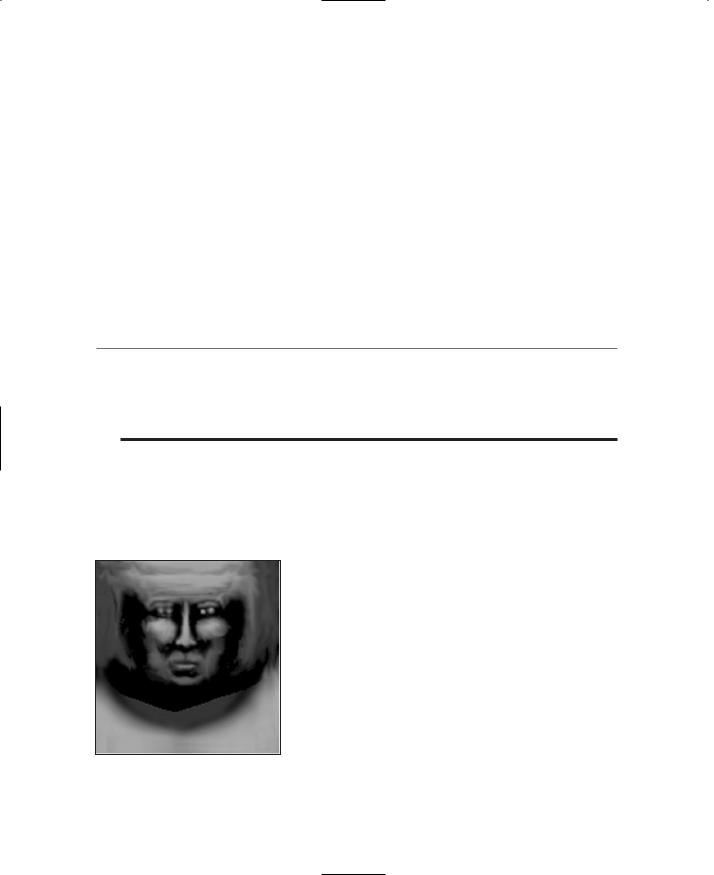
The character we'll use as the basis for this section is one affectionately called the Standard Male Character. He was created to be the base model for derivatives to be used in the Tubettiworld game that is currently in development at Tubetti Enterprises.
Figure 9.23 shows an early prototype of the Standard Male Character striking a heroic pose in the wilderness, confronting his, um, well, some trial or tribulation, I guess. This character began life as a concept sketch I did while nestled in front of a roaring fire on vacation in the Laurentians. My wife told me what the character should look like, and I sketched him about a hundred times until she was happy with it (see Figure 9.24).
I sent the concept artwork to a talented young man who goes by the name Psionic (http://www.psionic3d.co.uk) on the Internet, and he created the original model prototypes for me. The model came out pretty well, but as I said, the character in Figure 9.23 was an early prototype. The main issue was the skin color—it was too pasty. But that was soon fixed. We have since used that model to generate variations in gender, build, ethnicity, and animation sets, mostly by modifying skins, but with some model changes as well—especially for the female versions.
The point here is that for all of your serious artwork, models, skins, and so on, it's a good idea to create concepts beforehand—on paper or digitally, it doesn't matter. This way you have a tool to communicate the idea that you have in your head. It may take weeks or months to get a model completed, and it can happen that you stray unacceptably far from your original concept. It's especially important to have concept artwork if you want to sell a game idea to build a team and recruit talent to help you. If they can go away with a few pictures in their minds of what your dream is, it will help
you a great deal.
Figure 9.23 The Tubettiworld Standard Male Character model rendered by the Torque Engine.
The Head and Neck
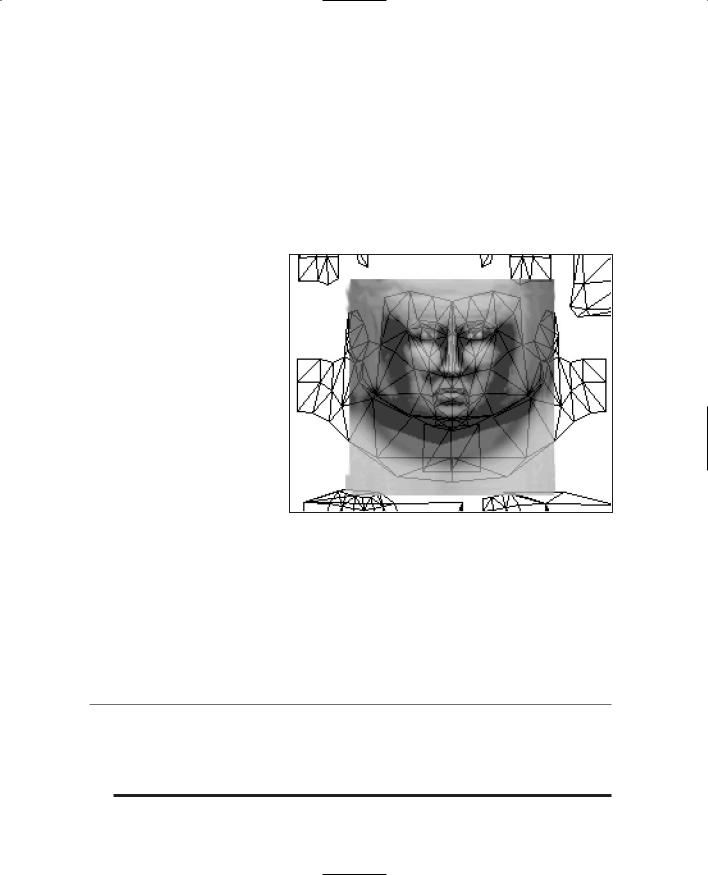
Now on with the show. Take a look at Figure 9.25. This is the unwrapped UV template for
Team LRN
Making a Player Skin |
323 |
the Standard Male. I've labeled the various parts in the picture to help identify what goes where. The file C:\3DGPAi1\resources\ch9\player.bmp has the proper template in it (though without the labels) for you to work with. Let's get started.
1.As before, open the template file, this time called C:\3DGPAi1\resources\ch9\player.bmp, save it somewhere as a PSP file, and work with that.
2.Create a new raster layer and name it "Skin" in the New Raster Layer dialog box. You are going to create a lot of raster layers in this procedure— make sure you label each one as I indicate.
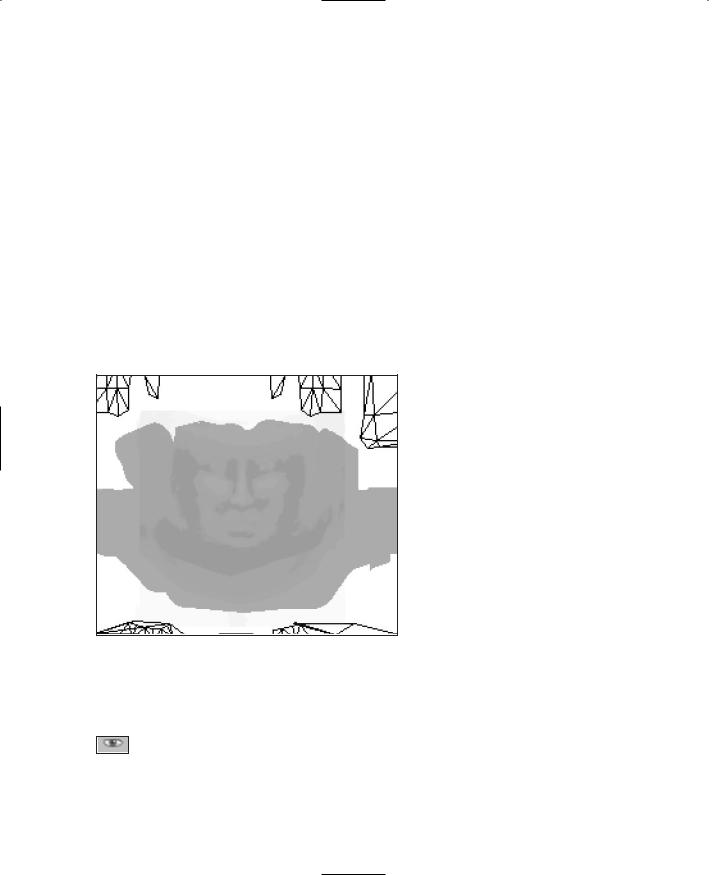
3.Using whichever technique you like best, cover the entire face and neck part of the template with a flesh color, as in Figure 9.26. (I use
the RGB values shown in Table 9.4 for a basic flesh color. Of course, you are free to twiddle the numbers to get something you like.) Make sure you apply your color to the skin layer and not to the background layer that holds your template.
Figure 9.24 Concept artwork for the Standard Male Character.
t i p
Normally you can draw a vector object directly to a vector layer or create it as a raster on a raster layer. The problem is that once you've drawn it, you can't adjust it. The solution is to draw your object as a vector on a new vector layer and then add it to a raster layer when you have finished with it. You do this by setting all the layers you aren't interested in to invisible (click on the eye icon next to each layer in the Layer palette). You want to have only two layers visible: the vector layer of the object you just made and the raster layer you want to add it to. Then you choose Layers, Merge, Merge Visible. Your vector layer will be converted to raster form and added on top of the raster layer. Then just set all the rest of your layers to be visible again by clicking on their eye icons one more time.
Figure 9.25 UV template for the Standard Male.
Figure 9.26 Basic flesh tone applied to the skin layer.
Team LRN
324 Chapter 9 ■ Skins
|
Table 9.4 |
Flesh-Tone RGB Settings |
|
|
|
|
Color Component |
Value |
|
|
Basic |
Red |
215 |
|
|
|
Green |
165 |
|
|
|
Blue |
95 |
|
|
Shadow |
Red |
183 |
|
|
|
Green |
133 |
|
|
|
Blue |
83 |
|
|
Highlight |
Red |
247 |
|
|
|
Green |
187 |
|
|
|
Blue |
107 |
|
|
|
|
|
|
t i p
In Figure 9.26 you can see the lines of the UV template through the skin layer's flesh color. Do this by reducing the opacity of the skin layer to about 95 percent or so. In the Layer palette, slide the Opacity slider left until it gets to the value you want. The lower you set the opacity, the more you can see of the layer beneath it—however, the less your skin layer's colors will look like their actual settings.
4.Now comes a bit of magic. You need to get some basic skin shading done next. There is a highlight and shadow image template that I like to use to get the basic head shades in place. Figure 9.27 shows the template, and you have a copy of it (C:\3DGPAi1\resources\ch9\hilite.png) that you can use for your own purposes. Open this file in Paint Shop Pro.
5.With the hilite.png image file active, choose Edit, Copy. You must make sure that you have no selections in the image. You can make doubly sure by choosing the Selection tool and right-clicking inside the image; this will deselect any selections that might exist—sometimes they can be so small that you don't notice them.
6.Find your working copy of player.psp in Paint Shop Pro, and choose Edit, Paste, Paste as New Layer. This will paste the hilite image you copied into a new raster layer. Rename the layer as "Hilite". The
Figure 9.27 Hilite template. first thing you will probably notice is that it is larger than the head and neck template area.
Team LRN
Making a Player Skin |
325 |
7.Choose Image, Resize and you will get the Resize dialog box. Clear the Resize All Layers box, and then in the Pixel Dimensions frame, set Height and Width to 80, and choose Percent from the combo box to the right. Click OK.
8.Now lower the opacity of the new layer to about 80 percent.
9.Make the skin layer invisible.
10.Drag the image around until you get the best fit over the UV template of the head and neck.
You should get an image that looks like Figure 9.28.
Being the astute observer that I know you are, you've no doubt noticed that although the hilite template fits quite well at 80 percent of its full size, it's not exactly right. For one thing, the eyes are wrong—the hilite of the eye area needs to be slanted to match the contours of the UV triangles. We're going to fix that right now.
11.Make sure that the new
raster layer with the |
Figure 9.28 Hilite template applied over the head and neck |
|
UV template. |
||
hilites on it is active by |
||
|
making sure that its entry in the Layer palette is selected. Then choose the Selection tool, which is the fifth tool from the top of the Tool palette.
12.Select an area around the right that encompasses the eye, the brow above, and a small amount of the upper cheek below, but no part of the bridge of the nose.
13.Choose Image, Rotate, Free Rotate. In the Free Rotate dialog box, click on Left and then click on Free. Type 5.00 into the Free box and click OK.
t i p
The hilite.png template was created by taking several full-face photos and drawings and stretching the contrast of each quite a bit in grayscale. The images were then all overlaid and averaged to give a resulting template. That result was then tested in a few models and manually tweaked a few times. The originals were chosen to be all of the same face shape and type. Different templates for different ethnicities and face shapes were made this way.
Team LRN
326Chapter 9 ■ Skins
14.The eye area has rotated. Press Ctrl+Up Arrow to nudge the selection up once and then Ctrl+Right Arrow to nudge it once to the right.
15.Right-click in the image to deselect the selection, and check to make sure that it is aligned correctly. If it isn't, press Ctrl+Z and you will get your selection back. You can then rotate it or nudge it some more.
16.When you have the eye hilites placed, repeat this process for the other eye.
17.Lower the opacity for the hilite layer to about 20 percent, and raise the opacity of the skin layer to 100 percent.
18.Save your file (just a precaution).
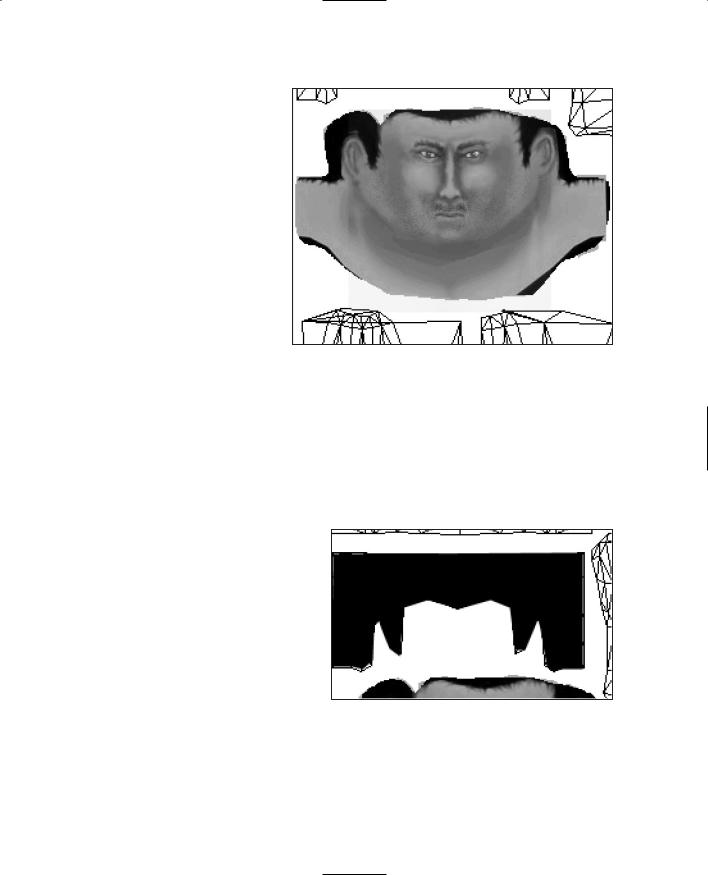
Now you have something like Figure 9.29, with the rough shading and coloring of flesh tones showing the major features of the face. At this point it becomes a case of filling in the details. You can go ahead and do it however you like. Zoom in close and use the Air Brush and Paint Brush tools. Add lip color, eyebrows, eye details, and ears. You might find it hard to put actual eye color in, but give it a try.
Eye detail can be added by creating ellipse objects on a scratch vector layer, sizing and rotating them correctly, and placing them over the eye areas. When you create eyes remember that the colored area in the center, the combined pupil and iris regions, usually has a white or otherwise light spot offset a bit to one side and a bit above center, as shown in Figure 9.30.
Also remember that certain areas of the face are usually lighter in tone than others, like the upper
Figure 9.29 Hilite template applied over the skin layer.
part of the lower lip, the upper eyelid, the nostrils, and so on.
You can make a good five-day stubble by using the Paint Brush with the density set low, like 25 percent or so. Dab the brush in the areas where it is needed. Make a moustache by applying the stubble brush over and over to the upper lip. Encourage yourself to experiment!
Eventually you will end up with something like Figure 9.31.
Figure 9.30 An eye.
Team LRN
Making a Player Skin |
327 |
Hair and Hands
Next we'll tackle the hair and hands of the Standard Male. We'll do these two together because they both use skin (flesh) tones (the guy is going to have a bald spot). Once these are done, we are finished with the skin part of the skin. Or something like that.
Both of the next subsections will be using the skin layer in addition to other layers.
Hair Textures |
Figure 9.31 Finished face and neck. |
Hair has a pattern, though not a specific pattern. There is often quite a bit of randomness, but nonetheless there is a grain, if you will, like the grain in a wooden plank or the lay of a lawn. There's a clue there!
Try this:
1.Locate the hair portion of the UV template in your working file, player.psp.
2.Draw an object that encompasses the hair, and set the fill to match the color of the hair you used in the bits that show in the head area as in Figure 9.32.
3.Copy that object and paste the copy into another new layer. Modify the fill of that object. (Reminder: You can do this by double-clicking on the object with the Object Select tool and then clicking on the Fill color box.)
4.Set the hair RGB color value to those listed in Table 9.5.
5.Select the Texture check box.
Figure 9.32 Filled hair template area.
6.Click the Current Texture dis-
play box and select Grass02 from the list that pops up.
7.Set Angle to 90 and Scale to 50.
Team LRN