

Beginning ASP.NET 2.0 With CSharp (2006) [eng]
.pdfChapter 7
Selection List Controls
Selection list controls are optimized to accept a user selection. These two controls display just one field from each record and stand by for a mouse-click. As shown in Figure 7-3, ListBox controls (right side of figure) are by default expanded, whereas DropDownList controls (left side of figure) display a single row until the user expands. As you would expect, these controls are display-only with no capability to change data.
Figure 7-2
Figure 7-3
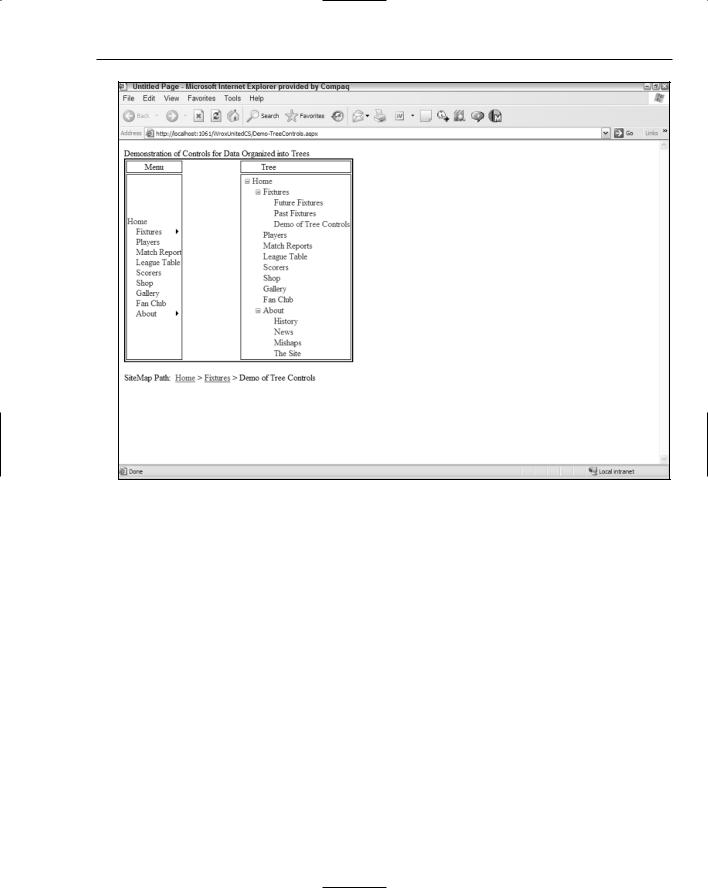
Tree Controls
Tree controls are optimized to handle data that are stored in nodes rather than tables. The Menu control provides a slide-out dynamic so that when you pass your mouse over a menu choice the submenu slides out. The TreeView control gives the user the option to expand or collapse nodes (see Figure 7-4). The Menu control is on the left of Figure 7-4, and the TreeView control is on the right. The SiteMapPath control offers a navigation trail that automatically updates based on the current page.
208
Reading Data
Figure 7-4
The following table summarizes the differences among the data-bound controls.
Control |
Primary Data |
Capabilities |
Description and |
|
Structure |
|
Primary Uses |
|
|
|
|
GridView |
Table |
Read and edit |
Separate column for each field. |
|
|
|
Each field value in its own cell. |
|
|
|
Display multiple records in a |
|
|
|
grid. |
|
|
|
Edit existing records. |
DataList |
Table or Tree |
Read and edit |
All fields in one cell. |
|
|
|
One cell equals one record. |
|
|
|
Display multiple records in a |
|
|
|
grid. |
|
|
|
Create new record for GridView. |
|
|
|
Table continued on following page |
209

Chapter 7
Control |
Primary Data |
Capabilities |
Description and |
|
Structure |
|
Primary Uses |
|
|
|
|
|
|
|
|
Repeater |
Table or Tree |
Read only |
All fields in one cell. |
|
|
|
One cell equals one record. |
|
|
|
Display multiple records in a |
|
|
|
grid.Create new record for |
|
|
|
GridView. |
DetailsView |
Table or Tree |
Read, edit, create |
Display single records. |
|
|
|
Default structure provided. |
|
|
|
Edit existing records. |
|
|
|
Create new records. |
FormView |
Table or Tree |
Read, edit, create |
Display single records. |
|
|
|
No default structure. |
|
|
|
Edit existing records. |
|
|
|
Create new records. |
DropDownList |
Table or Tree |
Read only |
List of a few fields. |
and ListBox |
|
|
|
|
|
|
Invites a user selection. |
|
|
|
Display data for user selection. |
SiteMapPath |
Tree |
Read only |
List page names between home |
|
|
|
and current page. |
|
|
|
Used to identify current position |
|
|
|
in site. |
Menu |
Tree |
Read only |
Displays top-level nodes with |
|
|
|
the option to expand one sub- |
|
|
|
node at a time. |
|
|
|
Used to display a menu where |
|
|
|
there will be one selection. |
TreeView |
Tree |
Read only |
Displays top-level nodes with |
|
|
|
option to expand one or many |
|
|
|
subnodes. |
|
|
|
Used to display multiple |
|
|
|
subnodes simultaneously. |
|
|
|
|
210

Reading Data
Data Source Controls and Data-Bound
Controls Work Together
As discussed in the previous two sections, ASP.NET 2.0 offers two families of controls for working with data: data source controls and data-bound controls. This section takes a moment to look at how they work together. The data source control handles the behind-the-scenes connections to the data as well as a set of behaviors such as editing, sorting, and paging. The data-bound control presents the data and behavior to the user in actual renderings to the page.
The two controls you use on your page should match in type. Tabular-type data-bound controls such as GridView and FormView should be sourced by table-type data source controls such as the
SqlDataSource. Tree-type data-bound controls should be sourced by an XML data source. Lists can be sourced by either type. Having said that, there are some exceptions. Some tree sources can be used with tabular data-bound controls. This combination generally requires an InfoPath statement that narrows the scope of information that is harvested from the tree source of data.
A data-bound control must have a property that sets its source to the data source control. In addition, for many behaviors there must be some coordination of properties between the pair of controls. For example, if editing is to be enabled, the data source control must have that option turned on and the databound control must also have its editing features enabled. As the controls are demonstrated later in the chapter, you will see more details of how data source and data-bound controls work together.
Configuring Data Controls with VWD
When you place a data source control on your page (in Design View) VWD leads you through a wizard to configure the various properties of the control. This procedure is remarkably cognizant of all the details required to work with data on a page.
You can add data interactions using VWD at several levels. If you like to create controls one at a time, you can drag a data source control and walk through its wizard, and then drag a data-bound control and connect it to the data source control. Alternatively, you can start with a data-bound control, and its wizard steps you through creating a data source control. You can even work at a higher level by opening the Database Explorer, selecting several fields, and dragging them to the page. VWD then creates both the data source controls and data-bound controls for you.
VWD also offers tools for editing data controls that already exist on the page. The Properties window offers a graphical user interface for changing settings. If you are working with code in Source View, you can move the insertion bar within a data control tag and press the space bar to get a list of the appropriate attributes in IntelliSense.
Last, VWD offers a very useful tool within wizards for building the SQL statements needed to display or modify data. Instead of you typing (and commonly mistyping) the names of fields and the SQL keywords, the wizard offers a drag-and-drop interface with check box options. When you click Finish, VWD builds the SQL statement for you.
The tools of VWD greatly speed the development of data pages. However, you may find that some of the default settings and tags created by VWD are not to your liking.The number of tags created by VWD
211

Chapter 7
can be overwhelming (like long lists of parameters), particularly for beginners. Advanced designers may want to substitute validation controls for the basic text boxes created by VWD. So although VWD does a large amount of the page construction for you, most designers follow on with tweaks or partial rewrites. You will see an example in a Try It Out later in this chapter.
Data Source Controls
This section moves from the theory to the practice by adding data source controls to a page. As mentioned in the previous section on VWD and data controls, a data source control is most easily created by adding a data-bound control to a page and letting the VWD wizard set up the data source control.
However, at times you will have to create the data source control yourself, so you will walk through that process here. The first step, of course, is to decide which data source control to use based on your type of data. Take a look at a SQL Server Express data source (as used in this book).
The Basic Properties of Data Source Controls
Data source controls require several attributes. The obvious are an ID and the runat=”server”. You must also specify which database on which server to use and your log on name and password for authentication. These data are held in a connection string. Next you must specify which records and fields to read from the data source. The data source control also requires a provider that describes how to interact with the database. (The default provider for the SqlDataSource control is the provider for Microsoft SQL Server.) In this case, VWD walks you through these specifications in a wizard.
In this chapter, you mostly work on a Fixtures.aspx page that will list Wrox United’s schedule. In this Try It Out, you add the data source control using the VWD wizard and then examine the source code that the IDE created for you.
Try It Out |
Data Source Control |
1.If you have not done so already, create a folder in the root of your site named App_Data. Rightclick the new folder and select Add Existing Item. Navigate to your downloads for this book. Look in the App_Data folder and select the file named WroxUnited.mdf. Click OK to import the data file to your site.
2.Open the web site for the chapter (C:\BegASPNET2\WroxUnitedCS) and create a Web Form called Fixtures.aspx in the site’s root using the web form template with the site.master page and with code in a separate page. Switch to Design View and type Fixtures in the content panel.
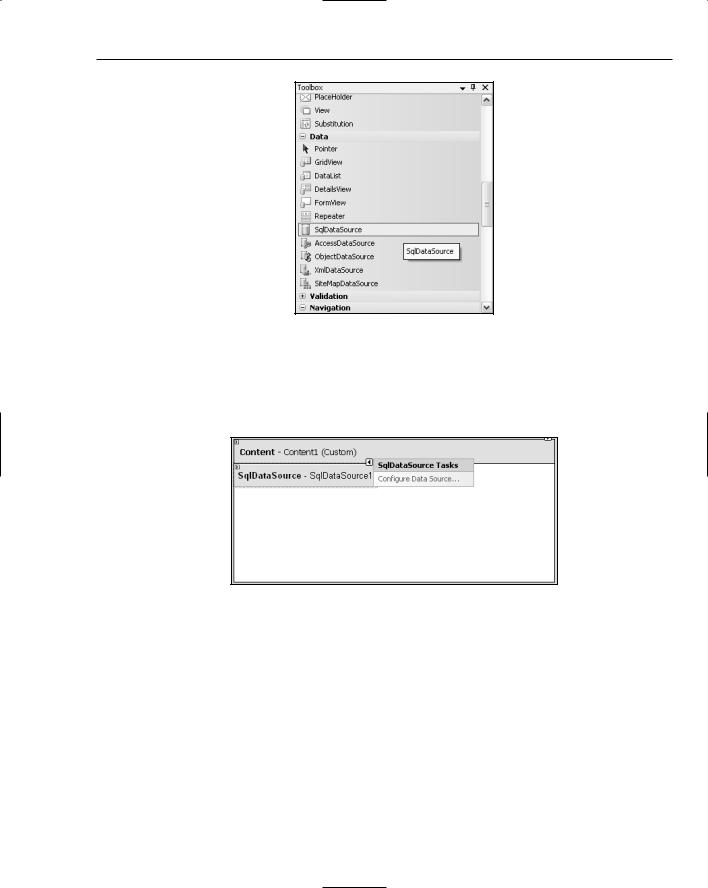
3.From the Data section of the toolbar (see Figure 7-5), drag a SqlDataSource control to the middle of the content pane. You may have to scroll down to see the new control.
212
Reading Data
Figure 7-5
3.Click the small arrow at the top right of the control to open the smart task panel (as shown in Figure 7-6) and click Configure Data Source. A wizard starts. In the first dialog box, drop down the list of connections and select WroxUnited.mdf. Click Next. Do not save to the application configuration file.
Figure 7-6
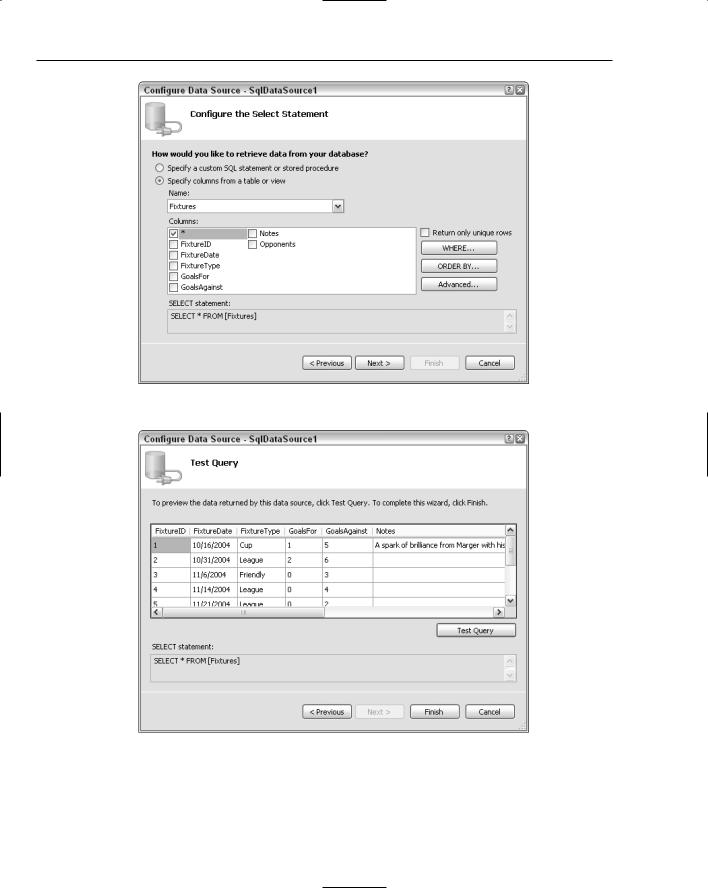
4.Click Next and in the dialog box, accept the choice to specify columns from a table. From the drop-down list, select the Fixtures table. Then select all of its fields by checking the asterisk (*) choice in the columns panel. See Figure 7-7 for an example.
5.Click Next. In the last step of the wizard, you have an opportunity to test your query. You should see several records and fields appear in the panel as in Figure 7-8. Click Finish.
213
Chapter 7
Figure 7-7
Figure 7-8
6.Run the page and observe that although you have created a data source control, there is no rendering. That will come when you add a data-bound control.
214

Reading Data
7.Close the browser and click Source View in VWD. Take a look at what VWD built for you in the SqlDataSource control. The Fixtures.aspx page appears as follows in Source View. Instead of (local)\SQLExpress, your server may be identified with a period (full stop) as
.\SQLExpress:
<%@ Page Language=”C#” MasterPageFile=”~/site.master” AutoEventWireup=”false” CodeFile=”Fixture.aspx.cs” Inherits=”Fixture” title=”Untitled Page” %>
<asp:Content ID=”Content1” ContentPlaceHolderID=”mainContent” Runat=”Server”>
<asp:SqlDataSource ID=”SqlDataSource1” runat=”server”
ConnectionString=”Data Source=.\SQLEXPRESS; AttachDbFilename=C:\BegAspNet2\
WroxUnitedCS\app_Data\WroxUnited.mdf; Integrated Security=True;
User Instance=True”
providerName=”System.Data.SqlClient”
SelectCommand=”SELECT * FROM [Fixtures]”>
</asp:SqlDataSource>
</asp:Content>
How It Works
In this Try It Out, you used VWD to create a SqlDataSource control for you. Note how easy it was to drag the control and then answer the series of questions in the wizard. VWD typed each of the properties listed earlier in the section. The basic ID and Runat are there. Then you see a connection string holding the name of your server and database identified in connection string syntax as the initial catalog.
In the wizard, you requested Windows Authentication and so VWD wrote the connection string with Integrated Security. That means you will allow Windows to certify who you are by using the name and password with which you logged in to Windows. Last, when you picked your data source to be a Microsoft SQL Server data file, VWD added a property to the data source control that sets the provider to use the System.Data.SqlClient.
Hiding the Connection String
In the preceding Try It Out, you placed the data of your connection string in the page. This leads to two problems. First, if the name of your server or database changes, you have to change the connection string in every page. Second, if you are using SQL Authentication, you have to present credentials (name and password). Although the connection string is never sent to the browser, it should still make any developer nervous to ever have that confidential authentication information on an ASP page.
Both of these problems can be solved by moving the connection string from the pages into a single entry of the Web.config file, and then referring to the entry rather than writing out the entire connection string in the page. This change can be made by simply accepting the offer to “save the connection string in the application configuration file” in the second page of the Data Source Configuration wizard.
In this Try It Out, you replace the data source control of Fixtures.aspx with a new data source control configured to use a connection string stored in the Web.config file.
215

Chapter 7
Try It Out |
Hiding Connection Strings |
1.Open your Fixtures.aspx page in Design View and delete the SqlDataSource1 control.
2.Drag a new SqlDataSource control to the content panel of the page. Click Configure Data Source.
3.Make a new connection to the WroxUnited.mdb in the App_Data folder. Click test and OK. Click Next to move to the Save the Connection String panel.
4.This time leave the check on (as default) to save the connection string to the application configuration file and give it the name WroxUnited (see Figure 7-9). Click Next.
Figure 7-9
5.Continue with the rest of the wizard as before, using the fixtures table and selecting all of the columns. Click Next, test the query, and click Finish. Save the page.
6.In the end, your data source control will appear as follows in the Fixtures.aspx page:
<asp:sqldatasource id=”SqlDataSource1” runat=”server” connectionstring=”<%$ ConnectionStrings:WroxUnited %>”> SelectCommand=”SELECT * FROM [Fixtures]”
</asp:sqldatasource>
7.Meanwhile, an addition has been created in <connectionstrings> section of the Web.config code. In the actual Web.config file, the connection string runs on across one long line. To make it easier to consider here, the line is broken into its sections:
216

Reading Data
<connectionStrings>
<add name=”WroxUnited”
connectionString=”Data Source=.\SQLEXPRESS; AttachDbFilename=|DataDirectory|WroxUnited.mdf; Integrated Security=True;
Connect Timeout=30;
User Instance=True”/> providerName=”System.Data.SqlClient” />
</connectionStrings>
How It Works
Take a look at the Fixtures.aspx page in Source View and focus on the data source control. Notice that it now lacks the actual values for the connection string. Instead, you get a pointer to connectionString (which is understood to mean in the Web.config file) and within the connection strings to Wrox United.
Open the Web.config file. Go to the section on connectionStrings. The <add> tag indicates another connection string within the section. Following the name, you see the same information that you provided on the page in the previous Try It Out.
Details of the Connection String and Provider
The most complex parts of the data source control are the connectionString and the provider. The previous examples present the simplest case. The connection string has three parts when connecting to a SQL Server data source:
First is the data source that means the name of the SQL server. A period (full stop) means the local server:
<connectionStrings> <add name=
“WroxUnited” connectionString=”Data Source=.\SQLEXPRESS;
Second is the name of the database file to attach:
AttachDbFilename=|DataDirectory|WroxUnited.mdf;
Or alternatively:
AttachDbFilename= C:\BegAspNet2\ WroxUnitedCS\app_Data\WroxUnited.mdf;
Last is the type of security to use:
Integrated Security=True;User Instance=True”/>
</connectionStrings>
If you use another relational database manager (such as Oracle or MySql), you must specify a provider as follows. The provider for SQL Server is the default, so you did not have to use a provider in the
Try It Out exercises of this book. But for other sources, you must use the following syntax. The Sql in SqlDataSource means that the control can be used with any SQL-compliant data source (not only Microsoft SQL Server). But if you use a data source other than Microsoft SQL Server, you must specify a provider for that source so that the named provider can override the default provider:
217