

Beginning ASP.NET 2.0 With CSharp (2006) [eng]
.pdfChapter 7
The problem is that an ASP.NET 2.0 page will, by default, look for an image file in the same folder as itself. The images are kept in a different folder named MatchImages. So, you can use a feature of the ImageURL property to add the relative path to the name of the picture file. You add a second argument that embellishes some text onto whatever value is provided by the database. In this case, you added the path. There are two new tricks in this syntax. First, in the formatting argument, you use a tilde (~) that means the root of the site. When you deploy the site to another server, you will not have to change all of the paths. Second, the syntax {0} indicates the place to plug in the value that comes from the database. So syntax such as the following will be translated into C:\BegAspNet2\WroxUnitedCS\MatchImages\ aaronson.jpg for the first record before it is used as the ImageURL:
<asp:Image ID=”Image1” runat=”server”
ImageUrl=’<%# Eval(“PictureURL”, “~/MatchImages/{0}”) %>’ />
You finished the exercise by getting some practice with editing templates. Remember that you must shift into Edit Templates mode prior to making changes to the controls in a template that actually present the data. If you become perplexed by the unresponsiveness of VWD when you attempt to select or modify the Label and Image controls, you have forgotten to enter Edit Templates mode. You saw how fields could be selected and then deleted or moved.
Figure 7-30
238
Reading Data
The DetailsView and FormView Controls
The three data-bound controls you have studied so far (GridView, DataList, and Repeater) display more than one record at a time. An alternative pair of data-bound controls display just one record at a time: DetailsView automatically creates a set of templates, and FormView is a blank slate upon which you build templates as desired. These are useful controls when you want to focus the user’s attention on one record or need more screen real estate to display many fields for one record. They are also the preferred controls for adding or editing a record.
Like many other data-bound controls, DetailsView and FormView can be added to the page either directly, in which case VWD kicks off the wizard to create a data source control, or they can be added after a data source control is already on the page.
As you will study in Chapter 8, only DetailsView and FormView can accept the addition of new records. GridView, DataList, and Repeater can change, display, and modify existing records, but not create new records.
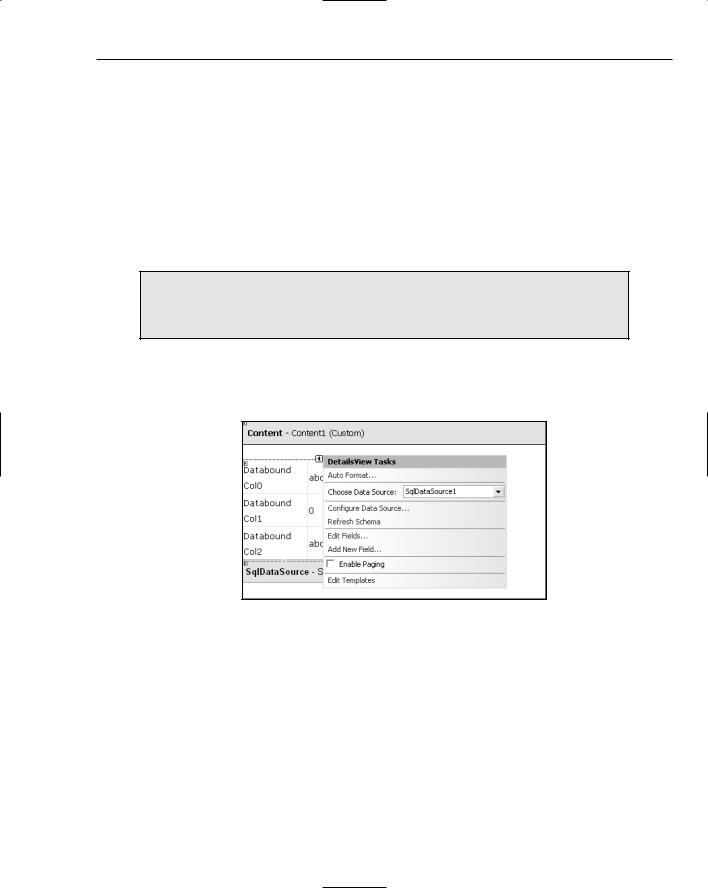
Both the DetailsView and FormView controls rely on templates as described in the previous section. After creating the control, open the smart task panel and click Edit Templates. The appearance will change as you enter Template Edit Mode. Figure 7-31 shows the default mode.
Figure 7-31
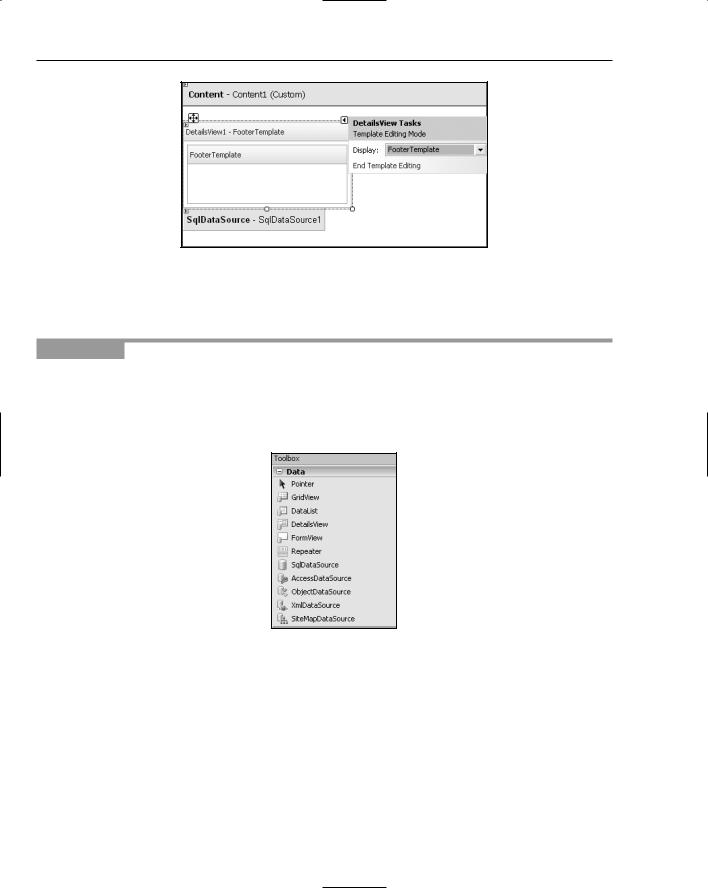
Figure 7-32 depicts the Template Edit mode where fields can be added, removed, or rearranged.
When you’re displaying only one record, you have to make a decision whether or not to allow navigation from record to record. If you are showing details of a record selected in a GridView control, you would not want the user to be able to navigate off to other records because that would cause a loss of synchronization with the GridView. But if the DetailsView is standing alone, you can turn on paging with the check box in the smart task panel. The same Navigation Mode options are available as discussed for the GridView, such as Numeric, FirstLast, and PreviousNext.
239
Chapter 7
Figure 7-32
In this Try It Out, you practice looking at the information of one Wrox United match at a time using
DetailsView.
Try It Out |
Using DetailsView and FormView |
1.Create a new page in the root of your site named Fixtures-Stacked using the Master page and putting the C# code in a separate file.
2.Working in Design View, drag a DetailsView control from the Toolbox onto the page, as shown in Figure 7-33.
Figure 7-33
3.In the DetailsView control’s smart task panel, choose its data source to be a new data source from Database with an ID of SqlDataSource2 and using the existing Wrox United connection string. Be sure to name it SqlDataSource2 because you will add a 1 later, and when the page is complete it will be logical to have the DetailsView as the second control. Include all of the fields from the Fixtures table. Test the query and finish the wizard.
4.Before testing the page in your browser, enable paging from the DetailsView control’s smart task panel. In addition, in the Properties window, configure the Pager Settings / Mode to use
NumericFirstLast.
240

Reading Data
5.Staying with the DetailsView control selected, in the Properties window change the LastPageText property to “Last Game of the Season” and FirstPageText property to “First Game of the Season.” Finally, go to the Layout section, and set the Width to about 500px. (Alternatively, you can drag the right edge of the control in the Design View.
The results are as follows:
<%@ Page Language=”C#” MasterPageFile=”~/site.master” AutoEventWireup=”false” CodeFile=”Fixtures-Stacked.aspx.cs” Inherits=”Fixtures_Stacked” title=”Untitled Page” %>
<asp:Content ID=”Content1” ContentPlaceHolderID=”mainContent” Runat=”Server”>
<asp:DetailsView ID=”DetailsView1” runat=”server” AllowPaging=”True”
AutoGenerateRows=”False”
DataKeyNames=”FixtureID”
DataSourceID=”SqlDataSource2”
Height=”50px” Width=”450px”> <PagerSettings
Mode=”NumericFirstLast” FirstPageText=”First Game of the Season” LastPageText=”Last Game of the Season” />
<Fields>
<asp:BoundField DataField=”FixtureID” HeaderText=”FixtureID” InsertVisible=”False”
ReadOnly=”True” SortExpression=”FixtureID” /> <asp:BoundField DataField=”FixtureDate” HeaderText=”FixtureDate”
SortExpression=”FixtureDate” />
<asp:BoundField DataField=”FixtureType” HeaderText=”FixtureType” SortExpression=”FixtureType” />
<asp:BoundField DataField=”GoalsFor” HeaderText=”GoalsFor” SortExpression=”GoalsFor” />
<asp:BoundField DataField=”GoalsAgainst” HeaderText=”GoalsAgainst” SortExpression=”GoalsAgainst” />
<asp:BoundField DataField=”Notes” HeaderText=”Notes” SortExpression=”Notes” />
<asp:BoundField DataField=”Opponents” HeaderText=”Opponents” SortExpression=”Opponents” />
</Fields>
</asp:DetailsView>
<asp:SqlDataSource ID=”SqlDataSource2” runat=”server” ConnectionString=”<%$ ConnectionStrings:WroxUnited %>” SelectCommand=”SELECT * FROM [Fixtures]”>
</asp:SqlDataSource>
</asp:Content>
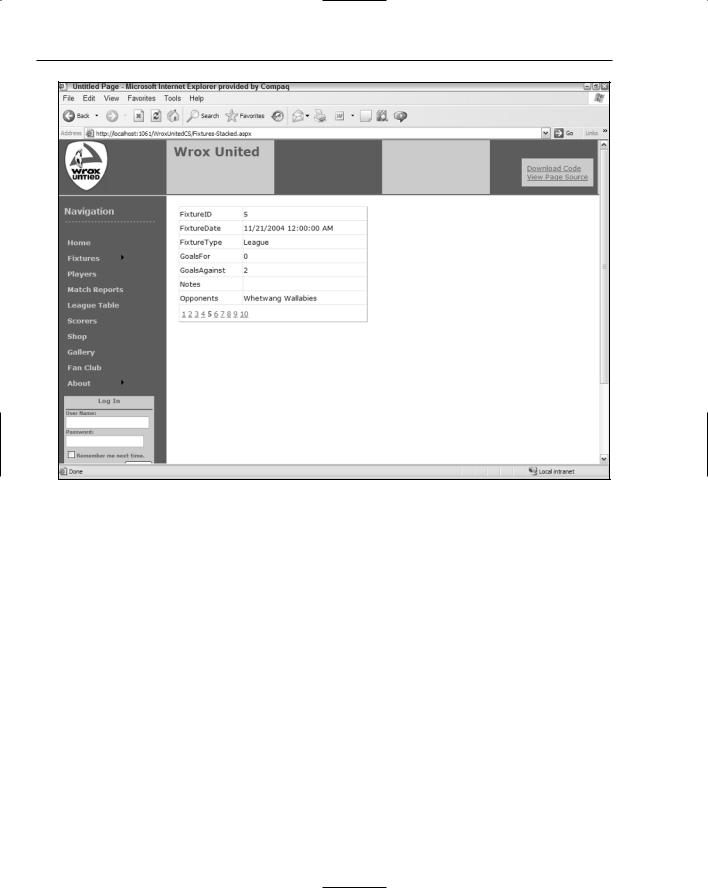
6.Run the page in your browser to observe that only one match is shown at a time (see Figure 7-34).
241
Chapter 7
Figure 7-34
How It Works
The key point of this exercise is to create and view a presentation where one record is shown at a time, like the top playing card in a deck. You can use either DetailsView or FormView. In this case, you chose DetailsView because it does an automatic default layout for you.
The modifications you made to the DetailsView control were almost the same as those for other databound controls in earlier exercises. To move through the records of games, you enabled paging by checking the appropriate box in the control’s smart task panel. To enhance the user experience, you specified a set of navigation tools in the Properties window of the control and modified their text to present a more logical user interface.
Data Source Controls with Parameters
So far in this chapter, you have created pages with fixed sets of data. With parameters, you can dynamically determine what data to display in a data-bound control. In ASP.NET 2.0, a parameter is a tag that holds a piece of data that can be used when a control carries out its task. For example, a parameter could
242
Reading Data
hold a date, and that date is used to determine which game to show in a data-bound control. This section starts with a simpler case where you will look at how you can pass a parameter between pages. In the next section, you use parameters to enable two controls to work together. As with all of ASP.NET 2.0, the implementation is made even easier with tools in VWD. You will start with a simple page that picks up a value from a querystring and uses it to find one record of a table.
A querystring is a field name and value added to a HTTP request, as shown in the italicized part of the following URL (the text following the question mark): www.WroxUnited.com\PlayerInformation.aspx?PlayerLastName=Smith.
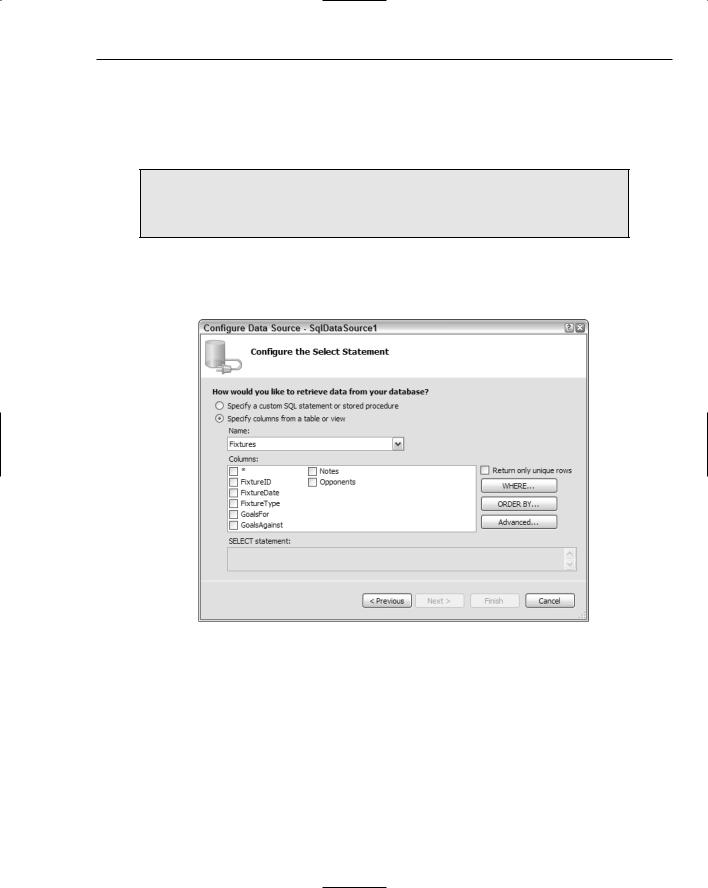
When you created data source controls earlier in the chapter, you saw how to add only certain columns from a table in the “Configure the Select Statement” dialog step, but the wizard button captioned WHERE was not discussed (see Figure 7-35).
Figure 7-35
If you click the WHERE button of the wizard you get a dialog box that leads you through the options to limit the data set to only certain records. This step selects which column to use in the process of limiting records. Then the “source” drop-down list offers the choice of getting the data from a querystring. That opens a section for parameter properties. In the following code, you would enter PlayerLastName in the shaded box. These steps add a section to the data source control called SelectParameters, as shown in the following shaded code. SelectParameters is one type of parameter; you will encounter others later in the book.
<asp:SqlDataSource ID=”SqlDataSource1” runat=”server” ConnectionString=”<%$ ConnectionStrings:WroxUnited %>”
243
Chapter 7
SelectCommand=
“SELECT * FROM [Players] WHERE ([PlayerLastName] = @PlayerLastName)”>
<SelectParameters>
<asp:QueryStringParameter Name=”PlayerLastName”
DefaultValue=”XXX” QueryStringField=”PlayerLastName” Type=”String” /> </SelectParameters>
</asp:SqlDataSource>
In this code, first notice that a <SelectParameters> is added in the shaded section. This is similar to a variable that will be filled by ASP.NET 2.0 with the value of Smith that comes in when you specify a querystring, as you did earlier. Then notice in the SELECT command that VWD has made the WHERE clause equal to a name starting with an at (@) sign. The @ symbol means a parameter — in this case, the
parameter that holds the player’s last name. Each time the page is opened or refreshed, it will search the querystring for a PlayerLastName value. Typing all of these would be a waste of time, so you will instruct VWD to do it for you in the next exercise.
In this Try It Out, you modify the previous Try It Out. Instead of presenting a DetailsView control with all of the games stacked up, you will present just one game. That one game will be determined by a game identifier (FixtureID) in the querystring.
Try It Out |
Data Controls with Parameters |
1.Make a new page named Fixtures-One.aspx.
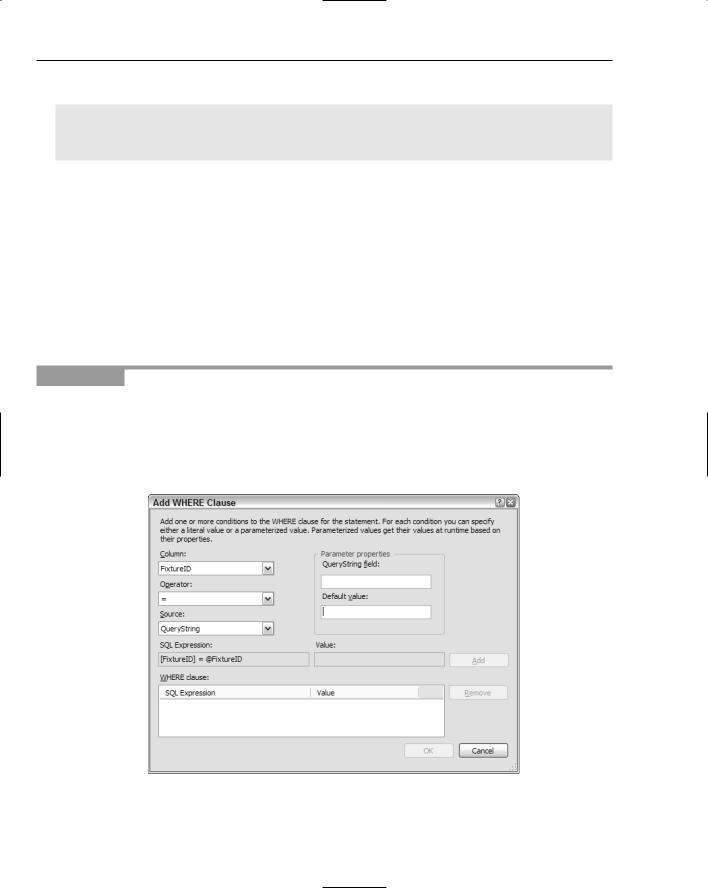
2.Drag and drop a DetailsView control, open its smart task panel, and choose a new data source. Select a source of database and accept the default name. Select the WroxUnited connection and go to the configuration of the Select Statement. Select all the fields from the Fixtures table. Click the WHERE button to detour to the Add WHERE Clause box (see Figure 7-36).
Figure 7-36
244
Reading Data
3.Select FixtureID from the drop-down list of columns.
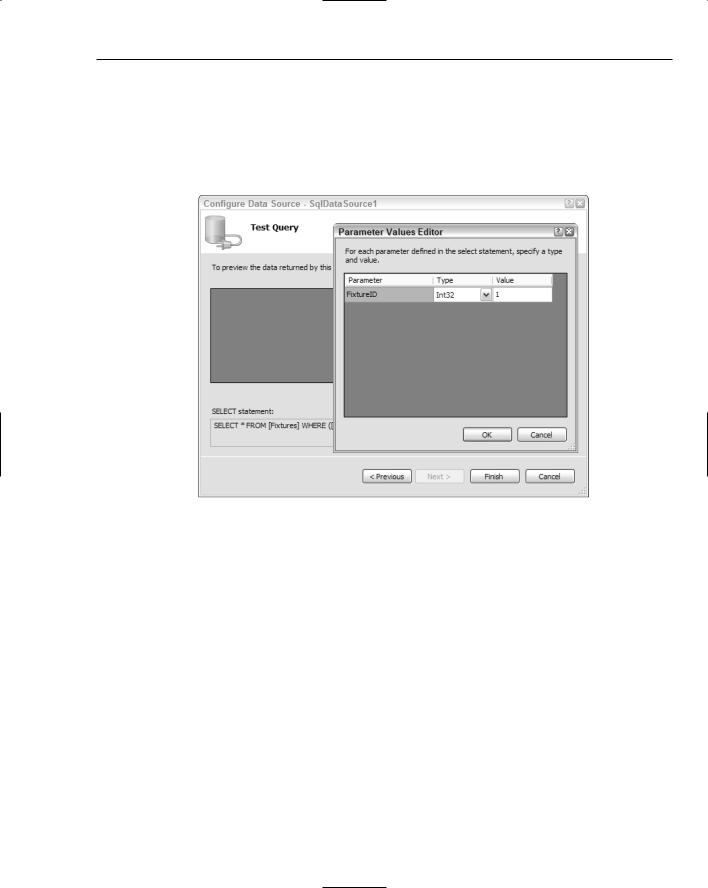
4.Accept an operator of = and set the source to querystring. In the parameters properties panel, set the QueryString field to FixID (type in the name) and a default of 1. Click Add and then click OK. Click Next and test. Notice that before the test runs, VWD gives you a chance to input the value that will be in the querystring. Try the default of 1, and then also test various numbers between. (See Figure 7-37.)
Figure 7-37
5.Click Finish. While the DetailsView is selected, change its width to about 450px. Your source code will end up as follows:
<%@ Page Language=”C#” MasterPageFile=”~/site.master” AutoEventWireup=”true” CodeFile=”Fixtures-One.aspx.cs” Inherits=”Fixtures_One” Title=”Untitled Page” %> <asp:Content ID=”Content1” ContentPlaceHolderID=”mainContent” Runat=”Server”>
TIO - DataList - Gallery-All<br /> <asp:DetailsView ID=”DetailsView1” runat=”server”
AutoGenerateRows=”False”
DataKeyNames=”FixtureID”
DataSourceID=”SqlDataSource1”
Height=”50px” Width=”450px”> <Fields>
<asp:BoundField DataField=”FixtureID” HeaderText=”FixtureID” InsertVisible=”False” ReadOnly=”True” SortExpression=”FixtureID” />
<asp:BoundField DataField=”FixtureDate” HeaderText=”FixtureDate” SortExpression=”FixtureDate” />
245

Chapter 7
<asp:BoundField DataField=”FixtureType” HeaderText=”FixtureType” SortExpression=”FixtureType” />
<asp:BoundField DataField=”GoalsFor” HeaderText=”GoalsFor” SortExpression=”GoalsFor” />
<asp:BoundField DataField=”GoalsAgainst” HeaderText=”GoalsAgainst” SortExpression=”GoalsAgainst” />
<asp:BoundField DataField=”Notes” HeaderText=”Notes” SortExpression=”Notes” />
<asp:BoundField DataField=”Opponents” HeaderText=”Opponents” SortExpression=”Opponents” />
</Fields>
</asp:DetailsView>
<asp:SqlDataSource ID=”SqlDataSource1” runat=”server” ConnectionString=”<%$ ConnectionStrings:WroxUnited %>” SelectCommand=”
SELECT *
FROM [Fixtures]
WHERE ([FixtureID] = @FixtureID)”> <SelectParameters>
<asp:QueryStringParameter
DefaultValue=”1”
Name=”FixtureID”
QueryStringField=”FixID” Type=”Int32” />
</SelectParameters>
</asp:SqlDataSource>
</asp:Content>
6.Test the page by running it. By default, game number 1 will be displayed. In your browser’s address bar, try changing the URL from . . . /WroxUnited/Fixtures-One.aspx by adding a querystring to make . . . /WroxUnited/Fixtures-One.aspx?FixID=3 and click the GO button of your browser (as shown in Figure 7-38).
Figure 7-38
246

Reading Data
How It Works
First, you disabled paging because with only one record in the stack, there is no need for navigation. Then you revised your SelectCommand. Even though you already have your SqlDataSource control configured, you can restart the wizard and modify the control. This eliminates the possibility of introducing typos by editing in Source View.
In prior exercises, you did not use the WHERE button and so VWD built for you a SelectCommand that returned all of the records. In the Add WHERE Clause step, you selected a column (a field) that was going to be scanned for matches. You wanted your matches to be exact, so you selected the = operator. Then you selected a source of QueryString. This means that the value of which fixture to display (the parameter) can be found in the querystring. Under parameters properties, you set the name of the value in the querystring to be FixID. Don’t forget to click the Add button in the Add WHERE Clause window — it
is easy to overlook.
VWD keeps an eye on the data source control for each data-bound control. When you finish your revision to the data source control, VWD warns you that you better synch up any data-bound controls using that source. You can also do that synch explicitly by clicking the Refresh Schema button of the smart task panel.
All of these changes left the page ready to accept an ID of a game in the querystring. The value must have the name of FixID. Your data source will take that value (or 1 if there is no FixID) and use that in the SelectCommand to find the records with a matching FixtureID. Only that game will be shown. When you test the page, you only have to remember the syntax to attach a value to a URL. After the page name, type a question mark to begin parameters. Then type the parameter name, an = sign, and the parameter’s value.
Multiple Data Controls Working Together
The previous section described a crude way to use parameters by typing them into the URL. The enlightened way is to use one data-bound control to create the parameters for another data-bound control. These are called ControlParameters. This section demonstrates two very common cases. In the first case,
a DropDownList control determines which record or records to display in a GridView control. In the second case, a selection in a GridView control determines the record for which the page should show more fields in a DetailsView control. These are called master-child scenarios. A selection in a master databound control establishes the value for a WHERE clause in the data source control of the child data-bound control. In almost all cases, there must be separate data source controls for the master and child databound controls.
In the master control, you only need one special property. If the master control is a ListBox or DropDownList control, the AutoPostBack property must be set to True so that when a selection is made from the master, ASP.NET 2.0 will invoke a refresh of the page and the resulting change in the record will be shown in the child control. Keep in mind that ListBox and DropDownList controls have two field parameters. The first is the field to display (the DataTextField property), and the second is the field that is used in page code (the DataValueField property). This allows a last name, for example, to be displayed to the user in the list box but the more useful value of, for example, PlayerID to be used in SQL statements. If the master control is a GridView, you can open its smart task panel and choose
247