

СУБД Oracle / Литература / PowerDesigner 9 / PDM_Tutorial
.pdf&KDSWHU &UHDWLQJ D 7DEOH LQ WKH 3'0
$GG D WDEOH
You will add the HISTORY table to the PDM.
1Click the 7DEOH tool in the palette.
2Click in the GLDJUDP underneath the TITLE table symbol. A table symbol appears at the click position.
The table has the code Table_Q, where Q is a number assigned in the order of creation of objects.
3Click the 3RLQWHU tool in the palette.
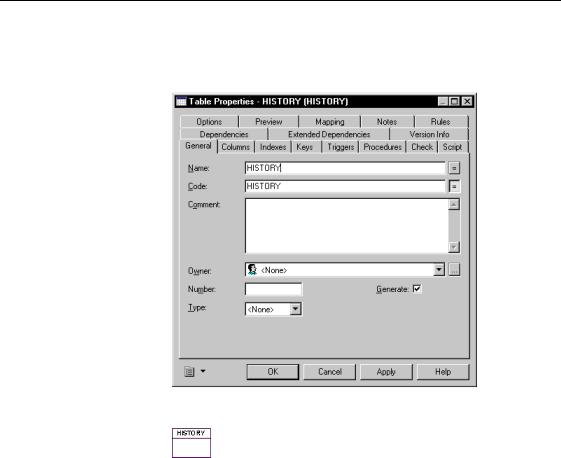
4Double-click the new table symbol.
The Table Properties dialog box appears.
PDM Getting Started |
|
$GG D WDEOH
5Type +,6725< in the Name box.
This is the name of the table. HISTORY appears automatically in the Code box. This is the code for the table.
6 Click 2..
What you learned In this section, you learned how to:
♦Customize a PDM by adding a table to store data
|
PowerDesigner |
&KDSWHU &UHDWLQJ D 7DEOH LQ WKH 3'0
$GG FROXPQV
You will add the columns TITLE_ISBN, TITLE_PRICE, and TITLE_TEXT to the HISTORY table.
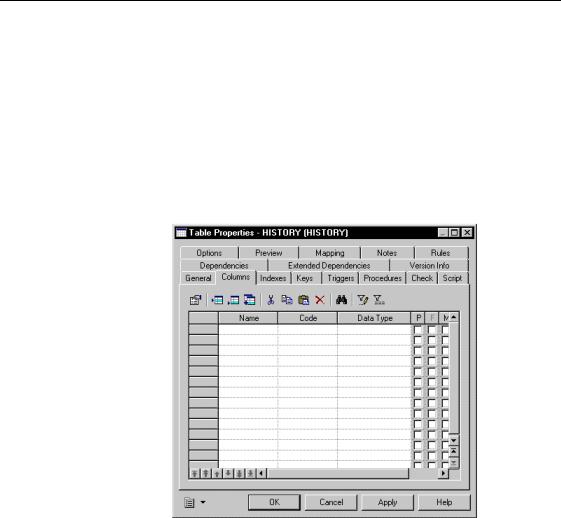
1Double-click the +,6725< table symbol. The Table Properties dialog box appears.
2Click the &ROXPQV tab.
The Columns page appears. The table does not yet have any columns so the list is empty.
PDM Getting Started |
|
$GG FROXPQV
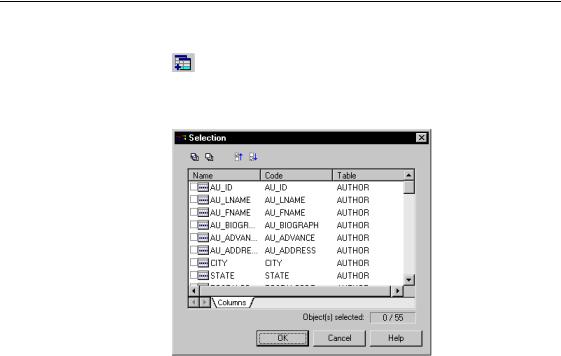
3Click the $GG &ROXPQV tool.
The Selection dialog box appears. It shows the name and code for each column in the model, and the table to which it belongs.
4Click the 7DEOH column header to sort the columns alphabetically by table.
5Scroll down the list to the columns in the 7,7/( table.
6Select the 7,7/( ,6%1 checkbox. Select the 7,7/( 35,&( checkbox. Select the 7,7/( 7(;7 checkbox.
|
PowerDesigner |
&KDSWHU &UHDWLQJ D 7DEOH LQ WKH 3'0
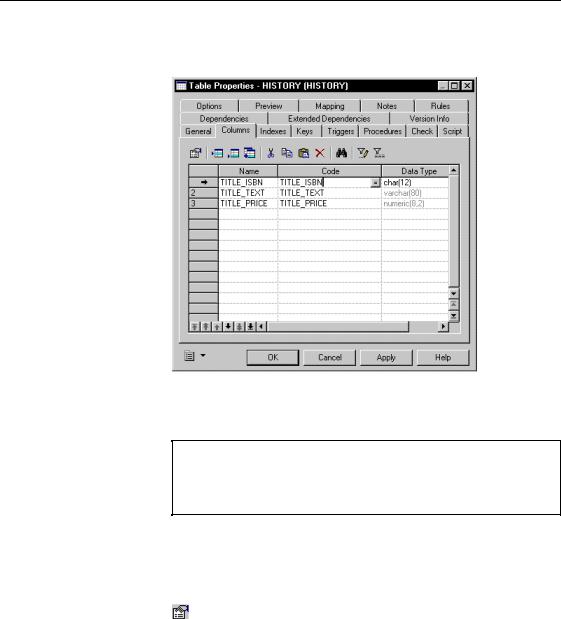
7Click 2..
The selected columns appear in the list of columns.
8Click $SSO\.
This commits the changes that you have made to the HISTORY table.
1DPHV VRUWHG DOSKDEHWLFDOO\
When you click $SSO\ or 2., all names in the list are sorted alphabetically. The order of appearance of the names in the list will therefore change with either of these operations.
9Click the 7,7/(B,6%1 column. The row is selected.
10Click the 3URSHUWLHV tool.
RU
Double-click the arrow beside 7LWOHB,6%1.
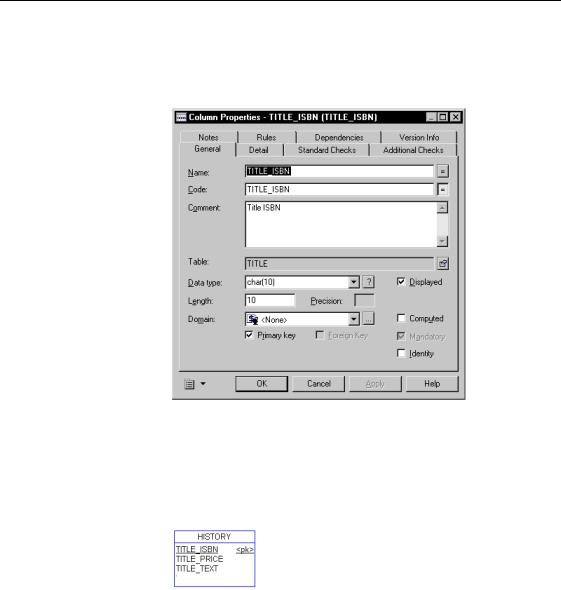
The Title_ISBN property sheet opens to the General page.
PDM Getting Started |
|
$GG FROXPQV
11Select the 3ULPDU\ NH\ checkbox in the bottom part of the General page.
This indicates that Title ISBN is the primary key. The Foreign Key and Mandatory Key checkboxes are grayed. Mandatory values translate to a Not null field in most SQL databases.
12Click 2..
You return to the property sheet for the HISTORY table.
13Click 2..
This saves the column definition. Column TITLE_ISBN has the symbol <pk> next to it. This indicates that it is a primary key column.
What you learned In this section, you learned how to:
♦Add existing columns to a table in the PDM
♦Define a primary key
|
PowerDesigner |
&KDSWHU &UHDWLQJ D 7DEOH LQ WKH 3'0
&UHDWLQJ D GRPDLQ
You will create a domain to assign a standardized data type for money amounts.
1Select 0RGHO→'RPDLQV.
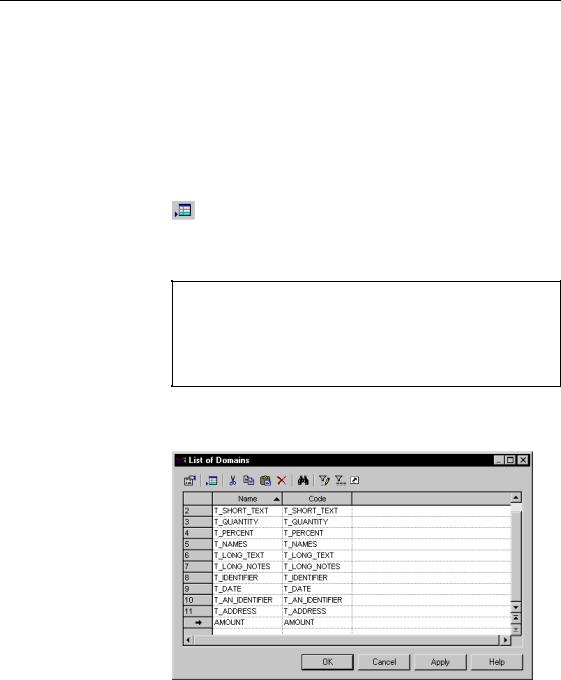
The List of Domains appears. It lists all the domains defined in the model.
2Click the $GG D 5RZ tool.
An arrow appears at the start of the first empty line and a default name and code are entered.
$ GHIDXOW QDPH DQG FRGH DSSHDU
When you create a new list item, a default name and code automatically appear for the new item. If the default name is selected it disappears when you start to type the item name. If the default name is not selected, select it and either type the new item name, or delete the default name before typing the new item name.
3Type $02817 in the Name column. This is the name of the domain.
4Click $SSO\.
The creation of the new domain is committed.
PDM Getting Started |
|
&UHDWLQJ D GRPDLQ
1DPHV VRUWHG DOSKDEHWLFDOO\
When you click $SSO\ or 2., all names in the list are sorted alphabetically. The order of appearance of the names in the list will therefore change with either of these operations.
5Click the new domain line.
An arrow appears at the beginning of the line.
6Click the 3URSHUWLHV tool.
RU
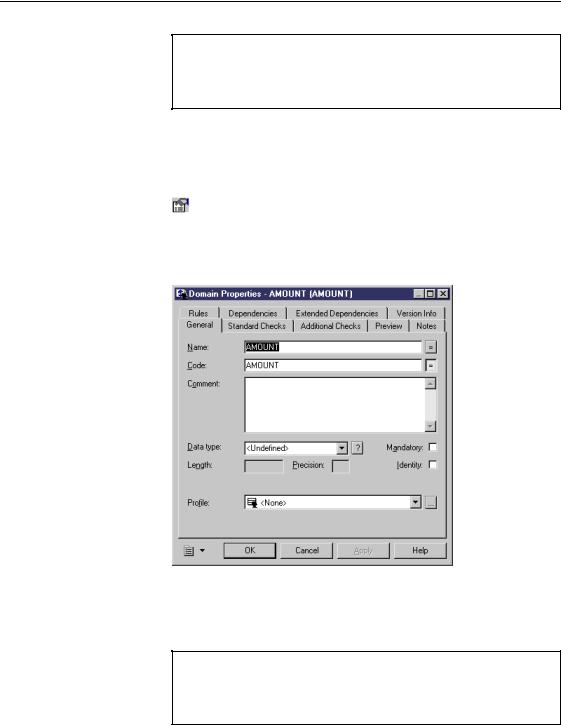
Double click the arrow at the beginning of the line. The property sheet for the new domain appears.
7Click the " button next to the 'DWD 7\SH dropdown listbox.
The Standard Data Types dialog box appears. You can use this dialog box to specify the form of the data affected by the domain.
6HOHFWLQJ D GDWD W\SH GLUHFWO\
You can also select a data type directly by clicking the arrow at the end of the Data Type dropdown listbox, and selecting a data type from the dropdown list.
|
PowerDesigner |
&KDSWHU &UHDWLQJ D 7DEOH LQ WKH 3'0
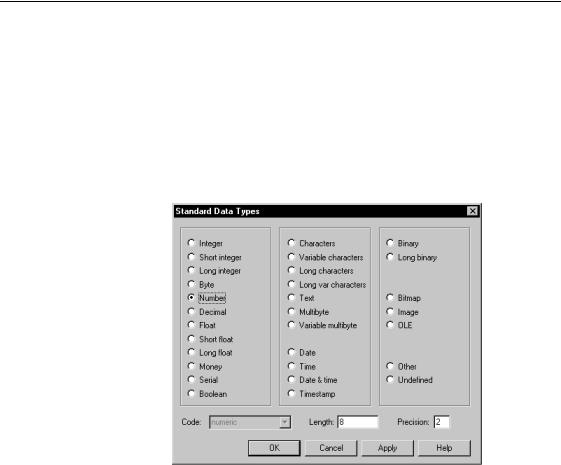
8Click the 1XPEHU radio button.
The domain now has a Number data type.
9Type in the Length box.
The maximum number of figures in a column attached to this domain will be 8.
10Type in the Precision box.
The maximum number of positions after the decimal point in a column attached to this domain will be 2.
11Click 2..
You return to the domain property sheet. The value QXPHULF appears in the Data Type dropdown listbox. Numeric is the code for a money data type, 8 indicates that an amount of money can have eight figures, 2 indicates that the amount has a decimal precision of two.
12Click 2. in each of the dialog boxes. You return to the PDM diagram.
PDM Getting Started |
|
$WWDFKLQJ FROXPQV WR D GRPDLQ
$WWDFKLQJ FROXPQV WR D GRPDLQ
You will attach the AMOUNT domain to all columns that store amounts of money.
1Select 0RGHO→&ROXPQV. The List of Columns appears.
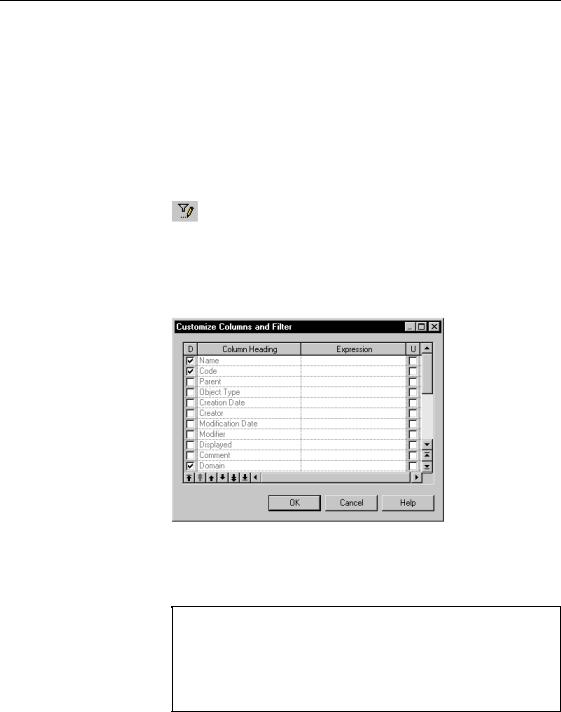
2Click the &XVWRPL]H &ROXPQV DQG )LOWHU tool from the tool bar at the top of the list.
The Customize Columns and Filter dialog box appears. You can select or clear check boxes for columns that you want to appear, or not to appear, in the list.
3Select the 'RPDLQ and 7DEOH checkboxes.
4Click 2..
You return to the List of Columns. The column Domain appears in the list of columns. It lists the domain used by each column in the model.
(QODUJLQJ GLDORJ ER[HV
You can enlarge dialog boxes and lists by placing the cursor on a dialog box or list edge so that the cursor becomes a double headed arrow. Click and while continuing to hold down the mouse button, drag the edge in the direction that you want the dialog box or list to be enlarged.
|
PowerDesigner |