


Personalization
data points are powerful — mainly because you can start using them immediately in your application. First, try creating some simple personalization properties. Later, you learn how to use these personalization properties within your application.
Adding a simple personalization property
The first step is to decide what data items you are going to store from the user. For our example, create a few items about the user that you might want to use within your application; assume that you want to store the following information about the user:
First name
Last name
Last visited
Age
Member
ASP.NET has a heavy dependency on storing configurations inside XML files, and the ASP.NET 2.0 personalization engine is no different. All these customization points concerning the end user are defined and stored within the web.config file of your application. This is illustrated in Listing 9-1.
Listing 9-1: Creating personalization properties in the web.config file
<configuration>
<system.web>
<profile inherits=”System.Web.Profile.HttpProfileBase, System.Web, Version=2.0.3600.0, Culture=neutral, PublicKeyToken=b03f5f7f11d50a3a”>
<properties>
<add name=”FirstName” /> <add name=”LastName” />
<add name=”LastVisited” /> <add name=”Age” />
<add name=”Member” />
</properties>
</profile>
</system.web>
</configuration>
Within the web.config file and nested within the <system.web> section of the file, you create a <profile> section in order to work with the ASP.NET 2.0 Personalization engine. Within this <profile> section of the web.config file, you need a <properties> section. In this section, you can define all the properties you want the personalization engine to store.
265

Chapter 9
From this code example, you can see that it was rather easy to define simple properties using the <add> element. This element simply takes the name attribute, which takes the name of the property you want to persist.
It’s just as easy to use these personalization properties as it is to define them. The next section looks at how to use these definitions in an application.
Using personalization properties
Now that you have defined the personalization properties in the web.config file, it’s possible to use these items in code. For an example, I create a simple form that asks for some of this information from the end user. On the Button_Click event, the data is stored in the personalization engine. Listing 9-2 shows an example of this.
Listing 9-2: Using the defined personalization properties
VB
<%@ Page Language=”VB” %>
<script runat=”server”>
Sub Button1_Click(ByVal sender As Object, ByVal e As System.EventArgs) Profile.FirstName = TextBox1.Text
Profile.LastName = TextBox2.Text Profile.Age = TextBox3.Text
Profile.Member = Radiobuttonlist1.SelectedItem.Text Profile.LastVisited = DateTime.Now().ToString()
Label1.Text = “Stored information includes:<p>” & _ “First name: “ & Profile.FirstName & _ “<br>Last name: “ & Profile.LastName & _ “<br>Age: “ & Profile.Age & _
“<br>Member: “ & Profile.Member & _ “<br>Last visited: “ & Profile.LastVisited
End Sub </script>
<html xmlns=”http://www.w3.org/1999/xhtml” > <head runat=”server”>
<title>Storing Personalization</title> </head>
<body>
<form id=”form1” runat=”server”> <p>First Name:
<asp:TextBox ID=”TextBox1” Runat=”server”></asp:TextBox></p> <p>Last Name:
<asp:TextBox ID=”TextBox2” Runat=”server”></asp:TextBox></p> <p>Age:
<asp:TextBox ID=”TextBox3” Runat=”server” Width=”50px” MaxLength=”3”></asp:TextBox></p>
<p>Are you a member?
266

Personalization
<asp:RadioButtonList ID=”Radiobuttonlist1” Runat=”server”> <asp:ListItem Value=”1”>Yes</asp:ListItem>
<asp:ListItem Value=”0” Selected=”True”>No</asp:ListItem> </asp:RadioButtonList></p>
<p><asp:Button ID=”Button1” Runat=”server” Text=”Submit” OnClick=”Button1_Click” />
</p>
<hr /><p>
<asp:Label ID=”Label1” Runat=”server”></asp:Label></p> </form>
</body>
</html>
C#
<%@ Page Language=”C#” %>
<script runat=”server”>
void Button1_Click(object sender, EventArgs e)
{
Profile.FirstName = TextBox1.Text;
Profile.LastName = TextBox2.Text; Profile.Age = TextBox3.Text;
Profile.Member = Radiobuttonlist1.SelectedItem.Text; Profile.LastVisited = DateTime.Now().ToString();
Label1.Text = “Stored information includes:<p>” + “First name: “ + Profile.FirstName + “<br>Last name: “ + Profile.LastName + “<br>Age: “ + Profile.Age +
“<br>Member: “ + Profile.Member + “<br>Last visited: “ + Profile.LastVisited;
}
</script>
This is similar to the way you worked with the Session object in the past, but note that the personalization properties you are storing and retrieving are not key based. Therefore, when working with them you don’t need to remember key names.
By default, these items are stored as type String, and you have early-bound access to the items stored. To store an item, you simply populate the personalization property directly using the Profile object:
Profile.FirstName = TextBox1.Text
To retrieve the same information, you simply grab the appropriate property of the Profile class as shown here:
Label1.Text = Profile.FirstName
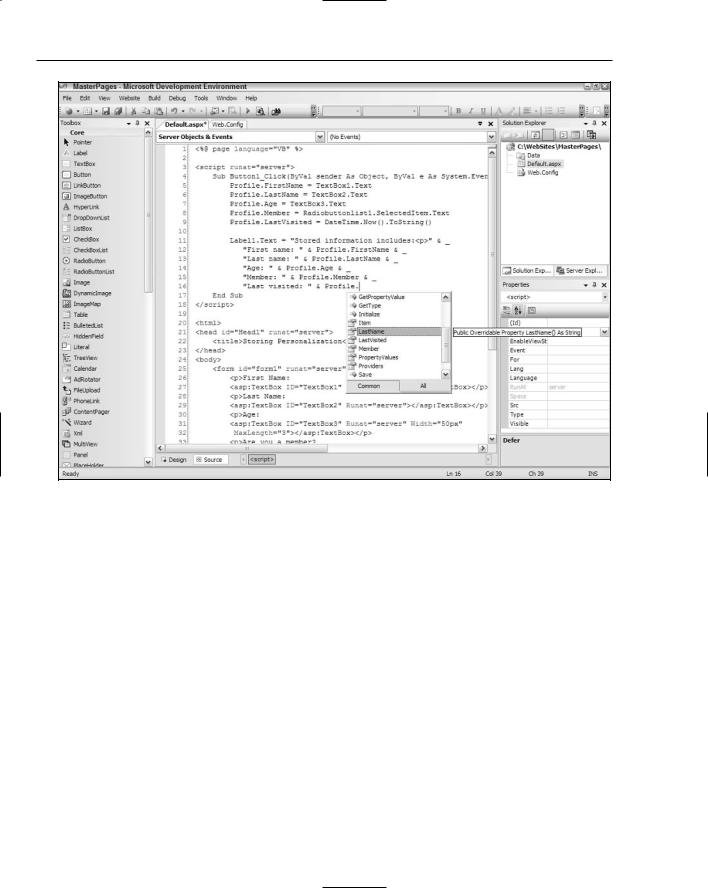
The great thing about using the Profile class and all the personalization properties defined in code is that this method provides IntelliSense. When working with the Profile class, all the items you define are listed as available options, as illustrated in Figure 9-2.
267
Chapter 9
Figure 9-2
All these properties are accessible in IntelliSense because the Profile class is hidden and dynamically compiled behind the scenes whenever you save the personalization changes made to the web.config file. After these items are saved in the web.config file, these properties are available to you throughout your application.
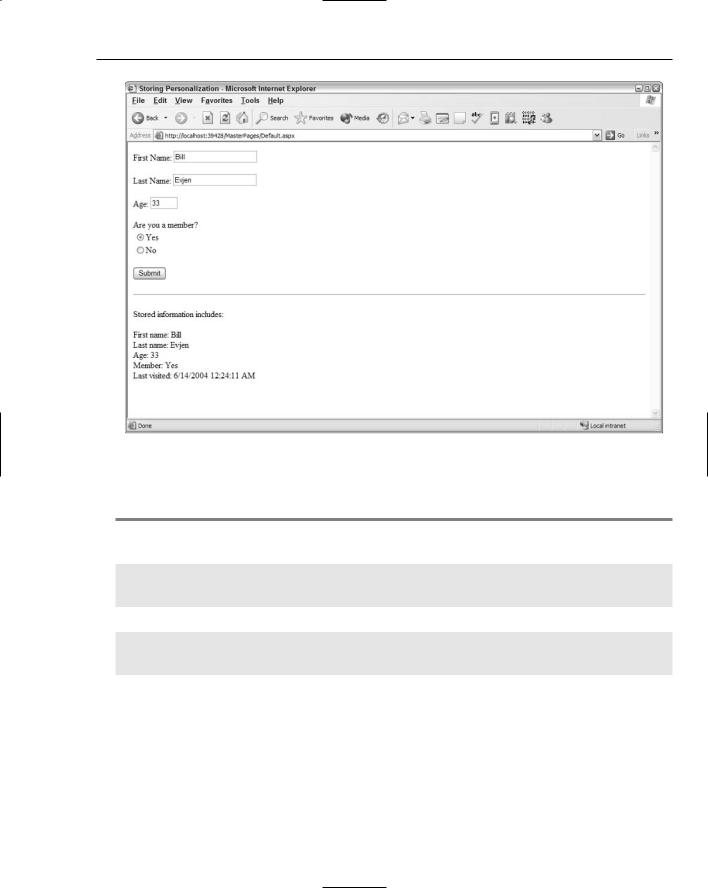
When run, the page from Listing 9-2 produces the results shown in Figure 9-3.
268
Personalization
Figure 9-3
In addition to using early-bound access techniques, you can also use late-bound access for the items that you store in the personalization engine. This technique is illustrated in Listing 9-3.
Listing 9-3: Using late-bound access
VB
Dim myFirstName As String
myFirstName = Profile.PropertyValues(“FirstName”).PropertyValue.ToString()
C#
string myFirstName;
myFirstName = (string) Profile.PropertyValues[“FirstName”].PropertyValue;
Whether it is early-bound access or late-bound access, you can easily store and retrieve personalization properties for a particular user using this new capability afforded by ASP.NET 2.0. All this is done in the personalization engine’s simplest form — now take a look at how you can customize for specific needs in your applications.
269