

Chapter 6
In the case of this master page, two defined areas exist where the content page can place content. Our master page contains a header and a footer area. It also defines two areas in the page where any inheriting content page can place its own content. Look at how a content page uses this master page.
Coding a Content Page
Now that you have a master page in place in your application, you can use this template for any content pages in your application. To create a new content page within your application, right-click on the application in the Solution Explorer and choose Add New Item.
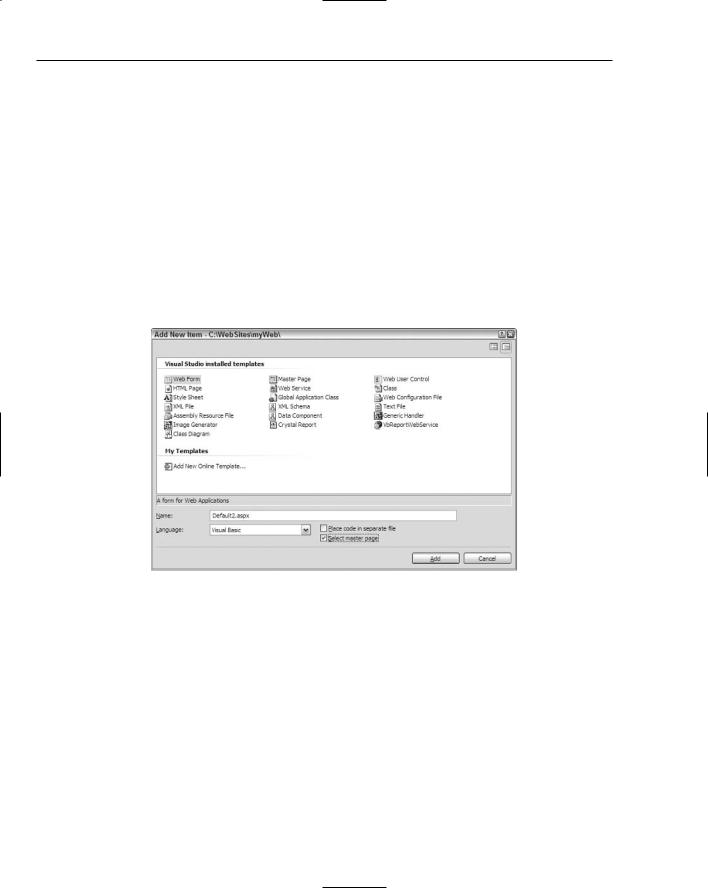
To create a content page, or a page that will use this master page as its template, you need to select a typical Web Form from the list of options in the Add New Item dialog. Instead of creating a typical Web Form, however, you need to check the Select Master Page check box. This gives you the option later of associating this Web Form to some master page. The Add New Item dialog is shown in Figure 6-6.
Figure 6-6
After you name your content page and click the Add button in the Add New Item dialog, you are presented with the Select a Master Page dialog, as shown in Figure 6-7.
This dialog allows you to choose the master page from which you want to build your content page. You choose from the available master pages that are contained within your application. Select the new master page that you created in Listing 6-1 and click the OK button. This creates the content page. The created page is a simple .aspx page with only a single line of code contained within the file, as shown in Listing 6-2.
180

Working with Master Pages
Figure 6-7
Listing 6-2: The created content page
<%@ Page Language=”VB” MasterPageFile=”~/Wrox.master” Title=”Untitled Page” %>
This content page is not much different from the typical .aspx page you coded in the past. The big difference is the inclusion of the MasterPageFile attribute within the Page directive. The use of this attribute specifies that this particular .aspx page inherits from another page. The location of the master page within the application is specified as the value of the MasterPageFile attribute.
The other big difference is that it contains neither the <form id=”form1” runat=”server”> tag nor any opening or closing HTML tags that would normally be included in a typical .aspx page.
This content page may seem simple, but if you switch to the Design view within Visual Studio 2005, you see the power of using content pages. What you get with visual inheritance is shown in Figure 6-8.
In this screen shot, you can see that just by using the MasterFilePage attribute in the Page directive, you are able to completely inherit everything that the Wrox.master file exposes. All the common areas defined in the master page are shown in gray, whereas the content areas that you specified in the master page using the <asp:ContentPlaceHolder> server control are shown clearly and available for additional content in the content page. You can add any content to these defined content areas as if you were working with a regular .aspx page. An example of using this .master page for a content page is shown in Listing 6-3.
181
Chapter 6
Figure 6-8
Listing 6-3: The content page that uses Wrox.master
VB
<%@ Page Language=”VB” MasterPageFile=”~/Wrox.master” %>
<script runat=”server” language=”vb”>
Sub Button1_Click(ByVal sender As Object, ByVal e As System.EventArgs) Label1.Text = “<b>Hello “ & TextBox1.Text & “!</b>”
End Sub </script>
<asp:Content ID=”Content1” ContentPlaceHolderId=”ContentPlaceHolder1” Runat=”server”>
<b>Enter your name:</b><br />
<asp:Textbox ID=”TextBox1” Runat=”server” /> <br />
<br />
182

Working with Master Pages
<asp:Button ID=”Button1” Runat=”server” Text=”Submit” OnClick=”Button1_Click” /><br />
<br />
<asp:Label ID=”Label1” Runat=”server” /> </asp:Content>
<asp:Content ID=”Content2” ContentPlaceHolderId=”ContentPlaceHolder2” Runat=”server”>
<asp:Image ID=”Image1” Runat=”server” ImageUrl=”wrox.gif” /> </asp:content>
C#
<%@ Page Language=”C#” MasterPageFile=”~/Wrox.master” %>
<script runat=”server” language=”c#”>
void Button1_Click(object sender, System.EventArgs e)
{
Label1.Text = “<b>Hello “ + TextBox1.Text + “!</b>”;
}
</script>
Right away you see some differences. As stated before, this page has no <form id=”form1” runat=”server”> tag nor any opening or closing HTML tags. These tags are not included because they are located in the master page. You should also notice a new server control — the <asp:Content> server control:
<asp:Content ID=”Content1” ContentPlaceHolderId=”ContentPlaceHolder1” Runat=”server”>
...
</asp:Content>
The <asp:Content> server control is a defined content area that maps to a specific <asp:Content PlaceHolder> server control on the master page. In this example, you can see that the <asp:Content> server control maps itself to the <asp:ContentPlaceHolder> server control in the master page that has the ID of ContentPlaceHolder1. Within the content page, you don’t have to worry about specifying the location of the content because this is completely defined within the master page. Therefore, your only concern is to place the appropriate content within the provided content sections, allowing the master page to do most of the work for you.
Just as when you work with any typical .aspx page, you can create any event handlers for your content page. In this case, you are using just a single event handler — the button-click when the end user submits the form. Finally, the created .aspx page that includes the master page and content page material is shown in Figure 6-9.
183