
- •Contents
- •Introduction
- •Acknowledgments
- •The Goals of ASP.NET 2.0
- •Developer productivity
- •Administration and management
- •Performance and scalability
- •Device-specific code generation
- •Additional New Features of ASP.NET 2.0
- •New developer infrastructures
- •New compilation system
- •Additions to the page framework
- •New objects for accessing data
- •New server controls
- •A New IDE for Building ASP.NET 2.0 Pages
- •The Document Window
- •Views in the Document Window
- •The tag navigator
- •Page tabs
- •Code change status notifications
- •Error notifications and assistance
- •The Toolbox
- •The Solution Explorer
- •Lost Windows
- •Other Common Visual Studio Activities
- •Creating new projects
- •Making references to other objects
- •Using smart tags
- •Saving and importing Visual Studio settings
- •Application Location Options
- •Built-in Web server
- •Web site requiring FrontPage Extensions
- •The ASP.NET Page Structure Options
- •Inline coding
- •New code-behind model
- •New Page Directives
- •New attributes
- •New directives
- •New Page Events
- •Cross-Page Posting
- •New Application Folders
- •\Code folder
- •\Themes folder
- •\Resources folder
- •Compilation
- •The New Data Source Controls
- •The SqlDataSource and GridView Controls
- •Reading data
- •Applying paging in the GridView
- •Sorting rows in the GridView control
- •Defining bound columns in the GridView control
- •Enabling the editing of rows in the GridView control
- •Deleting data from the GridView
- •Dealing with other column types in the GridView
- •Selecting which fields to display in the DetailsView control
- •Using the GridView and DetailsView together
- •Updating, inserting, and deleting rows
- •XmlDataSource Control
- •ObjectDataSource Control
- •SiteMapDataSource Control
- •DataSetDataSource Control
- •Visual Studio 2005
- •Connection Strings
- •Site Maps
- •The PathSeparator property
- •The PathDirection property
- •The ParentLevelsDisplayed property
- •The ShowToolTips property
- •Examining the parts of the TreeView control
- •Binding the TreeView control to an XML file
- •Selecting multiple options in a TreeView
- •Specifying custom icons in the TreeView control
- •Specifying lines used to connect nodes
- •Working with the TreeView control programmatically
- •Applying different styles to the Menu control
- •Menu Events
- •Binding the Menu control to an XML file
- •SiteMap Data Provider
- •SiteMapViewType
- •StartingNodeType
- •SiteMap API
- •Why Do You Need Master Pages?
- •The Basics of Master Pages
- •Coding a Master Page
- •Coding a Content Page
- •Mixing page types and languages
- •Specifying which master page to use
- •Working with the page title
- •Working with controls and properties from the master page
- •Nesting Master Pages
- •Container-Specific Master Pages
- •Event Ordering
- •Caching with Master Pages
- •Using ASP.NET 2.0 Packaged Themes
- •Applying a theme to a single ASP.NET page
- •Applying a theme to an entire application
- •Applying a theme to all applications on a server
- •Removing themes from server controls
- •Removing themes from Web pages
- •Removing themes from applications
- •Creating Your Own Themes
- •Creating the proper folder structure
- •Creating a skin
- •Including CSS files in your themes
- •Having your themes include images
- •Defining Multiple Skin Options
- •Programmatically Working with Themes
- •Themes and Custom Controls
- •Authentication
- •Authorization
- •ASP.NET 2.0 Authentication
- •Setting up your Web site for membership
- •Adding users
- •Asking for credentials
- •Working with authenticated users
- •Showing the number of users online
- •Dealing with passwords
- •ASP.NET 2.0 Authorization
- •Using the LoginView server control
- •Setting up your Web site for role management
- •Adding and retrieving application roles
- •Deleting roles
- •Adding users to roles
- •Getting all the users of a particular role
- •Getting all the roles of a particular user
- •Removing users from roles
- •Checking users in roles
- •Using the Web Site Administration Tool
- •The Personalization Model
- •Adding a simple personalization property
- •Using personalization properties
- •Adding a group of personalization properties
- •Using grouped personalization properties
- •Defining types for personalization properties
- •Using custom types
- •Providing default values
- •Making personalization properties read-only
- •Anonymous Personalization
- •Enabling anonymous identification of the end user
- •Working with anonymous identification events
- •Anonymous options for personalization properties
- •Migrating Anonymous Users
- •Personalization Providers
- •Working with the Access personalization provider
- •Working with the SQL Server personalization provider
- •Using multiple providers
- •Building Dynamic and Modular Web Sites
- •Introducing the WebPartManager control
- •Working with zone layouts
- •Understanding the WebPartZone control
- •Explaining the WebPartPageMenu control
- •Modifying zones
- •Caching in ASP.NET 1.0/1.1
- •Output caching
- •Partial page caching
- •Data caching using the Cache object
- •Cache dependencies
- •ASP.NET 2.0 unseals the CacheDependency class
- •Enabling databases for SQL Server cache invalidation
- •Enabling tables for SQL Server cache invalidation
- •Looking at SQL Server
- •Looking at the tables that are enabled
- •Disabling a table for SQL Server cache invalidation
- •Disabling a database for SQL Server cache invalidation
- •Configuring your ASP.NET Application
- •Adding more than one table to a page
- •Attaching SQL Server cache dependencies to the Request object
- •Attaching SQL Server cache dependencies to the Cache object
- •Customizing the side navigation
- •Examining the AllowReturn attribute
- •Working with the StepType attribute
- •Adding a header to the Wizard control
- •Utilizing Wizard control events
- •Working with images from disk
- •Resizing images
- •Displaying images from streams
- •The MMC ASP.NET Snap-In
- •General
- •Custom Errors
- •Authorization
- •Authentication
- •Application
- •State Management
- •Advanced
- •ASP.NET Web Site Administration Tool
- •Home
- •Security
- •Profile
- •Application
- •Provider
- •Managing the Site Counter System
- •Generics
- •Iterators
- •Anonymous Methods
- •Operator Overloading
- •Visual Basic XML Documentation
- •New Visual Basic Keywords
- •Continue
- •Using
- •Global
- •Index

Chapter 4
Visual Studio 2005
Visual Studio 2005 makes it rather easy and straightforward to create and configure data source controls and then bind them to any of the data-bound controls. So far in this chapter, you have looked at the creation of data source controls via the code that you write. This is the best way to learn about the capabilities of ASP.NET 2.0’s data controls. You can also take the approach of simply dragging and dropping these controls onto the Visual Studio 2005 design surface and manipulating the controls in the IDE’s Properties Window.
To create your data source controls and bind them to the data-bound controls, you can use the controls’ smart tags. For an example of this, drag and drop a GridView control onto an empty design surface. Then below the GridView control, drag and drop a SqlDataSource control onto the page.
The first step is to set up your SqlDataSource control to get the data you want. To do this in the visual designer, you simply highlight the gray box that represents the SqlDataSource control and click the arrow in the upper-right-hand corner of the control. Doing this opens the control’s smart tag and provides you with the option to configure and modify the control. The smart tag for the SqlDataSource control appears as shown in Figure 4-32.
Figure 4-32
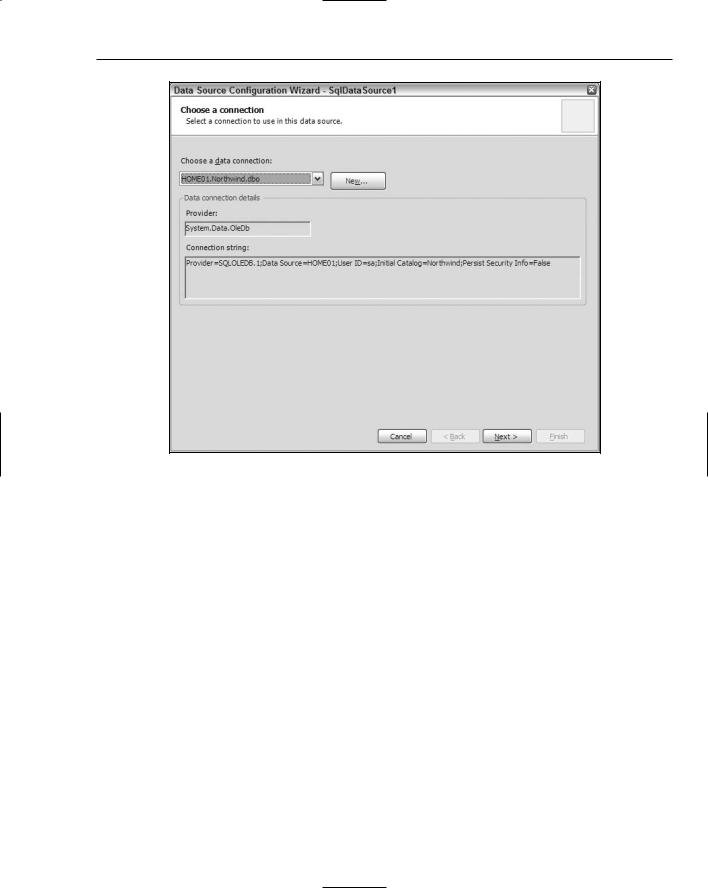
Within the smart tag for the SqlDataSource control, click the Configure Data Source link. This initiates the Data Source Configuration Wizard. The first step in the configuration process is to select the database you are connecting to. The wizard then shows you the connection string it’s creating for you in a grayed-out pane (see Figure 4-33).
118

New Ways to Handle Data
Figure 4-33
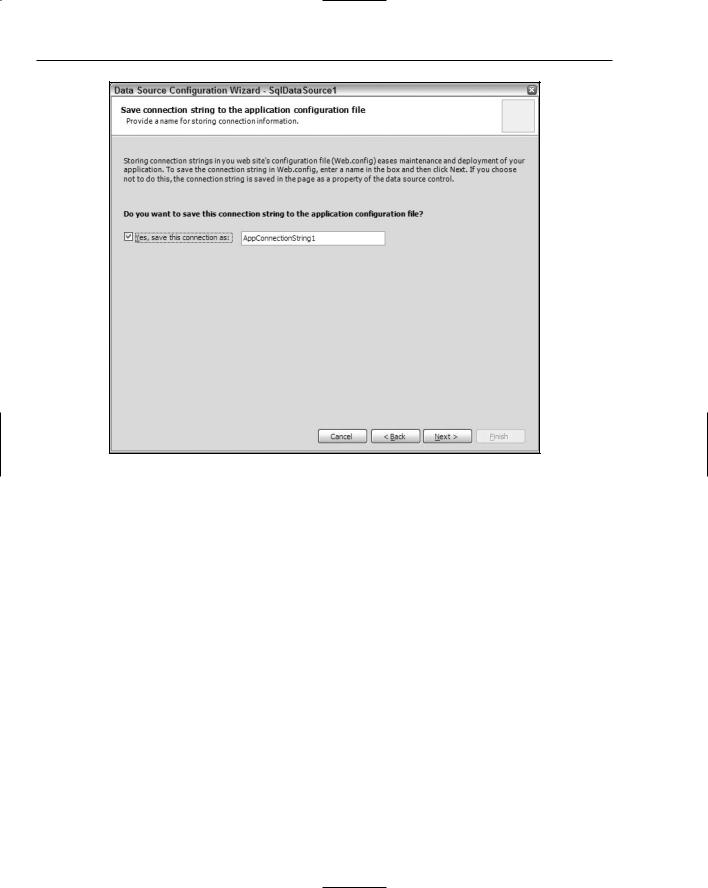
When you click the Next button, the Data Source Configuration Wizard gives you the option of storing the connection string in the web.config file, which is an outstanding idea because it is a safe way to store it. Any .config file is not browser-accessible and gives you a single place in the application where you can change the connection string and have that change take effect throughout the application. Keep the check box for this checked if you want to store the connection string in this manner (see Figure 4-34); otherwise, uncheck the box.
119

Chapter 4
Figure 4-34
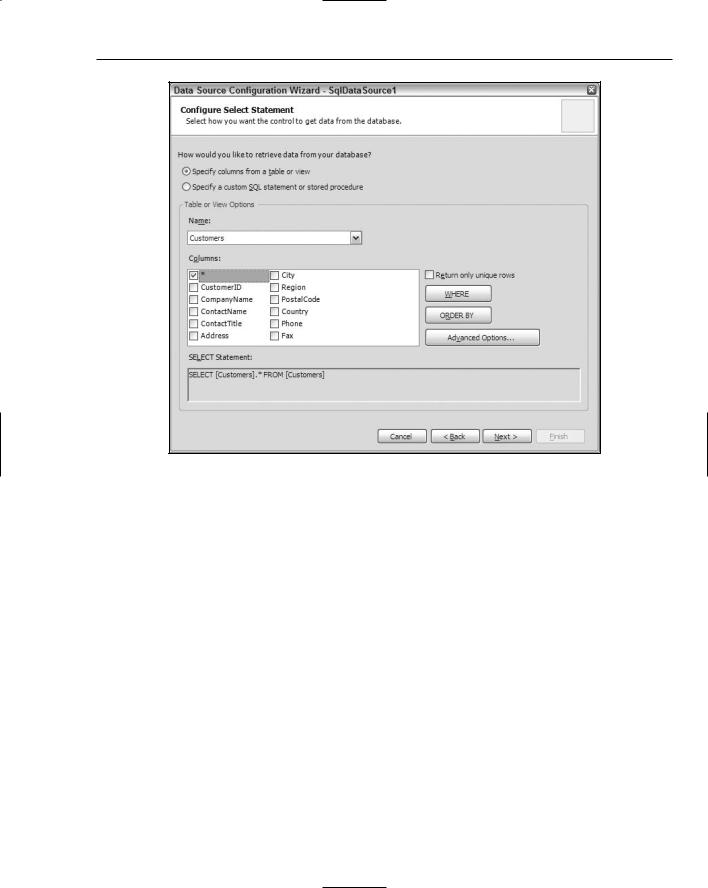
Again, click the Next button and configure the Select statement that the SqlDataSource control utilizes. Simply select the Customers table from the drop-down list and then check the * check box (see Figure 4-35). This means that you want each and every field from the Customers table.
120

New Ways to Handle Data
Figure 4-35
Click Next, and you can test out the SqlDataSource and its connection to the data store by clicking the Test Query button shown in Figure 4-36.
121

Chapter 4
Figure 4-36
Clicking the Finish button brings you back to the design surface in Visual Studio. The SqlDataSource control is now ready to use with the GridView control. In the GridView control, from the drop-down list in the smart tag, select the SqlDataSource1 control and check the Enable Paging check box (see Figure 4-37). Next, you can create a better look and feel by choosing the Auto Format option.
Figure 4-37
That’s it! Everything is in place and no coding is needed. Simply press F5 to run the page, and you get the results shown in Figure 4-38.
122