
- •Contents
- •Introduction
- •Acknowledgments
- •The Goals of ASP.NET 2.0
- •Developer productivity
- •Administration and management
- •Performance and scalability
- •Device-specific code generation
- •Additional New Features of ASP.NET 2.0
- •New developer infrastructures
- •New compilation system
- •Additions to the page framework
- •New objects for accessing data
- •New server controls
- •A New IDE for Building ASP.NET 2.0 Pages
- •The Document Window
- •Views in the Document Window
- •The tag navigator
- •Page tabs
- •Code change status notifications
- •Error notifications and assistance
- •The Toolbox
- •The Solution Explorer
- •Lost Windows
- •Other Common Visual Studio Activities
- •Creating new projects
- •Making references to other objects
- •Using smart tags
- •Saving and importing Visual Studio settings
- •Application Location Options
- •Built-in Web server
- •Web site requiring FrontPage Extensions
- •The ASP.NET Page Structure Options
- •Inline coding
- •New code-behind model
- •New Page Directives
- •New attributes
- •New directives
- •New Page Events
- •Cross-Page Posting
- •New Application Folders
- •\Code folder
- •\Themes folder
- •\Resources folder
- •Compilation
- •The New Data Source Controls
- •The SqlDataSource and GridView Controls
- •Reading data
- •Applying paging in the GridView
- •Sorting rows in the GridView control
- •Defining bound columns in the GridView control
- •Enabling the editing of rows in the GridView control
- •Deleting data from the GridView
- •Dealing with other column types in the GridView
- •Selecting which fields to display in the DetailsView control
- •Using the GridView and DetailsView together
- •Updating, inserting, and deleting rows
- •XmlDataSource Control
- •ObjectDataSource Control
- •SiteMapDataSource Control
- •DataSetDataSource Control
- •Visual Studio 2005
- •Connection Strings
- •Site Maps
- •The PathSeparator property
- •The PathDirection property
- •The ParentLevelsDisplayed property
- •The ShowToolTips property
- •Examining the parts of the TreeView control
- •Binding the TreeView control to an XML file
- •Selecting multiple options in a TreeView
- •Specifying custom icons in the TreeView control
- •Specifying lines used to connect nodes
- •Working with the TreeView control programmatically
- •Applying different styles to the Menu control
- •Menu Events
- •Binding the Menu control to an XML file
- •SiteMap Data Provider
- •SiteMapViewType
- •StartingNodeType
- •SiteMap API
- •Why Do You Need Master Pages?
- •The Basics of Master Pages
- •Coding a Master Page
- •Coding a Content Page
- •Mixing page types and languages
- •Specifying which master page to use
- •Working with the page title
- •Working with controls and properties from the master page
- •Nesting Master Pages
- •Container-Specific Master Pages
- •Event Ordering
- •Caching with Master Pages
- •Using ASP.NET 2.0 Packaged Themes
- •Applying a theme to a single ASP.NET page
- •Applying a theme to an entire application
- •Applying a theme to all applications on a server
- •Removing themes from server controls
- •Removing themes from Web pages
- •Removing themes from applications
- •Creating Your Own Themes
- •Creating the proper folder structure
- •Creating a skin
- •Including CSS files in your themes
- •Having your themes include images
- •Defining Multiple Skin Options
- •Programmatically Working with Themes
- •Themes and Custom Controls
- •Authentication
- •Authorization
- •ASP.NET 2.0 Authentication
- •Setting up your Web site for membership
- •Adding users
- •Asking for credentials
- •Working with authenticated users
- •Showing the number of users online
- •Dealing with passwords
- •ASP.NET 2.0 Authorization
- •Using the LoginView server control
- •Setting up your Web site for role management
- •Adding and retrieving application roles
- •Deleting roles
- •Adding users to roles
- •Getting all the users of a particular role
- •Getting all the roles of a particular user
- •Removing users from roles
- •Checking users in roles
- •Using the Web Site Administration Tool
- •The Personalization Model
- •Adding a simple personalization property
- •Using personalization properties
- •Adding a group of personalization properties
- •Using grouped personalization properties
- •Defining types for personalization properties
- •Using custom types
- •Providing default values
- •Making personalization properties read-only
- •Anonymous Personalization
- •Enabling anonymous identification of the end user
- •Working with anonymous identification events
- •Anonymous options for personalization properties
- •Migrating Anonymous Users
- •Personalization Providers
- •Working with the Access personalization provider
- •Working with the SQL Server personalization provider
- •Using multiple providers
- •Building Dynamic and Modular Web Sites
- •Introducing the WebPartManager control
- •Working with zone layouts
- •Understanding the WebPartZone control
- •Explaining the WebPartPageMenu control
- •Modifying zones
- •Caching in ASP.NET 1.0/1.1
- •Output caching
- •Partial page caching
- •Data caching using the Cache object
- •Cache dependencies
- •ASP.NET 2.0 unseals the CacheDependency class
- •Enabling databases for SQL Server cache invalidation
- •Enabling tables for SQL Server cache invalidation
- •Looking at SQL Server
- •Looking at the tables that are enabled
- •Disabling a table for SQL Server cache invalidation
- •Disabling a database for SQL Server cache invalidation
- •Configuring your ASP.NET Application
- •Adding more than one table to a page
- •Attaching SQL Server cache dependencies to the Request object
- •Attaching SQL Server cache dependencies to the Cache object
- •Customizing the side navigation
- •Examining the AllowReturn attribute
- •Working with the StepType attribute
- •Adding a header to the Wizard control
- •Utilizing Wizard control events
- •Working with images from disk
- •Resizing images
- •Displaying images from streams
- •The MMC ASP.NET Snap-In
- •General
- •Custom Errors
- •Authorization
- •Authentication
- •Application
- •State Management
- •Advanced
- •ASP.NET Web Site Administration Tool
- •Home
- •Security
- •Profile
- •Application
- •Provider
- •Managing the Site Counter System
- •Generics
- •Iterators
- •Anonymous Methods
- •Operator Overloading
- •Visual Basic XML Documentation
- •New Visual Basic Keywords
- •Continue
- •Using
- •Global
- •Index

Visual Studio 2005
The Toolbox
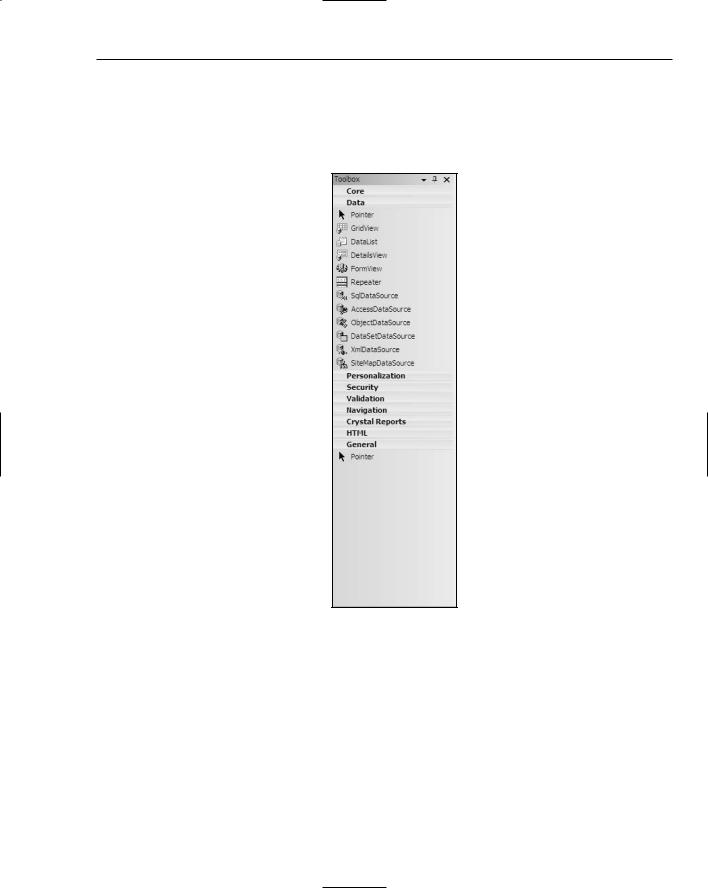
One of the first changes you notice when you open this latest release of Visual Studio is a change in the Toolbox. The controls in the IDE are now presented in a hierarchical manner. This change was made because of the tremendous number of new controls in ASP.NET 2.0. The Toolbox is shown in Figure 2-10.
Figure 2-10
Because of the number of new controls (somewhere around 50), they have been organized into sections in the Toolbox. The new control sections include those shown in the following table.
29

Chapter 2
Control Section |
Controls the Section Contains |
|
|
Core |
This main control section contains the standard <asp:> controls, |
|
such as TextBox, Button, and other core controls. |
Data |
Includes all the controls that deal with the retrieval and display of data |
|
that comes from a data store of some kind. Therefore, this section |
|
includes all the data source controls (SqlDataSource, AccessDataSource, |
|
and more), as well as the data display controls, such as GridView and |
|
DetailsView. |
Personalization |
Includes all the controls that deal with the new personalization fea- |
|
tures provided by ASP.NET 2.0, including all the WebPart controls |
|
such as WebPartManager and WebPartZone. |
Security |
Contains all controls that deal with adding user login and password |
|
capabilities to your ASP.NET applications, such as Login, LoginView, |
|
and LoginStatus. |
Validation |
Includes all the validation controls that have always been a part of |
|
ASP.NET, such as RequiredFieldValidator and RegularExpression- |
|
Validator. |
Navigation |
Includes controls that enable end users to work through a collection |
|
of ASP.NET pages, including SiteMapPath, Menu, and TreeView. |
Crystal Reports |
Includes all controls that enable users to work with Crystal Reports. |
HTML |
Includes the HTML server controls that have been a part of ASP.NET |
|
since the beginning. The names of these controls, however, have |
|
changed. |
General |
Contains only a pointer, although you are free to use this section for |
|
your own custom developed controls. (You can also create a com- |
|
pletely new control section if you choose.) |
|
|
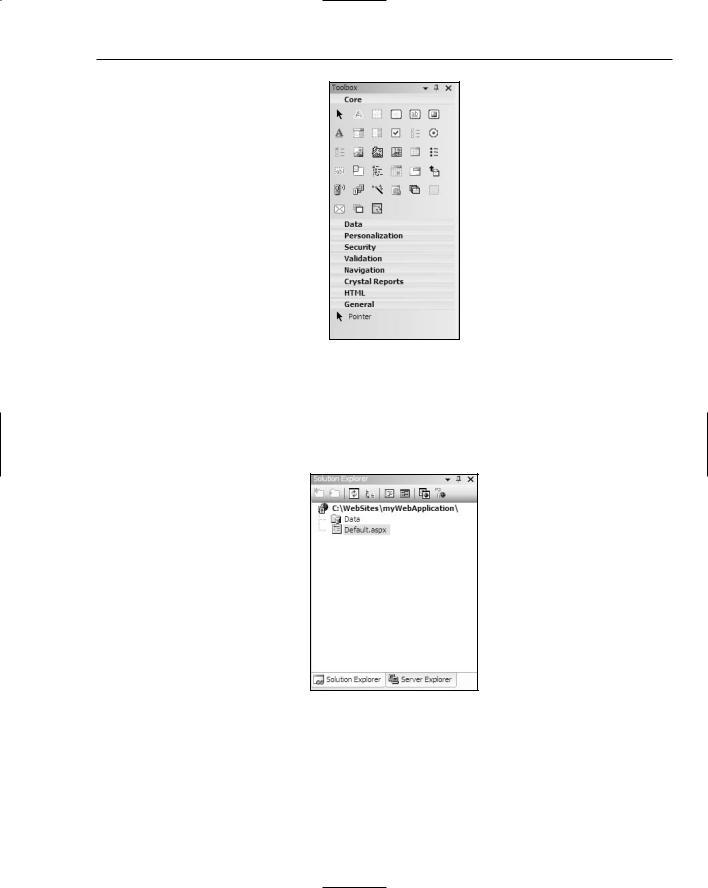
One feature that has always been present in Visual Studio, but makes more sense now that so many new controls have been added, enables you to turn off the List View of the controls. Doing this causes the Toolbox to show the controls simply as icons (see Figure 2-11).
Right-click in the section of the Toolbox you want to change and deselect List View. This changes the view only for those controls in the section where you right-clicked. Each section in the Toolbox maintains its own settings.
30

Visual Studio 2005
Figure 2-11
The Solution Explorer
The Solution Explorer is still located where it was in previous versions of Visual Studio. The Solution Explorer, shown in Figure 2-12, provides you with an organized view of the projects in your application.
Figure 2-12
The toolbar at the top of the Solution Explorer still enables you to do many of the same tasks that you could perform in previous versions of Visual Studio, but this latest release of Visual Studio has some additional buttons on the toolbar. Figure 2-13 shows you the toolbar with a description of the items it contains.
31

Chapter 2
Un–nest Related Files
View Designer
Unhide All |
ASP.NET Configuration |
Refresh |
Copy Web Site |
View Code
Add New Solution Folder
Figure 2-13
The Un-nest Related Files button is a new feature in the Solution Explorer that enables you to undo the nesting found in ASP.NET pages that are developed using code-behind files. By default when working with code-behind files, you click the plus sign next to the .aspx page to expose the code-behind file (.aspx.vb or .aspx.cs). Un-nesting these files puts them all on the same hierarchical level.
Another new button in the Solution Explorer is the Copy Web Site button. This opens up a new dialog in the Document Window that enables you to copy your application from one point to another. This dialog is shown in Figure 2-14.
Figure 2-14
32

Visual Studio 2005
Using this dialog, you can copy your projects to a different place on the same server or to an entirely different server. You can now enjoy easy file movements and synchronization between two projects.
A final new button in the toolbar is the ASP.NET Configuration button that pulls up the ASP.NET configuration page for your selected application within the Document Window. This configuration system is discussed in detail in Chapter 14.
The Ser ver Explorer
The Server Explorer is one of the more valuable windows within Visual Studio. This window can now be found on a separate tab next to the Solution Explorer. The Server Explorer (shown in Figure 2-15) enables you to perform a number of functions, such as working with database connectivity and performance monitoring and interacting with event logs.
Figure 2-15
The Proper ties Window
The Properties Window is also relatively unchanged from the previous versions of Visual Studio. This window (shown in Figure 2-16) enables you to work with and control the properties of any item that is part of your application. After an item is selected, or if the cursor is focused on an item in the Code view of your ASP.NET page, the properties of that particular item are shown in the Properties Window.
33