- •About the Authors
- •Contents at a Glance
- •Contents
- •Introduction
- •Goal of the Book
- •How to Use this Book
- •Introduction to the .NET Framework
- •Common Language Runtime (CLR)
- •Class Library
- •Assembly
- •Versioning
- •Exceptions
- •Threads
- •Delegates
- •Summary
- •Introduction to C#
- •Variables
- •Initializing Variables
- •Variable Modifiers
- •Variable Data Types
- •Types of Variables
- •Variable Scope
- •Types of Data Type Casting
- •Arrays
- •Strings
- •Initializing Strings
- •Working with Strings
- •Statements and Expressions
- •Types of Statements
- •Expressions
- •Summary
- •Classes
- •Declaring Classes
- •Inheritance
- •Constructors
- •Destructors
- •Methods
- •Declaring a Method
- •Calling a Method
- •Passing Parameters to Methods
- •Method Modifiers
- •Overloading a Method
- •Namespaces
- •Declaring Namespaces
- •Aliases
- •Structs
- •Enumerations
- •Interfaces
- •Writing, Compiling, and Executing
- •Writing a C# Program
- •Compiling a C# Program
- •Executing a C# Program
- •Summary
- •Arrays
- •Single-Dimensional Arrays
- •Multidimensional Arrays
- •Methods in Arrays
- •Collections
- •Creating Collections
- •Working with Collections
- •Indexers
- •Boxing and Unboxing
- •Preprocessor Directives
- •Summary
- •Attributes
- •Declaring Attributes
- •Attribute Class
- •Attribute Parameters
- •Default Attributes
- •Properties
- •Declaring Properties
- •Accessors
- •Types of Properties
- •Summary
- •Introduction to Threads
- •Creating Threads
- •Aborting Threads
- •Joining Threads
- •Suspending Threads
- •Making Threads Sleep
- •Thread States
- •Thread Priorities
- •Synchronization
- •Summary
- •Case Study
- •Project Life Cycle
- •Analyzing Requirements
- •High-Level Design
- •Primary and Foreign Keys
- •Referential Integrity
- •Normalization
- •Designing a Database
- •Low-Level Design
- •Construction
- •Integration and Testing
- •User Acceptance Testing
- •Implementation
- •Operations and Maintenance
- •Summary
- •Creating a New Project
- •Console Application
- •Windows Applications
- •Creating a Windows Application for the Customer Maintenance Project
- •Creating an Interface for Form1
- •Creating an Interface for WorkerForm
- •Creating an Interface for CustomerForm
- •Creating an Interface for ReportsForm
- •Creating an Interface for JobDetailsForm
- •Summary
- •Performing Validations
- •Identifying the Validation Mechanism
- •Using the ErrorProvider Control
- •Handling Exceptions
- •Using the try and catch Statements
- •Using the Debug and Trace Classes
- •Using the Debugging Features of Visual Studio .NET
- •Using the Task List
- •Summary
- •Creating Form1
- •Connecting WorkerForm to the Workers Table
- •Connecting CustomerForm to the tblCustomer Table
- •Connecting the JobDetails Form
- •to the tblJobDetails Table
- •Summary
- •Introduction to the Crystal Reports Designer Tool
- •Creating the Reports Form
- •Creating Crystal Reports
- •Creating the Windows Forms Viewer Control
- •Creating the Monthly Worker Report
- •Summary
- •Introduction to Deploying a Windows Application
- •Deployment Projects Available in Visual Studio .NET
- •Deployment Project Editors
- •Summary
- •Case Study
- •Project Life Cycle
- •Analyzing Requirements
- •High-Level Design
- •Low-Level Design
- •Summary
- •Populating the TreeView Control
- •Displaying Employee Codes in the TreeView Control
- •Event Handling
- •Displaying Employee Details in the ListView Control
- •Summary
- •Case Study
- •Project Life Cycle
- •Analyzing Requirements
- •High-Level Design
- •Low-Level Design
- •Summary
- •Adding the Programming Logic to the Application
- •Adding Code to the Form Load() Method
- •Adding Code to the OK Button
- •Adding Code to the Exit Button
- •Summary
- •The Created Event
- •Adding Code to the Created Event
- •Overview of XML
- •The XmlReader Class
- •The XmlWriter Class
- •Displaying Data in an XML Document
- •Displaying an Error Message in the Event Log
- •Displaying Event Entries from Event Viewer
- •Displaying Data from the Summary.xml Document in a Message Box
- •Summary
- •Airline Profile
- •Role of a Business Manager
- •Role of a Network Administrator
- •Role of a Line-of-Business Executive
- •Project Requirements
- •Creation and Deletion of User Accounts
- •Addition of Flight Details
- •Reservations
- •Cancellations
- •Query of Status
- •Confirmation of Tickets
- •Creation of Reports
- •Launch of Frequent Flier Programs
- •Summarizing the Tasks
- •Project Design
- •Database Design
- •Web Forms Design
- •Enabling Security with the Directory Structure
- •Summary
- •Getting Started with ASP.NET
- •Prerequisites for ASP.NET Applications
- •New Features in ASP.NET
- •Types of ASP.NET Applications
- •Exploring ASP.NET Web Applications
- •Introducing Web Forms
- •Web Form Server Controls
- •Configuring ASP.NET Applications
- •Configuring Security for ASP.NET Applications
- •Deploying ASP.NET Applications
- •Creating a Sample ASP.NET Application
- •Creating a New Project
- •Adding Controls to the Project
- •Coding the Application
- •Summary
- •Creating the Database Schema
- •Creating Database Tables
- •Managing Primary Keys and Relationships
- •Viewing the Database Schema
- •Designing Application Forms
- •Standardizing the Interface of the Application
- •Common Forms in the Application
- •Forms for Network Administrators
- •Forms for Business Managers
- •Forms for Line-of-Business Executives
- •Summary
- •The Default.aspx Form
- •The Logoff.aspx Form
- •The ManageUsers.aspx Form
- •The ManageDatabases.aspx Form
- •The ChangePassword.aspx Form
- •Restricting Access to Web Forms
- •The AddFl.aspx Form
- •The RequestID.aspx Form
- •The Reports.aspx Form
- •The FreqFl.aspx Form
- •Coding the Forms for LOB Executives
- •The CreateRes.aspx Form
- •The CancelRes.aspx Form
- •The QueryStat.aspx Form
- •The ConfirmRes.aspx Form
- •Summary
- •Designing the Form
- •The View New Flights Option
- •The View Ticket Status Option
- •The View Flight Status Option
- •The Confirm Reservation Option
- •Testing the Application
- •Summary
- •Locating Errors in Programs
- •Watch Window
- •Locals Window
- •Call Stack Window
- •Autos Window
- •Command Window
- •Testing the Application
- •Summary
- •Managing the Databases
- •Backing Up the SkyShark Airlines Databases
- •Exporting Data from Databases
- •Examining Database Logs
- •Scheduling Database Maintenance Tasks
- •Managing Internet Information Server
- •Configuring IIS Error Pages
- •Managing Web Server Log Files
- •Summary
- •Authentication Mechanisms
- •Securing a Web Site with IIS and ASP.NET
- •Configuring IIS Authentication
- •Configuring Authentication in ASP.NET
- •Securing SQL Server
- •Summary
- •Deployment Scenarios
- •Deployment Editors
- •Creating a Deployment Project
- •Adding the Output of SkySharkDeploy to the Deployment Project
- •Deploying the Project to a Web Server on Another Computer
- •Summary
- •Organization Profile
- •Project Requirements
- •Querying for Information about All Books
- •Querying for Information about Books Based on Criteria
- •Ordering a Book on the Web Site
- •Project Design
- •Database Design
- •Database Schema
- •Web Forms Design
- •Flowcharts for the Web Forms Modules
- •Summary
- •Introduction to ASP.NET Web Services
- •Web Service Architecture
- •Working of a Web Service
- •Technologies Used in Web Services
- •XML in a Web Service
- •WSDL in a Web Service
- •SOAP in a Web Service
- •UDDI in a Web Service
- •Web Services in the .NET Framework
- •The Default Code Generated for a Web Service
- •Testing the SampleWebService Web Service
- •Summary
- •Creating the SearchAll() Web Method
- •Creating the SrchISBN() Web Method
- •Creating the AcceptDetails() Web Method
- •Creating the GenerateOrder() Web Method
- •Testing the Web Service
- •Securing a Web Service
- •Summary
- •Creating the Web Forms for the Bookers Paradise Web Site
- •Adding Code to the Web Forms
- •Summary
- •Case Study
- •Project Life Cycle
- •Analyzing Requirements
- •High-Level Design
- •Low-Level Design
- •Summary
- •Overview of Mobile Applications
- •The Microsoft Mobile Internet Toolkit
- •Overview of WAP
- •The WAP Architecture
- •Overview of WML
- •The Mobile Web Form
- •The Design of the MobileTimeRetriever Application
- •Creating the Interface for the Mobile Web Forms
- •Adding Code to the MobileTimeRetriever Application
- •Summary
- •Creating the Forms Required for the MobileCallStatus Application
- •Creating the frmLogon Form
- •Creating the frmSelectOption Form
- •Creating the frmPending Form
- •Creating the frmUnattended Form
- •Adding Code to the Submit Button in the frmLogon Form
- •Adding Code to the Query Button in the frmSelectOption Form
- •Adding Code to the Mark checked as complete Button in the frmPending Form
- •Adding Code to the Back Button in the frmPending Form
- •Adding Code to the Accept checked call(s) Button in the frmUnattended Form
- •Adding Code to the Back Button in the frmUnattended Form
- •Summary
- •What Is COM?
- •Windows DNA
- •Microsoft Transaction Server (MTS)
- •.NET Interoperability
- •COM Interoperability
- •Messaging
- •Benefits of Message Queues
- •Limitations
- •Key Messaging Terms
- •Summary
- •Pointers
- •Declaring Pointers
- •Types of Code
- •Implementing Pointers
- •Using Pointers with Managed Code
- •Working with Pointers
- •Compiling Unsafe Code
- •Summary
- •Introduction to the Languages of Visual Studio .NET
- •Visual C# .NET
- •Visual Basic .NET
- •Visual C++ .NET
- •Overview of Visual Basic .NET
- •Abstraction
- •Encapsulation
- •Inheritance
- •Polymorphism
- •Components of Visual Basic .NET
- •Variables
- •Constants
- •Operators
- •Arrays
- •Collections
- •Procedures
- •Arguments
- •Functions
- •Adding Code to the Submit Button
- •Adding Code to the Exit Button
- •Summary
- •Introduction to Visual Studio .NET IDE
- •Menu Bar
- •Toolbars
- •Visual Studio .NET IDE Windows
- •Toolbox
- •The Task List Window
- •Managing Windows
- •Customizing Visual Studio .NET IDE
- •The Options Dialog Box
- •The Customize Dialog Box
- •Summary
- •Index
INTERACTING WITH A MICROSOFT WORD DOCUMENT |
Chapter 17 |
|
377 |
|
|
||||
|
|
|
|
|
After the application writes the data to the Summary.xml document, the application is ready to process the next document. Therefore, you need to again change the notification icon to Ready.ico. To do this, type the following statement in the
Created event.
icoNotify.Icon=m_Ready;
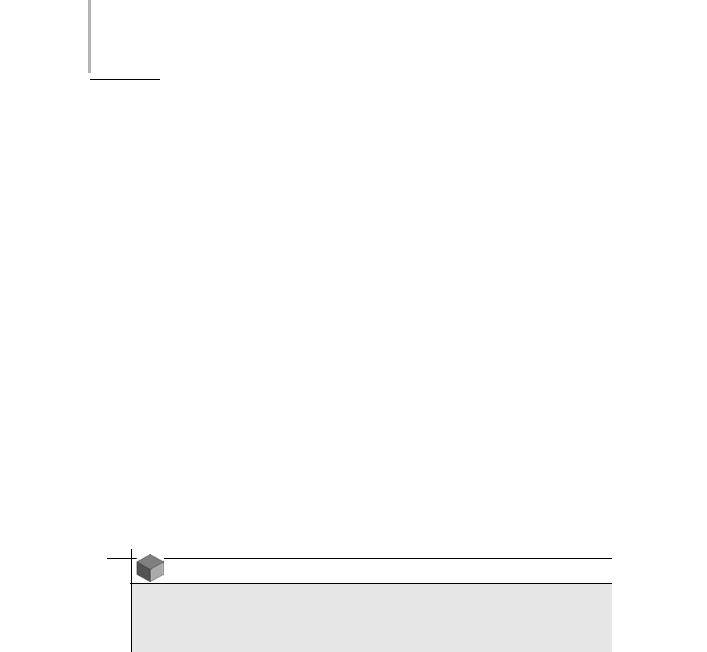
Figure 17-6 shows the Ready.ico notification icon in the status area of the taskbar.
FIGURE 17-6 Ready.ico notification icon in the status area of the taskbar
However, while processing a document, the application might detect an error, such as incorrect or incomplete data in the cash memo document. In such a case, the application generates an error message in Event Log.
Displaying an Error Message in the Event Log
Event logging is a method by which the Microsoft Windows operating system keeps track of all the important software and hardware events running on the system. Tracking the events helps the system administrator to detect the cause of any error that occurs on the system. You can view these software and hardware events in Event Viewer provided by Microsoft Windows. To access Event Viewer, perform the following steps:
1.Point to the Settings option on the Start menu.
2.In the displayed list, click on the Control Panel option. The Control Panel window is displayed.
3.In the Control Panel window, click on the Administrative Tools option. The Administrative Tools window is displayed.
378Project 3 CREATING A CREATIVE LEARNING PROJECT
4.In the Administrative Tools window, click on the Event Viewer option.
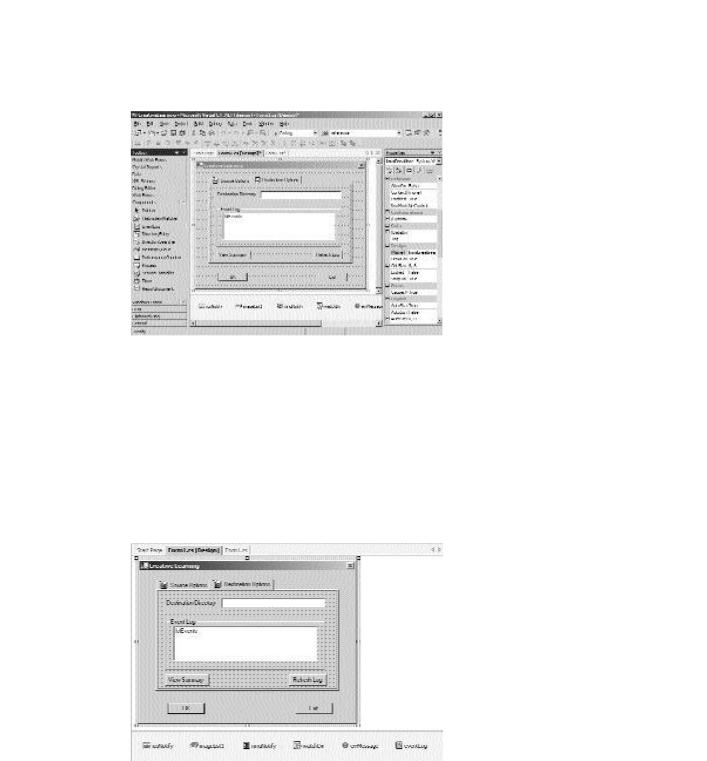
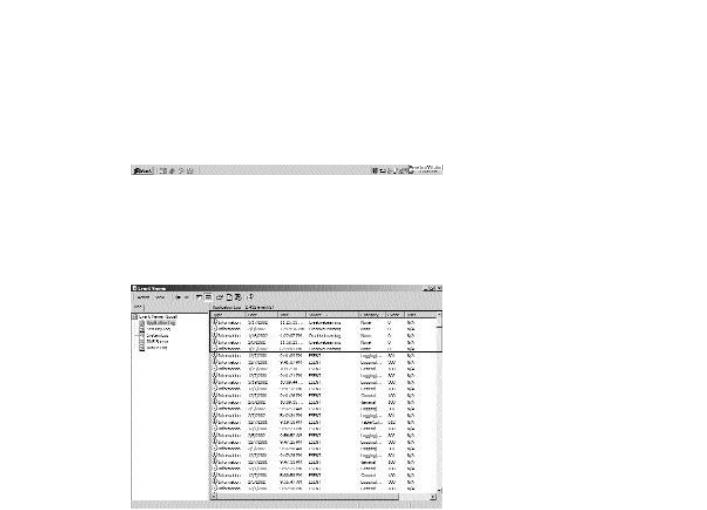
The Event Viewer window is displayed. Figure 17-7 displays the Event Viewer window.
FIGURE 17-7
|
|
Y |
|
L |
|
|
F |
|
|
M |
|
A |
|
|
E |
|
|
T |
|
|
The Event Viewer window |
|
The EventLog Component
Visual Studio .NET provides you with the EventLog component to view the events logged in Event Viewer. In addition to reading existing events, you can write event logs to Event Viewer by using the EventLog component.The EventLog component allows you to connect to Microsoft Windows Event Viewer on your local machine or on a remote machine.
You can access the EventLog component from the Components toolbox. Figure 17-8 shows the EventLog component in the Components toolbox.
Team-Fly®
INTERACTING WITH A MICROSOFT WORD DOCUMENT |
Chapter 17 |
379 |
|
|
|
|
|
FIGURE 17-8 The EventLog component in the Components toolbox
Adding the EventLog Component to the Form
To include the EventLog component, drag the EventLog component from the Components toolbox to the Creative Learning form. The EventLog component with a name eventLog1 is added to the component tray. Change the Name property of the control to eventLog. Figure 17-9 shows the eventLog component added to the component tray.
FIGURE 17-9 The eventLog component added to the component tray
380 Project 3 CREATING A CREATIVE LEARNING PROJECT
In addition to tracking events, Event Viewer can track the errors that are generated by the application while processing the cash memo document. When an error occurs, you can change the notification icon to Error.ico by creating an instance of the Error.ico file by adding the following statement to the frmCreative class:
private System.Drawing.Icon m_Error= new System.Drawing.Icon(“Error.ICO”);
TIP
Remember to add the Error.ico file to the bin folder of your application.
To add an error entry to the EventLog component, you need to catch any exception that is generated by the application. The exception can then be written to Event Viewer by using the WriteEntry() method.
The WriteEntry() method is a void method of the EventLog class in the System.Diagnostics namespace.The WriteEntry() method is used to write a message to Event Viewer. The message to be displayed is passed as a parameter to the WriteEntry() method. You can now add code to the Created event that writes error logs to Event Viewer.
catch (Exception catchException)
{
icoNotify.Icon=m_Error;
icoNotify.Text=”Error in “ + e.Name;
if (optGenerateLog.Checked==true)
eventLog.WriteEntry(e.Name + “: “ + catchException.Message);
}
In the preceding code, the Error.ico notification icon is displayed and a ToolTip displaying the error message is added to the notification icon. The code then checks whether the optGenerateLog check box is checked. If the user has selected the check box, the error entry is written to Event Viewer. However, the user may choose to clear the check box.This would prevent the error entry from being written to Event Viewer.
INTERACTING WITH A MICROSOFT WORD DOCUMENT |
Chapter 17 |
381 |
|
|
|
|
|
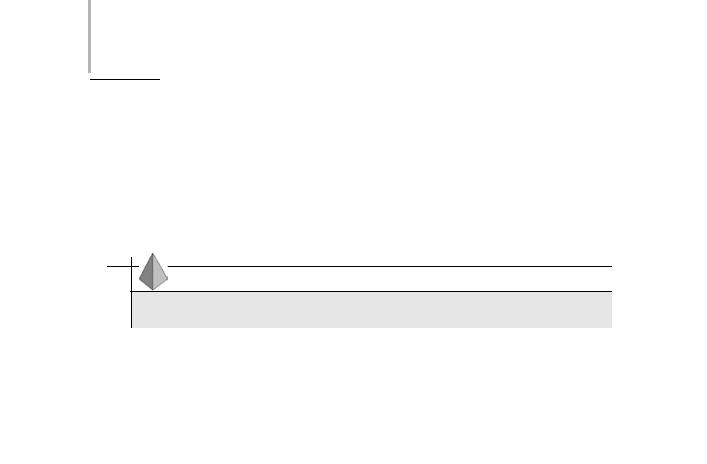
Figure 17-10 shows the Error.ico notification icon with an error message displayed in the status area.
FIGURE 17-10 The Error.ico notification icon with an error message
Figure 17-11 displays the error entry in Event Viewer.
FIGURE 17-11 The error entry in Event Viewer
After writing the data to an XML document, you need to close the object of the XmlTextWriter class by using the Close() method.In addition, you need to exit the Word application. You can do this by using the Quit() method. You can then instantiate the object of the Word.Application class to null so that the object can refer to another Word document in the source directory. In addition, you need to enable the directory watcher component to monitor the source directory.
finally
{
xmlWrite.Flush();
xmlWrite.Close();
382 Project 3 CREATING A CREATIVE LEARNING PROJECT
wdApp.Quit(ref optional, ref optional, ref optional);
wdApp=null;
watchDir.EnableRaisingEvents=true;
}
After the file is processed, you can move it the directory specified in the txtProcessedFile text box. To do this, add the following code to the Created event.
tryagain: try
{
File.Move(e.FullPath,txtProcessedFile.Text+e.Name);
}
catch
{
goto tryagain;
}
The File.Move() method call statement is enclosed in the try loop so that the application tries to move the processed file to the processed directory until the time the file closes and can be moved. The Move() method is used to move the processed file to the directory specified in the txtProcessedFile text box.The path of the source directory and destination directory are passed as parameters to the Move() method.
NOTE
The Move() method is used to move a specified object from the source directory to the destination directory. In addition, you can change the name of the object in the destination directory by passing the new name as a parameter to the Move() method.
The events that were generated are visible in Event Viewer. You can also create a list box that displays the event entries that are generated in Event Viewer for your Creative Learning application.