

Step 15 – Letter "I"
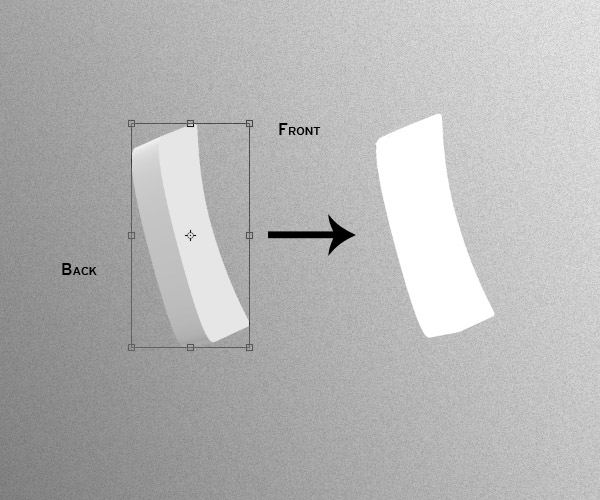
Just like we did before with the letter "W" we need to isolate both sides of the letter "I".
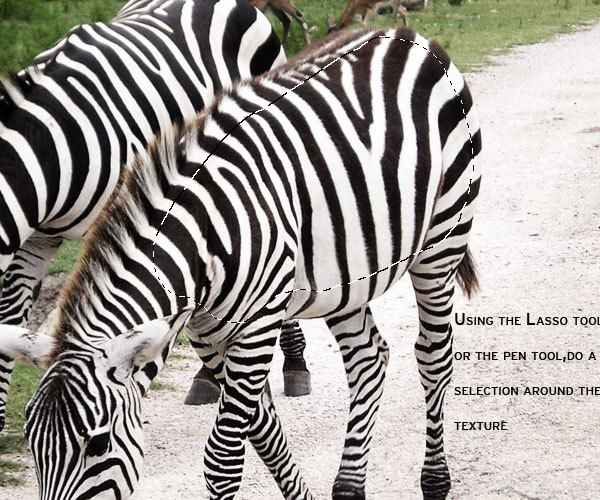
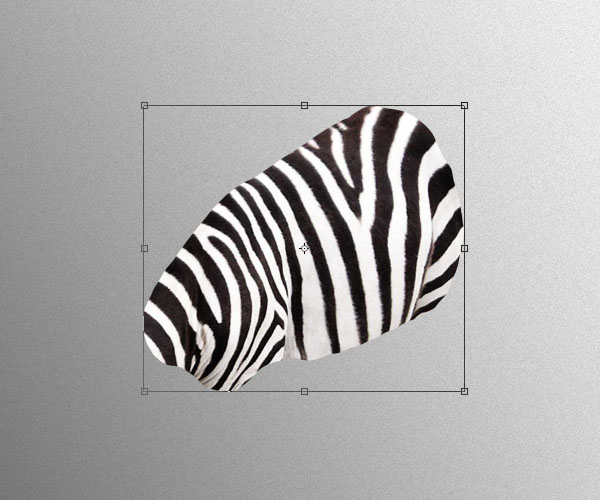
Drag the Zebras stock image to your document. Using the pen tool or the polygonal lasso, draw a big selection of the zebra skin and copy it to a new layer. This will be the texture we’ll be using for this letter.
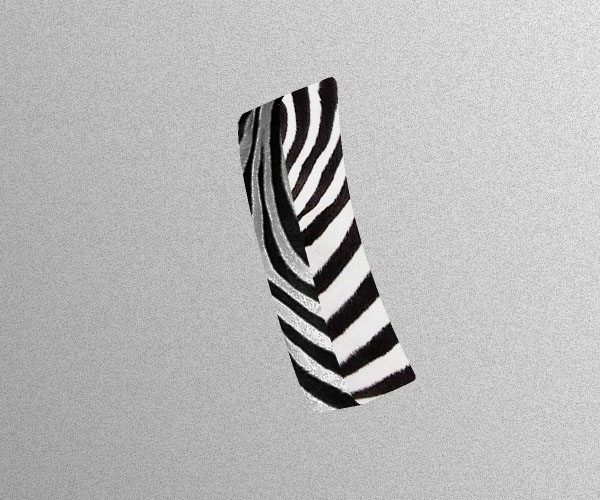
Using clip mask again, wrap the texture around the shapes. Be careful not to modify this one too much because we want to keep the zebra pattern as recognizable as possible.
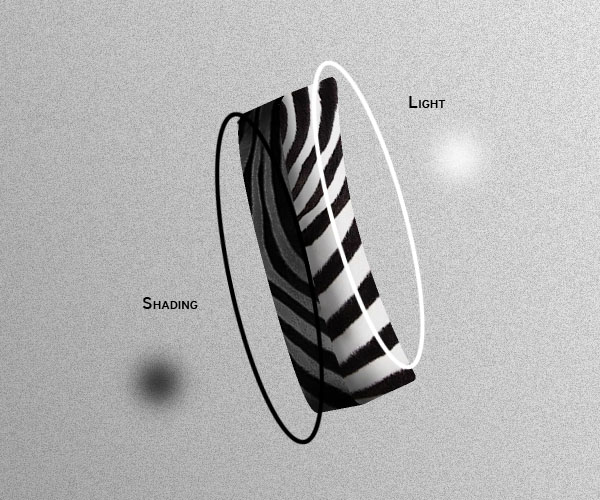
Once you have the texture, its time to do the shading and paint highlights. Create a new layer, clip mask it to the texture and shade accordingly.
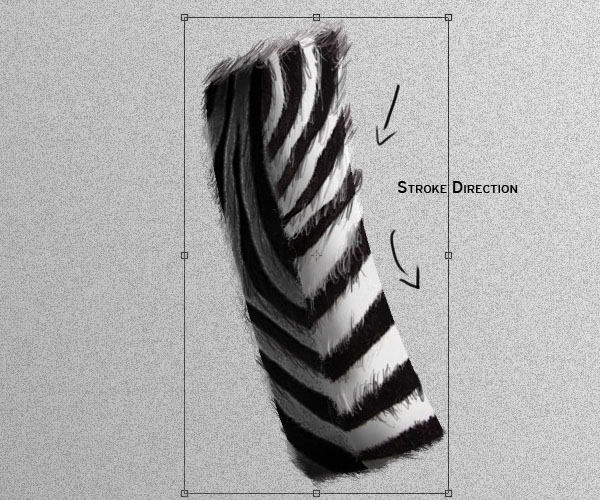
We also need to paint some hair around the edges. The difference is that this time, we need to paint the hair a little bit shorter than with the leopard letter. Use a hard round brush of about 2 pixels wide and sample the colors from the texture.
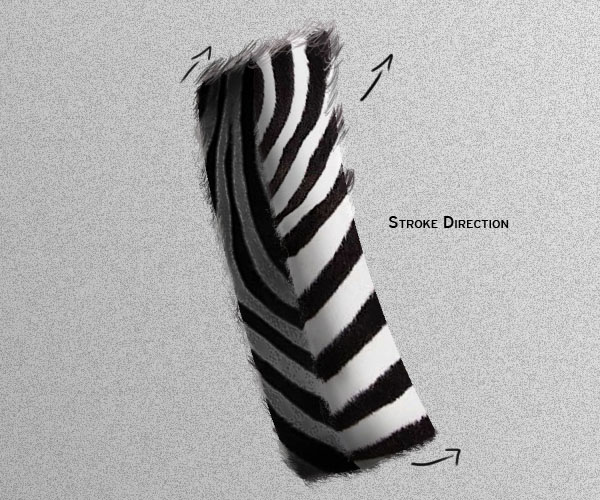
Since the texture looks a little bit flat the way it is right now. We need to paint also some hair details inside the letter. Use a 1 pixel and 2 pixel brush for this.
Step 16
For the detailing of this letter, go back to your original stock image and do a selection of the back hair of the Zebra. Use a feather radius of 3 pixels for the selection, and copy the hair into a new layer.
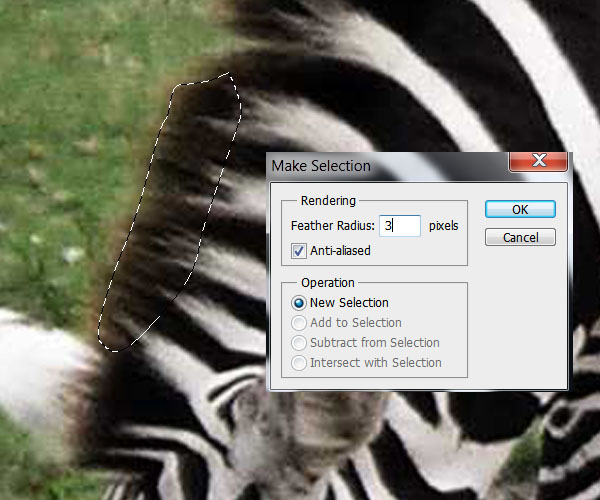
Place it behind the letter and paint some hair on it like on the step before. It should look something like this:
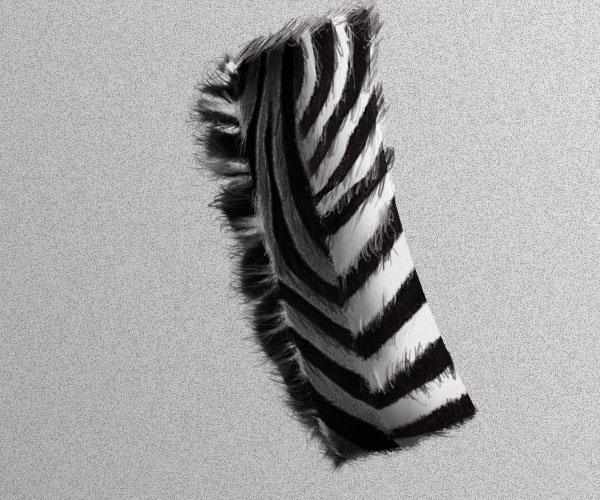
Step 17 – Zebra Tail
On the Zebra texture layer, draw a selection of another swirly shape (try to make each different from the other ones) and copy it to a new layer. Put this layer on top of the letter layers.
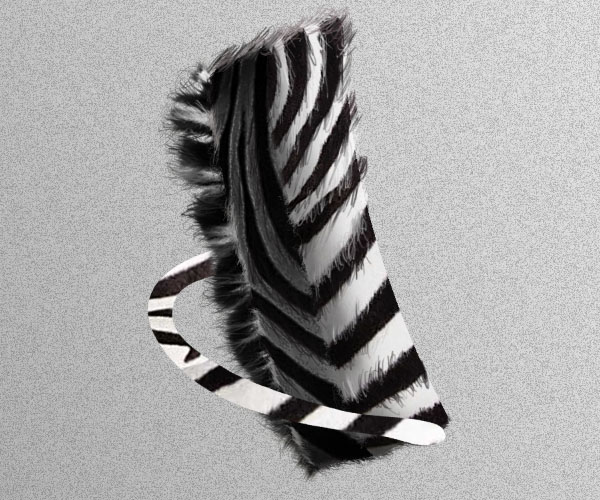
Clip mask a new layer and add shadings and highlights using a soft round brush.
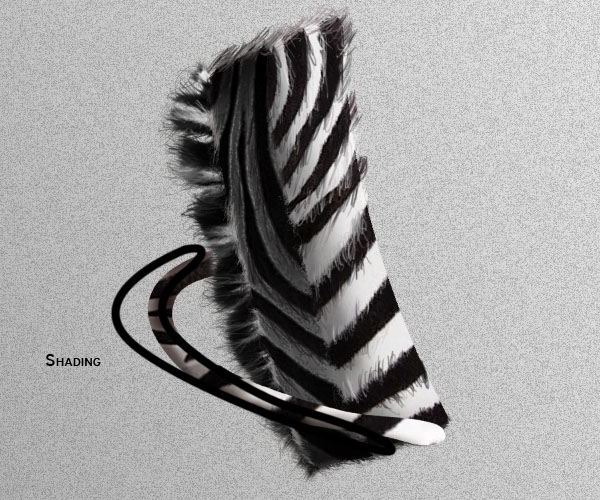
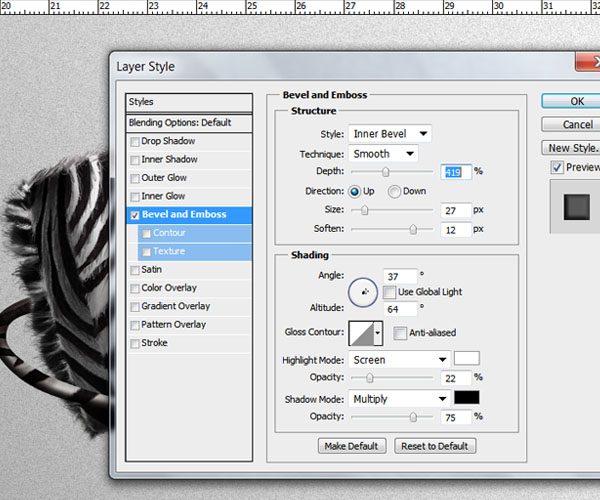
Open the layer style menu and use the next Bevel and Emboss settings to give volume to the tail. (Experiment with this values for different results)
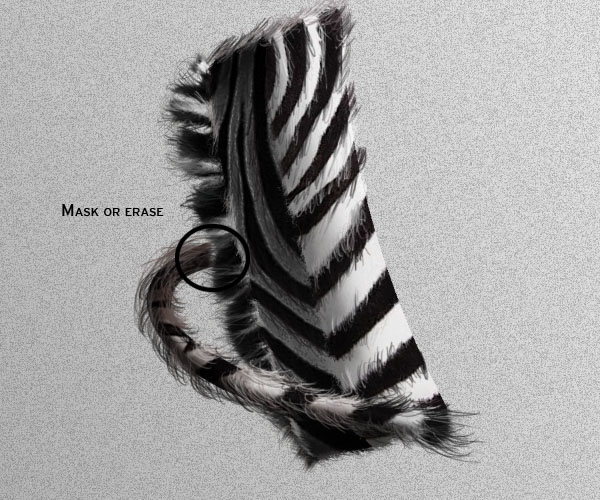
On a new layer, paint some hair to finish it off. Also mask or erase with a soft brush, a bit of the tail where it meets the back hair so it gives the appearance of the tail coming from behind to the top.
Step 18
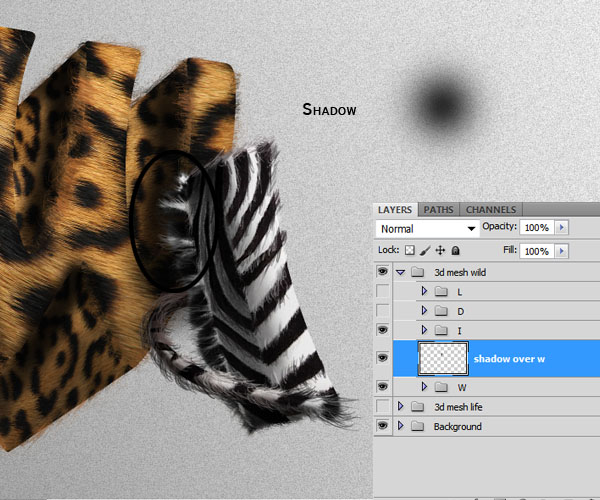
Create a new layer between the "I" and "W" groups. Here we are going to paint the shadow that falls on the "W" by the letter "I". Grab a soft round brush of about 200 pixels wide with an opacity of about 30% and brush over the letter "W" where the shadow should be:
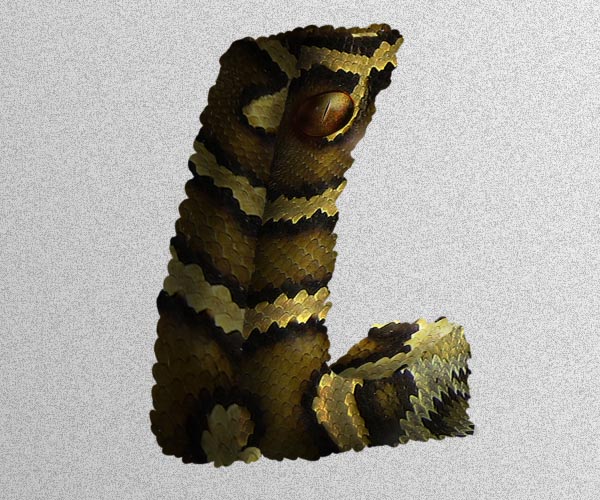
Step 19 – Letter "L"
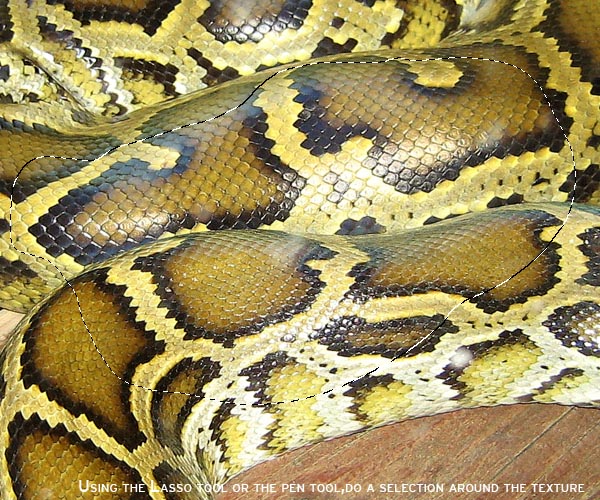
Start off by isolating each side of the letter into separate shapes. Then drag to your document the Snake skin texture, do a selection on the skin like before and copy it into a new layer.
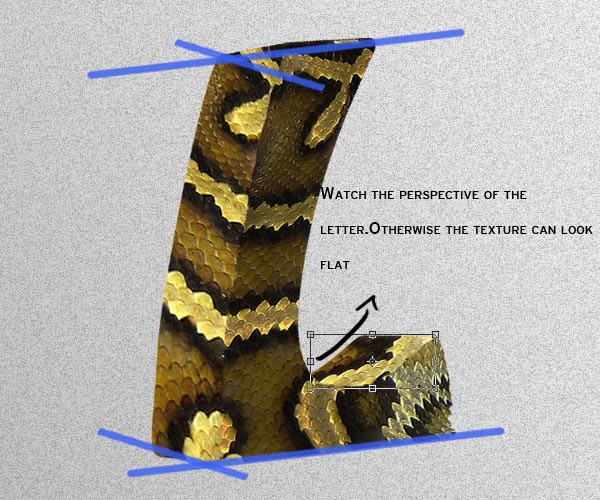
While clip masking the texture to the shapes, try following the texture patterns ans shapes. Experiment with different positions to see what would fit best. As you can see on the example below, I tried to make the pattern flow along the letter instead of just clipping the texture randomly:
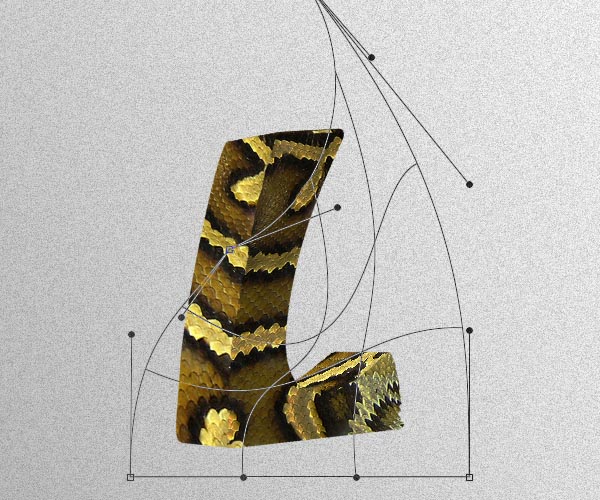
With a texture like this it can easily look very flat if you don’t transform the texture according to the perspective of the shapes in the letter.
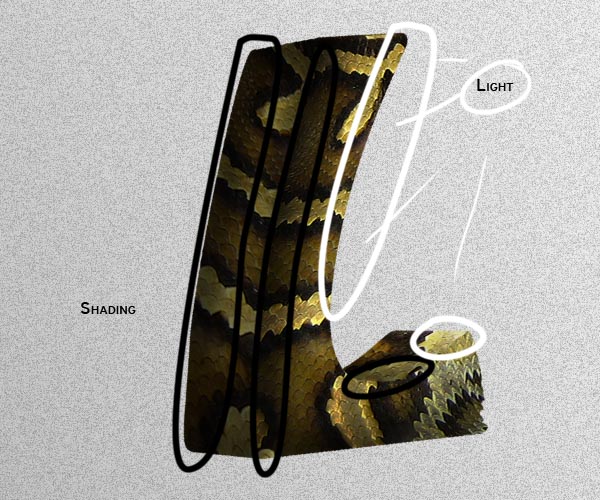
Add the Shading and lights like we did with the letters before:
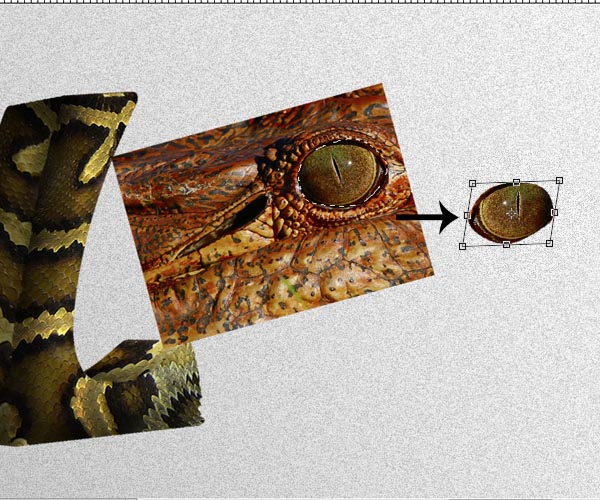
Step 20 – Snake eye
Take the Reptile Eye stock image and drag it to your document. Using the pen tool, extract the eye from the image. Flip it horizontally, transform it to match the perspective of the letter and place it on top of the front shape layer.
Now we are going to Dodge and Burn (O) it to match the light of the shape. Grab the Burn tool and select a soft round brush of about 30 pixels wide with the range of the Burn tool set to midtones and the Exposure to 25%. Brush around the darker areas to create some shading on the eye.

Now select the Dodge tool and do the same to create highlights.
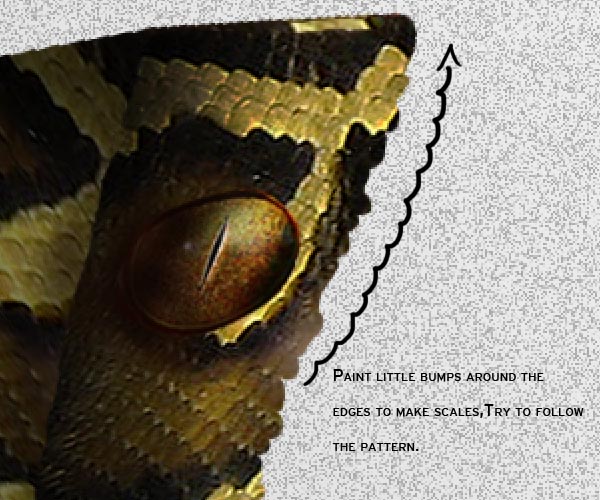
Step 21 – Detailing
Now we are going to add some detailing to the letter, to enhance further it’s animalistic reptile – like look.
Select a hard round brush of about 10 pixels wide and opacity set to 100%. Select the layer of the shape we clipped masked the textures on. Paint little bumps around the edges following the pattern of the scales. You’ll see the texture also acting on this new painted bits. If at any moment there are uncovered spots by the texture you can always transform it a bit more to cover everything up.
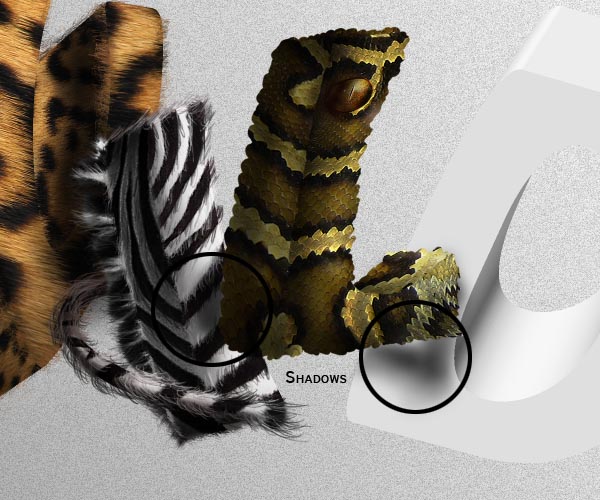
Step 22 – Shadows
Since this letter is positioned in front of other two letters we need to paint the shadows that fall over them. Create a new layer below the "L" group and use a soft round brush with color black and low opacity to paint the shadows on the letters just like we did back on Step 18.
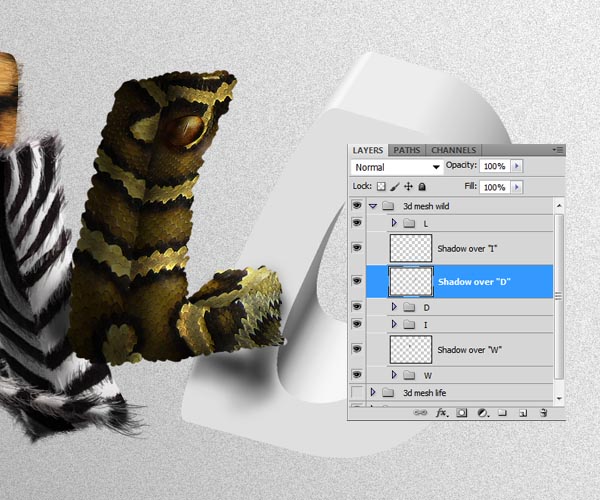
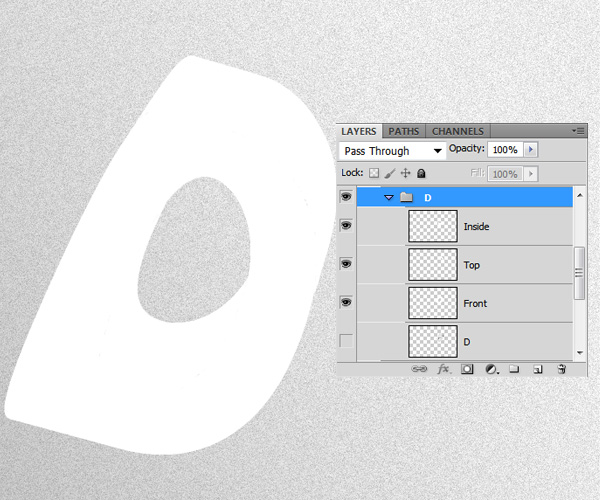
Here is a look at the layers panel so far.
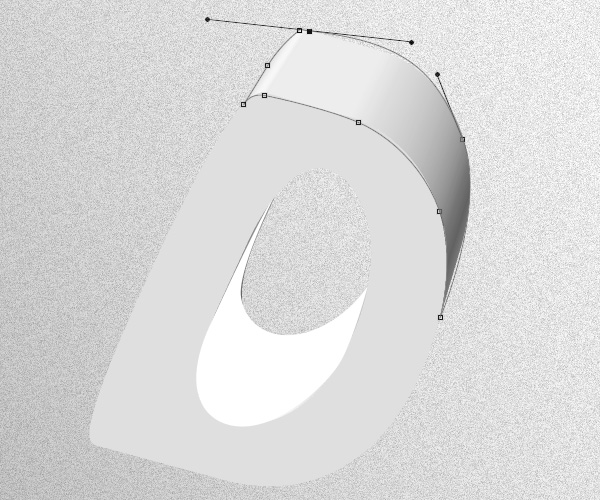
Step 23 – Letter "D"
Star by extracting each side of the letter in it’s own layer. In this case as well as on some other letters, using the magic wand tool might not work well. In this cases use the pen tool to draw a path along the shape and the filling it.
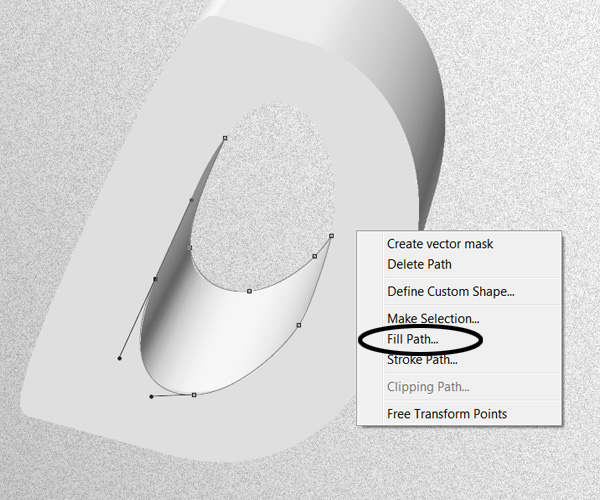
You might need to do this in letters that have a lot of shadows and curves.
Step 24 – Texturing
Take the Elephant texture stock image and apply the next Brightness and Contrast settings:
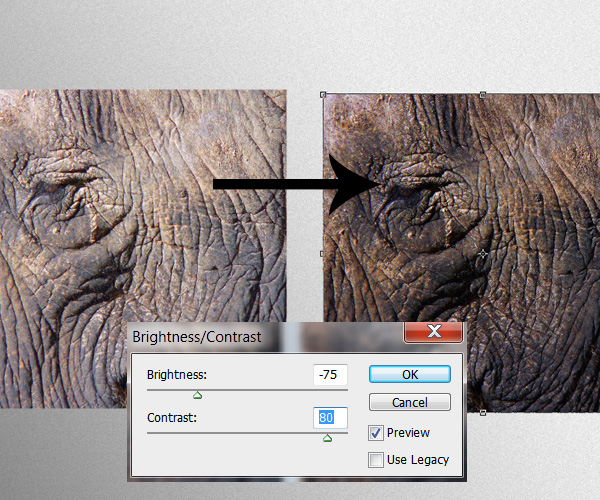
Just like we did on the previous steps, start clip duplicating and clip masking the texture layer to each of the sides of the letter.

Be careful and take your time to morph the texture especially on the round areas.
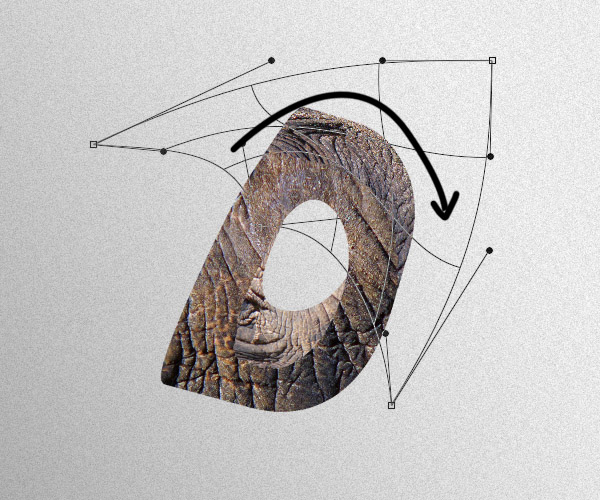
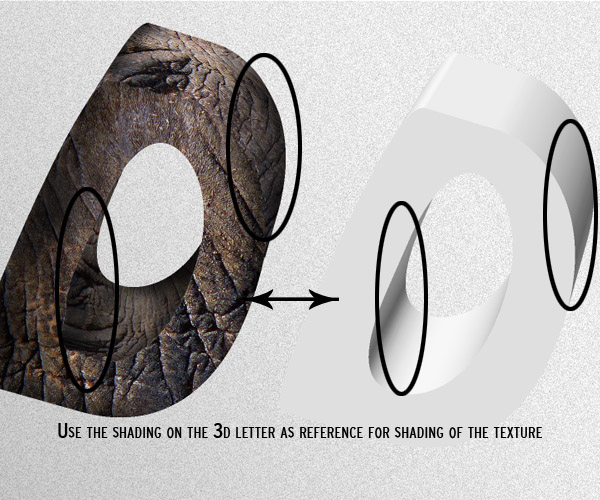
While doing the shading on the textures, take as a reference your first 3D shape, that way you can apply lights and shadows in a more accurate way.
Step 25 – Elephant Trunk
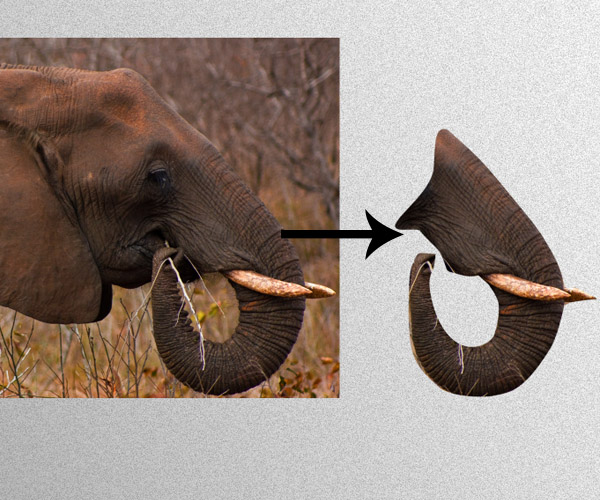
Drag the Elephant head Stock to your document, flip it horizontally and using the pen tool extract the trunk of the animal.
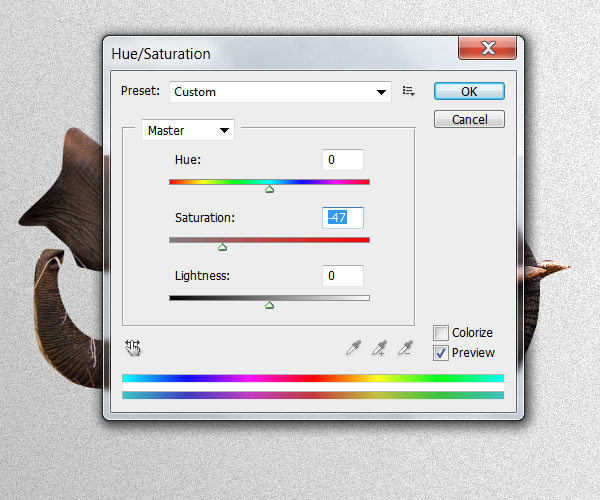
The image is a bit saturated at the moment and it will not blend with the rest of the textured layer properly. Go to the Hue and Saturation menu (Command/Ctrl + U) and desaturate the image.
Now that the saturation is fixed, we need to cover up the little parts grass on the trunk, to do this, we are going to use the Clone stamp tool. Select it (S) and choose a soft round brush; while holding the key ALT, sample a part of the trunk that’s similar to the part we want to patch, once sampled, brush slowly over the grass bit, sampling from a different source every time you need it.
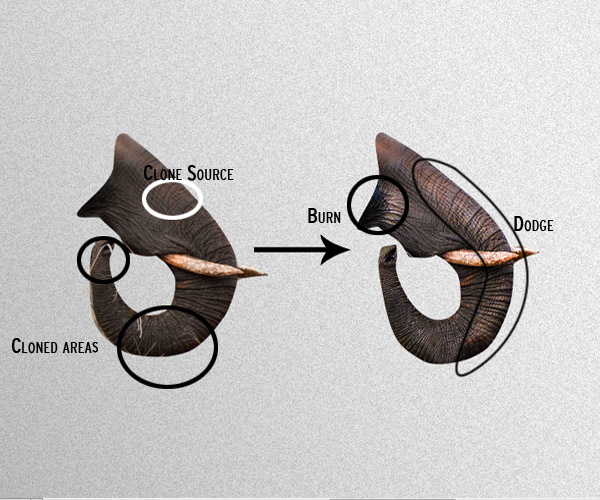
Using the dodge and burn tools, enhance the lights and shadows on the image. Place the trunk layer on top of the textured letter, we are going to start working on the blending of the trunk.
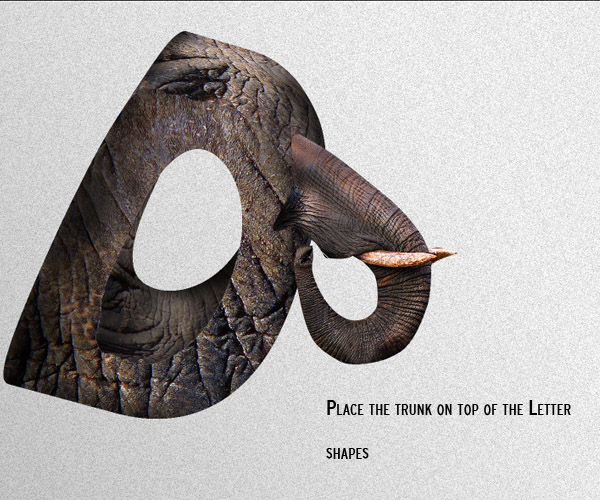
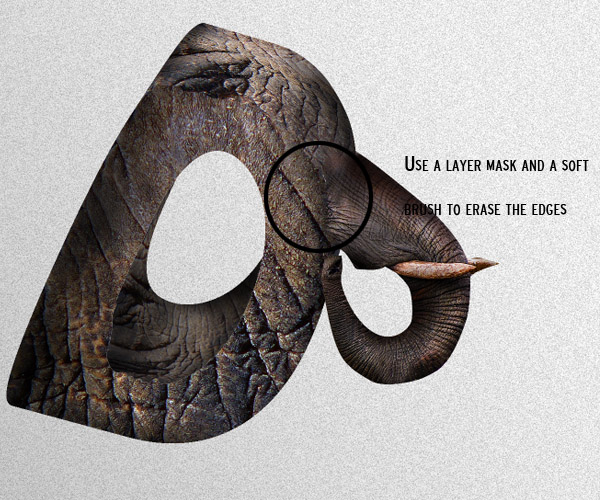
Add a layer mask to the trunk layer and using a soft brush, mask the edges of the trunk so it fades with the body of the letter.
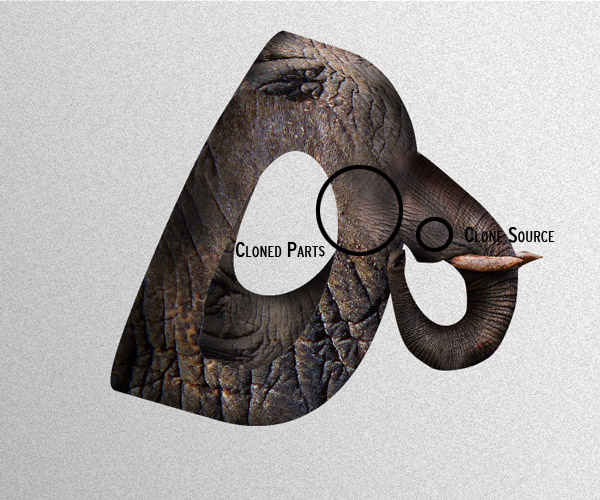
Using the Clone stamp tool with a soft brush, clone parts of the trunk into the body of the letter to get a better blending effect.
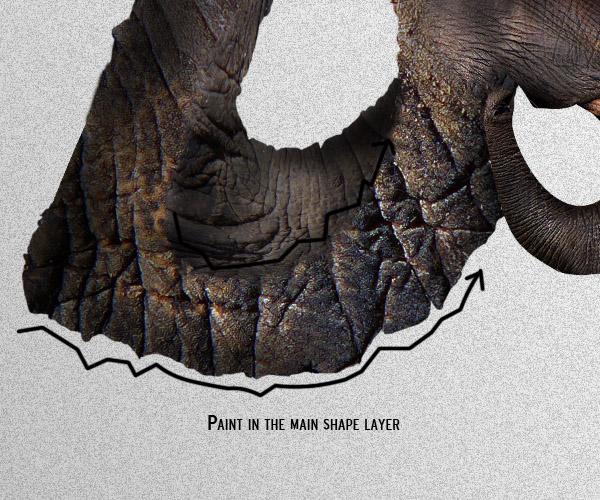
Step 26 – Detailing
Using the same technique as in Step 21, place yourself on any of the main shapes, and using a brush, paint along the edges with a hard brush following the pattern of the texture. Do this on the edges of every shape layer.
Step 27 – Hat
Take the Hat stock image and drag it to your document. Extract it then from its background then apply the next Brightness and contrast settings:
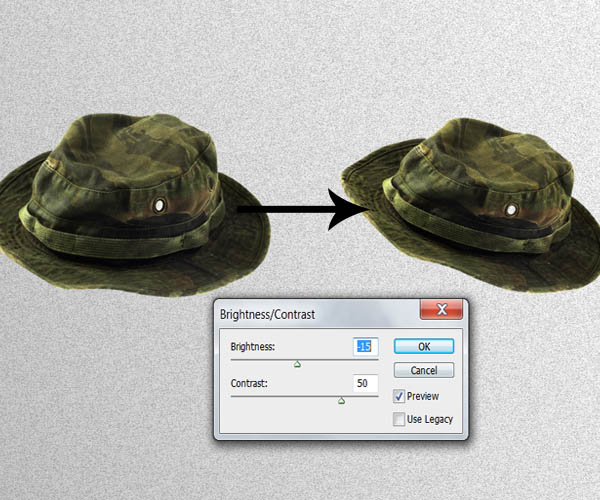
Place it on top the elephant textured letter. Create new layers and clip mask them to it to paint some shadows and highlights respectively. (You can also use the Burn and Dodge tools).
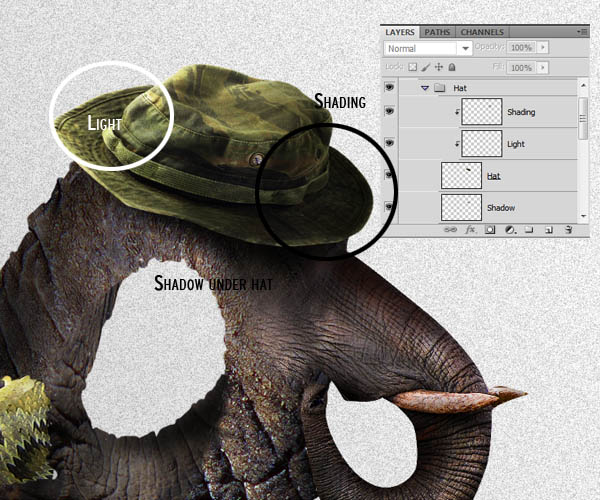
This is how your text should look like now after finishing the first word:
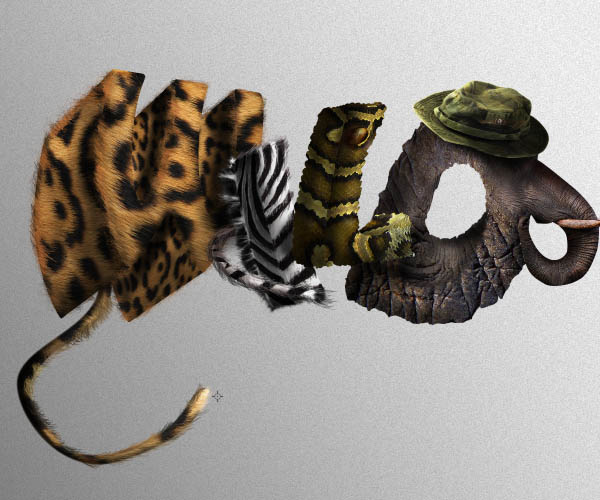
Now you are ready to create the next set of letters using the same techniques described in the previous steps. From now on, I´m only going to mention how to create the specific details for each of the new set of letter and skip the steps of isolating each part of the letter, shading and texturing since they’re the same for each letter.

Step 28 – Letter "L"