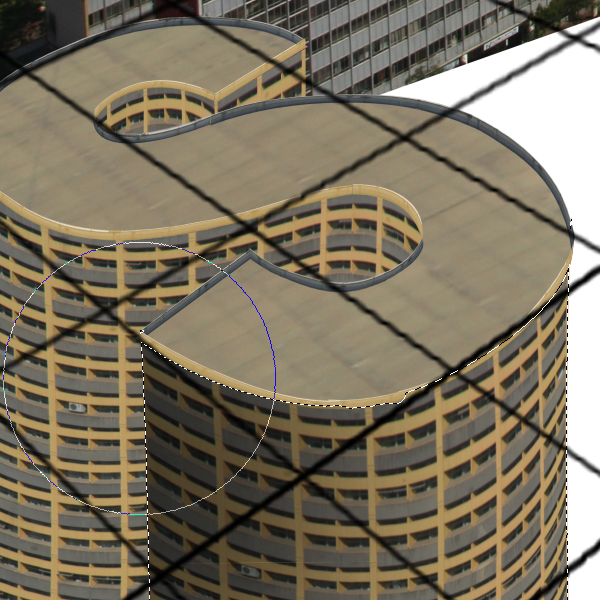
Creating convincing buildings that appear like text in a cityscape can be a challenging task. In today’stutorial we will learn how to create building-shaped typography in Photoshop using photos that you have taken yourself. Let’s get started!

Tutorial Assets
You may download the photos that were used in this tutorial for free from the link above.
Before You Begin
It is most fun to use your own photos for this tutorial. Feel free to use the ones provided, but you will feel much more satisfied when you use your own. If you decide you use your own, there are some things that you have to take into account. The first is to go to (one of the) highest building in a city with high rising buildings (more than 10 floors). Any capital in the world will do, except Amsterdam and Ouagadougou. Higher buildings are more spectacular. Take shots of complete buildings, of parts of buildings, take shots of streets, parks, pedestrians, cars, satellite dishes, antennas, rubbish baskets, take shots of everything you see. Zoom in to roofs and take shots of the small constructions on top, of laundry lines. You will be surprised how different things are on each roof. Use a reasonable zoom lens for some of the shots. When you start creating the image, you will get all kinds of ideas on small details and how to use them. Don’t be stingy with using your camera memory when you are on the roof; take loads of pictures.
Step 1- Nairobi Skyline
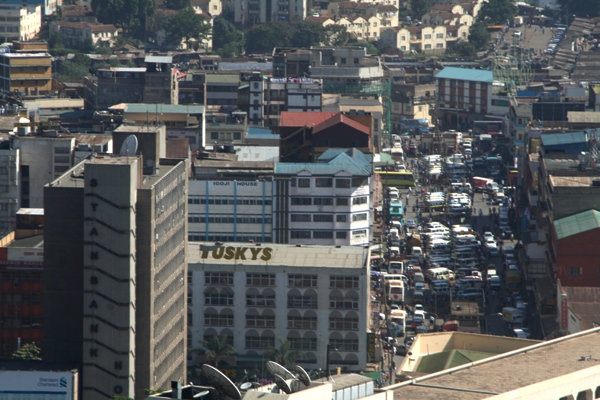
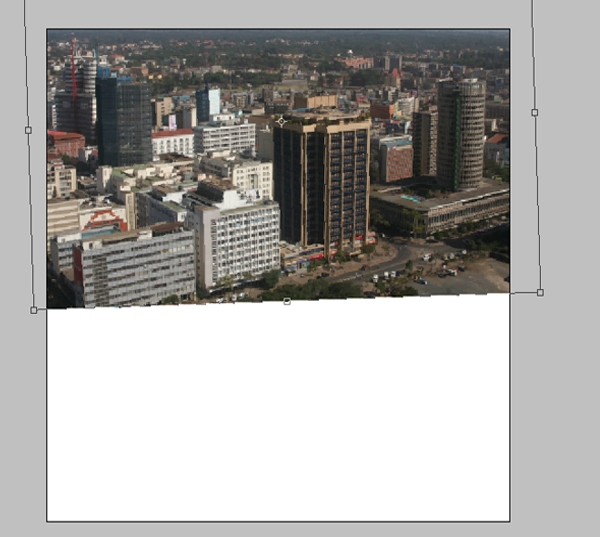
Create a white background image of 6000 x 6000. Save it as nairobifull.psd. Open Nairobi_skyline.jpg, copy it to Nairobifull, rename it to Nairobi background and drag this image as in the photo with the move tool (V). Make the horizon horizontal (turn it -2degrees or so) and drag it to the top of the working space, leaving the sky out of the image. Hit return (confirm).
Step 2 – Putting it in Perspective
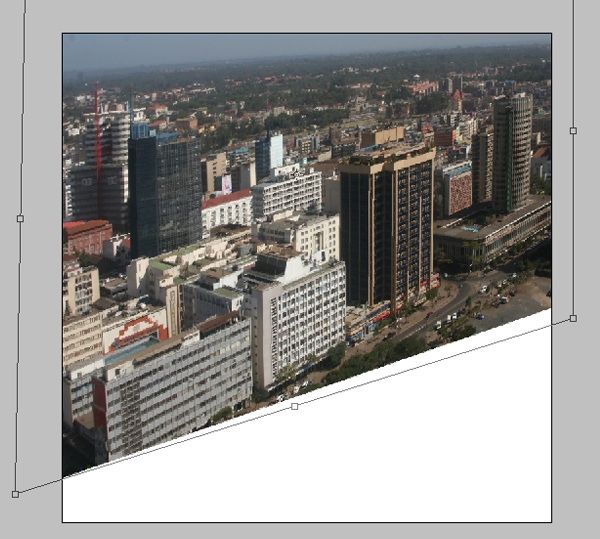
Horizontal text is boring. So we want to put things in perspective. We are still in move tool mode, press Command/Ctrl, click the left corner of nairobi background and drag the photo down on the left side (see image) correct the horizon again so that it is above/out of the image, maybe you need to drag the left point somewhat further to the left, to correct the vertical direction of buildings. It is important that all building are vertical. Make sure there is space for the text below.
Step 3 – Level it Out
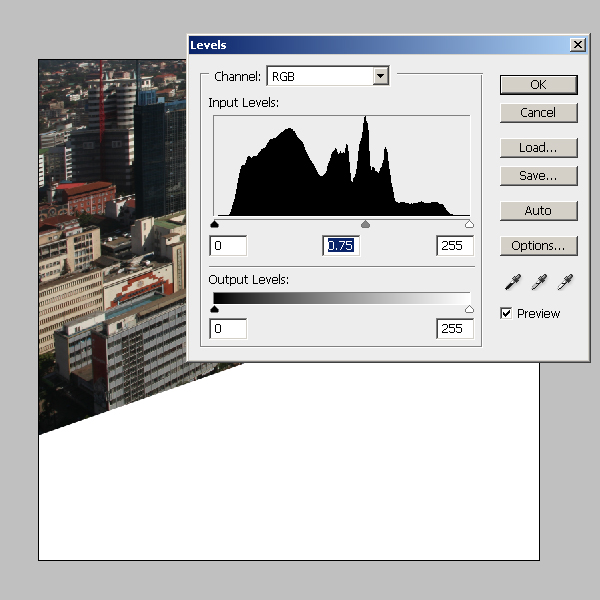
Go to image > adjustments > Levels, put the middle arrow to 75. If you use your own photos, you may want to wait with this till last. The colorization has to be in line with the front buildings.
Step 4 – Vanishing Points
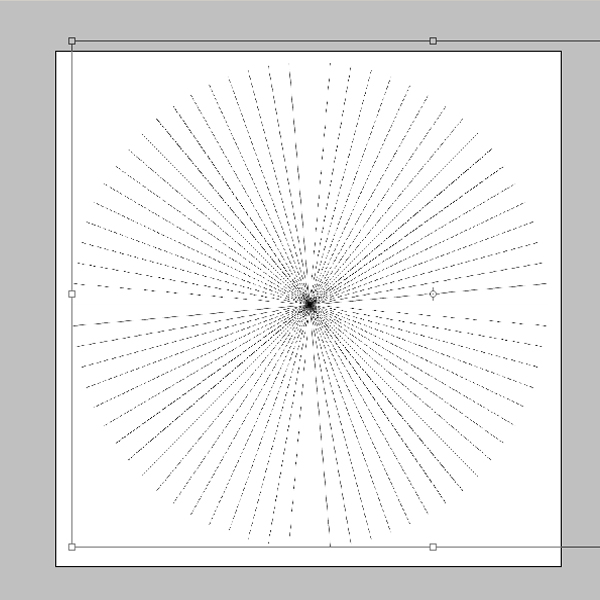
Now it is time to put the direction of the letters/buildings in perspective: vanishing points. Create a new layer. Call it vanishing points. Draw a vertical line (use Shift and the pencil tool). Duplicate the layer. Select the move tool and rotate the line 90 degrees. Merge the layers. Duplicate the layers. Rotate one layer 45 degrees, merge. Do this another two to three times, (22.5 degrees, 11.25 degrees, I guess you grab the idea). You now have a wheel like the picture below. Duplicate it, put it in one layer group (layer > new > group from layers (both vanishing points layers selected). Put this layer group to 50-60% transparency. I got the idea of the vanishing points from a previous tutorial on this site by Narendra Keshkar who created a great banana ship tutorial that was published in September 2010. Without it, this image would have been impossible. Have a look if you want.
Step 5 – Vanishing Points in the Image
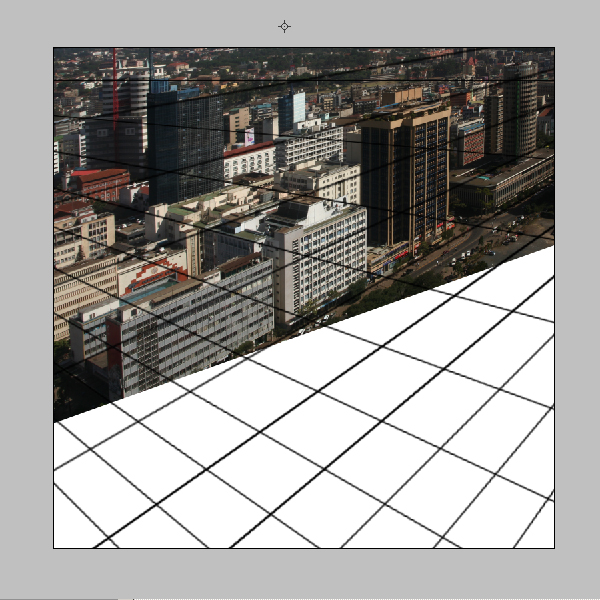
Use the move tool to enlarge the vanishing points layers 5 times or so. They have to be really much bigger than the canvas. Now starts one of the most important parts of the tutorial: put it in perspective. The lines of the vanishing points have to follow the perspective lines of the buildings. Move one vanishing point layer till it is done. It is easy to follow a floor in front of a vanishing point line. It has to be the same for the top floor as well as for the lower floor. When this is done correctly you can start with the next step: the text.
Step 6 – The Text
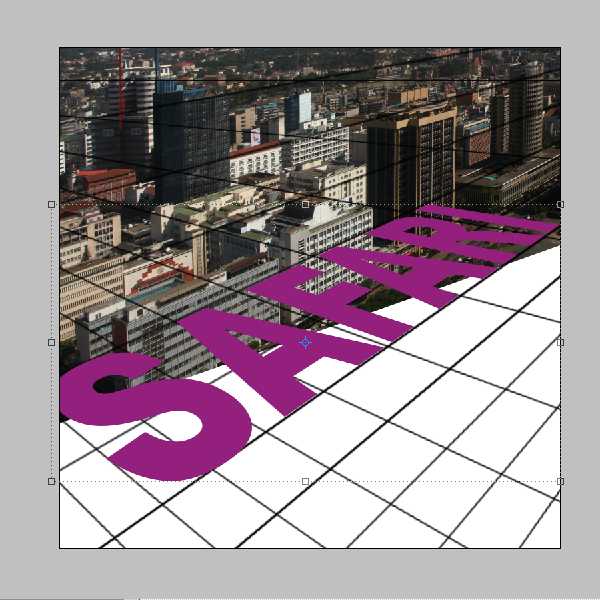
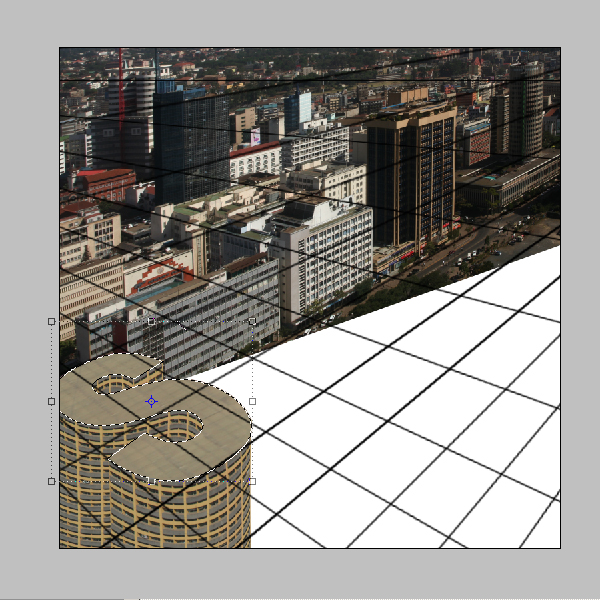
Select the text tool. Write SAFARI (or any other text) and enlarge the text so that it covers pretty much the white part of the canvas. Choose a simple font. Buildings made with Gothic or handwriting fonts are a bit more complicated than Arial if you know what I mean. Then right click the layer and rasterize the layer. Use the Command/Command/Ctrl + move tool to put things in perspective. Make sure the text follows the vanishing point lines nicely into the two directions, as seen in the photo below. Try to find a color that is very visible as font color; it will help with staying visible. Black is hard to see sometimes.
Step 7 – Organizing Group Layers
Duplicate the layer SAFARI, erase AFARI, so only the S survives. Select the layer and make a new layer group S building (layer > new > group from layers). This group is for the S building. Put all things for the building in that building. Use a similar way of organization for all the other buildings. Within the layer group, use other layer groups for walls, fences, roof shades and other things if need be. The tutorial may not mention all the layers used in the tutorial, but there is a lot of organization in such a file. It is important you can trace back a little thing within over 300 layers. Premium members can see the psd file with all the layer, layer groups and layer groups of layer groups.
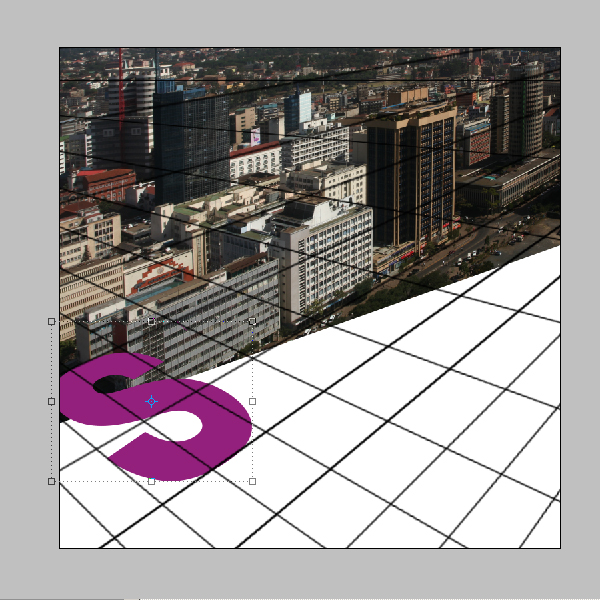
Step 8 – Perspective to Square
Open the file Nyayo house.jpg and copy it into your Nairobifull in the S-building group as a new layer. Call the layer Nyayo house. There is a kind of diagonal way the floors move because of the perspective the photo is taken. This has to be corrected. Command/Ctrl and the move tool are of help. Pick the little right middle selection square and pull it a bit up, till the floors are horizontal. Confirm the distortion. Then use the rectangular marquee selection tool, select a part as large as possible, this will be the area you are going to use for creating the building. Inverse the selection and hit delete. During the selection, try to be careful with where you cut. Cutting through glass is not good since this will make the building look as if it is incomplete. Cut it in such a way that putting the same selection next to each other seems to make it seamless.
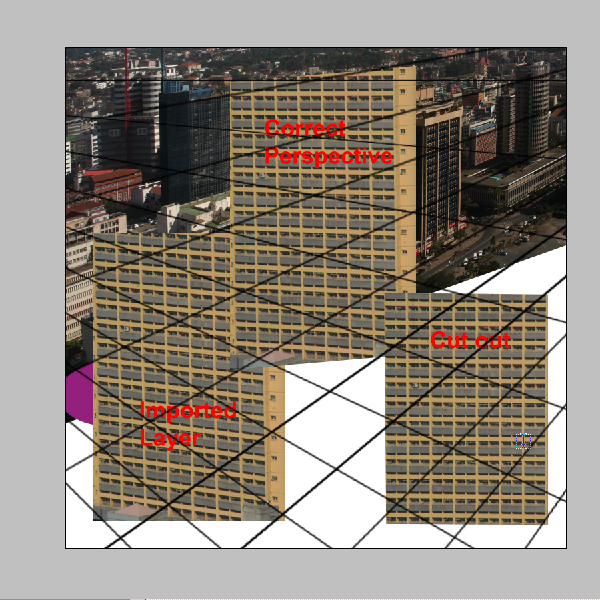
Step 9 – Wrap the First Wall
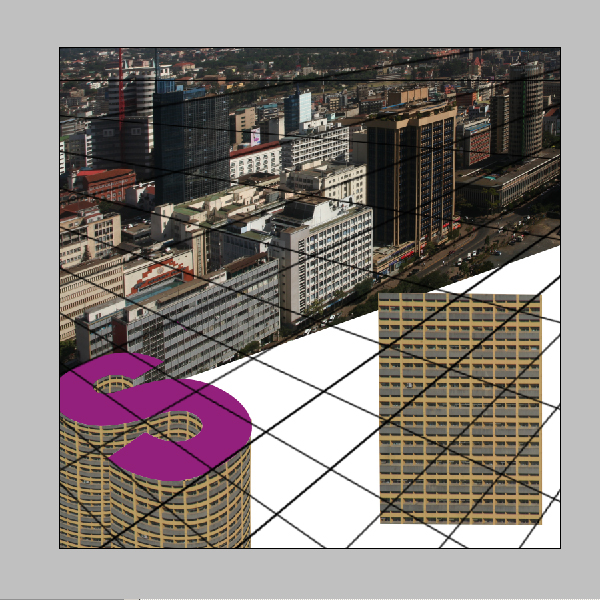
Copy the layer Nyayo house. Move the copied layer below the purple S. while in the move mode click on one of the corners. The wrap function appears. Click on it. This allows you to distort the layer the way you want. You want the layer to look like it is following the curve of the S. So make the edges higher, push the middle lower so that you get the impression the wall of the building is round. You should also try to make the middle windows wider and especially the ones on the right edge smaller so that you get the idea that they are really facing away.
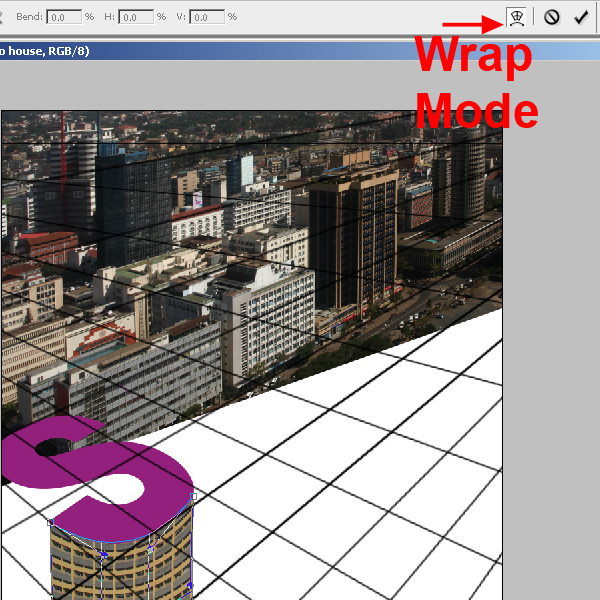
Step 10 Wave the Second Wall
Continue with the next wall. Copy the original Nyayo house layer again, and wrap it in the middle of the S. Make sure it is below the first layer. This time it is like a wave. The process of wrapping needs quite some attention. You can accept the wrap and do it again to get a better result. Make sure the floors are in line with the edge of the roof.
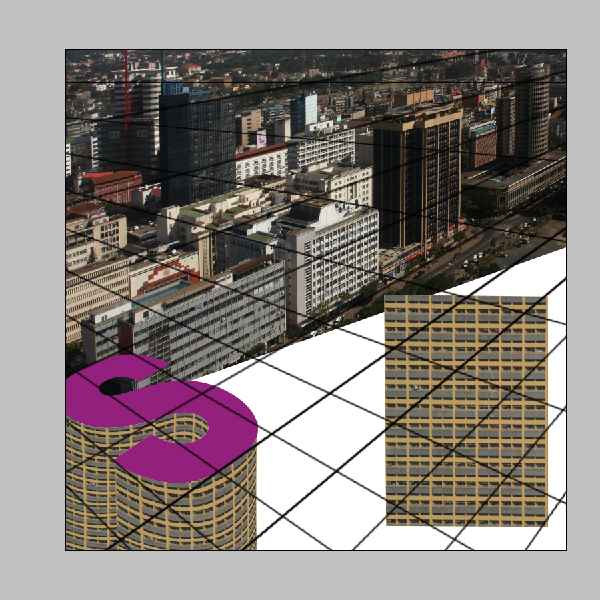
Step 11- The Last Curve
The inside of the S top is also not complete yet. Duplicate your Nyayo house layer again, and cut the left half away so that the only part left that will be visible later. You only need three windows wide for this part. This way you have more control over the wrap.
Step 12 – Finalizing the S Walls
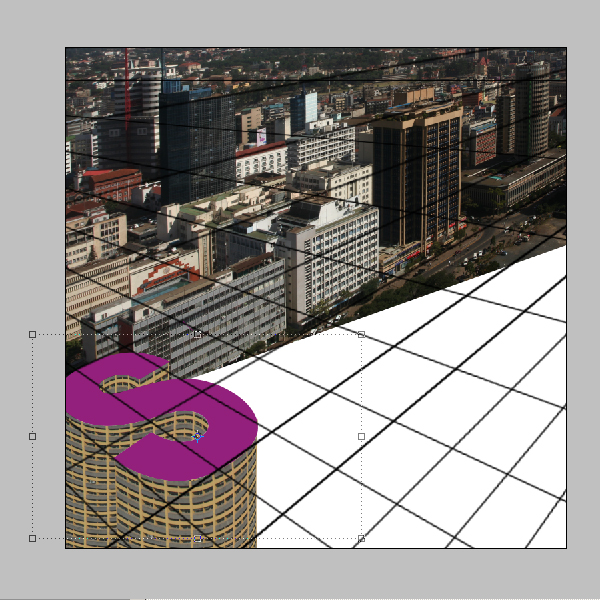
The last wall is the simplest. No wrap after duplication, use Command/Ctrl and draw the layer in perspective Make sure you have two windows on the edge. Select the rest and delete it. Now you should have an S standing out as a kind of building. Make the last Nyayo house invisible. You can delete it, but it makes life easier if it is invisible because you never know if you may become unhappy with one of the previous layers and you want to start from scratch. Now select all the nyayo house layers make a new group from layers and call it nyayo house walls.
Step 13 – Sourcing the Roof
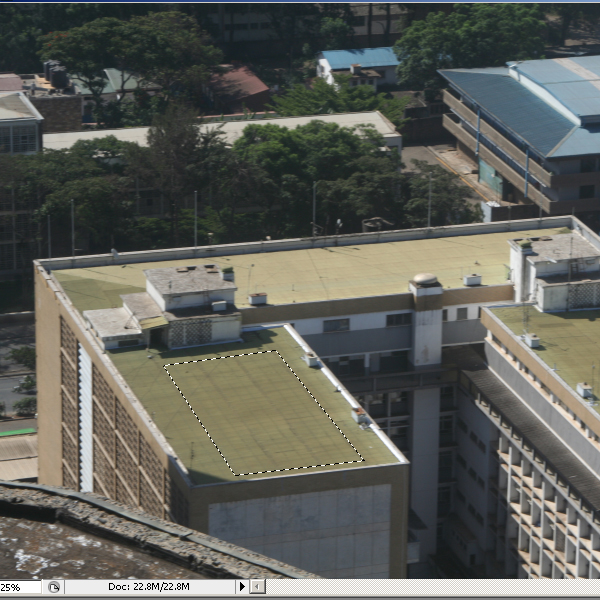
Roofs are not smooth and purple. Time for texture and a better color. Open roof 1 and select a part of the roof with the polygonal lasso tool (L), copy it and put it in the Nairobifull file Under the S building. Rename the layer Roof
Step 14 – Put the Texture in Perspective
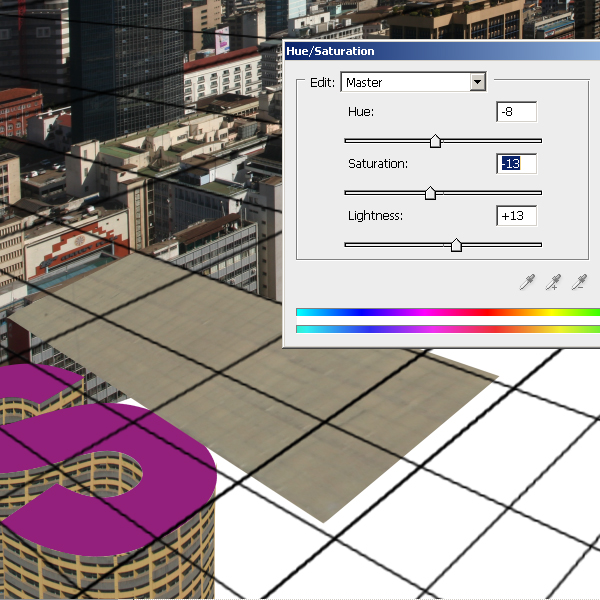
Stretch the layer so that it would be big enough to cover the entire purple S. Also put it in perspective. The roof textures has some lines, the lines should also more or less follow the vanishing point lines. You can use the same method as in step 8 followed by the same way as the text was put in the boxes, step 6. After that you may want to adjust the color a bit. Go to Image > adjustments > hue and saturation. I removed the green a bit, made it lighter and desaturate the color somewhat. The idea is to have a realistic color with the right brightness. Copy the layer once and make it the original invisible. We will use it again with building F.
Step 15 – Finalize the Roof
Move the roof layer on top of the purple layer. Command/Ctrl + click on the purple S layer (probably called safari copy). This selects all pixels in that layer. While the layer roof selected, inverse and delete. Now you have a roof on your building.
Step 16 – Safety First
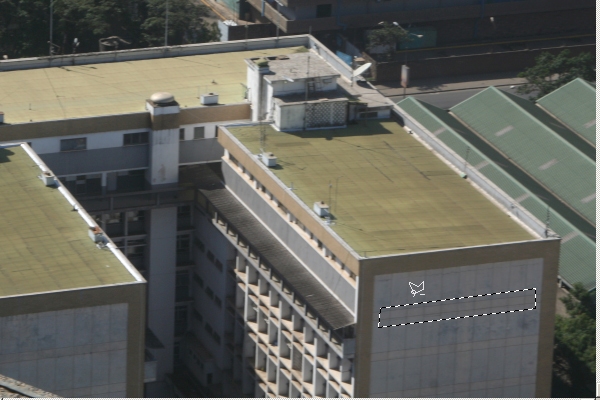
It starts to look a bit like a building isn’t it? Time for details. We do not want our friends fall off the roof so a small wall at the edge needs to be made. Go to the roof photo again, cut out something out of the wall. Use the polygonal lasso tool like step 13. Copy it to Nairobifull > S-building group and rename it edge. Make it square like step 8.
Step 17 – Placing the Edges
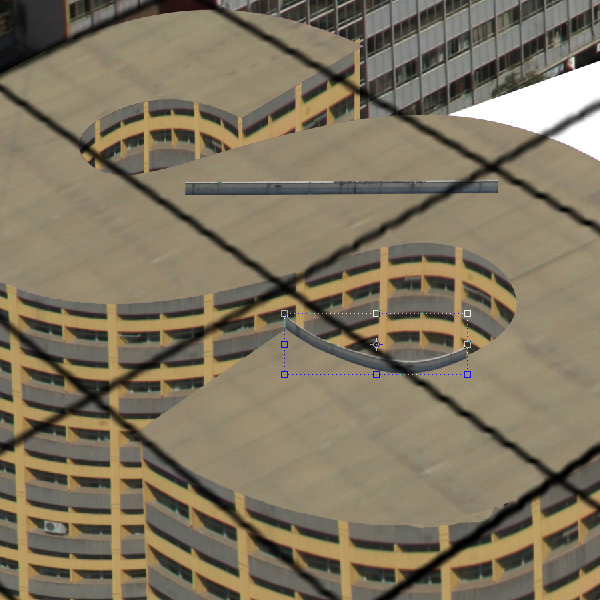
Make a new layer group from edge and call it ‘edge of S’ or something like that. Move the edge layer to the group and copy it and start to make a fence or wall on the edge of the S. Use the wrap mode as explained in step 9. Copy the original edge layer again and continue to repeat with this till you have walls around the whole S that are visible from within the roof (see the image of step 18).
Step 18 – The Outside Edges
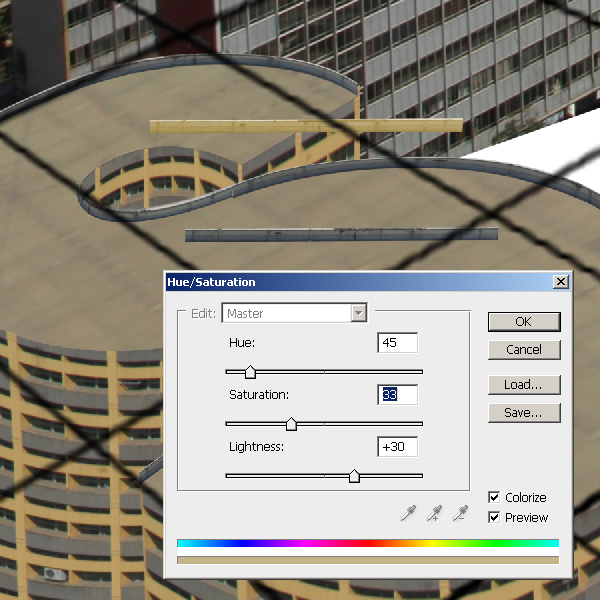
Now it is time to do the rest of the edges. The idea is that the edge of the inside has a different color than the outside. The inside should be yellow like parts of the rest of the building. So select the original edge again, open image > adjustments > hue and saturation and tick colorize, hue 45, saturation 33, lightness + 30. It should make the edge more or less yellow like the rest of the building. Now continue making edges like in step 17. Make the original edge and the original yellow edge invisible.
Step 19 – Shading
Now we have a kind of building, but it still looks like a computer 3D generated thing. Partly because the shades are missing. First think of how the shades should be. Look at the background image and look at the shadows. Where is the sun situated? Make a new layer, call it shades S. Select the brush tool. Seize 1400, opacity 15, hardness 0%. Now we have to be careful with what we paint. The brush is too big for every detail and the a smaller brush is not an option because of the hardness. So we have to select wall by wall. Open the group Nyayo walls. When you click Command/Ctrl and the icon of a layer, you select objects that are present in that layer.
When you hold Command/Ctrl + alt and you select another layer, the objects that are in the other layer are removed from the selection. This way you can quickly and precisely select and deselect what you want to paint (shade) at a go.
Select the wall as seen in the image below (Command/Ctrl and select the layer called nyayo house copy and Command/Ctrl + Alt on the roof icon, in case there is overlap Command/Ctrl + Alt will remove the layer you click on. Command/Ctrl + Shift will add a new layer). Paint once over the area right of the middle, a bit more on the middle and several times on the left. The result should be a nice shade on the left side. Paint vertically. If you are not happy with it, you can always throw the layer and start a fresh. Now repeat this step for each nyayo house wall. Once you are done with the walls, you have to do the edges.
