


8 Part I Introducing Microsoft Visual C# and Microsoft Visual Studio 2008
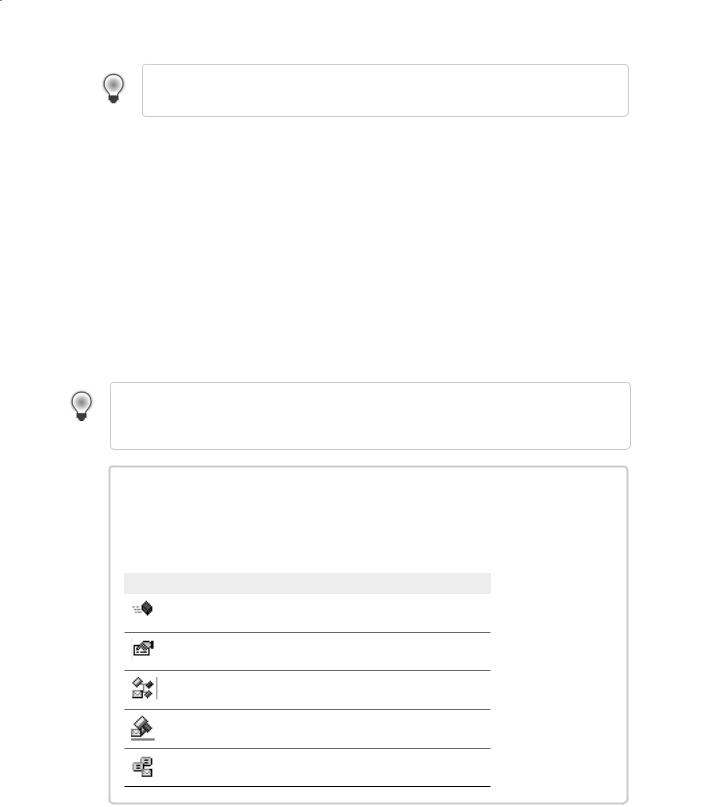
TextHello This is the C# project file. Each project file references one or more files containing the source code and other items for the project. All the source code in a single project must be written in the same programming language. In Windows Explorer, this file is actually called TextHello.csproj, and it is stored in your \My Documents\Microsoft Press\Visual CSharp Step by Step\Chapter 1\TextHello\TextHello folder.
Properties This is a folder in the TextHello project. If you expand it, you will see that it contains a file called AssemblyInfo.cs. AssemblyInfo.cs is a special file that you can use to add attributes to a program, such as the name of the author, the date the program was written, and so on. You can specify additional attributes to modify the way in which the program runs. Learning how to use these attributes is outside the scope of this book.
References This is a folder that contains references to compiled code that your application can use. When code is compiled, it is converted into an assembly and given a unique name. Developers use assemblies to package useful bits of code they have written so they can distribute it to other developers who might want to use the code in
their applications. Many of the features that you will be using when writing applications using this book make use of assemblies provided by Microsoft with Visual Studio 2008.
Program.cs This is a C# source file and is the one currently displayed in the Code and Text Editor window when the project is first created. You will write your code for the console application in this file. It also contains some code that Visual Studio 2008 provides automatically, which you will examine shortly.
Writing Your First Program
The Program.cs file defines a class called Program that contains a method called Main. All methods must be defined inside a class. You will learn more about classes in Chapter 7, “Creating and Managing Classes and Objects.” The Main method is special—it designates the program’s entry point. It must be a static method. (You will look at methods in detail in Chapter 3, “Writing Methods and Applying Scope,” and I discuss static methods in Chapter 7.)
Important C# is a case-sensitive language. You must spell Main with a capital M.
In the following exercises, you’ll write the code to display the message Hello World in the console; you’ll build and run your Hello World console application; and you’ll learn how namespaces are used to partition code elements.

Chapter 1 Welcome to C# |
9 |
Write the code by using IntelliSense
1.In the Code and Text Editor window displaying the Program.cs file, place the cursor in the Main method immediately after the opening brace, {, and then press Enter to create a new line. On the new line, type the word Console, which is the name of a builtin class. As you type the letter C at the start of the word Console, an IntelliSense list appears. This list contains all of the C# keywords and data types that are valid in this
context. You can either continue typing or scroll through the list and double-click the Console item with the mouse. Alternatively, after you have typed Con, the IntelliSense list will automatically home in on the Console item and you can press the Tab or Enter key to select it.
Main should look like this:
static void Main(string[] args)
{
Console
}
Note Console is a built-in class that contains the methods for displaying messages on the screen and getting input from the keyboard.
2.Type a period immediately after Console. Another IntelliSense list appears, displaying the methods, properties, and fields of the Console class.
3.Scroll down through the list, select WriteLine, and then press Enter. Alternatively, you can continue typing the characters W, r, i, t, e, L until WriteLine is selected, and then press Enter.
The IntelliSense list closes, and the word WriteLine is added to the source file. Main should now look like this:
static void Main(string[] args)
{
Console.WriteLine
}
4.Type an opening parenthesis , (. Another IntelliSense tip appears.
This tip displays the parameters that the WriteLine method can take. In fact, WriteLine is an overloaded method, meaning that the Console class contains more than one method named WriteLine—it actually provides 19 different versions of this method. Each version of the WriteLine method can be used to output different types of data. (Chapter 3 describes overloaded methods in more detail.) Main should now look like this:
static void Main(string[] args)
{
Console.WriteLine(
}
10 |
Part I Introducing Microsoft Visual C# and Microsoft Visual Studio 2008 |
Tip You can click the up and down arrows in the tip to scroll through the different overloads of WriteLine.
5.Type a closing parenthesis, ) followed by a semicolon, ;.
Main should now look like this:
static void Main(string[] args)
{
Console.WriteLine();
}
6.Move the cursor, and type the string “Hello World”, including the quotation marks, between the left and right parentheses following the WriteLine method.
Main should now look like this:
static void Main(string[] args)
{
Console.WriteLine(“Hello World”);
}
Tip Get into the habit of typing matched character pairs, such as ( and ) and { and }, before filling in their contents. It’s easy to forget the closing character if you wait until after you’ve entered the contents.
IntelliSense Icons
When you type a period after the name of a class, IntelliSense displays the name of every member of that class. To the left of each member name is an icon that depicts the type of member. Common icons and their types include the following:
Icon Meaning
method (discussed in Chapter 3)
property (discussed in Chapter 15)
class (discussed in Chapter 7)
struct (discussed in Chapter 9)
enum (discussed in Chapter 9)
Chapter 1 Welcome to C# |
11 |
Icon Meaning
interface (discussed in Chapter 13)
delegate (discussed in Chapter 17)
extension method (discussed in Chapter 12)
You will also see other IntelliSense icons appear as you type code in different contexts.
Note You will frequently see lines of code containing two forward slashes followed by ordinary text. These are comments. They are ignored by the compiler but are very useful for developers because they help document what a program is actually doing. For example:
Console.ReadLine(); // Wait for the user to press the Enter key
The compiler will skip all text from the two slashes to the end of the line. You can also add multiline comments that start with a forward slash followed by an asterisk (/*). The compiler will skip everything until it finds an asterisk followed by a forward slash sequence (*/), which could be many lines lower down. You are actively encouraged to document your code with as many meaningful comments as necessary.
Build and run the console application
1.On the Build menu, click Build Solution.
This action compiles the C# code, resulting in a program that you can run. The Output window appears below the Code and Text Editor window.
Tip If the Output window does not appear, on the View menu, click Output to display it.
In the Output window, you should see messages similar to the following indicating how the program is being compiled.
------ Build started: Project: TextHello, Configuration: Debug Any CPU ----
C:\Windows\Microsoft.NET\Framework\v3.5\Csc.exe /config /nowarn:1701;1702 … Compile complete -- 0 errors, 0 warnings
TextHello -> C:\Documents and Settings\John\My Documents\Microsoft Press\…
========== Build: 1 succeeded or up-to-date, 0 failed, 0 skipped ========
If you have made some mistakes, they will appear in the Error List window. The following image shows what happens if you forget to type the closing quotation marks
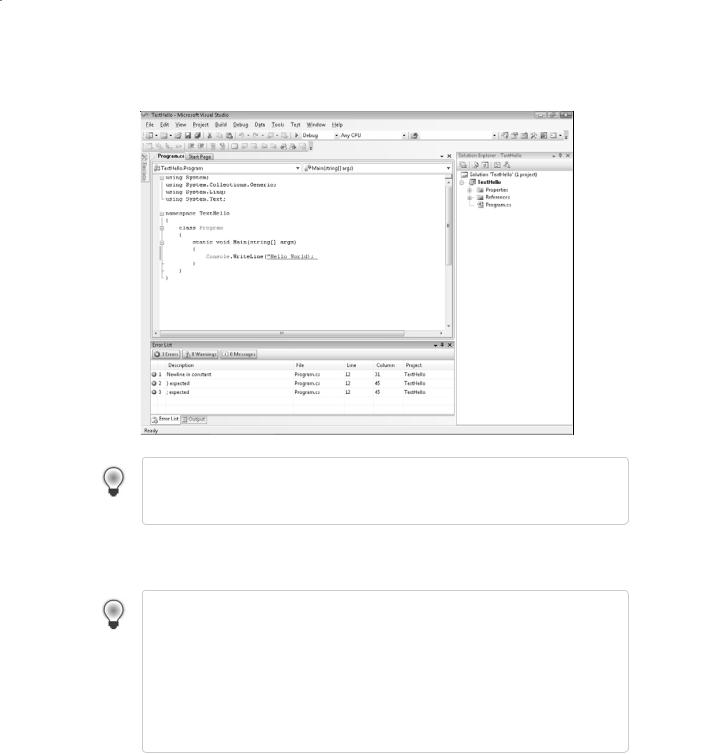
12 Part I Introducing Microsoft Visual C# and Microsoft Visual Studio 2008
after the text Hello World in the WriteLine statement. Notice that a single mistake can sometimes cause multiple compiler errors.
Tip You can double-click an item in the Error List window, and the cursor will be placed on the line that caused the error. You should also notice that Visual Studio displays a wavy red line under any lines of code that will not compile when you enter them.
If you have followed the previous instructions carefully, there should be no errors or warnings, and the program should build successfully.
Tip There is no need to save the file explicitly before building because the Build Solution command automatically saves the file. If you are using Visual Studio 2008 Standard Edition or Visual Studio 2008 Professional Edition, the project is saved in the location specified
when you created it. If you are using Visual C# 2008 Express Edition, the project is saved in a temporary location and is copied to the folder you specified in the Options dialog box
only when you explicitly save the project by using the Save All command on the File menu or when you close Visual C# 2008 Express Edition.
An asterisk after the file name in the tab above the Code and Text Editor window indicates that the file has been changed since it was last saved.
Chapter 1 Welcome to C# |
13 |
2.On the Debug menu, click Start Without Debugging.
A command window opens, and the program runs. The message Hello World appears, and then the program waits for you to press any key, as shown in the following graphic:
Note The prompt “Press any key to continue . . .” is generated by Visual Studio; you did not write any code to do this. If you run the program by using the Start Debugging com-
mand on the Debug menu, the application runs, but the command window closes immediately without waiting for you to press a key.
3.Ensure that the command window displaying the program’s output has the focus, and then press Enter.
The command window closes, and you return to the Visual Studio 2008 programming environment.
4.In Solution Explorer, click the TextHello project (not the solution), and then click the Show All Files toolbar button on the Solution Explorer toolbar—this is the second button from the left on the toolbar in the Solution Explorer window.
Entries named bin and obj appear above the Program.cs file. These entries correspond directly to folders named bin and obj in the project folder (Microsoft Press\Visual CSharp Step by Step\Chapter 1\TextHello\TextHello). Visual Studio creates these folders when you build your application, and they contain the executable version of the program together with some other files used to build and debug the application.
5.In Solution Explorer, click the plus sign (+) to the left of the bin entry. Another folder named Debug appears.
Note You may also see a folder called Release.