

An Ax to Grind - A practical Ax manual
.pdfGetting the Hang of It 
Figure 55—The fitted handle is ready for wedging. Use a correctly sized wooden wedge, usually made of wellseasoned yellow poplar or other hardwood. Avoid plastic or steel wedges.
Figure 57—Before inserting the wedge in the handle, apply a coat of Swel-Lock to the inside kerf cut and the new wooden wedge. Swel-Lock is a product that swells wood. It is not a glue or an adhesive; rather, it penetrates and expands wood fibers to keep the new handle tight.
Figure 56—Sometimes the wedge is too thick for the saw kerf and ax eye. If so, thin the wedge out a little bit so that it can be driven almost full length.
Figure 58—Insert the wooden wedge. Rest the handle bottom on something solid. Drive the wedge squarely and firmly into the kerf with a wooden carpenter’s mallet. If you have set everything up properly, there should only be 1/4 to 1/2 inch of wedge protruding above the top of the handle when the wedge has been driven to the point of refusal. Use a coping saw to cut off
any excess wedge.
25
 Getting the Hang of It
Never insert iron, steel, screws, nails, or any other metal object down in the wooden wedge to tighten the handle, even though you see this being done on many factory-handled axes. Epoxy should not be used, either. This advice applies for the entire life of your ax. The metal wedges tend to split the grain on the hickory handle. I can’t see any reason why you would want to do that to a properly hung ax.
A loose handle can be temporarily tightened either in the field or in the shop by soaking the head in a bucket of linseed oil. Never soak the handle in water, except for short-term, emergency field tightening. Water will tighten the handle to the head, but the water dries out rapidly, leaving the head looser than before you started. Tightening the handle by soaking it in linseed oil is also a temporary measure. The ax must be rewedged or hung again to keep it tight.
Sharpening
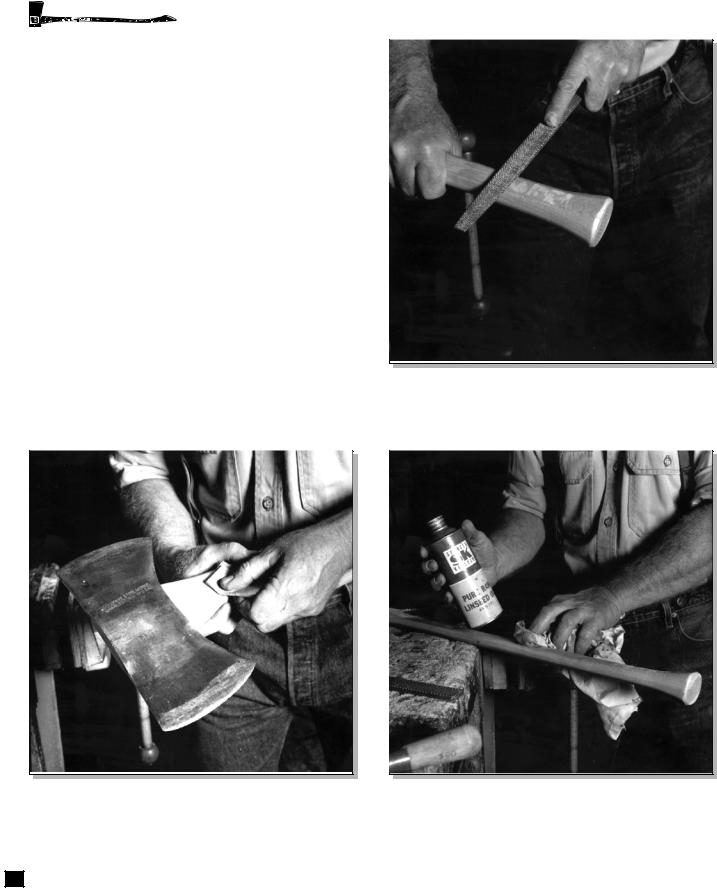
Figure 59—Sand any paint, varnish, shellac, or wax from the handle. Sand the handle smooth on all but 6 inches of the butt section. The body of the sanded handle is where your hand will slide. You don’t want any splinters or rough wood there.
Figure 60—Rough up the lower 6 inches of the butt section of the handle with a wood rasp. This rough section will give purchase, or grip, to your stationary hand at the bottom of the ax handle.
Figure 61—Apply a light coat of raw linseed oil if it is available, or boiled linseed oil if it is not. Tung oil will also work. A regular application of these oils will protect against drying and cracking. Wipe off the excess oil.
26
With oil and rags, there is a risk of spontaneous combustion. Be
sure to discard the oily rags or soak them in buckets of water to prevent any accidents.
“Putting your nose to the grindstone” implies tedious, repetitious, and unending work. You will find that sharpening a dull or abused ax is indeed tedious and repetitious, but to do it right you have to do it slowly (Figure 62). Along the way, you’ll learn the value of patience, and appreciate the differences in steel tempering and ax quality as you sharpen different axes. Best of all, you will appreciate the usefulness of a razor-sharp ax, and the importance of doing everything you can to keep it sharp.
Never use an electric high-speed dry bench grinder
Getting the Hang of It 
to sharpen your ax. That type of a grinder will almost certainly draw the temper from the ax and ruin it. Very few people have enough skill to use a high-speed grinder without drawing the temper from the steel, leaving the steel too soft to hold an edge. The only grindstone that I recommend is one of the old-style pedal grindstones that stay wet with a constant application of water to the stone. If you draw the temper from your ax with a high-speed grinder, you may have ruined the ax for good. At the minimum, you’ve drawn the temper for at least 3/16 of an inch back from the edge. You can always tell when the temper is drawn because the color of the steel at the edge turns blue. If this happens to your ax, you’ve got to remove a lot of steel to reshape the edge back to where it still is tempered. If you use a pedal grindstone, keep it wet, and always rotate the grindstone toward you and into the ax, not away from it.
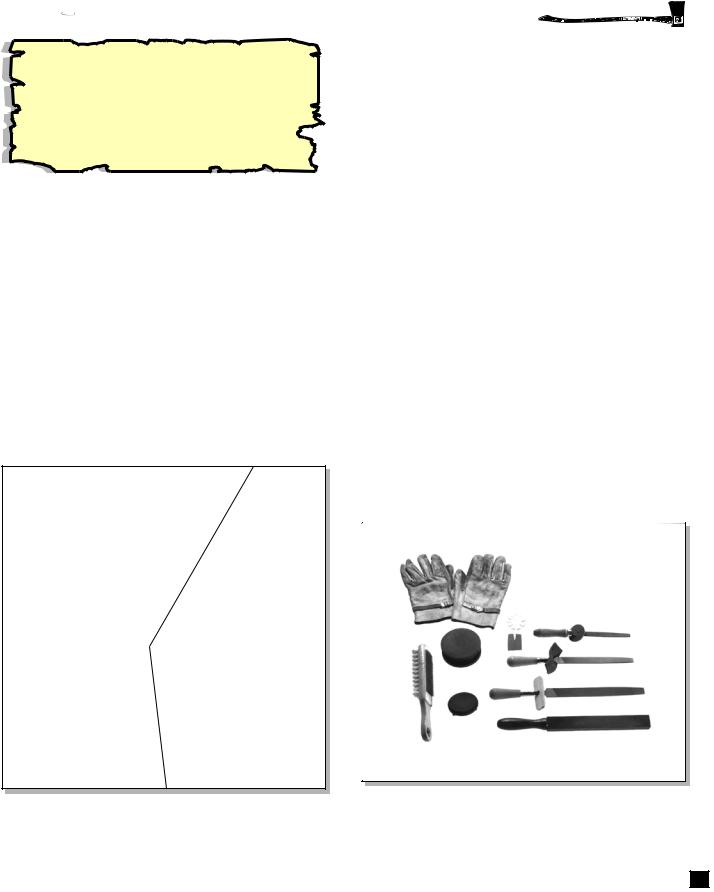
If you don’t have a pedal grindstone, your options are limited to a file and whetstone. This is how most quality ax sharpening is done today. Few stores carry pedal grindstones. Wear leather gloves (Figure 63) throughout the sharpening process, as the ax will become razor-sharp.
Figure 62—The right way and wrong way to use a grinding wheel (drawings by Frederic H. Kock).
Figure 63 —Tools for sharpening (clockwise from top left) include leather gloves; ax-bit width gauges; 8-inch, 10-inch, and 12-inch mill bastard files; Carborundum scythe stone; Carbor-undum ax stone; file card; and grooved Carborundum sharpen-ing stone. Natural Arkansas sharpening stones also work.
27
 Getting the Hang of It
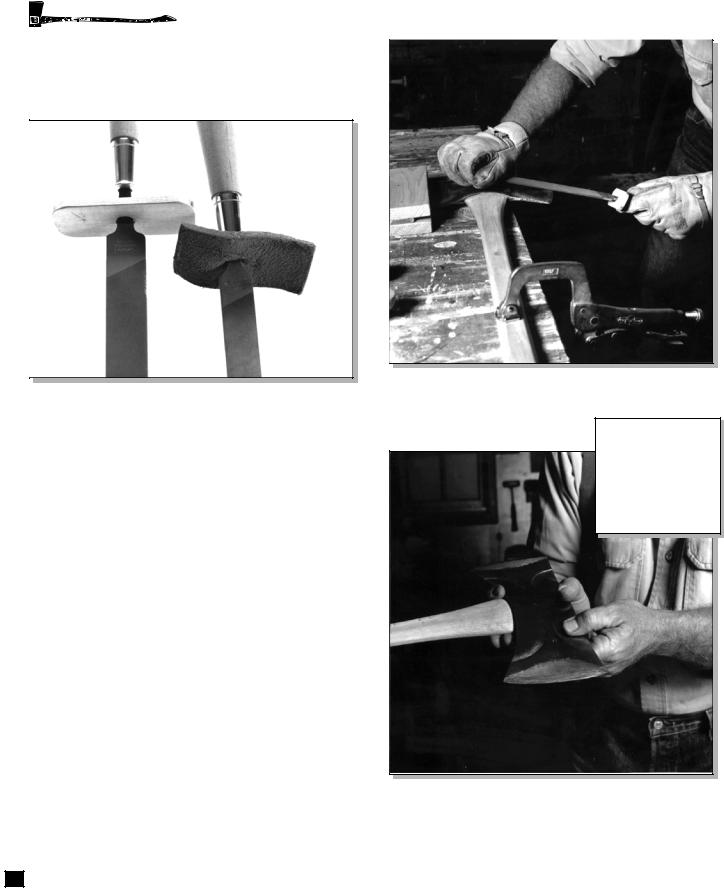
Fit your file with a guard to protect your hands (Figure 64). The guards, which keep your fin-gers away from the sharpened ax blade, can be made from leather, wood, or a piece of fire hose.
Figure 64—File guards help keep your fingers away from the sharpened ax blade.
Figure 65—Clamp the ax to the bench at a comfortable height for sharpening.
Clamp the ax to the bench at a comfortable height (Figure 65). Put on gloves to protect your hands. Hold the file as shown. Because you file into the edge of the ax, not away from it, you need gloves in case of a minor slip. Always file into the edge, toward the center of the ax handle, because this creates the least amount of burr to remove on the other side. The single-cut file sharpens only on the push stroke. Lift it away from the ax head on the return stroke. If you “saw” with your file, it will fill with metal particles. It will not cut well and it can also be ruined as the file edges are peened over. Occasionally brush the metal particles from the file with a file card. Always store and transport your files so they are protected from each other and other metal tools. Banging them together will dull their edges.
When sharpening, always try for a fan-shaped effect on the cheek of the ax (Figure 66). File back for a distance of approximately 2 to 3 inches from the cutting edge right at the middle point of the ax. Work your way from the cheek down to the actual edge, keeping a rounded profile. Stop filing once you have filed one side so that a burr of metal can be felt on the back side. Turn the ax
Figure 66—When sharpening, try for a fan-shaped effect on the cheek of the ax (drawing by Frederic H. Kock).
28
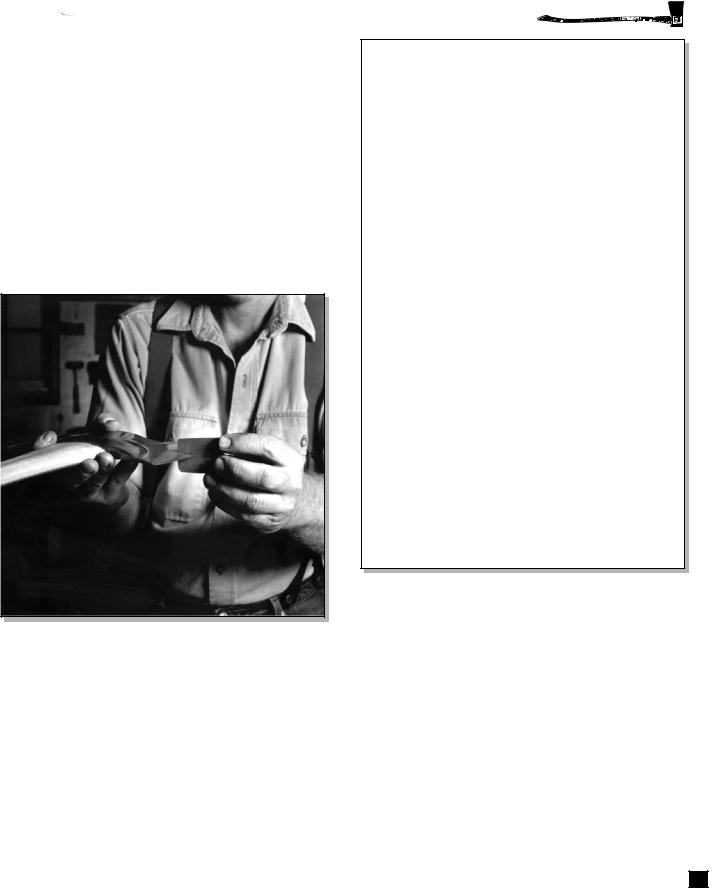
over and repeat the process on the other side of the ax. Continue filing on the opposite side until the burr goes back over to the first side of the ax where you started. Stop at this point.
It is time to check the shape of the edge with a sharpening gauge (Figure 67). This gauge can be handmade from a piece of cardboard, a small piece of brass, or even a piece of wood. See the illustration for the proper shape of your edge. The angle is about 25 degrees, but is slightly convex. The gauge is exactly to scale and can serve as a template (Figure 68).
Continue to file equally on both sides of the ax until the sharpening gauge pattern fits exactly
Figure 67—Use a sharpening gauge to check the shape of the edge.
over the edge. If you are sharpening a double-bit ax, keep one blade slightly thicker for rough work and grubbing near the ground, and the other blade shaped according to the sharpening gauge. Use the properly shaped edge for fast, clean cutting.
Now it is time to hone the edge with a whetstone. The honing process finishes and polishes the
Getting the Hang of It 
Figure 68—A template for a sharpening gauge (reproduced to exact size) and illustrations showing its use (drawings by Frederic H. Kock).
edge and removes the burr. Honing should always be done immediately after reshaping with a file. It should also be done in the field during use and every morning before starting the day’s ax work. Natural whetstones are quarry stones. My favorites are Arkansas stones, which come in different grades. The Washita is my favorite for fast cutting and the Hard Arkansas is my favorite for finishing. One of the finest finishing oil stones is called a Surgical Black Hard Arkansas. This stone will
29
 Getting the Hang of It
put a razor edge on your ax. Manmade stones are usually oil stones of Carborundum and come with a coarse and a fine side. Other whetstones are called water stones and use water to float the metal particles out of the stone instead of oil. Always use oil with an oil stone or water with a water stone to float the metal particles away. Wipe the stone clean of these metal particles periodically and apply more oil or water. Water stones are quite a bit softer than oil stones and tend to cup and wear faster. The advantage of the water stone is that it rapidly puts a fine polished edge on your ax.
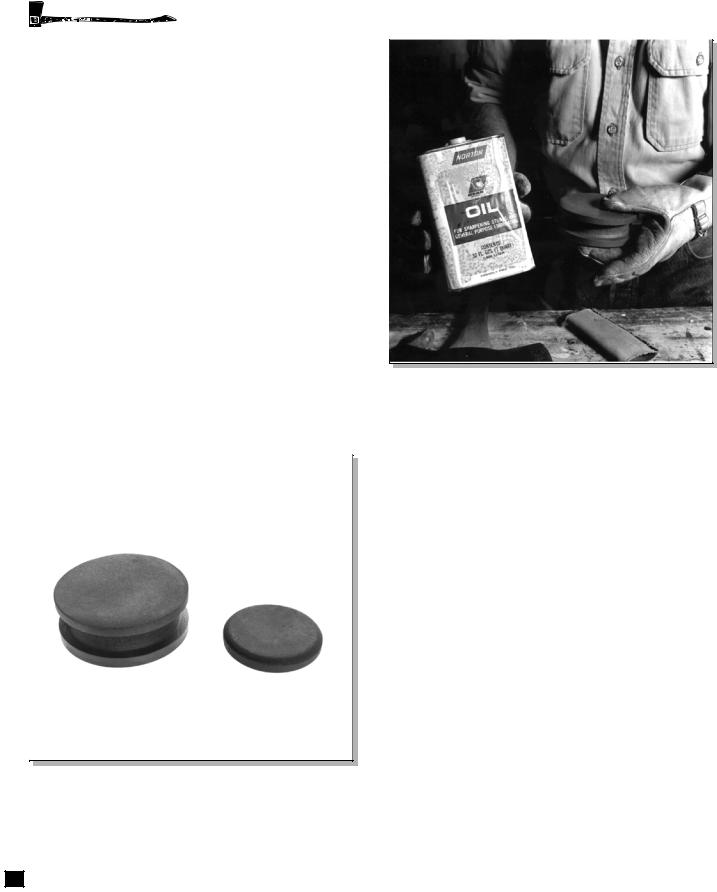
Round artificial ax stones (Figure 69) are sometimes called pocket stones. I know of two types. The traditional type has both a coarse and a fine side and is about 1/2 inch thick. This traditional ax stone can be dangerous to use, because your fingertips are always in jeopardy. Another type of ax stone has a finger groove in the center to keep your fingertips out of jeopardy. Both of these round ax stones are of Carborundum and require oil (Figure 70) to float the metal particles off of the stone.
Figure 69—Round ax stones, sometimes called pocket stones.
Figure 70—Use oil to float metal particles off ax stones made of Carborundum.
Use the ax stone in a circular motion, working into the edge, toward the middle of the ax head (Figure 71). Work one side of the ax with the coarse stone until it creates a metal burr, then flip the ax over and use the coarse stone until it pushes the burr back. Switch to the fine side of the ax stone and repeat the process until there’s a very fine burr and both sides of the ax edge have been honed. Honing the edge removes very small particles of metal from the blade and causes the remaining ax metal to burr slightly. This is sometimes known as a wire edge or a feather edge. At this point you may want to move to one of the Arkansas stones like the Hard Arkansas finishing stone and work the burr back and forth until it breaks off or becomes very fine. I recommend stropping the edge by drawing the ax toward the edge (opposite the direction used during sharpening) on a piece of finished leather or a piece of soft, clear wood like pine. This stropping will remove the final burr or wire edge.
The last step is to apply a protective coating to
30

Figure 71—Use the ax stone in a circular motion, working into the edge, toward the middle of the ax head (drawings by Frederic H. Kock).
the ax head itself (Figure 72). You can clean the rust and pitch from the metal with an abrasive impregnated rubber eraser block called the Wonderbar. Wipe light machine oil over all the metal on both sides of the ax, and then carefully rub a beeswax and oil mixture into the steel. The mixture will cling to the steel and protect it from rust. The ax head should be warm to ensure better coverage of the mixture.
Always check the ax for sharpness. A honed ax will cut faster, be safer to use, and stay sharp longer. If you look directly into the edge of your ax with the light over your shoulder (either sunlight or artificial light), the edge that you’ve just honed will reflect no light. If you see any light reflected from the edge, you need to go back and hone the ax with the stone. Occasionally, a ding or a nick in the edge will reflect light just at one point. It is not always necessary to remove
Getting the Hang of It
Figure 72—Protective coatings for the ax head.
these dings as they will disappear through repeated filings. A correctly honed edge is sharp with no wire edge. It reflects no light. If you followed procedures, your edge should be sharp enough to shave with (Figure 73). I sometimes check the sharpness by carefully dry shaving the hair on the back of
Figure 73—Shaving hair on the back of your hand is a traditional method of checking an ax’s sharpness. A safer method is to place your fingernail against the edge. The edge should bite into your fingernail.
31
 Getting the Hang of It
my hand. This is a traditional method used in the woods for years. A safer and equally effective test is to carefully put your fingernail (not your finger)
against the sharpened edge. The edge should bite into your fingernail and not slide down it.
32
U sing Axes
A Most Versatile Tool
The ax is a wonderful tool. It can be used to fell standing trees, to buck them into logs, and to limb them once they are on the ground. Axes can be used for hewing logs square, or for splitting firewood or fence rails. The tasks they’re suited for range from trail work and fire fighting to restoring historic buildings.
Before you lift an ax to admire it or work with it, you need to recognize its potential danger. An ax is a sharp wedge, normally applied with enough force to cut something. Whether that “something” is a log, your foot, or the person standing too close to you depends on your skill and concentration. By taking pride in your work, taking good care of your ax, and learning the correct techniques, you can avoid most of the danger of using an ax.
Master your ax instead of fearing it. You master ax work by practicing it. Chopping is an art. It takes years to become an expert. You can learn only so much by reading manuals and looking at illustrations; the rest you can learn only by swinging. Take a cautious, rather than aggressive, approach to chopping your first logs. Placement, control, proper stance, and technique are far more important than power. Only when you have become fully proficient does power become a consideration.
This chapter gives some basic instruction—and a few tricks of the trade—for using an ax for felling, limbing, bucking, splitting, and hewing. It also describes how to use an adz for log work. I’ve relied heavily on illustrations from one of my favorite books about axes, Woodsmanship, by Bernard S. Mason (1954). The wonderful illustrations are by Frederic H. Kock. Unfortunately, it is long out of print, but some of the illustrations are reproduced here by permission. We also used some good information from Fred C. Simmons’ Northeastern Loggers’ Handbook (1951).
Bear in mind that some of these historic illustrations do not reflect modern personal protective equipment, particularly hardhats and eye protection.
Using an Ax Safely
Personal protective equipment that you need for ax work varies with the job. Always wear good, stout leather boots, at least 8-inches high. Always wear safety glasses or goggles for eye protection. Hard hats are needed when there is any chance of being struck by something overhead. Hard hats are a must for tree-felling operations.
Some people wear gloves when using an ax, some don’t. Gloves are a good idea for splitting firewood, where you are handling many pieces of splintered wood. Leather gloves are always required while sharpening an ax. For chopping, use your judgment. If leather gloves protect your hands and help give you a good grip on the handle, wear them. I personally don’t wear gloves most of the time because I get a better purchase on the ax handle without them. The last thing I want to happen is for the ax to fly out of my hands on a swing. Then the person next to me really will need that hard hat!
It’s always a good idea to complete a job hazard analysis that identifies the
safety concerns of the ax work you will be doing. In the Forest Service, a job hazard analysis is required. You must also describe the safety gear and procedures you need to follow to do the job safely. The job hazard analysis can save your life. Do it!
33
 Using Axes
Figure 74—A dull ax or one that is too blunt is more likely to glance off dangerously than it is to cut (drawing from the Northeastern Loggers’ Handbook).
Always carry your sheathed single-bit ax at its point of balance near its head with the edge pointing down. The ax should be on your downhill side if you are walking on a slope. If you fall or trip, toss the ax away from you. Carry a double-bit ax at your side. Carrying an ax on your shoulder is asking for trouble, especially in the woods or on rough trails. Don’t do it.
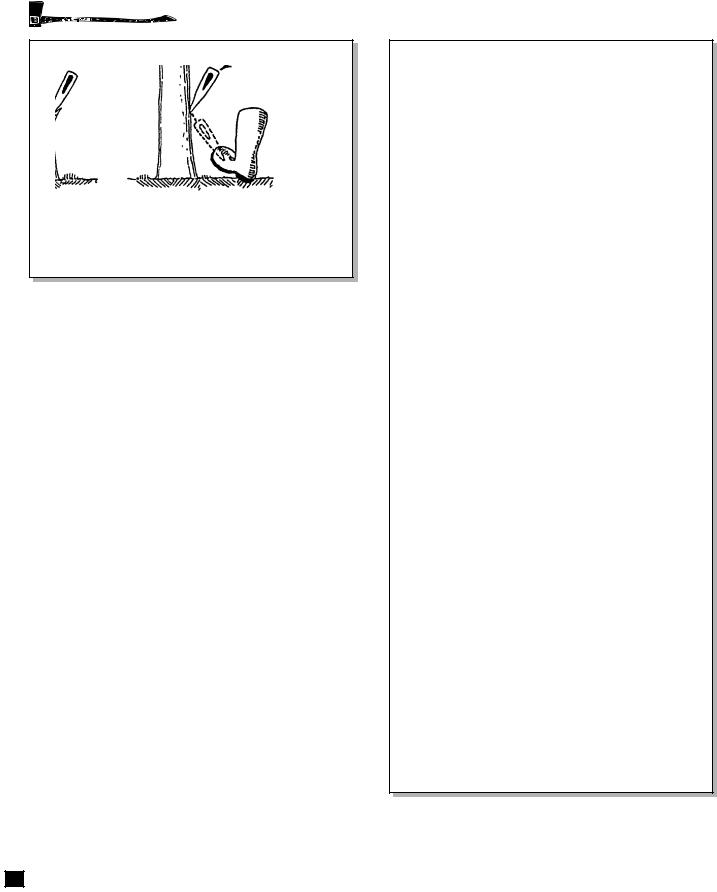
Keep track of your ax. Be careful where and how you lay it down, and remember where it is. If you must leave your ax unsheathed, lay it flat with the edge toward a solid object like a log or a wall (Figure 75). Serious accidents are caused by stumbling over or falling on a carelessly placed ax.
For temporary safe storage, stick a single-bit ax in a log or a stump. Never lay it down flat out in the open. Never lean it up against a tree, a wall, or any other object where the edge is exposed. Don’t leave it stuck for long in a block of wood because it will rust. A double-bit ax should never be stuck in a log with one edge sticking out. Place your double-bit ax underneath a log lying flat or put one bit into a small piece of wood and then stick the other bit into a horizontal log. A sheath is better than any of these methods.
Here are a few more pointers on ax work:
Figure 75—These methods may work, but it’s better to keep a protective sheath on your ax (drawings by Frederic H. Kock).
34