

LOADING AND SHOWING FORMS 211
Another technique for exposing the controls of a form to the code of the other forms of the application is to create Public Shared variables that represent the controls to be shared. The following declaration makes the TBox variable of Form1 available to all other forms in the application:
Public Shared TBox As TextBox
To make this variable represent a TextBox control, assign to it the name of the control:
TBox = TextBox1
This statement appears usually in the form’s Load() subroutine, but it can appear anywhere in your code. It just has to be executed before you show another form. To access the TextBox1 control on Form1 from within another form’s code, use the following expression:
Form1.TBox
This expression represents a TextBox control, and you can call any of the TextBox control’s properties and methods:
Form1.TBox.Length |
‘ |
returns |
the length of the text |
Form1.TBox.Append(“some text”) |
‘ |
appends |
text |
Keep in mind that the controls you want to access from within another form’s code must be declared with as Public Shared, not just Public.
Forms vs. Dialog Boxes
Dialog boxes are special types of forms with rather limited functionality, which we use to prompt the user for data. The Open and Save dialog boxes are two of the most familiar dialog boxes in Windows. They’re so common, they’re actually known as common dialog boxes. Technically, a dialog box is a good old Form with its BorderStyle property set to FixedDialog. Like forms, dialog boxes may contain a few simple controls, such as Labels, TextBoxes, and Buttons. You can’t overload a dialog box with controls and functionality, because you’ll end up with a regular form.
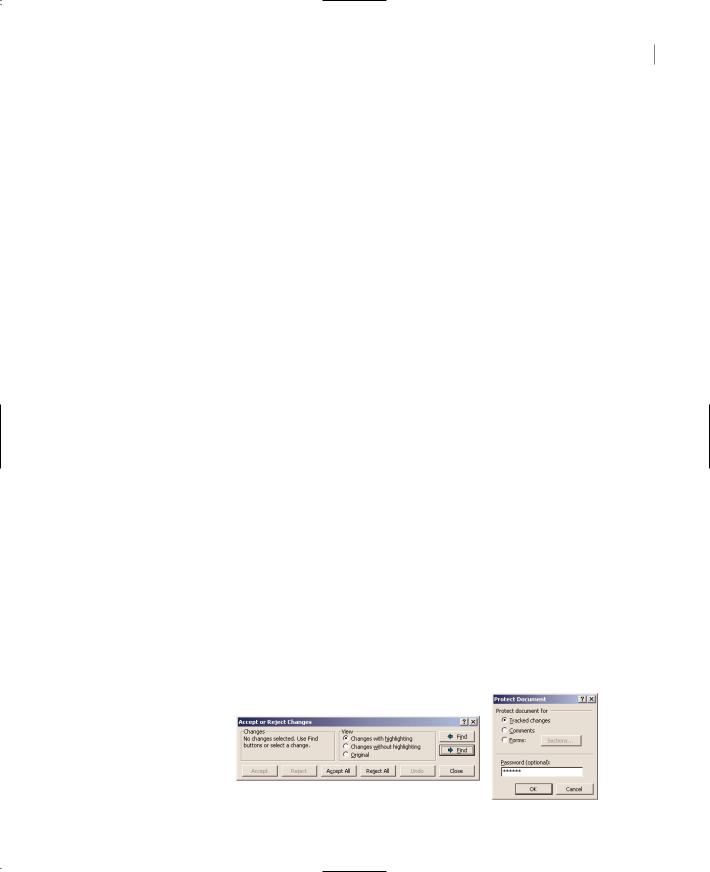
Figure 5.14 shows a few dialog boxes you have certainly seen while working with
Windows applications. The Protect Document dialog box of Word is a modal dialog box: You must close it before switching to your document. The Accept or Reject Changes dialog box is modeless, like the Find and Replace dialog box. It allows you to switch to your document, yet it remains visible while open even if it doesn’t have the focus.
Notice that some dialog boxes, such as Open, Color, and even the humble MessageBox, come with the .NET Framework, and you can incorporate them in your applications without having to design them.
Figure 5.14
Typical dialog boxes used by Word
Copyright ©2002 SYBEX, Inc., Alameda, CA |
www.sybex.com |

212 Chapter 5 WORKING WITH FORMS
Another difference between forms and dialog boxes is that forms usually interact with each other. If you need to keep two windows open and allow the user to switch from one to the other, you need to implement them as regular forms. If one of them is modal, then you should implement it as a dialog box. A characteristic of dialog boxes is that they provide an OK and a Cancel button. The OK button tells the application that you’re done using the dialog box and the application can process the information on it. The Cancel button tells the application that it should ignore the information on the dialog box and cancel the current operation. As you will see, dialog boxes allow you to quickly find out which button was clicked to close them, so that your application can take a different action in each case.
In short, the difference between forms and dialog boxes is artificial. If it were really important to distinguish between the two, they’d be implemented as two different objects—but they’re the same object. So, without any further introduction, let’s look at how to create and use dialog boxes.
To create a dialog box, start with a Windows Form, set its BorderStyle property to FixedDialog and set the ControlBox, MinimizeBox, and MaximizeBox properties to False. Then add the necessary controls on the form and code the appropriate events, as you would do with a regular Windows form. Figure 5.15 shows a simple dialog box that prompts the user for an ID and a password. The dialog box contains two TextBox controls, next to the appropriate labels, and the usual OK and Cancel buttons. The Cancel button signifies that the user wants to cancel the operation, which was initiated in the form that displayed the dialog box. The forms of Figure 5.15 are the Password project on the CD.
Figure 5.15
A simple dialog box that prompts users for a username and password
Start a new project, rename the form to MainForm, and place a button on the form. This is the application’s main form, and we’ll invoke the dialog box from within the button’s Click event handler. Then add a new form to the project, name it PasswordForm, and place on it the controls shown in Figure 5.15.
We have the dialog box, but how do we initiate it from within another form’s code? The process of displaying a dialog box is no different than displaying another form. To do so, enter the following code in the event handler from which you want to initiate the dialog box (this is the Click event handler of the main form’s button):
Private Sub Button1_Click(ByVal sender As System.Object, _
ByVal e As System.EventArgs) Handles Button1.Click
Dim DLG as new PasswordForm()
DLG.ShowDialog
End Sub
Copyright ©2002 SYBEX, Inc., Alameda, CA |
www.sybex.com |

LOADING AND SHOWING FORMS 213
Here, PasswordForm is the name of the dialog box. The ShowDialog method displays a dialog box as modal; to display a modeless dialog box, use the Show method instead. An important distinction between modal and modeless dialog boxes has to do with the calling application. When you display a modal dialog box, the statement following the one that called the ShowDialog method is not executed. The statements from this point to the end of the event handler will be executed when the user closes the dialog box. Statements following the Show method, however, are executed immediately as soon as the dialog box is displayed.
You already know how to read the values entered on the controls of the dialog box. You also need to know which button was clicked to close the dialog box. To convey this information from the dialog box back to the calling application, the Form object provides the DialogResult property. This property can be set to one of the values shown in Table 5.5 to indicate what button was clicked. The DialogResult.OK value indicates that the user has clicked the OK button on the form. There’s no need to place an OK button on the form; just set the form’s DialogResult property to DialogResult.OK.
Table 5.5: The DialogResult Enumeration
Value |
Description |
Abort |
The dialog box was closed with the Abort button. |
Cancel |
The dialog box was closed with the Cancel button. |
Ignore |
The dialog box was closed with the Ignore button. |
No |
The dialog box was closed with the No button. |
None |
The dialog box hasn’t been closed yet. Use this option to find out whether a modeless |
|
dialog box is still open. |
OK |
The dialog box was closed with the OK button. |
Retry |
The dialog box was closed with the Retry button. |
Yes |
The dialog box was closed with the Yes button. |
|
|
The dialog box need not contain any of the buttons mentioned here. It’s your responsibility to set the value of the DialogResult property from within your code to one of the settings shown in the table. This value can be retrieved by the calling application. Notice also that the action of assigning a value to the DialogResult property also closes the dialog box—you don’t have to call the Close method explicitly.
Let’s say your dialog box contains a button named Done, which signifies that the user is done entering values on the dialog box. The Click event handler for this button contains a single line:
Me.DialogResult = DialogResult.OK
This statement sets the DialogResult property, which will be read by the code of the form that invoked the dialog box, and also closes the dialog box. The event handler of the button that displays this dialog box should contain these lines:
Dim DLG as Form = new PasswordForm
If DLG.ShowDialog = DialogResult.OK Then
Copyright ©2002 SYBEX, Inc., Alameda, CA |
www.sybex.com |

214Chapter 5 WORKING WITH FORMS
{process the user selection } End If
Figure 5.16 demonstrates how this is done in the Password project.
Figure 5.16
The code window of the Password project’s main form
The dialog box may actually contain two buttons, one of them called Activate or Register Now and the other called Cancel or Remind Me Later. In addition, the dialog box may contain any number of buttons. You decide which buttons will close the form and enter the statement that sets the DialogResult property in their Click event handlers. The value of the DialogResult property is usually set from within two buttons—one that accepts the data and one that rejects them. Depending on your application, you may allow the user to close the dialog box by clicking more than two buttons. Some of them must set the DialogResult property to DialogResult.OK, others to DialogResult.Abort.
Note Of course, you can read the values of the controls on the dialog box anyway—it’s your application and you can do whatever you wish with it. If the user has closed the dialog box with the Cancel button, however, the information is incorrect, and any results your application generates based on these values will also be incorrect.
The DialogResult property applies to buttons as well. You can close the dialog box and pass the appropriate information to the calling application by setting the DialogResult property of a button to one of the members of the DialogResult enumeration in the Properties window. If you also set one of the buttons on the form to be the Accept button and another to be the Cancel button, you don’t have to enter a single line of code in the modal form. The user can enter values on the various controls and then close the dialog box by pressing the Enter or Cancel key. The dialog box will close
and will return the DialogResult.OK or DialogResult.Cancel value.
The dialog box doesn’t contain a single line of code. Just make sure the Form’s AcceptButton property is bttnOK, the CancelButton property is bttnCancel, and the DialogResult properties of the two buttons are OK and Cancel, respectively. The AcceptButton sets the form’s DialogResult property to DialogResult.OK automatically, and the CancelButton sets the same property to DialogResult.Cancel. Any other button must set the DialogResult property explicitly. Listing 5.5 shows the code behind the Log In button on the main form.
Copyright ©2002 SYBEX, Inc., Alameda, CA |
www.sybex.com |

LOADING AND SHOWING FORMS 215
Listing 5.5: Prompting the User for an ID and a Password
Private Sub Button1_Click(ByVal sender As System.Object, _
ByVal e As System.EventArgs) Handles Button1.Click Dim DLG As New PasswordForm()
If DLG.ShowDialog() = DialogResult.OK Then
If DLG.txtUserID.Text = “” Or DLG.txtPassword.Text = “” Then MsgBox(“Please specify a user ID and a password to connect”) Exit Sub
End If
MsgBox(“You were connected as “ & DLG.txtUserID.Text) Else
MsgBox(“Connection failed for user “ & DLG.txtPassword.Text) End If
End Sub
The code of the main form reads the values of the controls on the dialog box through the DLG variable. If the dialog box contains many controls, it’s better to communicate the data back to the calling application through properties. All you have to do is create a Property procedure for each control and then read the values entered by the user as properties. The topic of Property procedures is discussed in detail in Chapter 8, but it’s nothing really complicated. To keep the complexity to a minimum, you can also implement the properties with Public Shared variables. Let’s say that the dialog box prompts the user to select a state on a ComboBox control. To create a State property, use the following declaration:
Public Shared State As String
This variable will be exposed by the dialog box as a property, and the application that invoked the dialog box can read the value of the State property with a statement like DLG.State.
The value of the State variable must be set each time the user selects a state on the ComboBox control, from within the control’s SelectedIndexChanged event handler:
State = cmbStates.Text
where cmbStates is the name of the ComboBox control. The user may change their mind and repeat the action of selecting a state. The most recently selected state’s name will be stored in the variable State, because the SelectedIndexChanged event takes place every time the user makes another selection.
You can invoke the dialog box and then read the value of the State variable from within your code with the following statements:
Dim Dlg as StatesDialogBox = new StatesDialogBox
Dlg.ShowDialog
If Dlg.DialogResult = DialogResult.OK Then
Console.WriteLine(Dlg.State)
End If
This is a good place to demonstrate how to design multiple interacting forms and dialog boxes with an example.
Copyright ©2002 SYBEX, Inc., Alameda, CA |
www.sybex.com |