


58 Chapter 2 VISUAL BASIC PROJECTS
Listing 2.10: The Revised Equals Button
Private Sub bttnEquals_Click(ByVal sender As System.Object, _
ByVal e As System.EventArgs) Handles bttnEquals.Click Dim result As Double
Operand2 = Val(lblDisplay.Text) Try
Select Case Operator Case “+”
result = Operand1 + Operand2 Case “-”
result = Operand1 - Operand2 Case “*”
result = Operand1 * Operand2 Case “/”
If Operand2 <> “0” Then result = Operand1 / Operand2 End Select
lblDisplay.Text = result Catch exc As Exception
MsgBox(exc.Message) lblDisplay.Text= “ERROR”
Finally
clearDisplay = True End Try
End Sub
Most of the time, the error handler remains inactive and doesn’t interfere with the operation of the program. If an error occurs, which most likely will be an overflow error, the error-handling section of the Try…Catch…End Try statement will be executed. This code displays a message box with the description of the error, and it also displays the string “ERROR” on the display. The Finally section is executed regardless of whether an exception occurred or not. In this example, the Finally section sets the clearDisplay variable to True so that when another digit button is clicked, a new number will appear on the display.
Note The exc variable represents an exception; it exposes a few properties in addition to the Message property, which is the description of the exception. For more information on the members of the Exception class and how to handle exceptions, see Chapter 17.
Taking the LoanCalculator to the Web
In this section, we’re going to build a new project that is a loan calculator just like the one we built earlier. This time, though, the application will run on the browser, and any user who can connect to your server will be able to use it without having to install it on their computer. As you can understand, you’re about to convert the LoanCalculator from a Windows application to a Web application. It’s a
Copyright ©2002 SYBEX, Inc., Alameda, CA |
www.sybex.com |
TAKING THE LOANCALCULATOR TO THE WEB 59
little early in the book to discuss Web applications, but I wanted to show you that building a Web application is quite similar to building a Windows app.
Web applications are discussed in detail in the last part of the book, but since they’re among the hot new features of the .NET platform, let me demonstrate why they are so hot. In a sentence, Visual Studio.NET is the first attempt to make the development of Web applications as easy as VB applications. You will see shortly that you can create the interface of a Web form (an HTML page with controls that interact with the user) just as you create a Windows form. As for the application’s code, it’s just like writing VB code to handle the events of a Windows form.
To write and test Web applications, you must have Internet Information Server (IIS) installed and running on your computer. IIS is distributed with Windows 2000, and you must make sure it’s running. Open the Start menu and select Settings Control Panel. Double-click the Administrative Tools, then double-click the icon of the Internet Services Manager tool. When the Internet Services Manager window appears, expand the node of your computer, right-click the Default Web Site item, and from the context menu, select Start. This will start the Web server.
Start a new project and, on the New Project dialog box, click the ASP.NET Web Application icon. Then enter the name of the application in the Name box—call it WebLoanCalculator. When you close the New Project dialog box, you will see a window with a grid as usual, which represents the Web page, or Web form. This document is called WebForm1.aspx (the default name of the Web form). The Web form is equivalent to the Windows form, but it’s displayed as HTML on a browser such as Internet Explorer, as you see in Figure 2.7.
Figure 2.7
The WebLoanCalculator Web application
A new Windows project is stored in its own folder under the folder specified in the Location field on the New Project dialog box. Web applications are also stored in their own folder, but this folder is created under the Web server’s root folder (usually the C:\Inetpub\wwwroot folder).
Opening a Web project is not as simple as double-clicking the icon of a Solution file. I suggest you follow the steps described in this chapter to create the project. If you want to open the WebLoanCalculator project on the CD, copy the entire WebLoanCalculator folder into the Web Server’s root folder. Then start Visual Studio.NET and open the WebLoanCalculator solution file.
Copyright ©2002 SYBEX, Inc., Alameda, CA |
www.sybex.com |

60 |
Chapter 2 VISUAL BASIC PROJECTS |
The text describes how to create the project from scratch. The application’s main form is called WebLoanForm.aspx (it’s equivalent to a Windows form). You can open the application by starting Internet Explorer and enter the following URL in its Address box:
http://localhost/WebLoanCalculator/WebLoanForm.aspx
Let me describe the process of building the Web application from scratch. Change the name of WebForm1 to WebLoanForm. Open the Toolbox, and you see that the Web Forms tab is activated, instead of the Windows Forms tab. The Web Forms tab contains the icons of the controls you can place on a Web form, which are similar to the Windows controls but not as elaborate or as rich in functionality. As you already know, Web pages use a much simpler user-interaction model. The viewer can enter text on certain controls, check or clear a few options, and click a button to submit the form to the server. The server reads the values on the controls, processes them, and returns a new page with the results. In the future, you can expect that applications running over the Internet will become more and more elaborate, but for now no one questions the HTML model used so far. As long as the browser can only handle HTML files, the Web application’s front end is confined to HTML pages.
There’s another tab on the Toolbox, the HTML tab. These are the standard HTML controls you can use on any Web page. The Web Forms tab contains the so-called Web controls, and there are quite a few Web controls, as opposed to the rather limited number of HTML controls. Some of the Web controls are also quite advanced compared to the really limited capabilities of the HTML controls. Does this mean that a page that contains Web controls can’t be displayed on a browser other than Internet Explorer? Not at all. Web controls are translated automatically into standard HTML code that can be rendered on any browser. For example, on the Web Forms tab you’ll find some very elaborate controls, such as the TreeView control. HTML doesn’t provide any controls that come even near the functionality of TreeView. Yet a Web TreeView control can be rendered on any browser. The Web Forms Designer will insert the appropriate HTML tags to create something that looks and behaves like the TreeView control—but it’s not a TreeView control. There’s a lot to be said about Web controls, but you’ll have to wait until the last part of the book. For now, we’ll build a simple application that uses Web controls to prompt the user for the parameters of a loan and that will display the monthly payment on the same page, just like a Windows application.
Start by placing four Label controls on the Web form. (Double-click the Label control’s icon on the Toolbox four times, and four labels be placed on the Web form for you.) Change their placement on the form by arranging them with the mouse, just as you would do with the controls on a Windows form. You don’t have to align them perfectly now; you’ll use the commands of the Format menu to align the controls on the form. Just place them roughly at positions shown in Figure 2.7. Then select each Label with the mouse and, in the Properties window, locate the Text property of the control.
As you can see, most of the basic properties of the Web controls have the same name as the Windows controls. Change the captions of the four labels to “Loan Amount,” “Duration (months),” “Interest,” and ‘Monthly Payment.” Notice that the Label Web control is resized automatically to accommodate the string you assign to its Text property.
Now place four TextBox controls on the Web form, each next to one of the Labels. By default, all TextBox controls are empty (they have no initial content). Change their size with the mouse and
Copyright ©2002 SYBEX, Inc., Alameda, CA |
www.sybex.com |

TAKING THE LOANCALCULATOR TO THE WEB 61
align them roughly to the Label controls they correspond to. Then select them one at a time and change their ID property to txtAmount, txtDuration, txtRate, and txtPayment, respectively. The ID property of a Web control is the unique identifier of the control, similar to the Name property of a Windows control. You’ll use the ID property to access the control’s members from within your code.
Then place a CheckBox control, set its Text property to Early Payment, and name it chkPayEarly. Set its TextAlign property to Left, so that its check box will be placed to the right of the text. The check box will be drawn immediately after the text, so you have to append a few spaces to the control’s caption to clearly separate it from the check box.
The last control to place on the form is the Button control, whose Text property will be “Monthly Payment” and Name property will be bttnShowPayment. This button will submit the loan parameters entered on the form to the server, where the appropriate code will calculate the monthly payment and return it to the client. This is a good point to align the controls on the Web form. Select the Label controls and align them left with the Format Align Lefts command. While the labels are selected, use Format Vertical Spacing Make Equal to space them equally from one another. Once the labels are in place, you can align each text box to the corresponding label, with the Format Align Middles command. Select a pair of a Label and a TextBox control at a time and align them. Just make sure that the Label control is used as the reference control for the alignment.
At this point, you’re done designing the interface of the application. The interface is quite similar to the interface of the equivalent Windows application, only this one was designed on a Web form with Web controls. Other than that, the process was the same; even the tools for aligning the controls on the Web form are the same as those for the Windows form. Our next task is to program the application.
Double-click the button on the Web form, and the editor window will open. The Web Form Designer has selected the Click event of the button and inserted its definition. All you have to do is insert the same code we used in the LoanCalculator application. You can switch to the Windows application and copy the code (which was shown back in Listing 2.2). Just paste the code behind the Show Payment button of the LoanCalculator Windows application in the Click event handler of the Monthly payment button of the Web application, and there won’t be a single error. You can reuse the code as is!
Press F5 to run the application. It will be several seconds before the Internet Explorer window will pop up, displaying the page you’ve designed. Enter the parameters of a loan and then click the Monthly Payment button. A few seconds later, the monthly payment will appear on the form. As you will notice, a totally new page will arrive in the browser; this page contains the parameters of the loan (the values you’ve entered on the form) and the result of the calculations.
If you look at the source code of the document shown on Internet Explorer, you will see straight HTML code. The interface of the WebLoanCalculator application looks fine, but not quite like
a Web page. There’s none of the color or graphics we’re so accustomed to seeing on Web pages. Our Web form contains only controls, but it’s an HTML page and you can add any element that could appear on a Web page. In other words, the Web form can be edited as an HTML document. Not only that, but the IDE allows you to edit your page either visually or in HTML mode. Let’s add a colored caption and change the page’s background color.
Select the Web form by clicking somewhere on the form. In the Properties window, locate the property pageLayout. Its setting is GridLayout, which explains why you were able to place the controls anywhere on the page and align them in all possible ways. Those of you familiar with HTML know that aligning controls on a Web form is anything but trivial. Change the pageLayout property
Copyright ©2002 SYBEX, Inc., Alameda, CA |
www.sybex.com |
62 |
Chapter 2 VISUAL BASIC PROJECTS |
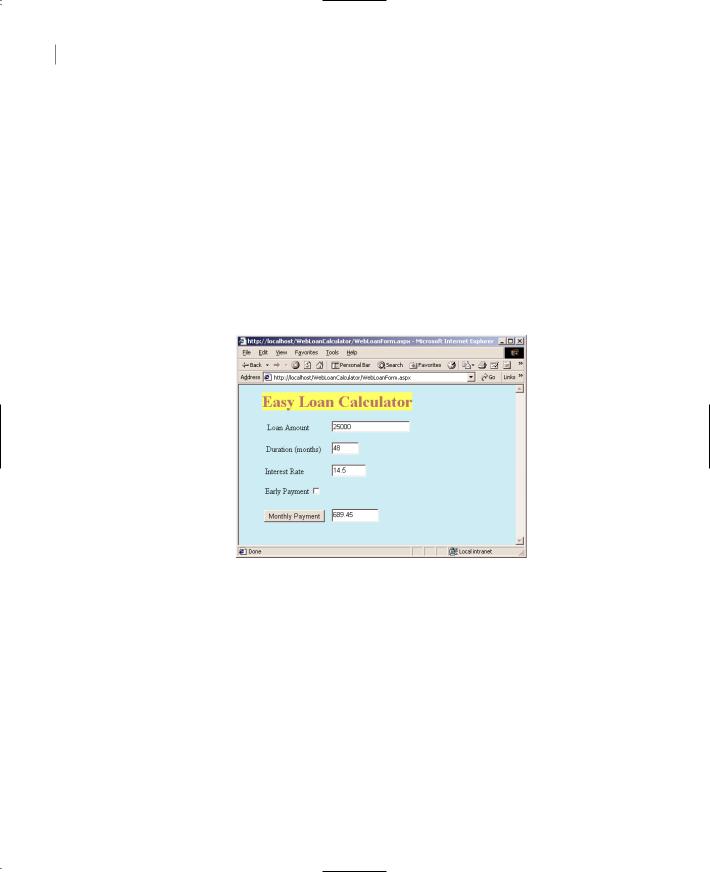
from GridLayout to FlowLayout. Now you’re in normal HTML editing mode. Place the cursor at the top of the page and start typing. Enter the string Easy Loan Calculator and then select it with the mouse. You will notice that the text-formatting buttons on the toolbar have been enabled. Set the text’s size to 6 and set its foreground and background colors. To set these properties, use the two buttons next to the Bold/Italic/Underline group of buttons. The string is flush left on the form, so enter a few spaces in front of the string to center it above the controls.
Note A quick comment for readers familiar with HTML: Browsers ignore multiple spaces, but the editor silently converts the spaces you enter into codes, which are the HTML equivalent of “hard”—that is, nonbreaking—spaces.
You can also change the color of the page. Locate the page’s bgColor property in the Properties window and set it to a light color. When the Color Picker dialog box appears on the form, you will see the tab with the Web colors. These are the colors than can be displayed by all browsers, the socalled safe colors. The form now looks like Figure 2.8 when viewed in a browser.
Figure 2.8
The WebLoan-
Calculator as a
Web page
To see how the Web Form Designer handles the HTML elements of the page, click the HTML button at the bottom of the Designer. The Web form can be viewed and designed either in Design view (which is the default view) or in HTML view. The Web Form Designer inserted the following statement in the HTML document to generate the header of the page:
<FONT style=”BACKGROUND-COLOR: #ffff66” color=”#996666” size=”6”> <STRONG>Easy Loan Calculator</STRONG></FONT>
This is straight HTML code that could appear in any Web page, and it doesn’t use any Web controls. Select the <FONT> tag and delete it. Then switch to the Design view to see that the header has disappeared. Switch back to the HTML view and insert the following statement right after the <body> tag and before the <form> tag, as shown in Figure 2.9:
<h1>Easy Loan Calculator</h1>
Copyright ©2002 SYBEX, Inc., Alameda, CA |
www.sybex.com |