

Professional ASP.NET Security - Jeff Ferguson
.pdfASP.NET Security Configuration
IIS security is tightly integrated with both Windows security and the security of the .NET runtime. For instance, we can configure IIS security settings so that only certain types of files may be executed by certain Windows users (we saw how to do this is Appendix A). Similarly, ASP.NET processes run, by default, under a specific Windows account that has certain restricted permissions - the ASPNET account - and we can control the types of resources that are accessible via .NET processes by configuring permissions for this account.
In this appendix, we run through some key aspects of configuring Windows Security, controlling the ASPNET account privileges, and ways of using impersonation, whereby we can run code under a different identity to that of a current logged in user.
Securing Windows
IIS security is tightly coupled to the Windows operating system. The file permissions, registry settings, password usage, user rights, Access Control Lists (ACL), and other issues associated with Windows operating system security have a direct impact on IIS security. First, we'll look at important ways to secure Windows 2000 server family operating systems by running through a list of all the key aspects of Windows security configuration that need our attention.
Installing Windows and Service Packs
For a secure system it's always a good idea to start from a fresh Windows Server Family installation, rather than upgrading from previous builds with security packs. This approach minimizes the risk that we might leave ourselves vulnerable to attack through the security holes of previous builds.
If you decided to go with a fresh install, before installing Windows, ensure that the hard drive is formatted using the NTFS format. It is more secure than FAT and FAT32 formats, since it enables us to set file-level ACLs.
You can change your format from FAT to NTFS by running the following command.
Convert C:/ FS:NTFS
However, use this with caution, as you might lose data. This could well cause problems if you are using Windows 2000 and another version of Windows on the same hard drive.
If you do not reinstall Windows, you should ensure that you have the appropriate service packs and latest system security patches installed. These can be obtained from the Windows Update web site at http://www.windowsupdate.com.
Use a Good Password
Windows supports very long passwords (about 127 characters), and we should choose a very long and complex password for the administrator account. The longer and more complex the password, the harder it is to crack. When choosing an administrator account password, choose a combination of letters, numbers, punctuation marks, nonprinting ASCII characters generated by using the ALT key, and three-digit key codes on the numeric keypad.
Reconfiguring the Administrator Account
We should protect the administrator account by renaming it or disabling it and creating a new user account with administrator account privileges. This doesn't provide unbreakable security, but makes it harder to break in.
Locking User Accounts
Windows 2000 - and above - has a user account lockout policy that locks a user account after a certain number of failed attempts to log on. This is configurable by the administrators, and this option can come handy when someone is trying to break into the server. The best policy will be to lock out the user account after 3 to 5 failures.
Delete Superfluous Accounts
We should delete or disable any unnecessary user accounts such as the Guest account.
Encrypting Passwords
The Windows user account passwords are stored in the Security Account Manager (SAM) registry hive as hashed values. If someone gains access to the SAM, then they can use programs like lOphtcrack (http://www.securitysoftwaretech.com/) to crack all the passwords in the system.
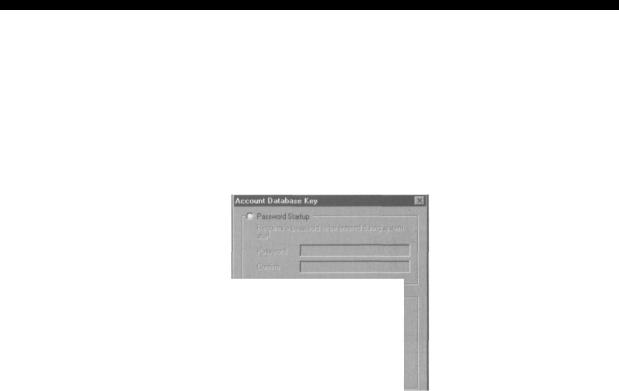
We can prevent this by running the SYSKEY utility (Syskey. exe), which adds further protection by encrypting the SAM database using strong 128-bit key encryption. The following screenshot shows the SYSKEY utility options.
400
ASP.NET Security Configuration
Securing the Windows NT Account Database
This tod wii alow you to configure the Accounts Database fo enable additional encryption, further protecting the database from compromise.
Once enabled, this encryption cannot be disabled.
(° ^Encryption £nabjecl
Cancel Update
The SYSKEY utility also provides a few ways to secure the 128-bit encryption key. We can see the key security options when we click the JJpdate button.
System Generated Password
i~ Store Startup Key an Floppy Disk
Requires a floppy disk to be inserted during system start.
l^ Store Startup Key locally
Stores a key as part of the operating system, and no interaction is required duriig system start.
When we choose the Password Startup option, the server will prompt us to type the password after the Windows server begins the startup process, before the network connections are established. In this way, we have to supply the password at startup.
When we choose the Store Startup Key on Floppy Disk option, the machine generated random 128-bit encryption key is stored on a floppy disk. When we boot the server the server will prompt for the floppy disk with the random machine 128-bit encryption key at startup sequence. Of course, it is a good idea to keep the key on a second floppy disk.
When we choose the Store Startup Key Locally option, the machine generated random 128-bit encryption key is stored in the local system and will be used when we're starting the server. The biggest problem with this approach is that, if the hacker gets physical access to the server, they can access the encryption key stored locally in the server, which will allow them to decrypt the SAM database.
Remove All Unnecessary File Shares
We should remove all the unnecessary file shares in the server, which will prevent the hacker from getting into the local system using the file shares as the gateway.
401
Configure Access Control Lists
Set appropriate ACLs for the necessary file shares. By default, when we create a file share, all users have Full Control permissions. This should be changed to Read access for the Everyone group, and appropriate ACLs should be set for the specific users, based on an application's requirements (we look at how to do this in Appendix A).
Disabling Unused Services
It's always wise to disable the services that aren't needed. This should include the services that are vulnerable to attack, including those that provide the attacker with opportunities to access the system, or access information. Unless you specifically require them, disable FTP, Telnet, and STMP services.
Install Extra Software with Caution
Don't install any development tools or other unwanted tools such as office productivity tools on the server, since they can add more loopholes to the server.
Removing Command-Line Tools
Once the attacker gains access to the server, one of the common ways to exploit the server is by using the tf tp.exe (FTP command-line utility) to download malicious code to your server, and using the cmd.exe (DOS command-shell utility) file to execute it. By removing the command-line tools from the %Windows%/System32 folder, we can avoid this kind of attack.
The command-line utilities that we should remove include:
xcopy . exe |
Regedt32 . exe |
ftp. exe |
arp . exe |
rexec . exe |
at . exe |
posix. exe |
cscript .exe |
runonce . exe |
cacls . exe |
ping. exe |
nbtstat . exe |
debug . exe |
rep . exe |
netstat . exe |
nslookup. exe |
regedit . exe |
telnet . exe |
wscript . exe |
cmd . exe |
finger. exe |
edlin. exe |
net . exe |
syskey.exe |
rsh.exe |
route . exe |
tracert . exe |
ipconf ig . exe |
secedit .exe |
os2 . exe |
tf tp.exe |
edit . com |
|
|
|
|
Note that when you delete OS files, Windows File Protection places a new copy of the file to its original location from the DllCache folder. Windows File Protection is a background process that monitors the file types . Sys, . Dll, . Exe, and . Ocx files. When an OS protected file is replaced - either by an installation program, or manually - Windows File Protection Service will be triggered, using the Directory change event. If the file that has been replaced is the correct version, then the file will not be replaced by the one on the DLLCache folder. Otherwise, the new file will be replaced with the old file.
402
ASP.NET Security uonnguraiion
You can find out more about Windows File Protection Services in the Microsoft Support article at http://support.microsoft.eom/support/kb/articles/Q254/1/35.asp.
Disabling NetBIOS
Disable NetBIOS over TCP/IP. NetBIOS protocol provides services such as Integrated Windows Authentication, WINS name lookups, Remote Procedure Calls (RFC), file and printer sharing, and network browsing. Keeping this protocol in the network stack adds enormous risk of exposing your network on the Internet with these services, which is not recommended at all.
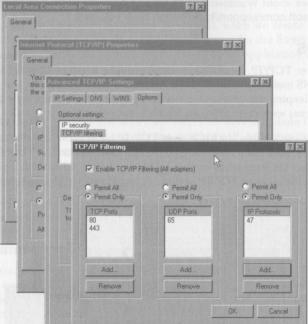
In Windows 2000 we can disable NetBIOS over TCP/IP by selecting the Properties dialog box from the Local Area Connection: from Network and Dial-up Connections, select Internet Protocol (TCP/IP) from the list, and select the Properties command button. Select Advanced...,go to the WINS tab, and select the Disable NetBIOS over TCP/IP option:
Tout this c the |
|
|
|
|
a |
|
Advanced TCP/IP Sellings |
|
|
|
|
|
||
r t? |
|
IP Sailings | DNS |
WHS j Options) |
|
|
|
|
|
|
IP |
|
WINS addresses, in order of use: |
|
|
Si |
|
|
|
|
P<r |
|
|
|
|
(T |
|
|
|
|
|
|
|
Edit... |
Remove |
D |
If LMHOSTS lookup is enabled it apples to ai eonnectioro fof which |
|||
|
TCP4P is enabled. |
|
|
|
|
W tnatie LMHOSTS bokup |
Impoit LMHOSTS.. |
||
C Ewbte NetBIOS ov« TCP/IP <* Disable NetBIOS over TCP/IP fn<Me NetBIOS setting (torn the DHCP saver
Cancel
The NetBIOS over TCP/IP option uses ports from 135 to 139. When we disable the NetBIOS over TCP/IP option, we should block these ports in the firewall.
Enabling IP Packet Filtering
We should enable IP packets at the NIC-card level. By configuring IP packet filtering, we can disable access to the server's ports, or enable a selected number of ports in the NIC card. This option provides an extra level of security, in case our firewall is breached.
403
Configuring Windows Security
To configure Windows security, we can use various tools, such as User Manager, Server Manager, and Access Control List (ACL) Editor. The Security Configuration Tool Set is a GUI-driven IIS MMC snap-in designed to add value to the existing system tools such as User Manager, Server Manager, and the Access Control List Editor.
The tool set enables the security administrator to view the information and perform security risk management for their entire IT infrastructure. It also enables administrators to configure account policies, local policies, restricted groups, system services, file or folder sharing, the system registry, and system store.
The security configuration files are text files saved with . inf extension. The Security Configuration Manager enables us to import, export, and configure the security database. When we configuration the security database, the Group Policy objects will be applied automatically to the local computer security policy database.
To use the Security Configuration Tool Set:
Q Go to Start I Run, type MMC in the run command window, and click
OK. Q Go to Console I Add/Remove Snap-in..., and click Add.
Q Select Security Configuration and Analysis from the list and click Add. Then close the pop-up windows.
404


Once the configuration is done, right-click on Security Configuration and Analysis and select the Analyze Computer Now... option. This will analyze the current configuration information set up by the utility, and it will show all the configuration information inside the MMC.
ggg^^ |
. ., |
J 3 3 |
|
|
lift cpnse, |
. |
|
|
|
|
• a? y |
|
|
|
|
|
|
||||
|
|
|
Action |
View |
Favorite? |
<!= ** |
• S HE] |
2*' E^i |
C? |
|
|
|
|
|
|||
|
|
|
• |
|
|
|
|
|
|
|
|
|
|
|
|
|
|
|
Tree | Favorites J |
|
|
|
|
|
|
|
|
|
|
|
|
||||
|
|
|
Polcy |
/ |
|
|
|
1 Database Sett^ig |
|
||||||||
|
|
|
|
|
|
|
|
|
|
|
|
|
|
|
|||
|
_J Console Root |
|
|
iE^j Enforce password history |
|
|
24 passwords reme, , , |
^4 |
|
||||||||
|
|
|
|
|
|
|
|
|
|
r |
|
|
|
|
|
|
|
|
E |jjj Security Configuration and Analysis |
|
@Ma»mum password age |
|
42 days |
42 |
|
||||||||||
|
|
|
EF^f Account Policies |
|
days |
|
|
|
|
2 days |
|
|
|
||||
|
|
|
|
^Minimum password age |
|
|
|
|
|
||||||||
f |
|
|
Password Poky |
|
|
|
^Minimum password length |
|
|
8 characters |
8 |
||||||
|
|
Account Lockout Policy |
|
|
|
^Passwords must meet complexity r. , . |
Enabled |
|
Enabled |
||||||||
|
f |
|
El- -^ Local Policies |
|
|
|
^Store password using reversible e... |
|
Disabled |
|
|
Oi |
|
||||
|
|
|
Audit Policy |
|
|
|
|
F.TB ^"l"^J!l|'iJl'lfflL[''tlll'J lill'll H " , |
|
|
' |
|
|||||
|
|
|
|
Security Options |
|
|
|
/•H 1 |
Mawimum password age |
|
|
|
|
|
|
||
|
|
|
B-jgjjl Event Log |
|
|
|
|
i¥ |
|
|
|
|
|
|
|
|
|
|
|
|
|
|
|
|
|
|
|
|
|
|
|
|
|||
; |
( ... gfj Settings for Event Logs |
|
|
|
|
|
|
|
|
|
|
|
|||||
|
|
|
:-f9 Restricted Groups |
|
|
|
|
|
|
|
|
|
|
|
|
||
|
|
|
:••• OS System Services |
|
|
Carr^uter setting on 04^10/2002 00:03:18 |
|
|
|
|
|
||||||
|
|
|
B CJ Registry |
|
|
|
Passwords expire in |
|
|
|
|
|
|
|
|||
|
|
|
IB-W MACHINE |
|
|
|
|
|
|
|
|
|
|
|
|||
|
|
|
|
|
J42 dajis |
|
|
|
|
|
|
|
|
||||
;S 31 USERS
E £^ File System |
R Define inis policy in the database |
|
|
|
Passwords expire in. |
|
|
|
This setting affects the database only, it does no* change current |
|
|
|
computer settings. |
|
|
<i |
] |
Cancel |
>l |
| |
|
As you can see from the preceding figure, the predefined template provides a set of rules for security configuration, including password policy, account lockout policy, and so on. We can always override these settings if necessary.
The toolkit also provides a command-line utility secedit. exe that is as powerful as the GUI tool.
More in-depth coverage of this utility, and using pre-defined templates, may be found in the
Microsoft support article HOW TO: Apply Predefined Security Templates at:
http://support.microsoft.com/directory/article.asp?ID=kb;en-us;Q309689
For more information about Microsoft Security Configuration Tool Set see the MS Security Configuration Tool Set White Paper at: http://www.microsoft.com/TechNet/prodtechnol/windows2000serv/deploy/confeat/secur con. asp
Microsoft Network Security Hotfix Checker
Ensuring that IIS is kept secure involves making sure that the most up to date patches are applied. Most of the attacks that IIS succumbs to arise because administrators do not ensure that patches are kept up to date. We can check on the patch status of Windows using the Microsoft Network Security Hotfix Checker (HFNetChk.Exe).
The HFNetChk version 3.3 can be downloaded from
http://www. microsoft, com/downloads/release, asp ?re/easeid=31154.
406

oecuruy
The Network Security Hotfix Checker (HFNetChk. Exe) is a command-line utility that can be used to check the patch status for the Windows NT 4.0 and Windows 2000 operating systems, as well as hot security fixes for IIS 4.0, IIS 5.0, SQL Server 7.0/2000/MSDE, and Internet Explorer 5.01 or later. The Hfnetchk utility downloads an XML file that contains security patch information for each product.
For example if we want to check if the any files are missing when applying the patches, we can use the HFNetChk utility, with the following switches:
HFNetChk -v -z
Where -v indicates that we want details specified, and - z indicates that we do not want to perform registry checks.
After adding or removing any Windows component, we should run this utility to ensure that we're not missing any hotfix fixes.
Frequently asked questions and more information about the HFNetChk utility may be found at http://support. microsoft, com/directory/article.asp ?ID=kb;en-us;Q305385.
The HFNetChk utility is developed by the company called Shavlikfor Microsoft. If you want a GUI front end for this utility you can buy the professional version of the utility from Shavlik..
http://www. sha vlik. com/security/prod_ hf. asp.
The Windows XP and Windows.NET Server family operating systems automate the security patch process, by adding a new tab to the System ICON in the control panel.
For more information about the automatic updating read the "Windows Update Corporate Edition" whitepaper at http://www.microsoft.com/technet/ittasks/support/CorpWU.asp.
URL Authorization
URL authorization is a service provided by the URLAuthorizationModule to control access to resources such as aspx files. It is very useful if we want to allow or deny certain parts of our ASP.NET application to selected people, or roles. For example, we may want to restrict the administration part of our ASP.NET application to administrators, and deny access to all others. This can be achieved very easily with URL authorization. We can configure it to grant or deny access depending on the user, role, or HTTP verb (such as the HTTP GET request, or HTTP POST request).
URL authorization can be configured in the web. conf ig file with <allow> and <deny> tags. For example, we can allow the user SrinivasaSivakumar and deny the groups Sales and Marketing from using our application.
<con£iguration>
<location path="Default Web Site/Wrox"> <system.web>
<authorization>
<!--Allow the user SrinivasaSivakumar to access this resource -->
<allow users="SrinivasaSivakumar" />
407