

Professional ASP.NET Security - Jeff Ferguson
.pdf
[ Regis tryPermiss ion (SecurityAct ion. Assert, Read="HKEY_LOCAL_MACHINE \\SOFTWARE\\COMP ANYA")]
We also need to ensure that callers are not required to have Company X custom permission granted. For this reason, before calling into the Company X assembly, frameworkclasses . dll puts an Assert on the custom permission object.
Company A allows access to the framework class to external assemblies via a fa$ade assembly (facadeassembly.dll). To do so, the fagade assembly has to Assert the StrongName identity permission. In this way, assemblies calling into the facadeassembly.dll will be excluded by stack walks activated by security demands put by the frameworkclasses .dll assembly:
[StrongNameldentityPermissionAttribute (SecurityAction. Assert ,
PublicKey=" 0x002400000480000094000000060200000024000052534131000400000100010OC7CB7
3D8EF")]
A standard client (TestClient. exe), acting as an external caller, shows what happens when the framework class is called directly:
Request for the permission of type System.Security.Permtssta |
Permission, roscorlib, Version**!.0.3300.0, |
Culture-neutral, PubfcKeyToken-b77aScS61934e089 fated, |
|
Or via the facade assembly:
Call Framework class directly
Call Framework class via facade
Input
Result (479001600
346
Code Access Security
Installation Instructions
Installing this simple case study should be quite straightforward. Simply follow these steps:
Q Expand the Zip file.
Q Register the custom permission object in the GAC and add it to the policy assemblies list.
G Add a custom code group in the machine policy as a child of the root node. Assign
FullTrust to a Site membership condition (where the site must match the computer name) Alternatively, you can assign a URL or StrongName membership condition.
Q Set up an IIS virtual directory allowing access to the CalcEngine. dll. Modify the URL specified in the CreatelnstanceFrom call accordingly.
Q Now run TestClient. exe to test it.
Summary
We can now see that a thorough understanding of Code Access Security is absolutely necessary if we are to develop robust and secure internet applications.
Throughout this chapter, we've investigated all aspects of Code Access Security. We've seen how to administer and customize CAS, and how to extend it via custom evidences and permissions. Additionally, we've also looked in some depth at the inner workings of CAS processes.
Remember that it's absolutely important when placing CAS calls in our code to invest part of the development process in code reviewing, in order to verify all possible assemblies' usage patterns, to avoid introducing security breaches that bypass BCL built-in security demands. Take extreme caution, especially when granting unmanaged code execution permission or placing Assert calls.
At the time of writing, there is no Microsoft mainstream product that relies on code access security. However, it's highly likely that next versions of end-user applications (Internet Explorer and Outlook Express), or server products like SQL Server, will take advantage of CAS features to provide a level of security hitherto unknown.
34.7

Web Service Security
According to business executives, the number one issue preventing them from implementing web services is security. This could be the single determining factor that prevents web services from ever reaching their full potential.
Web services directly expose your business logic to the Internet and to the malicious attacks of hackers. Building and deploying a secure web service requires the same "defense in depth" approach recommended for web servers; however, it also requires an increased focus on the security of our server and code.
In this chapter, we are going to build a simple pay-per-view web service with which clients have a number of credits to use the service, and access is denied when these credits run out. In the process, we are going to take a closer look at many of the security technologies we've looked at in previous chapters, and see how they apply to web services. We'll also take a look at SOAP, and see how we can use it to securely authenticate consumer applications to our web service.
Web Service Authentication
Microsoft Windows 2000 and Internet Information Server provide several authentication methods that we can use to verify that a users are who they say they are. These include:
1 . Basic Authentication
2 . Basic Authentication over SSL
3 . Digest Authentication
4 . Integrated Windows Authentication
5 . Client Certificate Authentication
The .Net Framework provides the following additional methods of authenticating users:
1 . Forms Authentication
2 . Forms Authentication over SSL
3 . Passport Authentication
4 . Custom Authentication
Since we have already discussed the concept and application of authentication in earlier chapters, we won't rehash it. Instead, we are going to proceed with building our pay-per-view web service we mentioned in the early part of this chapter.
Implementing Authentication in a Web Service
Initially, we will use forms authentication for our Web Service. Later, we'll convert to custom authentication, using SOAP to pass our users' credentials. I have chosen to use forms authentication for one reason. I can't tell you how many articles have been posted to popular web sites saying that you can't use forms authentication within a web service. Well folks, that is simply not true!
Some people might say that the authentication we're going to implement here isn't really forms authentication, but is a type of custom authentication. The issue is that in a typical scenario, forms authentication requires that an HTML form is displayed to a user in a browser, and the user needs to complete and submit the form, thereby passing their credentials to the application. Obviously, the user of our web service is the consumer application, and we would not be presenting an HTML form.
Web Service Setup
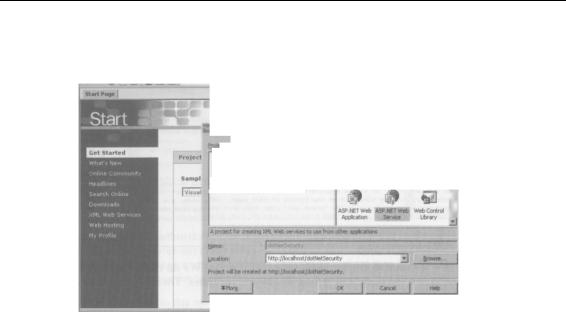
Let's get started by creating a new ASP.NET Web Service in C#. Open Visual Studio.Net, and select File I New from the toolbar. In the New Projects dialog box, select Visual C# Projects in the Project Types window, then select ASP.Net Web Service in the Templates window, give the project the name dotNetSecurity on the Location bar, and click OK. Visual Studio .Net creates the project and Web Service.
350

Ffe |
I* |
View |
Project |
BUd |
B«bu(l S* |
Table |
Tods iStido™ |
Ijdp |
|
|
|
jp • s. a? B 0 |
*3»®, « - ! • • • • <P-q, |
> D»US |
• |
|
|
|
|
||||
> B B « - » ' Q ^ . l « " < E * |
* * * * * 4 A . |
|
|
|
|
|
|||||
|
|
|
|
|
|
|
|
|
|
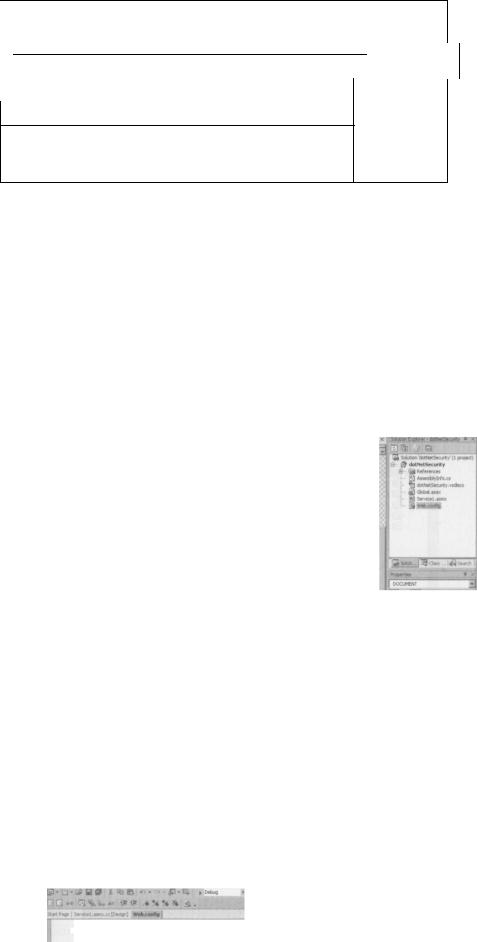
Solution Explorer - dttMetSecur^ ^ |
|
|
|
|
|
|
|
|
|
|
|
> |
|
|
|
<!— |
AUTHENTICATION |
|
|
|
|
^/J, |
. |
||
|
|
|
This section sets the |
|
|
|
|
|
.C.OKCI; |
||
|
|
|
"Passport" anci "Hone" |
|
|
|
|
* dotNetSecurity |
|||
|
|
|
|
|
|
|
|
|
|
|
| References |
|
|
|
|
|
|
|
|
|
|
|
5 AM6irUrIrfQ.es |
|
|
|
|
|
|
|
|
|
|
|
1 dotNetSecurity.vsdisco |
|
|
<'--- |
APPLICATION-LEVEL TRACE |
|
|
|
|
|
jGlobal.asax |
||
|
|
LOGGING |
|
|
|
|
|
|
|
p Servicel.asmx |
|
|
|
Set trace enabled="true" to enable |
application trace |
logging. |
If pageOutput="true" |
|
|||||
|
|
application trace |
log by browsing the |
"trace.axd" |
page |
from your |
web |
|
|||
|
|
application root. |
|
|
|
|
|
|
|
||
^Solutl... j 2? Class
We then specify how we want to configure forms authentication. We do this by adding a forms node within the authentication node and setting its various attributes. These attributes include loginurl, name, timeout, path, and protection.
The loginurl attribute of the forms node is normally used to redirect unauthenticated users to an HTML form. This occurs when a request is made that contains no authentication ticket. However, since our users are consumer applications and will be expecting a SOAP response, we will set it to the location of our web service, to prevent a redirection from occuring.
The name, protection, path, and timeout attributes of the forms element have been discussed in detail in earlier chapters, and their functionality doesn't change with regard to web services, so we won't go over them again here.
A pay-per-view Web Service like ours will require high availability, and will therefore run on multiple servers in a web farm. To use forms authentication in a web farm, we must modify the decryptionkey attribute in the <machinekey> element so that it is the same across all servers. This enables us to set the key used to decrypt authentication tickets. By default, it is set to autogenerate and is machine specific. Machine A will be unable to decrypt cookies generated by machine B if this key is different on each machine. To ensure each machine in the farm can read cookies generated by any of the other machines, we need to make certain that the decryptionkey attribute is the same on all machines. I generated the key used in the following example by randomly typing on my keyboard, which is fine for an application in development, although, for a production application, we should use one of the many key generators available on the Internet. A quick search for "key generator" on google.com yields several.
Add the following code to the web.config file, as shown in the diagram:
<authentication mode="Forms "> <forms loginurl="ppv.asmx"
name="ppv"
protection="all"
path="/"
timeout="5" /> </authentication> •cmachineKey decryptionKey = "lm23iqweojwolwiosdcoSZsaqwekwewekjvk" />
352
Web Service Security
Open ppv.asmx by double-clicking on it, and switch to code view. This will open the code-behind file ppv. asmx. cs where we will add our web methods.
Before we add our web methods, delete the HelloWorld() default example from ppv.asmx.cs.
Now go to the top of ppv. asmx. c s and add the Sys tern. Web. Secur i ty and
System. Data. SqlClient namespaces to get access to the FormsAuthentication and SqlConnection class.
using System.Web.Security; using System.Data.SqlClient;
Now we are ready to move on and begin looking at our web methods. The first we need will provide the authentication for our web service. We'll call it Signln.
This example is going to use the dotNETSecurity database and the USERS table that we created earlier to store the user's username and password.
The Signln WebMethod takes two string parameters, sMemberName and sMember Pas sword, and performs a check against our database to see if they are valid. The first section of our WebMethod sets up our database connection string, opens the connection, and uses the SQLCommand object to execute the SQL query. If the WebMethod doesn't return a result set, we return false, otherwise we read in the first row of the result set that was returned, and compare the values with those passed in by the consumer.
If the values returned in the result set match those passed in by the consumer, we use the SetAuthCookie method of the FormsAuthentication class to create an authentication ticket for our user. The SetAuthCookie method takes two parameters, the first one is a string and is the username of the authenticated user. The second parameter is a Boolean value, and determines if a persistent cookie is set. A persistent cookie is not removed when the user ends their session, and it enables them to be automatically authenticated the next time they visit our web service.
Note that you may need to change the connection string for this code to run on your machine.
// Signln WebMethod - takes our users credentials and authenticates them and // then sets the cookie if the credentials are valid.
[WebMethod(Description"Verifies the users credentials.")] public bool Signln(string sMemberName, string sMemberPassword) {
//Create our new SQLConnection object SqlConnection conn = new
SqlConnection("server=localhost;uid=sa;pwd=password;database=dotNetSecurity;"); //Open our SQL Connection
conn.Open();
//Setup the SQL string string sSQL =
"SELECT MemberName, MemberPassword FROM Users Where MemberName = '" + sMemberName + "'";
//Create the SQLCommand object
SqlCommand Cmd = new SqlCommandlsSQL, conn); //Create the DataReader
SqlDataReader Rdr = Cmd.ExecuteReader(CommandBehavior.CloseConnection);