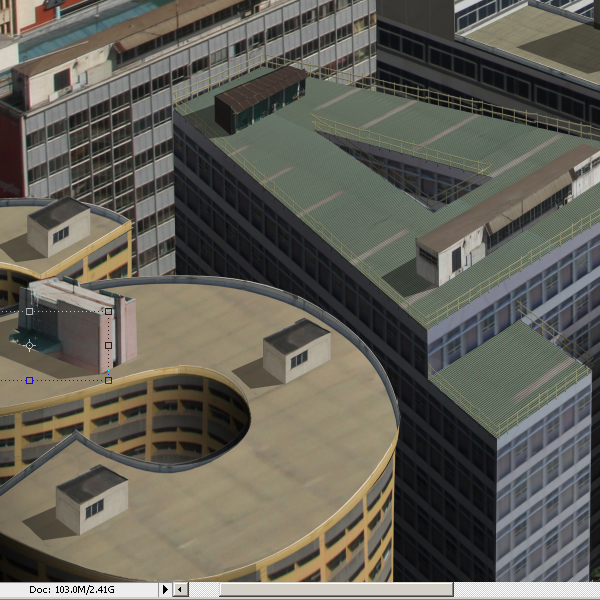
Step 54 – More Awesome Roof Structures
Copy the R-roofthing layer and move the copy to A. Make it higher, squeeze it a bit so that the perspective is a bit better. Also do the same thing to the shade. Make the color a bit different (hue/saturation), play with the lightness so that it is convincing that it could be there. Open building A2 again. You find some funny looking things on the roof there. Perfect to put on the A building. Cut them out, paste them on the A building, change the perspective a bit. Now the small rooftop buildings are more or less finished. However if you want more, please continue, the more the better.
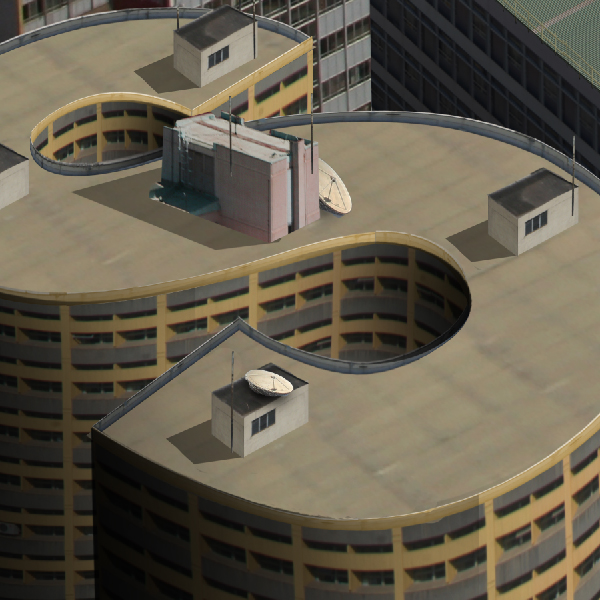
Step 55 – Dishes and Antennas
What are we still missing? Satellite dishes! They make or break the image, for real! Open Satelite dishes.jpg. The dish you see is not a very modern one (build in the seventies) but it will do. Cut it out, paste it in Nairobifull.jpg. Copy it at least 10 times. You can change the shape and seize every time. In some cases make it darker. Make a new layer under it, call it shade. Use a brush with 15% opacity and hardness 0%. Another thing that is typical is the amount of antennas. Grab building A2.jpg again and get a nice rusty pole. Copy and resize it about 30 times and put it in an equal amount of places. Almost done.
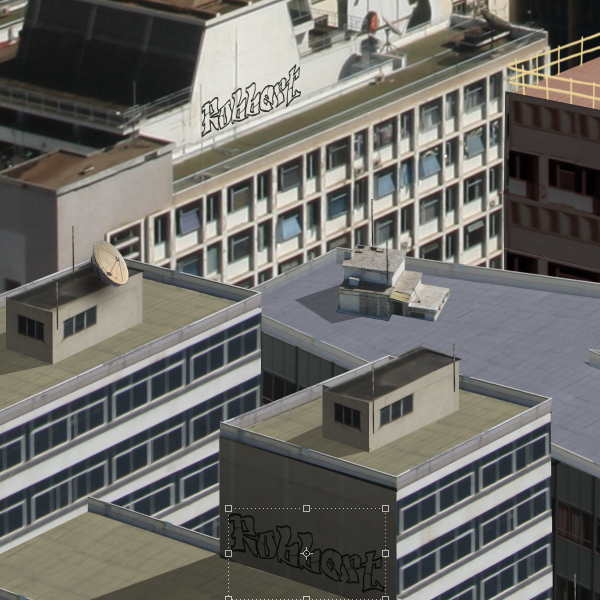
Step 56 – Signing Off
What is a city without graffiti? I think those do not exist. Many of the guys put their names at as many places as possible, and this is your town, so you can put your name everywhere. Go to Dafont.com and search for a nice graffiti font (don’t forget to give credit if the author asks for it). Put it where you want and maybe you need to distort it a bit (Command/Ctrl + move tool). You can use outerglow black to make lines thicker if needed. If you want to squeeze it, you need to rasterize it first. Put the opacity of each text to 60% in the shade and 75% in the sun. Congrats; your image is ready.
Conclusion
The photos I used were made with my first (and current) SLR camera, a Canon 350d with about 5 megapixels. Not a great camera, the lens I used was a Tamron 38-300. Some pictures with details are not too great because of keeping the lens steady/large exposure time. It was a sunny day in Nairobi so I still got a reasonable amount of light in the lens. Despite the fact that the photos were not excellent, the result can be quite ok.
Is my final image perfect? I don’t think so. Not all the shades are perfect, I may have put some fences together wrongly; forgot some shades etc. However the objective is to make something that looks realistic. I wanted to fool my friends. I don’t want to (I actually mean I can not) fool an experienced photo shopper. The result was somewhat in between, as you may see from the reactions on the photo on my flickr page.
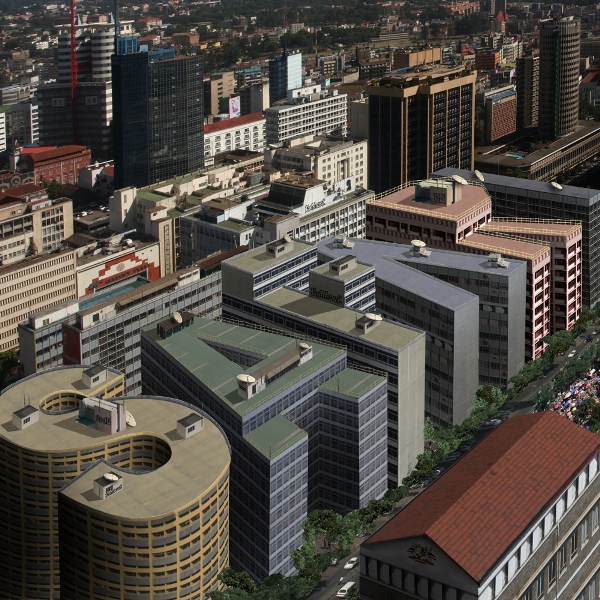
Realism is best realized by paying a lot of attention to the first buildings, S and A. F is also important but not so much. The front building should also look ok. Realism is details. Satellite dishes, laundry lines, dirt, graffiti, you name it. Pay attention to this and it really pays off. I also created a story with the image which you can find on my flickr page. That can also help. It is funny how a logo can make people believe they know the building but the real building looks completely different. People usually do not look up while walking in a familiar place. Do you know how your favorite fashion store looks above the first floor? What if you saw a photo and someone photoshopped something different on top? Would you notice?
You can really create your own reality with this work. What should you write in a city? Your own name? EAT ME in the Big Apple? PETER in St Petersburg? While I was making the tutorial, I thought: why did Khadaffi and Saddam Hussein not create their names of building in their cities. These buildings are definitely harder to pull down than their statues.
If you decide to follow the tutorial, it would be nice if you could post a link to your final result, especially if you use your own photos. A really final thought: I always see a tutorial as a recipe in a cooking book: use it for inspiration and some tips, but do not forget to put a personal touch in it. Have fun!