


Chapter 8 n Production Sound |
197 |
Recording Your Sound
With all your preparations complete (not just of sound, but of lighting, blocking, camera movement, cast preparation, costuming, set dressing, and so on), you’re finally ready to start shooting. First, you’ll need to get everything quiet on your set or location. When recording, “quiet” doesn’t mean “no sound,” but rather means to reduce the sound of your set to the natural ambience that belongs there. For example, if you’re on a busy street, “quiet” will mean the sounds of car and foot traffic.
If you are recording your dialogue separate from the background—for example, a conversation being held in a crowded room full of people—the “quiet” might mean completely quiet. As explained earlier, after recording your dialogue takes with the crowd pantomiming silent conversation, you’ll do a final take to record the sound of the crowd talking. These two elements will be mixed together later.
Once you’ve achieved quiet, you’re ready to begin.
nTell your tape operator to start rolling. If you’re recording sound onto your camera, then the camera is all that will roll, but if you’re recording non-sync sound on a separate recording deck, then that deck will have to be started also. For non-sync sound, you’ll next need to use a slate.
nTell your performers and crew to get ready. At this point, if you have a boom person, she will need to position the mic and double-check with the director of photography to ensure that the mic isn’t in the frame.
nAfter the call to action, your boom operator will begin following the sound. At the same time, your sound person will monitor your audio levels (if you have such hardware) and adjust them to ensure proper recording.
nFinally, with your take completed, all your decks will need to be stopped. Next, you do it all again, and again, and again.
If there is a pause between takes, your sound person should take the opportunity to ensure that the sound was properly recorded. He should play back a little bit of both the beginning and end, and listen to the sound on headphones. This will help to ensure that good sound was recorded throughout the take. If sound was not recorded, it is the sound person’s job to fix the problem and break the bad news that another take will be required.
Documentary filmmakers frequently don’t have the downtime between multiple takes that narrative filmmakers have. Consequently, whenever he can get a break, the sound engineer should listen to ensure that the recorded audio sounds good. If there’s no break during the day, then he should double-check different sections of the entire tape to make sure it’s all usable. If not, then another day at the location might be required.
198 The Digital Filmmaking Handbook, 4E
Room Tone
At some point during your shoot, your sound recordist will need to record 30 seconds to a minute of room tone. Room tone is nothing more than the sound of the room when no one is talking or making sound. This “empty” sound will be used by the sound editor to patch gaps in the soundtrack and to cover rough sound edits.
Because you are trying to record the natural ambient sound of your location, be sure to record your room tone after your set has been fully dressed. Recording it before might produce a different quality tone, as there will be fewer sound-absorbing set pieces and props. The end of your shooting day is usually the best time to record room tone. Simply ask everyone on the set to be quiet and start your recorder.
Run-and-Gun Audio
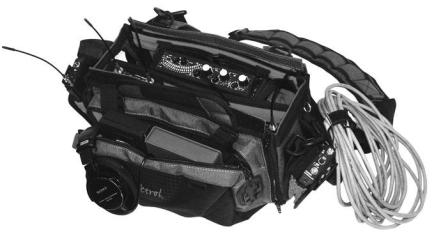
If you’re shooting corporate videos, documentaries, “reality” productions, or any type of project where you need to shoot quickly on-the-fly, then you won’t have the time or opportunity for complex audio setups, and you’ll need to have your gear organized and ready to move at all times (see Figure 8.18). At best, you might be able to get people outfitted with wireless lavs or be able to give them a handheld microphone. Ideally, you’ll want to have a boom mic and operator, but if you’re a single-person crew, or don’t have the budget for a boom, then you should at least invest in a quality, very directional shotgun mic and mount it on your camera.
As we said earlier, one problem with shotgun mics is that they can also pick up sounds coming from behind your subject. A directional mic will minimize these problems, and you can further improve your chances of getting good audio by moving in close to your subject. (Obviously, you don’t want to get so close that you must use a wide-angle focal length that will make their face look weird.)
Figure 8.18
A typical carrying case for run-and-gun sound recording.