


362 The Digital Filmmaking Handbook, 4E
nBe careful of flesh tones. In the previous example, the blue cast in the image appears mainly in the bright whites of the walls and couch. It’s easy to focus on these areas when applying correction. However, it’s important to ensure that, while correcting the background of the image, you don’t corrupt any skin tones in the foreground. The human eye is very discerning about skin tones and can easily recognize incorrect, or “bad,” color.
Correcting Part of an Image
Through the use of masks, stencils, alpha channels, or layers, you can selectively apply color corrections to part of an image, rather than to the entire image. You can even apply different color corrections— one to the foreground, another to the background. We’ll discuss this more in Chapter 17, “Titles and Effects.”
Using Tracks and Layers to Adjust Color
If you‘re using Adobe After Effects or another effects program that provides control over transfer modes, then you can perform color adjustments by layering different video tracks on top of each other. Although not so useful for fixing color problems, stacking tracks (or layers in a compositing program) is an easy way to increase contrast, pump up color, and create unique color effects.
Usually, when two video tracks occupy the same space in the timeline, the track that is higher in the stacking order is the only one that’s visible—lower tracks are simply covered up. However, if your editing application provides control over the transfer mode of a layer, then you can set upper tracks to mix and blend with lower tracks. (If you’ve ever changed the transfer mode of a layer in Photoshop, then you’ve seen such effects in action.)
If you change the transfer mode of a layer, the pixels in that layer will be mathematically combined with pixels in the lower layer (that layer, in turn, can be combined with the layer below it, and so on). The pixels that result from the combination can often be very different from either of the original pixels (see Color Plate 32).
You Say “Track,” I Say “Layer”
When we speak of putting a video clip on a layer, this is synonymous with putting a video clip on a track. No matter what terminology your editing or effects package uses, the concept is the same.
Black-and-White Effects
Monochrome, or “black-and-white,” video is one of the easiest and most common color effects out there. It can add a sense of historical significance, make disparate elements match, and it can often look very elegant or cool. Old film and video was truly black-and-white, but when colorists change full color video to monochrome, they usually leave some element of color intact (see Color Plate 33).

Chapter 16 n Color Correction |
363 |
The easiest way to make your footage monochrome is to use a simple Tint effect. You can choose to go with a true black-and-white image, or you can map black to a different color, such as dark blue or brown for a subtly tinted image. You can also select how much you want to tint the original image. Using 100% means a fully monochrome image; less than that, and you can get subtle color effects, such as in the tail lights of the passing car in Color Plate 33.
Correcting Color for Film
If your project will eventually be transferred to film, color correction in the computer will be a bit of a problem. If you’ve ever tried to print images on a color printer, you’ve probably discovered that what’s on your screen doesn’t always correspond to what comes out of your printer. The same is true for transferring images to film. The reasons for the disparity are many, and they range from differences in color gamut between video and film to differences in transfer processes to differences in how the film is exposed during the transfer.
Professional editing and effects houses try to deal with this problem through expensive, complicated procedures for calibrating monitors and other digital equipment. In the end, such systems still give little assurance of what the final color will look like. If your final destination is film and you want to do a lot of color correction and color effects, it’s a good idea to talk to your film transfer facility. Tell them you’re concerned about color control and ask their advice on how to proceed. You can also give single frames to your film lab and have them shot and tested.
Making Your Video Look Like Film
No matter how great your digital video looks, many filmmakers still covet the look of 35mm film. With its softer contrast and focus, different color gamut, grain, and slower frame rate, images shot on film look very different from video.
Before you get dead set on a “film look,” though, spend some time and look at what you already have. Film might be pretty, but high-resolution HD or digital cinema video is nothing to sneeze at either. Rather than trying to force it to be something it’s not, consider what digital video can do that film can’t, and try playing to those strengths.
If you’re dead set on a film look, there are a number of things you can do in postproduction.
Before you go filtering all of your video, be aware that there are different concerns for different types of output. If your final output will be film, then you don’t need to worry about most of what is covered here. The transfer to actual film stock will be all you need to make your video look like film. Don’t add extra grain, gamut enhancement, temporal changes, or special filters. (We cover film transfers in detail in Chapter 18, “Finishing.”)
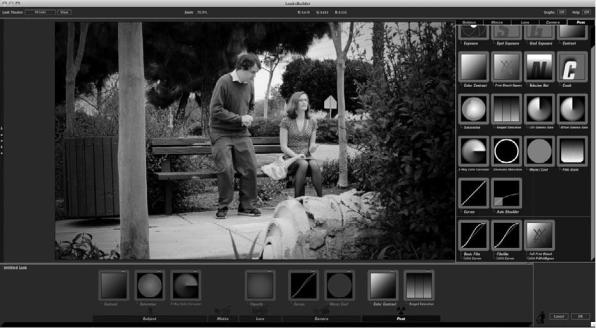
You can create a “film look” effect on your own using the color effects and filters we’ve discussed in this chapter, but there are a number of good plug-ins that can create a film look for you, such as Red Giant’s Magic Bullet Looks (see Figure 16.16 and Color Plate 34). If you’re serious about matching particular film stocks, creating a complicated effect such as old film, or having a high degree of control, the extra expense of these filters might be worth it. In Color Plate 35, we used a Magic Bullet Looks preset to add a gradient sunset effect on the same shot we color corrected in Color Plates 25–27.
364 The Digital Filmmaking Handbook, 4E
Figure 16.16
Here we used Magic Bullet Looks to add vignetting for a more film-like look. (See also Color Plates 34–35.)
“Film look” effects are really for people who are mastering for digital distribution. Your goal is to make your footage look as it if were shot on film and transferred to a digital format. When creating a film look, there are several characteristics that you’ll need to modify:
nFilm Grain: A piece of motion picture film consists of a layer of photo-sensitive silver halide particles suspended in an emulsion that is bonded to a strip of celluloid. The texture of these particles results in what is known as film grain. The more light sensitive the film stock, the bigger the silver halide particles, and the more visible the grain. Instead of grain, video has electronic noise that looks very different—it’s bigger, moves around more, is more colorful, and is generally considered to be more distracting.
nFilm Color: Film typically has a very different color quality than video does. What’s more, different types of film yield very different types of color. We’ve all seen the bright, Technicolor pastels of 1950s cinema, and we’ve also seen the hip, overexposed colors of modern music videos that use a bleach by-pass process.
nFilm diffusion: Film typically has a lower contrast ratio than video, and most film-look plug-ins offer several different ways to add diffusion so that you get a more film-like contrast ratio.
nFrame rates: If you didn’t shoot 24fps footage, you can use an effect in your editing software to change the frame rate. Also, if you didn’t shoot progressive scan, you can use a filter to de-interlace your video footage.

Chapter 16 n Color Correction |
365 |
nBlurring: Film also has a very characteristic motion blur that results in images that are a little softer and blurrier than the sharp contrast of video. Hopefully, when shooting, you kept your shutter speed to something reasonable like 1/60th of a second, so you’ve already got some motion blur in your image. Film-look plug-ins offer tools to add motion blur for a more film-like look.
One More Thing
Finally, we recommend color-correcting your footage before you composite any other elements on top of it. Your composited layers might have color issues of their own, so it’s better to separate the color troubles that your layers might have. Once you’ve corrected each layer, you can composite them together and then apply touch-up corrections to smooth the “seams” of your composites. If you’re not sure what we mean about composites, don’t worry, because a thorough discussion of compositing is coming up next.
Developing an eye for color correction takes practice. In particular, dig in to your software’s manual and try to learn about the different color-correction tools at your disposal. No matter what the nature of the tool, or the specifics of its controls, you’ll still need to be careful not to overcorrect and to stay on the lookout for troublesome artifacts. There is always something new to learn about color, and the more you practice, the better you will become.
By now you should be comfortable with the basics of color correction using your chosen editing application. If you’re still not comfortable using levels, curves, color balance, or the other color-correction tools provided in your editing program, then you’ll need to get some more practice. The best way to practice is to simply shoot some bad footage (just choose an incorrect white-balance setting) and start correcting. Color correction is a staple effect that’s well worth learning.