
- •CONTENTS
- •INTRODUCTION
- •1 Getting Started
- •Better, Cheaper, Easier
- •Who This Book Is For
- •What Kind of Digital Film Should You Make?
- •2 Writing and Scheduling
- •Screenwriting
- •Finding a Story
- •Structure
- •Writing Visually
- •Formatting Your Script
- •Writing for Television
- •Writing for “Unscripted”
- •Writing for Corporate Projects
- •Scheduling
- •Breaking Down a Script
- •Choosing a Shooting Order
- •How Much Can You Shoot in a Day?
- •Production Boards
- •Scheduling for Unscripted Projects
- •3 Digital Video Primer
- •What Is HD?
- •Components of Digital Video
- •Tracks
- •Frames
- •Scan Lines
- •Pixels
- •Audio Tracks
- •Audio Sampling
- •Working with Analog or SD Video
- •Digital Image Quality
- •Color Sampling
- •Bit Depth
- •Compression Ratios
- •Data Rate
- •Understanding Digital Media Files
- •Digital Video Container Files
- •Codecs
- •Audio Container Files and Codecs
- •Transcoding
- •Acquisition Formats
- •Unscientific Answers to Highly Technical Questions
- •4 Choosing a Camera
- •Evaluating a Camera
- •Image Quality
- •Sensors
- •Compression
- •Sharpening
- •White Balance
- •Image Tweaking
- •Lenses
- •Lens Quality
- •Lens Features
- •Interchangeable Lenses
- •Never Mind the Reasons, How Does It Look?
- •Camera Features
- •Camera Body Types
- •Manual Controls
- •Focus
- •Shutter Speed
- •Aperture Control
- •Image Stabilization
- •Viewfinder
- •Interface
- •Audio
- •Media Type
- •Wireless
- •Batteries and AC Adaptors
- •DSLRs
- •Use Your Director of Photography
- •Accessorizing
- •Tripods
- •Field Monitors
- •Remote Controls
- •Microphones
- •Filters
- •All That Other Stuff
- •What You Should Choose
- •5 Planning Your Shoot
- •Storyboarding
- •Shots and Coverage
- •Camera Angles
- •Computer-Generated Storyboards
- •Less Is More
- •Camera Diagrams and Shot Lists
- •Location Scouting
- •Production Design
- •Art Directing Basics
- •Building a Set
- •Set Dressing and Props
- •DIY Art Direction
- •Visual Planning for Documentaries
- •Effects Planning
- •Creating Rough Effects Shots
- •6 Lighting
- •Film-Style Lighting
- •The Art of Lighting
- •Three-Point Lighting
- •Types of Light
- •Color Temperature
- •Types of Lights
- •Wattage
- •Controlling the Quality of Light
- •Lighting Gels
- •Diffusion
- •Lighting Your Actors
- •Interior Lighting
- •Power Supply
- •Mixing Daylight and Interior Light
- •Using Household Lights
- •Exterior Lighting
- •Enhancing Existing Daylight
- •Video Lighting
- •Low-Light Shooting
- •Special Lighting Situations
- •Lighting for Video-to-Film Transfers
- •Lighting for Blue and Green Screen
- •7 Using the Camera
- •Setting Focus
- •Using the Zoom Lens
- •Controlling the Zoom
- •Exposure
- •Aperture
- •Shutter Speed
- •Gain
- •Which One to Adjust?
- •Exposure and Depth of Field
- •White Balancing
- •Composition
- •Headroom
- •Lead Your Subject
- •Following Versus Anticipating
- •Don’t Be Afraid to Get Too Close
- •Listen
- •Eyelines
- •Clearing Frame
- •Beware of the Stage Line
- •TV Framing
- •Breaking the Rules
- •Camera Movement
- •Panning and Tilting
- •Zooms and Dolly Shots
- •Tracking Shots
- •Handholding
- •Deciding When to Move
- •Shooting Checklist
- •8 Production Sound
- •What You Want to Record
- •Microphones
- •What a Mic Hears
- •How a Mic Hears
- •Types of Mics
- •Mixing
- •Connecting It All Up
- •Wireless Mics
- •Setting Up
- •Placing Your Mics
- •Getting the Right Sound for the Picture
- •Testing Sound
- •Reference Tone
- •Managing Your Set
- •Recording Your Sound
- •Room Tone
- •Run-and-Gun Audio
- •Gear Checklist
- •9 Shooting and Directing
- •The Shooting Script
- •Updating the Shooting Script
- •Directing
- •Rehearsals
- •Managing the Set
- •Putting Plans into Action
- •Double-Check Your Camera Settings
- •The Protocol of Shooting
- •Respect for Acting
- •Organization on the Set
- •Script Supervising for Scripted Projects
- •Documentary Field Notes
- •What’s Different with a DSLR?
- •DSLR Camera Settings for HD Video
- •Working with Interchangeable Lenses
- •What Lenses Do I Need?
- •How to Get a Shallow Depth of Field
- •Measuring and Pulling Focus
- •Measuring Focus
- •Pulling Focus
- •Advanced Camera Rigging and Supports
- •Viewing Video on the Set
- •Double-System Audio Recording
- •How to Record Double-System Audio
- •Multi-Cam Shooting
- •Multi-Cam Basics
- •Challenges of Multi-Cam Shoots
- •Going Tapeless
- •On-set Media Workstations
- •Media Cards and Workflow
- •Organizing Media on the Set
- •Audio Media Workflow
- •Shooting Blue-Screen Effects
- •11 Editing Gear
- •Setting Up a Workstation
- •Storage
- •Monitors
- •Videotape Interface
- •Custom Keyboards and Controllers
- •Backing Up
- •Networked Systems
- •Storage Area Networks (SANs) and Network-Attached Storage (NAS)
- •Cloud Storage
- •Render Farms
- •Audio Equipment
- •Digital Video Cables and Connectors
- •FireWire
- •HDMI
- •Fibre Channel
- •Thunderbolt
- •Audio Interfaces
- •Know What You Need
- •12 Editing Software
- •The Interface
- •Editing Tools
- •Drag-and-Drop Editing
- •Three-Point Editing
- •JKL Editing
- •Insert and Overwrite Editing
- •Trimming
- •Ripple and Roll, Slip and Slide
- •Multi-Camera Editing
- •Advanced Features
- •Organizational Tools
- •Importing Media
- •Effects and Titles
- •Types of Effects
- •Titles
- •Audio Tools
- •Equalization
- •Audio Effects and Filters
- •Audio Plug-In Formats
- •Mixing
- •OMF Export
- •Finishing Tools
- •Our Software Recommendations
- •Know What You Need
- •13 Preparing to Edit
- •Organizing Your Media
- •Create a Naming System
- •Setting Up Your Project
- •Importing and Transcoding
- •Capturing Tape-based Media
- •Logging
- •Capturing
- •Importing Audio
- •Importing Still Images
- •Moving Media
- •Sorting Media After Ingest
- •How to Sort by Content
- •Synchronizing Double-System Sound and Picture
- •Preparing Multi-Camera Media
- •Troubleshooting
- •14 Editing
- •Editing Basics
- •Applied Three-Act Structure
- •Building a Rough Cut
- •Watch Everything
- •Radio Cuts
- •Master Shot—Style Coverage
- •Editing Techniques
- •Cutaways and Reaction Shots
- •Matching Action
- •Matching Screen Position
- •Overlapping Edits
- •Matching Emotion and Tone
- •Pauses and Pull-Ups
- •Hard Sound Effects and Music
- •Transitions Between Scenes
- •Hard Cuts
- •Dissolves, Fades, and Wipes
- •Establishing Shots
- •Clearing Frame and Natural “Wipes”
- •Solving Technical Problems
- •Missing Elements
- •Temporary Elements
- •Multi-Cam Editing
- •Fine Cutting
- •Editing for Style
- •Duration
- •The Big Picture
- •15 Sound Editing
- •Sounding Off
- •Setting Up
- •Temp Mixes
- •Audio Levels Metering
- •Clipping and Distortion
- •Using Your Editing App for Sound
- •Dedicated Sound Editing Apps
- •Moving Your Audio
- •Editing Sound
- •Unintelligible Dialogue
- •Changes in Tone
- •Is There Extraneous Noise in the Shot?
- •Are There Bad Video Edits That Can Be Reinforced with Audio?
- •Is There Bad Audio?
- •Are There Vocal Problems You Need to Correct?
- •Dialogue Editing
- •Non-Dialogue Voice Recordings
- •EQ Is Your Friend
- •Sound Effects
- •Sound Effect Sources
- •Music
- •Editing Music
- •License to Play
- •Finding a Composer
- •Do It Yourself
- •16 Color Correction
- •Color Correction
- •Advanced Color Controls
- •Seeing Color
- •A Less Scientific Approach
- •Too Much of a Good Thing
- •Brightening Dark Video
- •Compensating for Overexposure
- •Correcting Bad White Balance
- •Using Tracks and Layers to Adjust Color
- •Black-and-White Effects
- •Correcting Color for Film
- •Making Your Video Look Like Film
- •One More Thing
- •17 Titles and Effects
- •Titles
- •Choosing Your Typeface and Size
- •Ordering Your Titles
- •Coloring Your Titles
- •Placing Your Titles
- •Safe Titles
- •Motion Effects
- •Keyframes and Interpolating
- •Integrating Still Images and Video
- •Special Effects Workflow
- •Compositing 101
- •Keys
- •Keying Tips
- •Mattes
- •Mixing SD and HD Footage
- •Using Effects to Fix Problems
- •Eliminating Camera Shake
- •Getting Rid of Things
- •Moving On
- •18 Finishing
- •What Do You Need?
- •Start Early
- •What Is Mastering?
- •What to Do Now
- •Preparing for Film Festivals
- •DIY File-Based Masters
- •Preparing Your Sequence
- •Color Grading
- •Create a Mix
- •Make a Textless Master
- •Export Your Masters
- •Watch Your Export
- •Web Video and Video-on-Demand
- •Streaming or Download?
- •Compressing for the Web
- •Choosing a Data Rate
- •Choosing a Keyframe Interval
- •DVD and Blu-Ray Discs
- •DVD and Blu-Ray Compression
- •DVD and Blu-Ray Disc Authoring
- •High-End Finishing
- •Reel Changes
- •Preparing for a Professional Audio Mix
- •Preparing for Professional Color Grading
- •Putting Audio and Video Back Together
- •Digital Videotape Masters
- •35mm Film Prints
- •The Film Printing Process
- •Printing from a Negative
- •Direct-to-Print
- •Optical Soundtracks
- •Digital Cinema Masters
- •Archiving Your Project
- •GLOSSARY
- •INDEX

1
Getting Started
Photo credit: Jason Hampton

This year marks the 10-year anniversary of the first edition of The Digital Filmmaking Handbook. Looking back, it’s rather shocking to see that 10 years ago the way films were made was very different. It’s an exciting time to be updating this book because
filmmaking technology has improved so dramatically. Video image quality has become so good that 35mm motion picture film, at least for indie filmmakers, has gone the way of 35mm still photography film: no one is shooting on it anymore. Digital is easier, cheaper, and although some will argue that it lacks a quality that film has, no one can say that it doesn’t look good in its own way.
Large crisp images with tons of detail, amazing low-light capabilities, a greatly simplified postproduction workflow, and prices that keep dropping make digital video the most popular choice for everyone from indie filmmakers to hobbyists. And, in addition to overall improvements in quality, working with digital video is much easier than it was 10 years ago.
Better, Cheaper, Easier
Why are things so much better for filmmakers today than they were in 2000? First, image quality is better. Ten years ago, DV was the norm for lower budget filmmakers. Nowadays, it’s HD. A quick comparison of a DV image and an HD image says it all (see Figure 1.1)
Figure 1.1
Video image quality 10 years ago (left) and today (right).

4The Digital Filmmaking Handbook, 4E
But it’s not just image quality that’s improved, computers are better, too. Faster data processing and digital connectivity mean that you don’t have to build and outfit a computer with specialized hardware upgrades to ensure that it can handle digital video editing. Yes, you’ll still need to make sure you have a computer with certain baseline characteristics, but you’ll most likely be able to use it straight out of the box, and it will probably cost less than a videocapable rig of 10 years ago (see Figure 1.2).
Storage drives are bigger and cheaper. Everyone’s got lots of media these days, so even nonfilmmakers commonly use storage drives that hold one terabyte (Tb) or more. That means HD-capable drives are easy to find at local retailers or online.
Monitors are better, cheaper, and more compatible across the board. Oh, yeah, and they’re wider. In the old days, you had to have a separate special video monitor in addition to your computer monitor, and those old-school monitors were square. Nowadays, you can use flat panel HD monitors for everything, and they are widescreen, just like your HD video (see Figure 1.3).
But the biggest improvement of the last few years is in the price and quality level of HD video cameras. You can get a DSLR camera that shoots full-quality HD video like the Canon T2i (see Figure 1.4) for about $700 (not including lenses and accessories), or you can get a very good HD camera that is considered comparable to 35mm film cameras, like the fullycustomizable RED One (shown in Figure 1.5). The $20,000 price tag of the RED One might sound expensive, and it is, but the RED One is designed to go head-to-head with high-end digital cinema cameras, which start at around $65,000.
Figure 1.2
Top-of-the-line computers, like this Apple MacBook Pro, can serve as a digital video editing workstation straight out of the box.

Chapter 1 n Getting Started |
5 |
Figure 1.3
Add about $500 in accessories (2Tb RAID storage, Bluetooth keyboard and mouse, 24" HD monitor), and a laptop becomes a very comfortable video editing workstation.
Figure 1.4
The Canon Rebel T2i DSLR camera can shoot full-quality HD video at a fraction of the cost of standard HD video cameras.
DSLRs and HD
Everyone’s talking about shooting HD with DSLRs—including us! In fact, we’ve added an entire chapter on it. In Chapter 10, “DSLRs and Other Advanced Shooting Situations,” we cover everything you need to know about shooting with DSLR cameras.

6The Digital Filmmaking Handbook, 4E
Figure 1.5
The RED One is a special fullcustomizable digital cinema camera aimed at indie filmmakers.
If you’re shooting on tape, you’ll still need some sort of video interface to get media off the videotape and into your computer, but as file-based media becomes the norm, you are much more likely to simply remove a disc from your camera, put it into your computer, and drag the files across (see Figure 1.6).
Figure 1.6
In a typical tapeless editing workflow, video is digitized inside the camera, stored on a disc, such as SD cards, and the resulting digital files are copied to the computer’s storage drive.
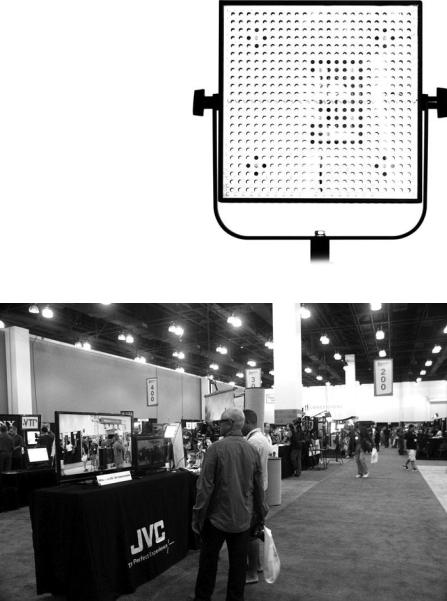
And there’s more. Lighting technology continues to improve: smaller HMIs, LED panels, and professional fluorescents use less power so that you don’t need a generator, give off less heat making the set more comfortable for everyone, and are professionally calibrated so that you can ensure that your project looks great (see Figure 1.7).

In fact, perhaps the biggest challenge is keeping up with all the new technology that’s available out there. One of the best ways to stay up-to- date is to attend trade shows like DV Expo in California (see Figure 1.8). You can see all the latest gear in person and speak to product reps who will fill you in on the latest developments, and it’s also a great way to meet other filmmakers.
Chapter 1 n Getting Started |
7 |
Figure 1.7
New and improved lighting solutions, like these LED lights from LitePanels, mean that it’s easier to shoot with standard household power.
Figure 1.8
Attending trade shows, like DV Expo in Pasadena, California, is a good way to stay up-to-date with the latest technology.
To sum up, over the last 10 years, digital video prices fell through the floor at the same time that the quality flew through the ceiling, and technology that practically required an engineering degree 10 years ago is now significantly easier to use. So what are you waiting for?