

Exploring the Chrome Serial API • 271
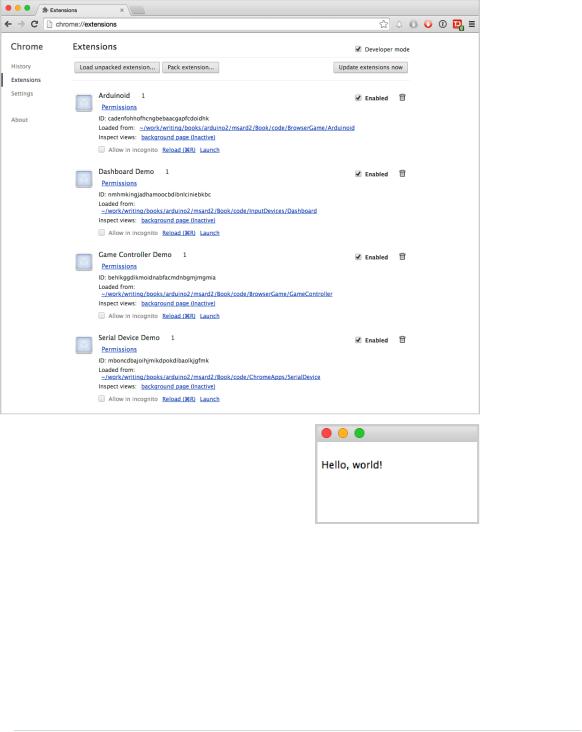
to chrome://extensions or choose the Tools > Extensions menu. You’ll see something like the following figure:
Make sure the Developer Mode checkbox at the top-right corner is checked. Click the Load Unpacked Extension button to load the Chrome app you wrote in the previous section. Click the Launch link belonging to the My First Chrome App application. Chrome will start a new Chrome app, which will look like the screenshot.
The Chrome app looks like a regular application in many regards. On Mac OS X, for example, it has a menu bar with a quit function, and it runs in a regular application window that you can minimize, maximize, and hide.
Exploring the Chrome Serial API
On Chrome’s Extensions site, you’ll see a link named background page next to each Chrome app. This link actually refers to a Chrome app’s background
report erratum • discuss

Appendix 4. Controlling the Arduino with a Browser • 272
page. If you click it, Chrome will open a console for the background page. Also, it automatically creates another link next to it, pointing to the application’s main page. If you click this link, you’ll get access to all of your application’s innards—that is, you’ll get a JavaScript console for your running Chrome App.
Because our first Chrome app’s manifest requests permission for accessing the serial port, you can use Chrome’s serial API6 in the application’s JavaScript console.
The following function prints the paths to all serial devices connected to your computer (to enter multi-line functions in the JavaScript console, press Shift+Enter at the end of each line):
chrome.serial.getDevices(function(devices) { devices.forEach(function(d) {
console.log(d.path);
})
});
On my machine this function outputs the following:
/dev/cu.Bluetooth-Incoming-Port /dev/tty.Bluetooth-Incoming-Port /dev/cu.Bluetooth-Modem /dev/tty.Bluetooth-Modem /dev/cu.usbmodem24321 /dev/tty.usbmodem24321
The last two lines represent the serial port connected to my Arduino. With the following statement you can connect to the Arduino from the JavaScript console:
chrome.serial.connect(
"/dev/tty.usbmodem24321", { bitrate: 38400 },
function(c) { console.log(c) })
chrome.serial.connect expects three arguments. The first is the path to the serial port to connect to. With the second argument, you can specify typical options for serial ports, such as the baud rate (named bitrate in this case) or the parity bit. Eventually you have to pass a callback function that gets called after Chrome tries to establish the connection.
6.https://developer.chrome.com/apps/serial
report erratum • discuss

Exploring the Chrome Serial API • 273
The callback function receives an object containing all information about the connection. The statement above prints a text representation of the serial connection object that has been created:
Object { bitrate: 38400
bufferSize: 4096 connectionId: 13 ctsFlowControl: false dataBits: "eight" name: ""
parityBit: "no" paused: false persistent: false receiveTimeout: 0 sendTimeout: 0 stopBits: "one"
}
This object contains all properties you’d expect in an object representing a serial connection. It contains properties for the parity bit and stop bit settings. One of its most important properties is connectionId. If the call to connect was successful, its value is greater than zero.
In a next step, you can add a receive listener that gets called whenever data arrives at the serial port:
var listener = function(r) { console.log(r.data); } chrome.serial.onReceive.addListener(listener)
This listener outputs the data it receives on the console. Its output looks like this:
ArrayBuffer {} ArrayBuffer {} ArrayBuffer {}
...
This probably isn’t what you expected. The problem is that the Chrome Serial API stores the data it receives in an ArrayBuffer object. This is necessary because you can transmit not only textual, but also binary data over a serial connection. JavaScript doesn’t support binary data out of the box, so you have to use a few helper classes, such as ArrayBuffer.
Using the following function, you can turn the content of an ArrayBuffer object into a JavaScript string:
report erratum • discuss

Appendix 4. Controlling the Arduino with a Browser • 274
function arrayBufferToString(buf) { var bufView = new Uint8Array(buf);
var encodedString = String.fromCharCode.apply(null, bufView); return decodeURIComponent(escape(encodedString));
};
Although this function comprises only a few statements, it’s very complex. It expects an ArrayBuffer object containing data encoded in UTF-8. That’s why it creates a Uint8Array object first. An ArrayBuffer represents an arbitrary chunk of memory, and using view classes like Uint8Array, you can specify how the memory chunk should be interpreted. In our case, we want to interpret the data we’ve received as characters encoded in UTF-8.
JavaScript strings are usually encoded in UTF-16, so the next two statements convert the UTF-8 data we’ve received into a UTF-16 string. They use the function arrayBufferToString to turn ArrayBuffer objects into JavaScript strings.7
var listener = function(r) { console.log(arrayBufferToString(r.data)); } chrome.serial.onReceive.addListener(listener)
This listener outputs the data received from the Arduino in a readable manner. Note that you’ll see a lot of unexpected line breaks because the serial API doesn’t look for newline characters. Whenever it receives a chunk of data, it hands the chunk over to the listener. It’s the application’s responsibility to interpret the data, and you’ll learn how to do this in the next section.
You’ve learned how to create your own Chrome apps and how to talk to serial devices on the JavaScript console. But one of the great things about JavaScript and Chrome apps is that you can tinker so easily with APIs in the browser.
Writing a SerialDevice Class
Playing with a new library in an interactive environment is a great way to learn. Still, you eventually have to come up with some proper JavaScript code that you can actually use in your project.
JavaScript supports object-oriented programming, so it seems logical to put all code related to accessing the serial port into its own class. This way, you can reuse it in other projects, and if you have to fix bugs or improve the code, you have to do it only in one place. In addition, chances are good that there will be a cross-browser solution for accessing the serial port soon.8 When this happens, you can replace the innards of your class with the new standard
7.At http://ecmanaut.blogspot.de/2006/07/encoding-decoding-utf8-in-javascript.html, you can find a detailed explanation of this function. It’s not for the faint of heart!
8.http://whatwg.github.io/serial/
report erratum • discuss

Writing a SerialDevice Class • 275
API, and your applications will work on all browsers automatically. At least the parts that access the serial port—all other parts will still be subject to browser incompatibilities, of course.
In this section, we’ll create a SerialDevice class that we can use in many of our projects. It’s based on one of the standard Google Chrome app samples,9 and you should have a look at the other samples, too. Studying them is a great way to learn.
Creating classes in JavaScript isn’t difficult, but it’s completely different from most other object-oriented languages you might know. JavaScript’s object system is based on prototypes, not classes. Instead of providing a template (class) for creating new objects, you create new objects immediately. Then you refine these objects and can use them afterward as a template (or parent) for other objects.
Despite all differences between class-based and prototype-based languages, you have to create your objects somehow. In JavaScript, you can use a constructor function:
ChromeApps/SerialDevice/js/serial_device.js
Line 1 var SerialDevice = function(path, baudRate) {
-this.path = path;
-this.baudRate = baudRate || 38400;
-this.connectionId = -1;
5this.readBuffer = "";
-this.boundOnReceive = this.onReceive.bind(this);
-this.boundOnReceiveError = this.onReceiveError.bind(this);
-this.onConnect = new chrome.Event();
-this.onReadLine = new chrome.Event();
10 this.onError = new chrome.Event(); - };
Using this function you can create new SerialDevice objects like this:
var arduino = new SerialDevice("/dev/tty.usbmodem24321");
Note the frequent use of the this keyword. In JavaScript, this refers to the current function’s execution context. You can use it for various purposes. When creating objects, you’ll most often use it to create attributes and methods that are bound to a certain object. In lines 2 to 5, we use it to define a few instance variables, such as path.
In the following two lines, we use it to define two more instance variables. This time, we use this also on the right-hand side of the assignment and pass
9.https://github.com/GoogleChrome/chrome-app-samples/tree/master/samples/serial/ledtoggle
report erratum • discuss

Appendix 4. Controlling the Arduino with a Browser • 276
it to the bind method. bind creates a new function and sets the new function’s this keyword to the value you passed to bind originally. Using bind, you can define a function now, but make sure that it has a certain context when you actually call it.
When working with event handlers, this is often necessary. Users of the SerialDevice class should be able to pass their own callback functions, but they should be executed in the class’ context. You’ll see how this works in a minute.
At the end of the constructor, we define three instance variables that are all instances of the chrome.Event class.10 This class provides some nice features to define and dispatch events within Chrome apps. We use it to define the three events that users of our SerialDevice class can listen for. Now users can register for readLine events using the onReadLine property.
The next three methods of the SerialDevice class implement everything needed for connecting and disconnecting serial devices:
ChromeApps/SerialDevice/js/serial_device.js
Line 1 SerialDevice.prototype.connect = function() {
-chrome.serial.connect(
-this.path,
-{ bitrate: this.baudRate },
5this.onConnectComplete.bind(this))
- |
}; |
- |
|
-SerialDevice.prototype.onConnectComplete = function(connectionInfo) {
-if (!connectionInfo) {
10 console.log("Could not connect to serial device.");
-return;
-}
-this.connectionId = connectionInfo.connectionId;
-chrome.serial.onReceive.addListener(this.boundOnReceive);
15 chrome.serial.onReceiveError.addListener(this.boundOnReceiveError);
-this.onConnect.dispatch();
-};
-
-SerialDevice.prototype.disconnect = function() { 20 if (this.connectionId < 0) {
-throw "No serial device connected.";
-}
-chrome.serial.disconnect(this.connectionId, function() {});
-};
10. https://developer.chrome.com/extensions/events
report erratum • discuss

Writing a SerialDevice Class • 277
First of all, you should note that we define all methods on the prototype property of the SerialDevice object. I won’t go into the details here, but you should know that this is one way to add new methods to objects in JavaScript.
The connect method delegates its work to the chrome.serial.connect function that you saw in the previous section already. The only thing worth noting is the callback function we pass in the function call. Again we use bind to set the callback function’s context explicitly. This way, we make sure that onConnectComplete has access to the properties of the SerialDevice object.
We benefit from that in the onConnectComplete method. Here we can set the connectionId property of our SerialDevice object as soon as we’ve successfully connected to a serial device. If we hadn’t bound onConnectComplete before, this would have a completely different meaning in this function, and we couldn’t access the properties of the SerialDevice object.
In lines 14 and 15, we use the same technique to add receive and error listeners to the chrome.serial object. Here we use the listeners we’ve prepared in the constructor function before. After we’ve established the connection successfully, we call the onConnect object’s dispatch method to spread the good news to all listeners outside.
Eventually, we have to implement the actual listener functions that deal with incoming and outgoing data and with errors:
ChromeApps/SerialDevice/js/serial_device.js
SerialDevice.prototype.onReceive = function(receiveInfo) { if (receiveInfo.connectionId !== this.connectionId) {
return;
}
this.readBuffer += this.arrayBufferToString(receiveInfo.data);
var n;
while ((n = this.readBuffer.indexOf('\n')) >= 0) { var line = this.readBuffer.substr(0, n + 1); this.onReadLine.dispatch(line);
this.readBuffer = this.readBuffer.substr(n + 1);
}
};
SerialDevice.prototype.onReceiveError = function(errorInfo) { if (errorInfo.connectionId === this.connectionId) {
this.onError.dispatch(errorInfo.error);
}
};
SerialDevice.prototype.send = function(data) {
report erratum • discuss

Appendix 4. Controlling the Arduino with a Browser • 278
if (this.connectionId < 0) {
throw "No serial device connected.";
}
chrome.serial.send(
this.connectionId,
this.stringToArrayBuffer(data), function() {});
};
onReceive basically works like the sample listener we implemented in Exploring the Chrome Serial API, on page 271. The only difference is that the new implementation looks for newline characters. Whenever it finds one, it passes the current read buffer to the function that is listening for onReadLine events. Note that more than one line can be transmitted in a single data chunk. Also note that onReceive checks whether it got data from the correct serial port.
The onReceiveError method also makes sure first that it got error information for the correct connection. In this case, it dispatches the event to the function that is listening for onError events.
For our purposes we don’t need a send method, but it doesn’t hurt to add it for the sake of completeness. This way, you have a SerialDevice class that you can use in many more projects.
Finally, we need our two helper methods for converting ArrayBuffer objects into strings and vice versa:
ChromeApps/SerialDevice/js/serial_device.js
SerialDevice.prototype.arrayBufferToString = function(buf) { var bufView = new Uint8Array(buf);
var encodedString = String.fromCharCode.apply(null, bufView); return decodeURIComponent(escape(encodedString));
};
SerialDevice.prototype.stringToArrayBuffer = function(str) { var encodedString = unescape(encodeURIComponent(str)); var bytes = new Uint8Array(encodedString.length);
for (var i = 0; i < encodedString.length; ++i) { bytes[i] = encodedString.charCodeAt(i);
}
return bytes.buffer;
};
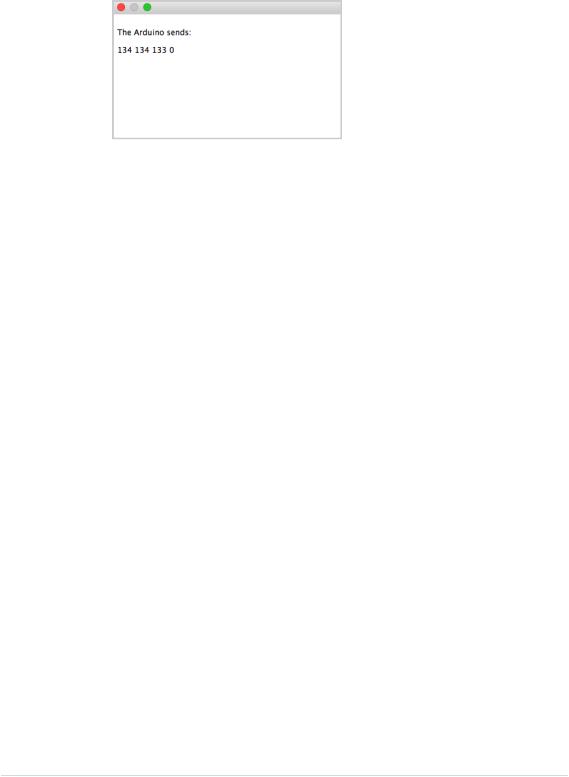
That’s it! We now have a generic class for communicating with serial devices from a Chrome app. Let’s use it right away and write a small demo application. This demo will be the simplest serial monitor possible. It will permanently read data from a serial port and display it in an HTML page. The HTML page looks as follows:
report erratum • discuss
Writing a SerialDevice Class • 279
ChromeApps/SerialDevice/main.html
<!DOCTYPE html>
<html lang="en">
<head>
<meta charset="utf-8"/> <title>Serial Device Demo</title>
</head>
<body>
<div id="main">
<p>The Arduino sends:</p> <p id="output"></p>
</div>
<script src="js/serial_device.js"></script> <script src="js/arduino.js"></script>
</body>
</html>
In the HTML page, you’ll find a paragraph element with its id attribute set to output. That’s the element we’ll fill with the data we read from the serial port. At the end of the document, we include our new JavaScript library for accessing the serial device. Also, we include a file named arduino.js:
ChromeApps/SerialDevice/js/arduino.js
var arduino = new SerialDevice('/dev/tty.usbmodem24311');
arduino.onConnect.addListener(function() { console.log('Connected to: ' + arduino.path);
});
arduino.onReadLine.addListener(function(line) { console.log('Read line: ' + line); document.getElementById('output').innerText = line;
});
arduino.connect();
Here we create a new SerialDevice object named arduino. Then we add listener functions for the onConnect and onReadLine events. Both write a message to the console. The onReadLine listener puts the line it has read into the browser’s Document Object Model (DOM).
Make sure you use the correct serial port in the first line of arduino.js. Then connect your Arduino to your computer and upload a sketch that permanently outputs lines of text on the serial port. You can use the sketch from Building Your Own Game Controller, on page 106. Start the Chrome app, and you should see something like the following figure:
report erratum • discuss
Appendix 4. Controlling the Arduino with a Browser • 280
The Chrome app will update the HTML page whenever it receives a new line of data.
Isn’t it fascinating how easy it is to combine modern Web technologies with microcontrollers?
There’s one minor drawback, though. Support for the serial API in the Google Chrome browser is still a rather new feature. It might happen that your browser crashes from time to time, especially when you’re starting or stopping Chrome apps that access the serial port, or when you’re attaching or detaching devices while the browser is running. Apart from that, everything runs smoothly and is stable. The situation will probably improve with every new browser release.
report erratum • discuss

|
APPENDIX 5 |
|
Bibliography |
[But09] |
Paul Butcher. Debug It!: Find, Repair, and Prevent Bugs in Your Code. The |
|
Pragmatic Bookshelf, Raleigh, NC and Dallas, TX, 2009. |
[KR98] |
Brian W. Kernighan and Dennis Ritchie. The C Programming Language. |
|
Prentice Hall, Englewood Cliffs, NJ, Second edition, 1998. |
[Mey97] |
Scott Meyers. Effective C++: 50 Specific Ways to Improve Your Programs |
|
and Designs. Addison-Wesley Longman, Reading, MA, Second edition, |
|
1997. |
[Pin09] |
Chris Pine. Learn to Program. The Pragmatic Bookshelf, Raleigh, NC and |
|
Dallas, TX, Second Edition, 2009. |
[Pla10] |
Charles Platt. Make: Electronics. O’Reilly & Associates, Inc., Sebastopol, |
|
CA, 2010. |
[Str00] |
Bjarne Stroustrup. The C++ Programming Language. Addison-Wesley, |
|
Reading, MA, 2000. |
report erratum • discuss