


This material is copyright and is licensed for the sole use by Kliwon Klimis on 28th October 2008 425 cilce, , frood, grradt, 525254
Zimbra and Outlook
At this time, we should take a quick look around Outlook and see how integrated
Zimbra really is with Outlook.
A Look at Zimbra Integration
The integration of Zimbra is more than just the ability to send and receive email. Outlook is now acting as the front end to create contacts, appointments, and tasks that will be stored on the server. Let's take a moment to look at each one individually.
Contacts
The easiest way to see the integration of contacts between Outlook and Zimbra is to compose a new mail message, and instead of typing in an email address, click
on the TO: button and select Global Address List from the Address Book drop-down menu.
[ 156 ]
This material is copyright and is licensed for the sole use by Kliwon Klimis on 28th October 2008 425 cilce, , frood, grradt, 525254
Chapter 7
As you can see, this feature looks exactly the same whether you are using Exchange or Zimbra as your back end collaboration server. Users are familiar with this look and feel, and the ability to select users that are within the organization's Global
Address List. This list comes directly from the Zimbra server and is maintained there as well.
The user also has the option to select the own personal contact list. This list could be created and maintained either via the web client, through Outlook directly, or both as they will synchronize together.
Appointments
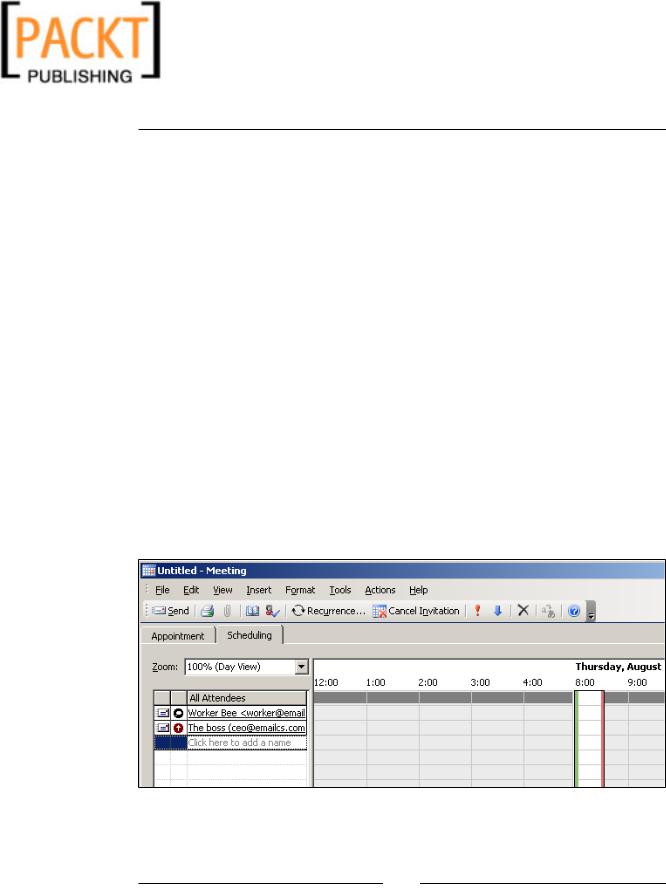
In most work organizations, the ability to create appointments, invite people to attend, and check invitees schedule is a key function of Exchange and Outlook. Luckily for us, the same functionality could be used with Zimbra and Outlook. As seen in the following figure, the process for creating an appointment is exactly the same.
1.In the Calendar application, click New Appointment.
2.Click on the Invite Attendees button.
3.Click the To button and select the Global Address List from the drop-down menu.
4.Select the CEO from the address list and click OK.
5.Click on the Scheduling tab.
The Calendar is synced with the Zimbra server and is able to check the availability of the users within the organization, a key feature of any collaboration suite.
[ 157 ]

This material is copyright and is licensed for the sole use by Kliwon Klimis on 28th October 2008 425 cilce, , frood, grradt, 525254
Zimbra and Outlook
Once you have found a schedule when all the attendees are free, go back to the Appointment tab, type in a Subject for your appointment then click on the Send button.
The last feature we will look at is Sharing Outlook folders.
Sharing Outlook Folders
Users have the option to share any Outlook folder with users in the Global Address List. Essentially, this is the same ability we covered in an earlier chapter with the Web Client for the Contacts or Calendar. However, here the process is different.
Users could be delegated different levels of access to Outlook folders. These levels include:
Read |
View items in folder only |
Edit |
Edit any contents in the folder |
Create |
Create/add items to the folder |
Delete |
Delete/modify items in the folder |
Act on workflow |
Respond to meeting and task requests |
Administer Folder |
Modify the permissions on the folder |
There are also predefined roles that users could assign to other users in the Global Address List including:
Administrator |
Has all rights to the folder listed above |
Delegate |
Has access to all rights except for |
|
Administer folder |
Editor |
Access to Read, Edit, Create and Delete |
Author |
Access to Read and Create |
Reviewer |
Read only |
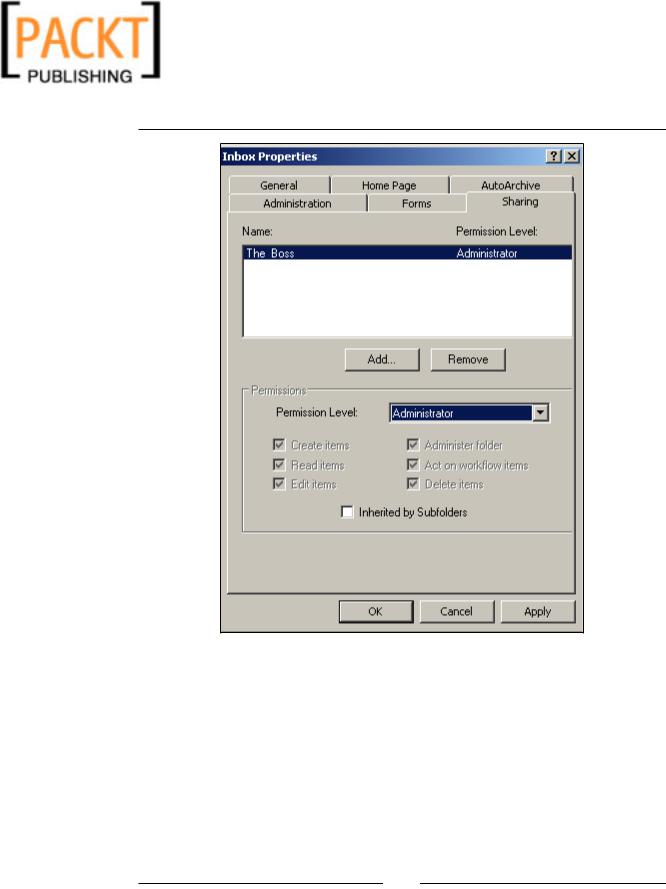
To assign roles and rights to the folder:
1.Right click the folder and click Properties.
2.Click on the Sharing tab.
3.Click Add and select CEO from the Global Address List.
4.With CEO highlighted, select Administrator from the Permission Level drop-down-box.
[ 158 ]
This material is copyright and is licensed for the sole use by Kliwon Klimis on 28th October 2008 425 cilce, , frood, grradt, 525254
Chapter 7
5.With Administrator selected, you should be able to see all of the Permissions selected.
6.Change the Permission Level to Reviewer and you will see that only Read items, is selected.
7.Go ahead and play with the various levels so you can get a feel for the different permissions associated with the various levels.
8.Once complete, click OK.
An email will be sent to the CEO informing him that he now has Administrator access to the Inbox of the Worker Bee.
[ 159 ]