

This material is copyright and is licensed for the sole use by Kliwon Klimis on 28th October 2008 425 cilce, , frood, grradt, 525254
Chapter 4
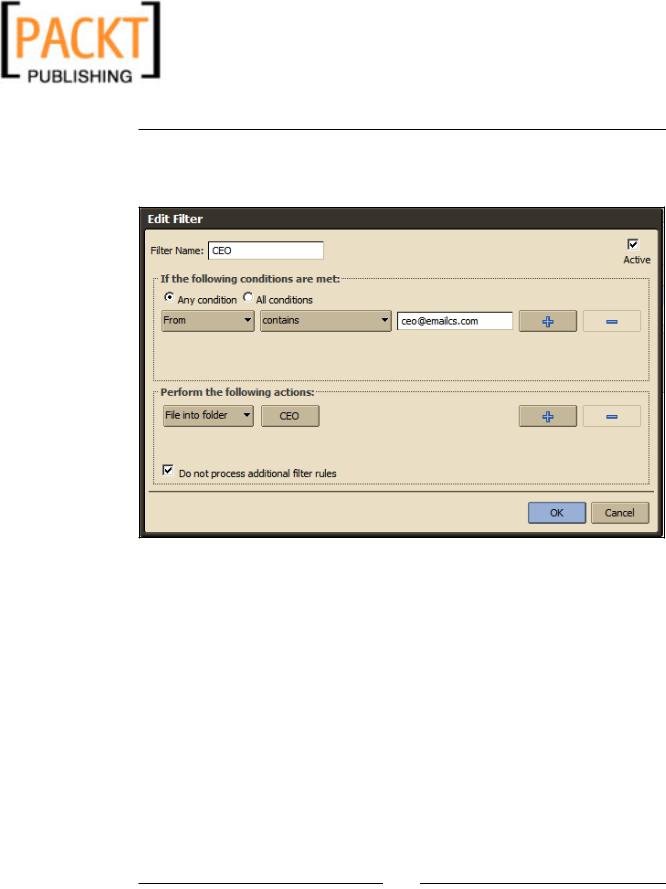
3.Most fields are automatically populated for you based on the message selected. You just need to add a Filter Name and select the folder you would like to file the email into.
4.This rule will be effective for every new email that comes in from the CEO. Now, just drag the current message from the Inbox (Content Pane) and place it into the CEO folder.
Please go ahead and reply to the CEO's message, so we could use the email message for later examples.
Composing Email
Just like the functionality for checking email, composing email in Zimbra is fairly straightforward. We had discussed earlier that clicking on the from or contact in an email message will automatically open up the compose email screen. However, if you are going to initiate an email to someone, you would:
1. Click on the New button of the Mail application toolbar.
[ 93 ]
This material is copyright and is licensed for the sole use by Kliwon Klimis on 28th October 2008 425 cilce, , frood, grradt, 525254
The Zimbra Web Client
2.The Content Pane is now changed to a new email message template, with the Toolbar changing as well. The new buttons are Send, Cancel, Save Draft,
Add Attachment, and Options.
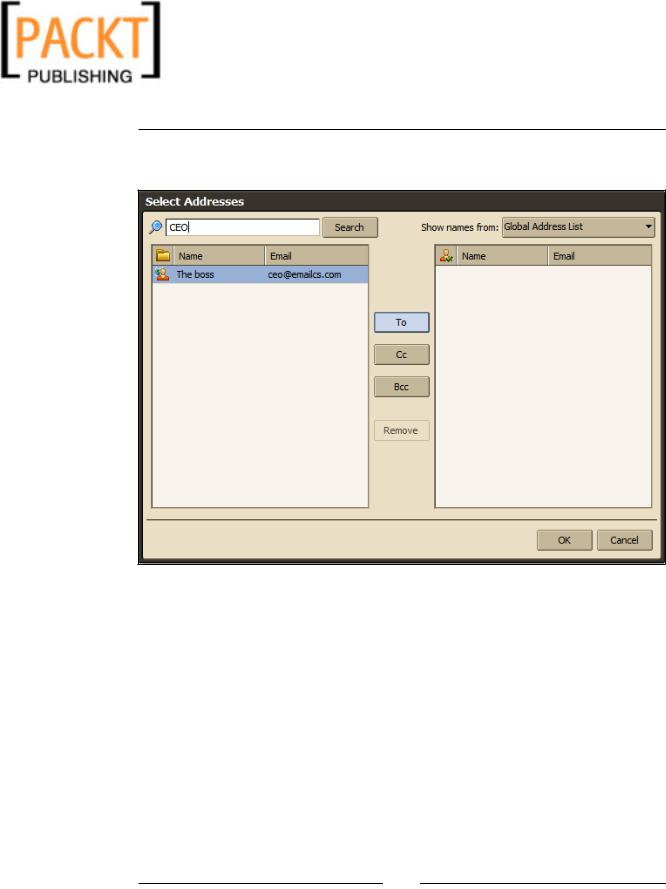
3.Either enter the contact name manually (if it is an address you have used before, Zimbra will display a list of matching entries as you type in the To address) or you could click on the To button to open up the contact list.
4.By default, there are three address lists to choose from:
a.Contacts
b.Personal and Shared Contacts
c.Global Address List
[ 94 ]
This material is copyright and is licensed for the sole use by Kliwon Klimis on 28th October 2008 425 cilce, , frood, grradt, 525254
Chapter 4
As we only have contacts in our Global Address List, select it from the drop-down menu and type CEO in the search text box.
5.You can now select the proper email address and add it to the To, Cc, or Bcc form of the email.
6.One option you have is to add an attachment to the email using the appropriate button on the toolbar. A text box will appear under the subject line and will also provide you with a Browse button to choose the attachment from your computer. You could add or remove attachments as you wish.
[ 95 ]

This material is copyright and is licensed for the sole use by Kliwon Klimis on 28th October 2008 425 cilce, , frood, grradt, 525254
The Zimbra Web Client
7.Another option is if you would like to save an email to work on later, or to just send at another point, you could click on the Save Draft button.
8.The Options button allows you to add additional options to the email including:
a.Format as HTML
b.Format as Text
c.Show Bcc
9.If you have installed the Zimbra Spell module, you will also have an option to spell check your email by clicking the appropriate button.
10.When you've finished composing the email, you may click on Send.
11.A copy of the email will be saved in the Sent folder by default.
Please go through the proceeding steps and send an email to the CEO. We will need this email to examine some additional features Zimbra offers.
Tags
Email clients are great, especially when they provide you with a means to organize emails into folders. But what happens when a particular email could be organized into multiple folders. Or what happens if you just want to group emails together on a particular topic or project, but do not want them filed away in separate folders? The answer is Tags.
Tags are used to flag messages and logically organize emails, regardless of which folders they are stored in. Tags are used to essentially "color code" email messages and create a quick way of seeing all emails related to a particular topic.
[ 96 ]
This material is copyright and is licensed for the sole use by Kliwon Klimis on 28th October 2008 425 cilce, , frood, grradt, 525254
Chapter 4
For example, we have received an email from the CEO and we have sent a completely unrelated message to him as well. Well, at least they are unrelated as far as Zimbra is concerned. But, in our minds, we want to be able to group those messages together. So what we will do is Tag each message, thereby grouping them together.
1.Login to the Zimbra Web Client at http://zimbra.emailcs.com.
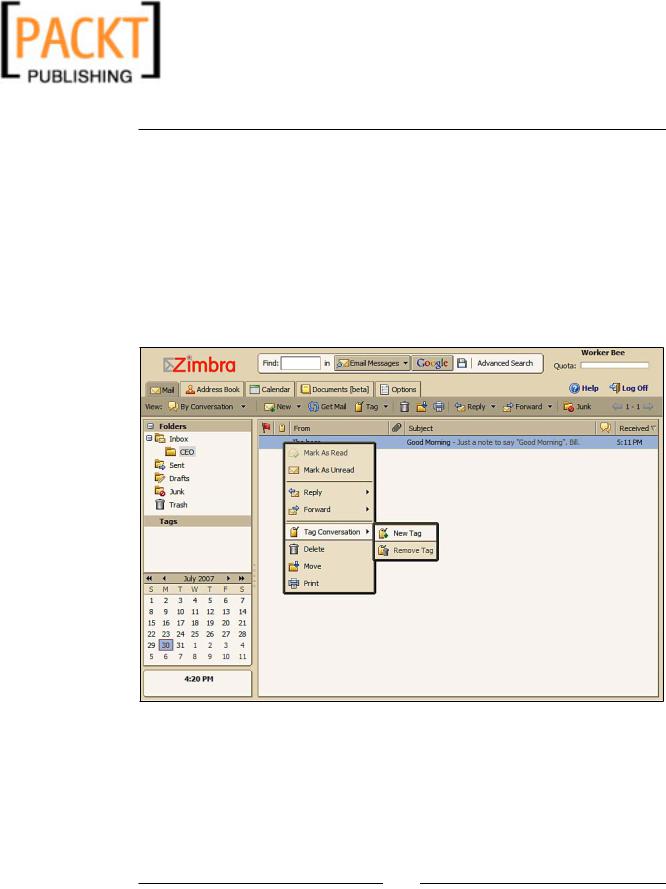
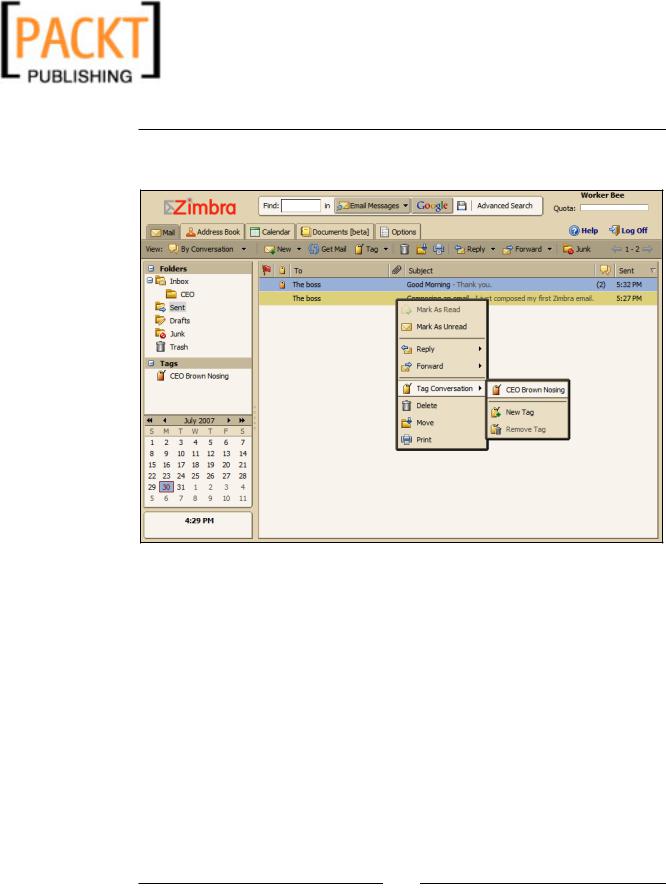
2.In the CEO folder, beneath the Inbox, right click on the "Good Morning" message from the CEO (you will need to send this message using the CEO account, if you have not already done so).
3.Select Tag ConversationNew Tag from the pop up menu.
[ 97 ]
This material is copyright and is licensed for the sole use by Kliwon Klimis on 28th October 2008 425 cilce, , frood, grradt, 525254
The Zimbra Web Client
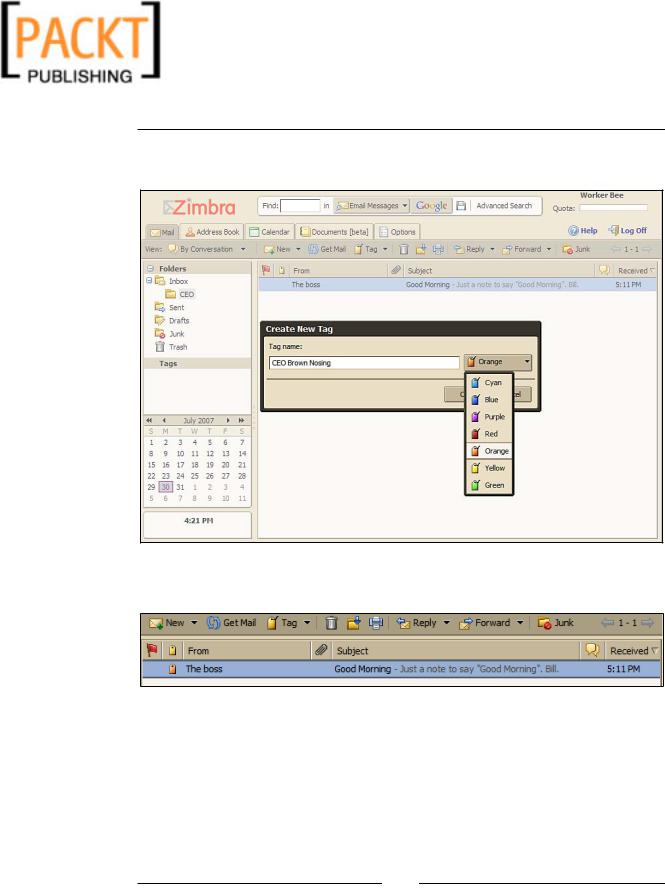
4.The Tag dialog box will open where we could name the Tag. Let's name the Tag "CEO Brown Nosing" and select Orange from the drop-down list.
5.Notice that the email message now has an orange tag next to it in the Tag column.
6.Click on the Sent folder and find the email you composed in the earlier section.
[ 98 ]
This material is copyright and is licensed for the sole use by Kliwon Klimis on 28th October 2008 425 cilce, , frood, grradt, 525254
Chapter 4
7.Right-click on the message, select Tag Conversation, and now you can select
"CEO Brown Nosing" from the list.
8. This message will now also have an orange tag in the Tag column.
You have now successfully tagged messages and grouped them together. You may have also noticed that the reply-to email message you created when replying to the CEO's earlier message also has an orange tag. The reason for this is by default,
Zimbra groups these messages together into conversations (see below), which we will explore in the next section. In this case, Zimbra automatically tagged the message as well.
To quickly bring up all the messages that are related to the "CEO Brown Nosing" group, click on the CEO Brown Nosing Tag on the Navigation Pane under Tags. This will display the two tagged messages. The reply-to is grouped together with the initial "Good Morning" email from the CEO.
[ 99 ]