
- •Disclaimer
- •Contact
- •Table of Contents
- •Welcome to REAKTOR
- •System Requirements
- •REAKTOR Modes: Full, Player and Demo
- •How to Get Started
- •The REAKTOR Documentation
- •Special Formatting used in this Document
- •Basic Settings in REAKTOR
- •Configuring the Audio Hardware
- •Accessing the Audio and MIDI Settings… dialog
- •Selecting an Audio Hardware Device
- •Selecting a Sample Rate
- •Adjusting Output Latency
- •Routing: Assigning REAKTOR's Inputs
- •Routing: Assigning REAKTOR's Outputs
- •Configuring the MIDI Hardware
- •Loading and Playing
- •A Few Important Buttons
- •Ensembles, Instruments and KOMPLETE Instruments
- •Loading Carbon 2
- •Opening the Sidepane
- •Opening the Browser
- •Loading a File
- •Playing Carbon 2 and its Snapshots
- •Loading a Snapshot
- •Adjusting the Sound
- •Switching Effects
- •Changing the Filter Movement
- •Changing the Filter Settings
- •Saving Your Settings
- •Modifying a REAKTOR Ensemble
- •Recap
- •Using the Browser to Load the Ensemble
- •Instruments inside Ensembles
- •Junatik Panel Overview
- •The Difference Between an Ensemble and an Instrument
- •Snapshot Master for Plug-In and Snapshot Hierarchies
- •Snapshot Hierarchy as seen in Properties
- •Recall by MIDI and Snapshot Master for Plug-In
- •Snapshot Properties for the Junatik Instrument
- •Snapshot with a REAKTOR Switch Turned Off
- •Snapshot Flexibility
- •Swapping the Delay Instrument for a Reverb Instrument
- •Opening a REAKTOR Structure
- •Removing an Instrument from the Structure
- •Using the Bowser to Search for Instruments
- •Connecting the Instrument to the Audio Out
- •Making the Connections
- •Resetting the Positions of Instruments in the Ensemble Panel
- •Restoring the Correct Snapshot Hierarchy
- •Opening the Instrument Properties
- •Creating a Sequenced Synthesizer
- •Recap and Overview
- •Creating the Synth Sequencer Ensemble
- •Create a New Ensemble
- •Using the Browser to Load the Instruments
- •Making the Synth Sequencer Work
- •Overview of the Structure
- •Removing the Unwanted Instrument
- •Connecting ANALOG Outputs to the Audio Out
- •Overview of Monoliner and ANALOG
- •Making the MIDI Connections between Instruments
- •Using Internal MIDI Connections
- •REAKTOR Run and Stop Buttons
- •Looking More Closely at Monoliner
- •Changing the Direction and Speed
- •Number of Steps, Step Offset and Shuffle/Swing
- •GATE, VELOCITY and PITCH Knobs and On/Off Buttons
- •Exploring the Snapshots/Show Hints
- •Exploring Snapshots in Monoliner and ANALOG
- •Show/Hide Hints
- •Exploring a REAKTOR Sampler
- •Recap and Overview
- •Using the Browser to Launch Memory Drum 2
- •Replacing and Editing Samples in the Sample Map Editor
- •Opening the Map and Playing the Samples
- •Using Replace in the Edit Sample List
- •Using Add from the Edit Sample List
- •The Memory Drum Interface
- •Changing Pitch for Just one Sample Slot
- •Exploring the Memory Drum Snapshots
- •Building a Synth Using Macros
- •What is a Macro
- •Preparation
- •Loading a New Ensemble
- •Removing the Default Instrument
- •Inserting a New Instrument
- •Connecting the Instrument to the Audio Out
- •Adding an Oscillator and an ADSR Env to the Instrument
- •Inserting an Oscillator
- •Inserting the ADSR Env
- •Inserting Pitch and Gate Modules
- •Connecting the Pitch and Gate Modules
- •Safe Output Level
- •Inserting the Filter
- •Inserting the Filter Macro and Doing Some Rewiring
- •Unlocking the Panel to Move the Macros
- •Adding a Second Oscillator and a Mixer
- •Adding a Second Oscillator Using Duplicate
- •Using Properties to Rename the Oscillator Macros
- •Adding a Mixer
- •Increasing the Number of Mixer Inputs
- •Adding Faders and Connecting them to the Mixer
- •Connecting the NotePitch Module to the ADSR Envelopes and Filter
- •Tidying Up in the Instrument Panel
- •Changing the Appearance of the Faders
- •Playing Your Synth and Making Changes to the Sound
- •Changing the Oscillators Waveform, Resetting the Filter and Output Level
- •Creating some Snapshots
- •Saving Your Work Using Save As
- •Make a Sampler Using REAKTOR Modules
- •Recap and Overview
- •What Kind of Sampler?
- •Building the Basic Structure
- •Load up a New Ensemble
- •Inserting the First Modules
- •Inserting the Envelope
- •Adding the Controls for the Envelope
- •Making the Connections
- •Connecting the Sampler to the 2 Audio Voice Combiners
- •Connecting the NotePitch and Gate Modules
- •Loading a Sample into the Sampler
- •Opening the Sample Map Editor from the View Menu
- •Adding a Sample to the Sample Map Editor
- •Tidying Up the Appearance and Moving the Modules
- •Moving Modules in the Structure
- •Deleting unwanted Modules
- •Using the Panel Lock Button to Move the Knobs
- •Adding More Samples and Changing their Settings
- •Changing the Settings of the Existing Sample
- •Adding More Samples
- •Sample Reverse and Other Playback Possibilities
- •Looping, and Direction Buttons
- •Transposing a Sample
- •Adding a Filter
- •Inserting the Filter Into the Structure
- •Creating the Filter Controls and Making the Connections
- •Tidying Up the Appearance in the Instrument Panel
- •Using Save Ensemble to Update Your Already Saved Sampler
- •Modifying the Existing Sampler
- •Inserting the Selector
- •Connecting the Filter Outputs
- •Increasing the Number of Selector Inputs
- •Adding the Position Fader and Changing its Range
- •Final connections and Panel Appearance
- •Explore Your Sampler and Make Some Snapshots
- •What’s Next?

Exploring a REAKTOR Sampler
Replacing and Editing Samples in the Sample Map Editor
6.3Replacing and Editing Samples in the Sample Map Editor
Now we will use the Sample Map Editor to replace Samples. We will open the Sample Map, use SEL BY KEY so our MIDI keyboard can play Samples in the Map, and also use our mouse to audition Samples.
6.3.1Opening the Map and Playing the Samples
1.Double-click on the Sample waveform. The Sample Map Editor will open up. Alterna tively you can also press the Sample Map button in the Sidebar or use the keyboard shortcut [F9].
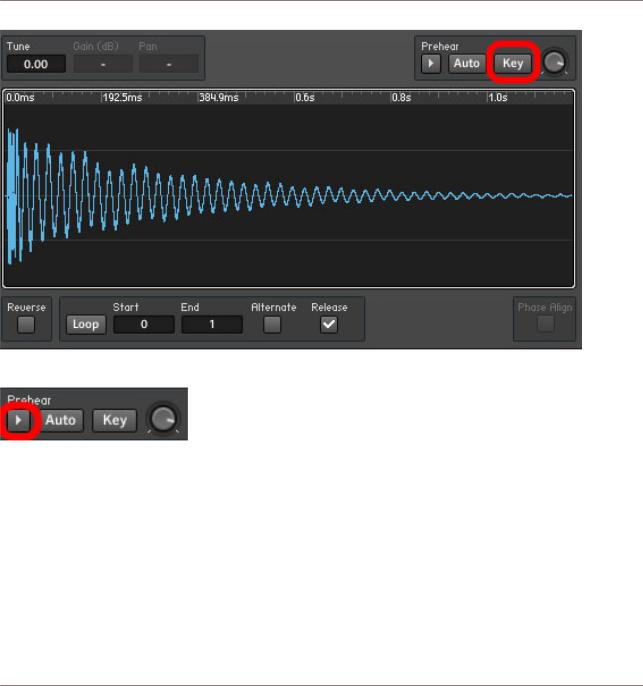
2.Turn on the Select Sample by Key feature by pressing the Key button in the top-right of the Sample Map. You can now select Samples with your MIDI keyboard.
REAKTOR 5.5 - Getting Started Guide - 75

Exploring a REAKTOR Sampler
Replacing and Editing Samples in the Sample Map Editor
3.Click on the Sample Prehear button to hear the samples in their original form.
Fig. 6.3 The Sample Prehear button
Let’s replace some samples with some of our own ones. Let’s replace the snare sample on MIDI Note 48. First of all we need to select it by pressing C2 on our keyboard.
6.3.2Using Replace in the Edit Sample List
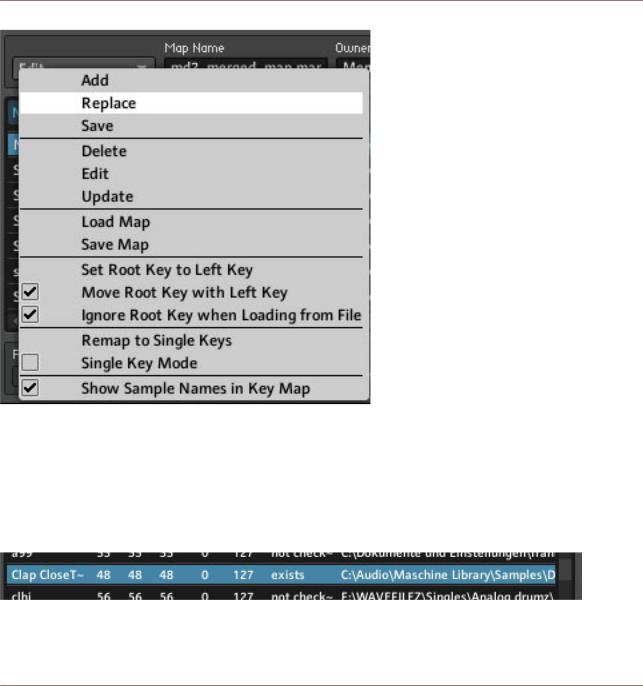
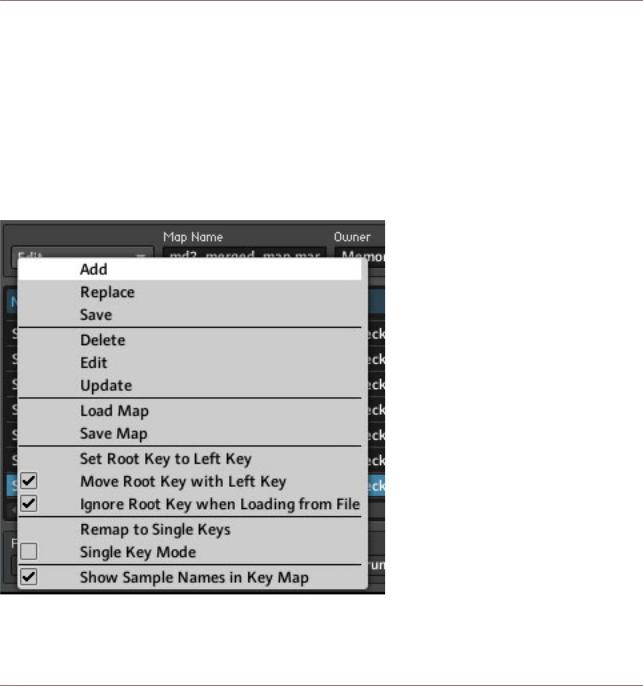
▪Open the Edit drop-down menu in the top-left of the Sample Map Editor and choose the Replace menu entry.
REAKTOR 5.5 - Getting Started Guide - 76

Exploring a REAKTOR Sampler
Replacing and Editing Samples in the Sample Map Editor
Fig. 6.4 The Replace menu entry replaces the selected sample
This should open the folder that we selected when we chose the pathways to our audio files in the REAKTOR Preferences. In my example I have replaced the Snare placed on the slot corresponding to MIDI Note 48.
6.3.3Sample Key-Split and Root Note
Let’s have a closer look at the sample.
Fig. 6.5 Clap CloseTheBook.wav as seen in the Sample Map Editor
REAKTOR 5.5 - Getting Started Guide - 77

Exploring a REAKTOR Sampler
Replacing and Editing Samples in the Sample Map Editor
L and R both have values of 48. That means the Key-split of this sample on the keyboard is just one note, that of MIDI 48, which is fine for a drum sound. Root is also 48. This means that the sample will play back at its original pitch, when allocated to the MIDI Note 48.
We have just replaced a sample, now we are going to add a new sample to the map.
6.3.4Using Add from the Edit Sample List
1.We need to scroll down to the last sample in the list, which is on MIDI Note 77 and bears the name Sound 9.
2.Click on the Edit drop-down menu and choose the menu entry Add.
Fig. 6.6 Adding a new sample to the Sample Map using the Add menu entry
REAKTOR 5.5 - Getting Started Guide - 78