
- •Disclaimer
- •Contact
- •Table of Contents
- •Welcome to REAKTOR
- •System Requirements
- •REAKTOR Modes: Full, Player and Demo
- •How to Get Started
- •The REAKTOR Documentation
- •Special Formatting used in this Document
- •Basic Settings in REAKTOR
- •Configuring the Audio Hardware
- •Accessing the Audio and MIDI Settings… dialog
- •Selecting an Audio Hardware Device
- •Selecting a Sample Rate
- •Adjusting Output Latency
- •Routing: Assigning REAKTOR's Inputs
- •Routing: Assigning REAKTOR's Outputs
- •Configuring the MIDI Hardware
- •Loading and Playing
- •A Few Important Buttons
- •Ensembles, Instruments and KOMPLETE Instruments
- •Loading Carbon 2
- •Opening the Sidepane
- •Opening the Browser
- •Loading a File
- •Playing Carbon 2 and its Snapshots
- •Loading a Snapshot
- •Adjusting the Sound
- •Switching Effects
- •Changing the Filter Movement
- •Changing the Filter Settings
- •Saving Your Settings
- •Modifying a REAKTOR Ensemble
- •Recap
- •Using the Browser to Load the Ensemble
- •Instruments inside Ensembles
- •Junatik Panel Overview
- •The Difference Between an Ensemble and an Instrument
- •Snapshot Master for Plug-In and Snapshot Hierarchies
- •Snapshot Hierarchy as seen in Properties
- •Recall by MIDI and Snapshot Master for Plug-In
- •Snapshot Properties for the Junatik Instrument
- •Snapshot with a REAKTOR Switch Turned Off
- •Snapshot Flexibility
- •Swapping the Delay Instrument for a Reverb Instrument
- •Opening a REAKTOR Structure
- •Removing an Instrument from the Structure
- •Using the Bowser to Search for Instruments
- •Connecting the Instrument to the Audio Out
- •Making the Connections
- •Resetting the Positions of Instruments in the Ensemble Panel
- •Restoring the Correct Snapshot Hierarchy
- •Opening the Instrument Properties
- •Creating a Sequenced Synthesizer
- •Recap and Overview
- •Creating the Synth Sequencer Ensemble
- •Create a New Ensemble
- •Using the Browser to Load the Instruments
- •Making the Synth Sequencer Work
- •Overview of the Structure
- •Removing the Unwanted Instrument
- •Connecting ANALOG Outputs to the Audio Out
- •Overview of Monoliner and ANALOG
- •Making the MIDI Connections between Instruments
- •Using Internal MIDI Connections
- •REAKTOR Run and Stop Buttons
- •Looking More Closely at Monoliner
- •Changing the Direction and Speed
- •Number of Steps, Step Offset and Shuffle/Swing
- •GATE, VELOCITY and PITCH Knobs and On/Off Buttons
- •Exploring the Snapshots/Show Hints
- •Exploring Snapshots in Monoliner and ANALOG
- •Show/Hide Hints
- •Exploring a REAKTOR Sampler
- •Recap and Overview
- •Using the Browser to Launch Memory Drum 2
- •Replacing and Editing Samples in the Sample Map Editor
- •Opening the Map and Playing the Samples
- •Using Replace in the Edit Sample List
- •Using Add from the Edit Sample List
- •The Memory Drum Interface
- •Changing Pitch for Just one Sample Slot
- •Exploring the Memory Drum Snapshots
- •Building a Synth Using Macros
- •What is a Macro
- •Preparation
- •Loading a New Ensemble
- •Removing the Default Instrument
- •Inserting a New Instrument
- •Connecting the Instrument to the Audio Out
- •Adding an Oscillator and an ADSR Env to the Instrument
- •Inserting an Oscillator
- •Inserting the ADSR Env
- •Inserting Pitch and Gate Modules
- •Connecting the Pitch and Gate Modules
- •Safe Output Level
- •Inserting the Filter
- •Inserting the Filter Macro and Doing Some Rewiring
- •Unlocking the Panel to Move the Macros
- •Adding a Second Oscillator and a Mixer
- •Adding a Second Oscillator Using Duplicate
- •Using Properties to Rename the Oscillator Macros
- •Adding a Mixer
- •Increasing the Number of Mixer Inputs
- •Adding Faders and Connecting them to the Mixer
- •Connecting the NotePitch Module to the ADSR Envelopes and Filter
- •Tidying Up in the Instrument Panel
- •Changing the Appearance of the Faders
- •Playing Your Synth and Making Changes to the Sound
- •Changing the Oscillators Waveform, Resetting the Filter and Output Level
- •Creating some Snapshots
- •Saving Your Work Using Save As
- •Make a Sampler Using REAKTOR Modules
- •Recap and Overview
- •What Kind of Sampler?
- •Building the Basic Structure
- •Load up a New Ensemble
- •Inserting the First Modules
- •Inserting the Envelope
- •Adding the Controls for the Envelope
- •Making the Connections
- •Connecting the Sampler to the 2 Audio Voice Combiners
- •Connecting the NotePitch and Gate Modules
- •Loading a Sample into the Sampler
- •Opening the Sample Map Editor from the View Menu
- •Adding a Sample to the Sample Map Editor
- •Tidying Up the Appearance and Moving the Modules
- •Moving Modules in the Structure
- •Deleting unwanted Modules
- •Using the Panel Lock Button to Move the Knobs
- •Adding More Samples and Changing their Settings
- •Changing the Settings of the Existing Sample
- •Adding More Samples
- •Sample Reverse and Other Playback Possibilities
- •Looping, and Direction Buttons
- •Transposing a Sample
- •Adding a Filter
- •Inserting the Filter Into the Structure
- •Creating the Filter Controls and Making the Connections
- •Tidying Up the Appearance in the Instrument Panel
- •Using Save Ensemble to Update Your Already Saved Sampler
- •Modifying the Existing Sampler
- •Inserting the Selector
- •Connecting the Filter Outputs
- •Increasing the Number of Selector Inputs
- •Adding the Position Fader and Changing its Range
- •Final connections and Panel Appearance
- •Explore Your Sampler and Make Some Snapshots
- •What’s Next?

Creating a Sequenced Synthesizer
Creating the Synth Sequencer Ensemble
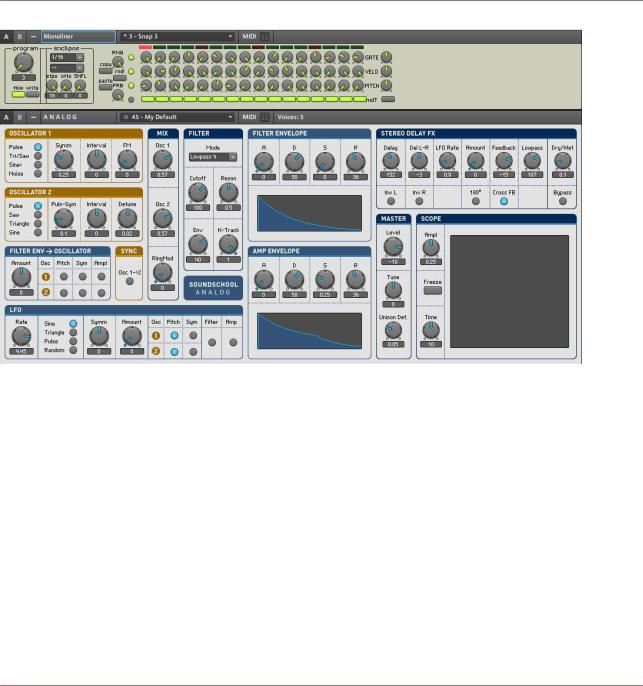
Fig. 5.1 Monoliner and Soundschool Analog (ANALOG)
5.2Creating the Synth Sequencer Ensemble
We need to start from a new Ensemble and then insert the Instruments.
5.2.1Create a New Ensemble
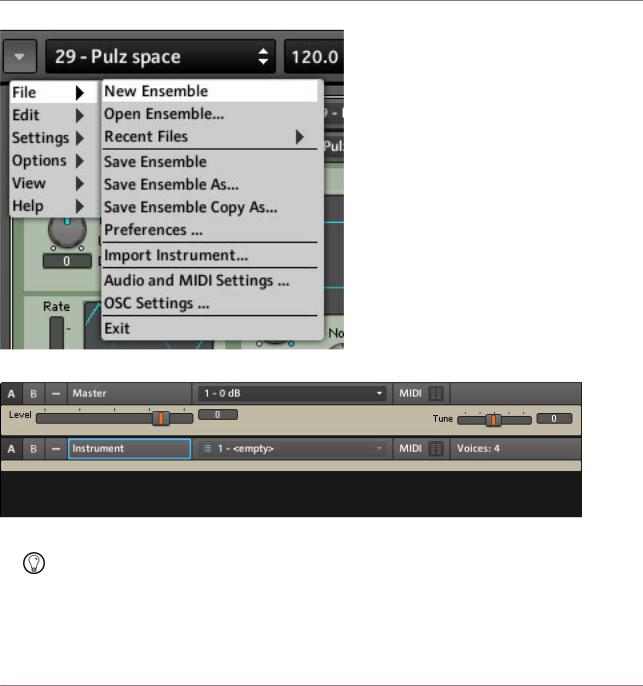
▪Create a new Ensemble by pressing the Menu button and choosing the File > New En semble menu entry.
REAKTOR 5.5 - Getting Started Guide - 57

Creating a Sequenced Synthesizer
Creating the Synth Sequencer Ensemble
Fig. 5.2 New Ensemble menu entry in the global menu
Fig. 5.3 The Panel of a new Ensemble
You can also use the keyboard shortcut [Ctrl]+[N] for Windows® ([Cmd]+[N] if you are on Mac OS® X) to create a new Ensemble.
5.2.2Using the Browser to Load the Instruments
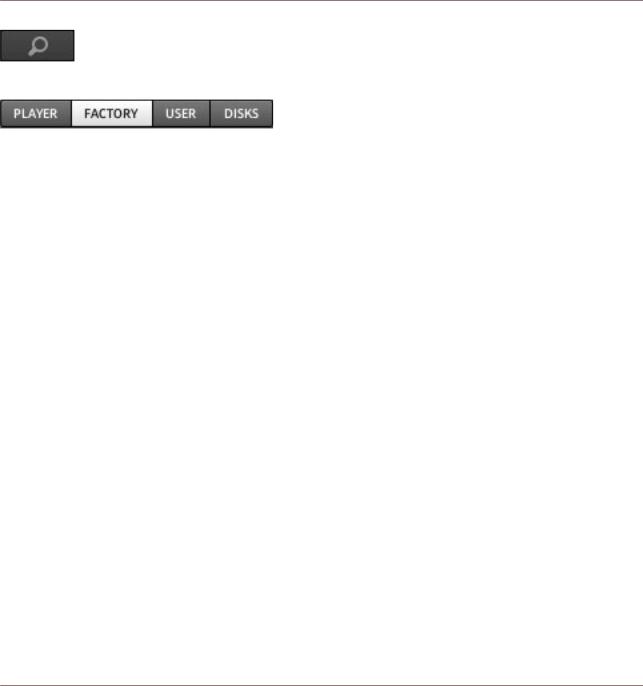
1.In the Sidepane, click the Browser tab to open the Browser.
REAKTOR 5.5 - Getting Started Guide - 58

Creating a Sequenced Synthesizer
Creating the Synth Sequencer Ensemble
2.Click the Factory button to go to the Factory Library.
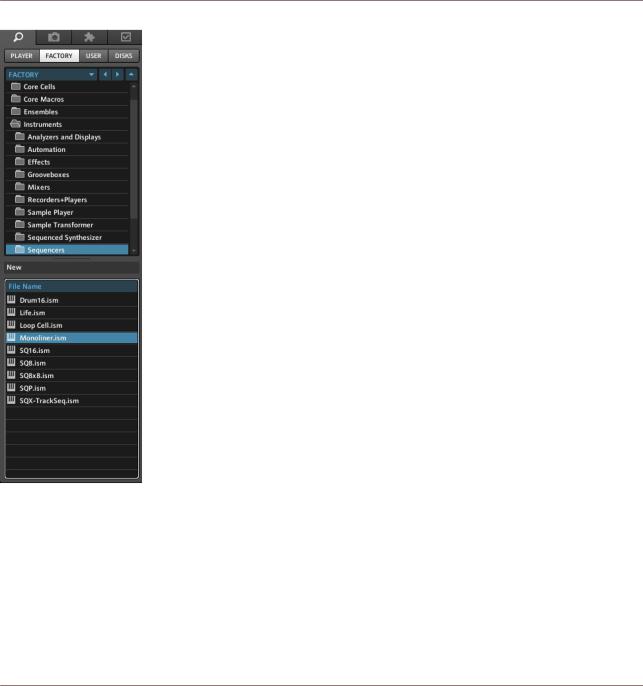
3.Then, using the folder tree of the Browser, navigate to the path Instruments > Se quencers.
4.Drag Monoliner.ism from the bottom part of the Browser to the Panel area on the right. This will insert Monoliner into your Ensemble.
REAKTOR 5.5 - Getting Started Guide - 59

Creating a Sequenced Synthesizer
Creating the Synth Sequencer Ensemble
Now we will use the Browser to load Soundschool Analog.
1.Using the folder tree, navigate to Instruments > Synthesizers.
2.Scroll down until you see Soundschool Analog.ism.
3.Click and drag Soundschool Analog.ism to the Panel area on the right.
REAKTOR 5.5 - Getting Started Guide - 60